Last Updated: March 20, 2026
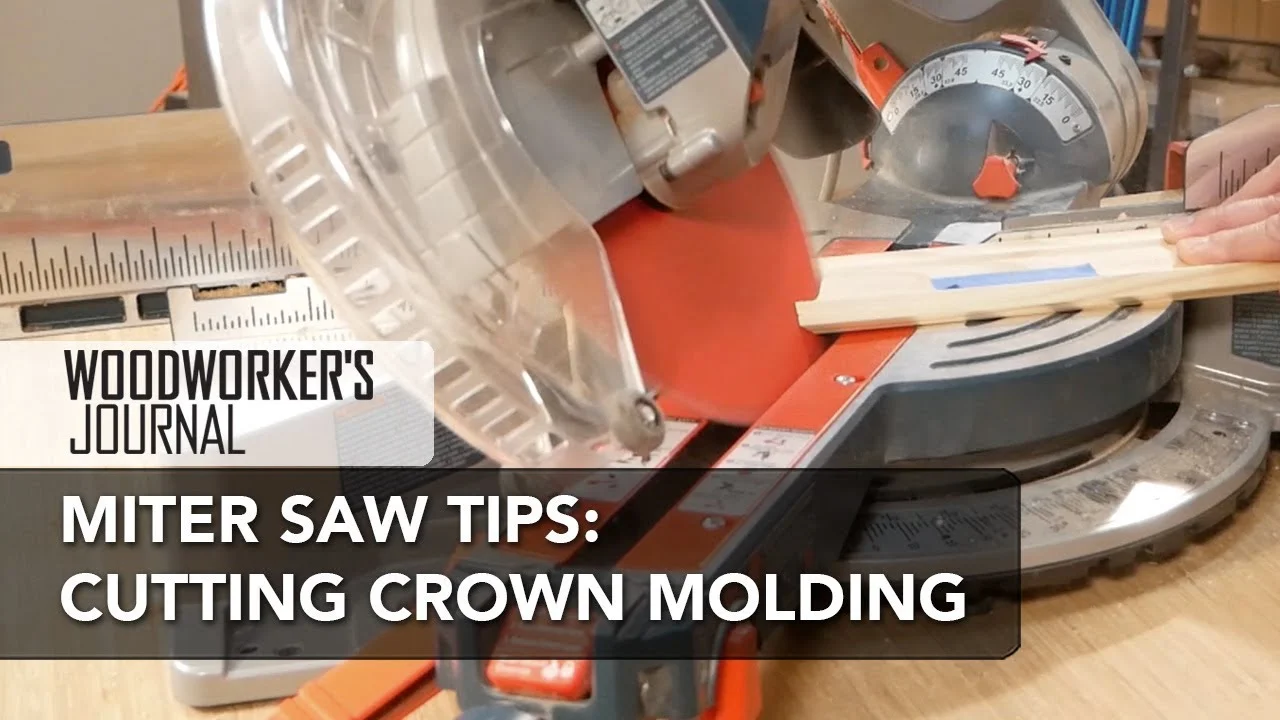
If you’ve ever tried to cut crown molding, you know it can feel tricky and confusing. But what if you could master the technique with just one tool?
Your miter saw is the key to making clean, precise cuts that fit perfectly in every corner of your room. In this guide, you’ll discover simple steps and insider tips to cut crown molding like a pro, even if you’re a beginner.
By the end, you’ll have the confidence to tackle your molding project with ease and transform your space with that perfect finishing touch. Ready to get started? Let’s dive in!
Credit: www.youtube.com
Preparing The Miter Saw
Preparing the miter saw is the first step to cutting crown molding accurately. It ensures clean, precise cuts and a smooth installation. Proper preparation saves time and reduces mistakes on the job.
Setting up your saw correctly allows you to handle the unique angles of crown molding. This preparation makes the cutting process easier and more efficient.
Choosing The Right Saw
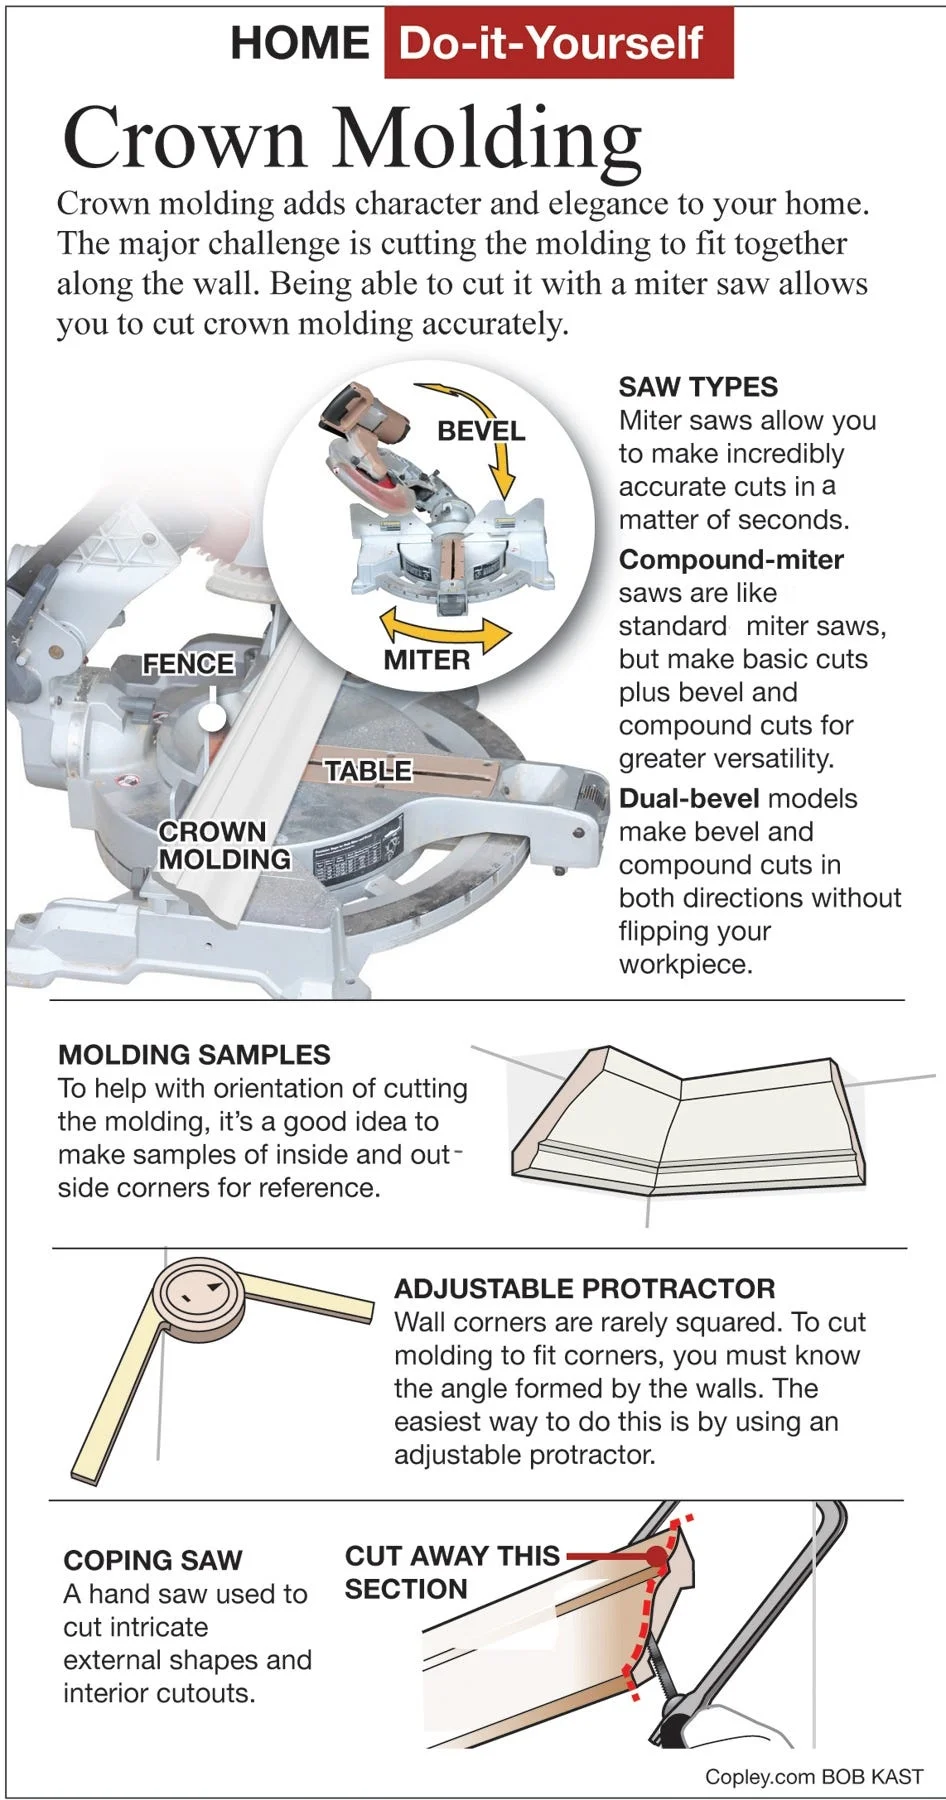
Select a saw that can handle the size of your crown molding. A compound miter saw is ideal for cutting angled edges. It allows both miter and bevel adjustments needed for crown molding cuts.
Make sure the saw blade is sharp and suitable for fine woodworking. A dull blade can cause rough edges and splintering. Choose a blade with many teeth for smooth, clean cuts.
Check the saw’s cutting capacity. It should fit the width and thickness of your molding without forcing the material.
Setting Up The Saw For Crown Molding
Adjust the saw to the correct angles before cutting. Crown molding requires specific bevel and miter settings to match corner joints.
Place the molding upside down on the saw table. The ceiling edge should rest against the saw fence, and the wall edge lies flat on the saw bed.
Lock the saw at the angle that matches your molding’s spring angle. Common spring angles are 38 or 45 degrees, so set the saw accordingly.
Test your setup with scrap pieces first. Make small cuts and check if the pieces fit together tightly. Adjust the angles if necessary before cutting the final molding.
Positioning Crown Molding
Positioning crown molding correctly on your miter saw is crucial for precise cuts. Crown molding sits at an angle between the wall and ceiling, which makes it tricky to cut. Understanding how to place the molding ensures clean, tight joints. It also saves time and reduces mistakes.
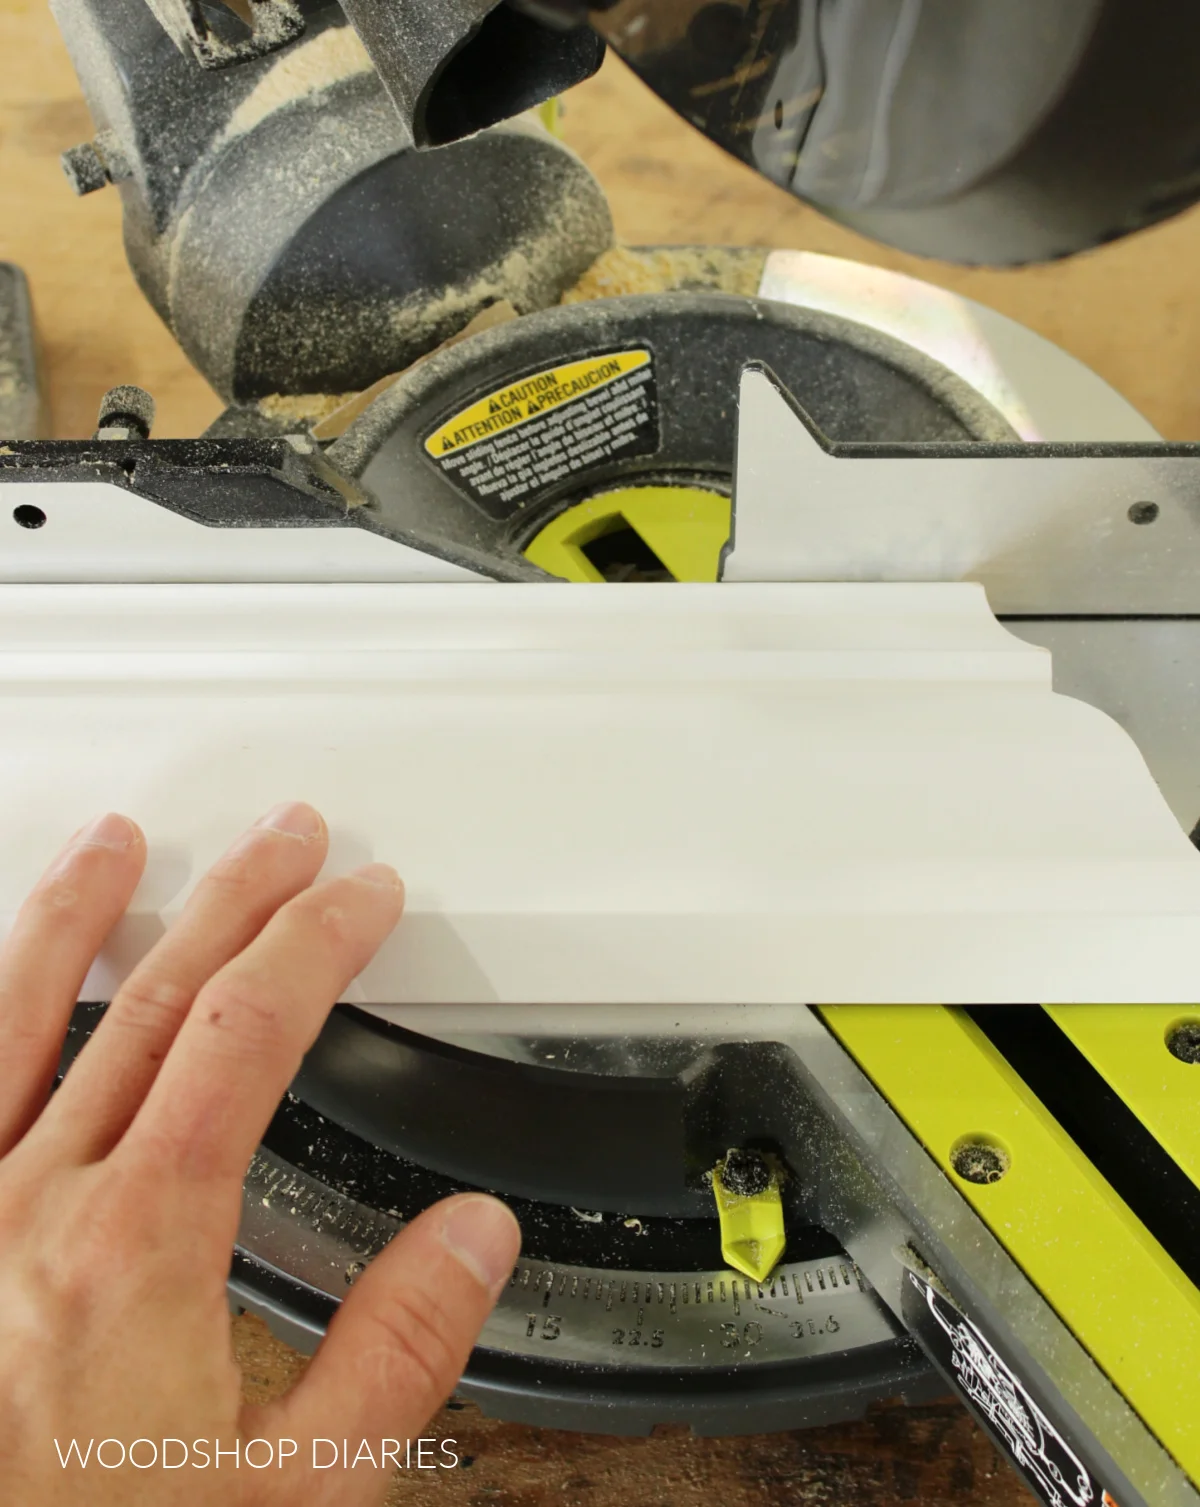
Upside-down Placement Technique
Place the crown molding upside down on the miter saw. The part that touches the ceiling goes against the saw’s fence. The part that touches the wall rests on the saw’s base. This setup mimics how the molding sits in the room. It helps you make accurate angled cuts without guessing.
Aligning Ceiling And Wall Edges
Match the molding’s ceiling edge flush against the saw fence. The wall edge should lie flat on the saw base. This alignment keeps the molding stable during cutting. It also ensures the saw blade cuts at the correct angle. Double-check edges before cutting for perfect fits.
Cutting Inside Corners
Cutting inside corners on crown molding requires accuracy and the right technique. The molding must fit perfectly to avoid gaps. This section explains how to make clean, tight inside corner cuts using a miter saw. Proper angle settings and careful cutting are key to success.
Understanding how to position the molding and adjust your saw helps create seamless joints. Follow the steps below to cut inside corners with confidence and ease.
Angle Settings For Left And Right Pieces
Set your miter saw angle correctly for each piece. For the left piece, tilt the saw to the left at 45 degrees. This cut allows the molding to fit snugly into the corner.
For the right piece, tilt the saw to the right at 45 degrees. This angle creates a matching cut that pairs perfectly with the left piece.
Double-check angles before cutting to avoid mistakes. These settings work for standard 90-degree inside corners.
Making Precise Inside Corner Cuts
Place the crown molding upside down on the saw. The ceiling edge should rest against the saw fence. The wall edge lies flat on the saw bed.
Hold the molding firmly to prevent movement during the cut. Make slow, steady cuts to keep edges smooth and accurate.
Test the cut pieces by fitting them together. Trim slightly if needed for a perfect fit. Precision here ensures your molding looks professional.
Cutting Outside Corners
Cutting outside corners on crown molding can be tricky. These corners need precise cuts to fit tightly. You must position the molding and saw correctly. Understanding angles and techniques helps avoid gaps and uneven edges. This section explains how to cut outside corners cleanly and accurately.
Adjusting Angles For Outside Corners
Start by measuring the corner angle with a protractor. Most outside corners are 90 degrees but check anyway. Set the miter saw to half the angle of the corner. For a 90-degree corner, set the saw to 45 degrees. Adjust the saw blade to cut the molding upside down. Place the ceiling edge against the saw fence. The wall edge should rest on the saw base. This setup ensures the correct angle for the outside corner cut.
Tips For Clean Outside Corner Cuts
Use a sharp blade for smooth cuts on crown molding. Cut slowly to avoid splintering the wood. Make test cuts on scrap pieces before cutting the actual molding. Label each piece to keep track of left and right corners. Sand the cut edges lightly to remove rough spots. Dry fit the pieces before nailing them to the wall. Small gaps can be filled with wood filler or caulk for a perfect finish.
Using Jigs And Test Cuts
Cutting crown molding with a miter saw can be tricky without proper tools. Using jigs and making test cuts improve your accuracy and save material. These steps help you get clean, precise cuts for perfect corners.
Benefits Of Using A Jig
A jig holds the crown molding at the correct angle on the saw. This prevents slipping and mistakes. It keeps both hands free to operate the saw safely. Jigs also speed up the cutting process by setting a consistent position. They reduce waste by minimizing wrong cuts. Using a jig helps beginners cut like professionals.
Making Test Cuts For Accuracy
Test cuts check your angles before cutting the real molding. Use scrap wood or extra molding pieces for this. Mark the test piece clearly to avoid confusion. Place it in the jig and make the cut just like the final one. Check if the pieces fit together well at the corners. Adjust your saw or jig if needed. Test cuts prevent costly errors and ensure a smooth installation.
Credit: www.woodshopdiaries.com
Troubleshooting Common Issues
Troubleshooting common issues helps improve your crown molding cuts. Small mistakes cause gaps and misalignments. Difficult molding shapes add complexity. Fix these problems to get a clean, professional look. The right techniques save time and material.
Fixing Gaps And Misalignments
Gaps appear when angles are slightly off. Check your miter saw angle settings carefully. Use a coping saw for inside corners to fit pieces tightly. Fill small gaps with wood filler or caulk. Sand the filler smooth after it dries. Clamp pieces firmly while glue dries to prevent shifting. Measure twice, cut once to avoid errors.
Handling Difficult Molding Shapes
Curved or ornate molding needs extra care. Mark the molding clearly before cutting. Use a flexible sanding block to smooth edges. For irregular shapes, take slow, precise cuts with a fine-toothed blade. Test fit pieces often during installation. Practice cuts on scrap molding to build confidence. Patience pays off with tricky profiles.
Credit: www.jacksonville.com
Frequently Asked Questions
Can You Cut Crown Molding With A Regular Miter Saw?
Yes, you can cut crown molding with a regular miter saw. Position the molding upside down for accurate cuts.
What Is The Trick To Cutting Crown Molding?
Place the crown molding upside down on the miter saw, with the ceiling edge against the fence and wall edge flat. Cut at precise angles for inside and outside corners. This positioning mimics the installed angle, ensuring accurate and clean cuts.
Hold firmly while cutting.
Why 31.6 Degrees For Crown Molding?
The 31. 6-degree angle matches crown molding’s spring angle, ensuring tight, precise corner joints. It simplifies miter saw setup for accurate cuts.
How To Cut 45 Degree Corners On Crown Molding?
Place crown molding upside down on the miter saw with the ceiling edge against the fence. Set the saw to 45 degrees and cut carefully. Hold the molding firmly to ensure precise angled cuts for perfect corners.
How Do You Position Crown Molding On A Miter Saw?
Place the molding upside down. The ceiling edge goes against the fence, wall edge on the saw bed.
What Angle Should I Set For Inside Corner Cuts?
Set the miter saw to 45 degrees. Adjust left or right depending on the corner side.
Conclusion
Cutting crown molding with a miter saw takes practice and patience. Always measure twice and cut once to avoid mistakes. Use the right angles and hold the molding firmly for clean cuts. Take your time to align the saw correctly before each cut.
With steady hands, you can achieve neat, professional-looking corners. Remember, safety is important—wear eye protection and keep your fingers clear. Keep practicing, and soon cutting crown molding will feel easier and more natural. The right technique makes a big difference in your home projects.
Related reading: how to sharpen table saw blades.
Related reading: how to measure band saw blades.
{ “@context”: “https://schema.org”, “@type”: “Article”, “headline”: “How to Cut Crown Molding With a Miter Saw: Expert Tips & Tricks”, “description”: “Learn how to cut crown molding with a miter saw by understanding the angles and techniques needed for precise, clean cuts in trim installation projects.”, “url”: “https://www.powertoolstoday.com/cut-crown-molding-miter-saw/”, “datePublished”: “2025-11-18”, “dateModified”: “2026-03-18”, “author”: { “@type”: “Organization”, “name”: “Power Tools Today”, “url”: “https://www.powertoolstoday.com” }, “publisher”: { “@type”: “Organization”, “name”: “Power Tools Today”, “url”: “https://www.powertoolstoday.com” }, “mainEntityOfPage”: { “@type”: “WebPage”, “@id”: “https://www.powertoolstoday.com/cut-crown-molding-miter-saw/” }, “image”: { “@type”: “ImageObject”, “url”: “https://www.powertoolstoday.com/wp-content/uploads/2025/11/how-to-cut-crown-molding-with-a-miter-saw.webp” } }nnnn