Last Updated: March 14, 2026
A blocked or slow drain can quickly turn into a big problem at home or work. Finding the cause is often tricky because most plumbing pipes are hidden behind walls or underground. This is where drain inspection cameras become essential. These compact devices help you look deep inside pipes without tearing up floors or digging outside. Understanding how these cameras work, what features matter, and how to use them can save you time, money, and frustration. Whether you’re a homeowner dealing with a stubborn clog or a plumber wanting to upgrade your tools, this guide will make drain inspection cameras easy to understand and use.
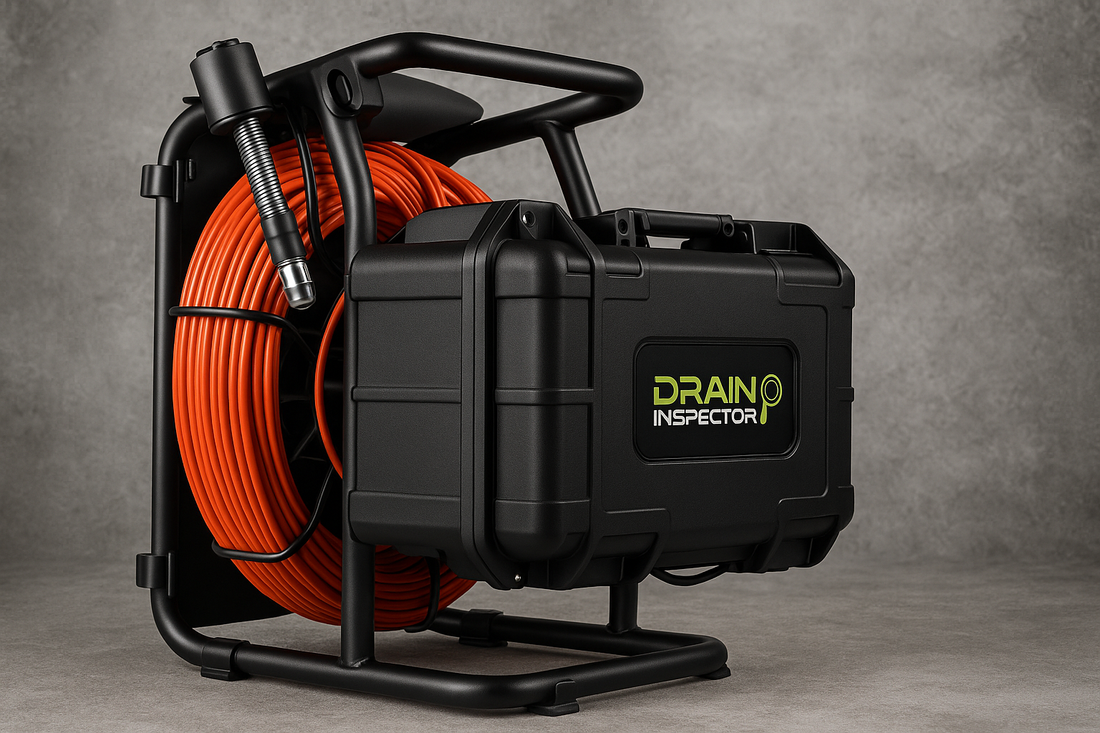
What Is A Drain Inspection Camera?
A drain inspection camera (sometimes called a sewer camera or pipe camera) is a small camera attached to a flexible cable. You push the cable into the drain or pipe, and the camera sends video to a screen. This lets you see inside the pipe in real time. Most cameras have bright LED lights to light up the dark space. Some models record video or take snapshots for later review.
These cameras are used by plumbers, maintenance staff, and homeowners. They help find clogs, cracks, tree root invasions, and even lost jewelry. Instead of guessing or doing expensive exploratory digging, you can see the problem directly.
How Drain Inspection Cameras Work
The main parts of a drain inspection camera are:
- Camera Head: Small and waterproof. Often between 8 mm and 23 mm wide.
- LED Lights: Surround the camera lens to brighten the pipe interior.
- Flexible Cable: Pushes through bends and curves, usually 10 to 40 meters long.
- Monitor/Screen: Shows live video. Can be handheld or built into a case.
- Control Unit: May allow video recording, image capture, or adjusting light brightness.
The camera head is pushed into the pipe with the cable. As it moves, you watch the monitor to spot blockages, cracks, or other damage. Some advanced models have a transmitter for precise location above ground, or a self-leveling camera to keep the video upright.
Key Features To Consider
Not all drain inspection cameras are the same. The right features depend on your needs and the types of pipes you’ll inspect. Here are the main things to look for:
1. Cable Length And Flexibility
Longer cables (20–40 meters) can reach deeper pipes or longer runs. However, too long a cable can be harder to push. For home drains, 10–20 meters is often enough. Make sure the cable is strong but flexible enough to bend around corners.
2. Camera Head Size
Smaller camera heads (8–12 mm) fit into narrow pipes like kitchen or bathroom drains. Larger heads (15–23 mm) are better for main sewer lines. A removable or interchangeable head gives more flexibility.
3. Image Quality
Resolution matters for spotting small cracks or tiny blockages. Look for at least 720p video. Some high-end models offer 1080p or even higher. Good LED lighting is also critical for clear images in dark pipes.
4. Waterproof Rating
Pipes are wet! The camera must be fully waterproof. Look for an IP67 or IP68 rating, meaning the camera can be submerged without damage.
5. Monitor Size And Recording
A larger screen (7 inches or more) makes it easier to see details. Some monitors are touch screens or have sunshades for outdoor use. Built-in recording lets you save video for reports or insurance claims.
6. Battery Life And Power
Portable cameras need good battery life—at least 4 to 6 hours per charge. Some models plug directly into power, which is fine for indoor work but less useful outside or in large buildings.
7. Locator And Self-leveling
A built-in locator helps you find the camera’s exact position underground. A self-leveling head keeps the image upright, which makes diagnosis easier.
Common Uses For Drain Inspection Cameras
Drain inspection cameras are useful in many situations:
- Finding Blockages: Discover what’s causing a clog—hair, grease, or a foreign object.
- Checking for Damage: Spot cracks, collapsed pipes, or corrosion before leaks get worse.
- Root Intrusion: See if tree roots have invaded the pipe.
- Lost Items: Recover rings, earrings, or other valuables dropped down the drain.
- Pre-Purchase Inspection: Homebuyers can check for hidden pipe problems before buying a property.
- Post-Repair Checks: Ensure repairs are complete and nothing was missed.

Credit: www.amazon.com
Types Of Drain Inspection Cameras
Drain cameras come in several styles. Each has its own strengths.
Push Rod Cameras
These are the most common. The camera is mounted on a flexible rod you push by hand. Ideal for household and small commercial pipes.
Handheld Mini Cameras
Smaller, battery-powered cameras with short cables (1–5 meters). Handy for sinks, toilets, or air ducts.
Pipe Crawler Cameras
Motorized, wheeled cameras for large pipes (often 150 mm or wider). Usually used by city workers or big plumbing companies. They can travel long distances inside the pipe and are controlled remotely.
Wireless/bluetooth Cameras
These connect to your smartphone or tablet, showing video through an app. Good for quick jobs or when you want to save images directly to your device.
When To Use A Drain Inspection Camera
You don’t need a camera for every clog. But there are times when it’s the best tool:
- Repeated Clogs: If a drain keeps blocking, a camera can reveal a hidden problem.
- Slow Drains: When water drains slowly but there’s no obvious reason, a camera can spot buildup or partial blockages.
- Before Major Repairs: Avoid unnecessary digging by seeing the issue first.
- After Flooding or Backups: Check for pipe damage after a major event.
- Renovations: Make sure old pipes are sound before installing new fixtures.
How To Use A Drain Inspection Camera: Step-by-step
Using a drain camera isn’t complicated, but there are a few tips to get the best results:
- Clear the Opening: Remove drain covers or traps for easier camera access.
- Check Equipment: Charge the camera, clean the lens, and test the monitor.
- Insert Slowly: Push the cable gently. Don’t force around sharp bends.
- Watch Closely: Look for unusual buildup, cracks, or objects.
- Adjust Lighting: If the video is too dark, increase the LED brightness.
- Record or Snap: Capture images of any problems for reference.
- Locate Above Ground: If your camera has a locator, use it to mark problem spots.
- Withdraw Carefully: Pull the cable out slowly to avoid damaging the lens or cable.
Pro tip: Wipe the camera lens clean between inspections to avoid blurry images. Even a small bit of dirt can make it hard to see details.
Comparing Popular Drain Inspection Camera Models
To help you understand the differences, here’s a comparison of three popular types:
| Model | Cable Length | Camera Size | Resolution | Waterproof | Recording |
|---|---|---|---|---|---|
| Mini Handheld | 5 meters | 8 mm | 720p | IP67 | No |
| Standard Push Rod | 20 meters | 16 mm | 1080p | IP68 | Yes |
| Pipe Crawler | 60 meters | 23 mm | 4K | IP68 | Yes |
Price Range And What To Expect
Prices for drain inspection cameras can vary widely, depending on features and quality.
| Category | Typical Price | Best For |
|---|---|---|
| Mini/Handheld | $40 – $150 | Homeowners, quick checks |
| Standard Push Rod | $200 – $1,000 | Plumbers, frequent use |
| Pipe Crawler | $5,000 – $15,000+ | Professionals, city work |
Higher price often means better video quality, longer cable, and more features like recording or Wi-Fi. However, for basic home use, a mid-range model is usually enough.
Important Safety And Maintenance Tips
- Never force the cable—if it won’t go, pull back and try again. Forcing can break the camera or cable.
- Clean after each use—wipe the camera and cable with a damp cloth. For sewage pipes, disinfect to avoid contamination.
- Store properly—coil the cable loosely and store in a dry place.
- Check for damage—inspect the cable and lens regularly for cracks or splits.
- Don’t use in hot pipes—most cameras can’t handle water over 60°C (140°F).
Non-obvious insight: Many beginners forget to check the camera’s waterproof rating. Even a small leak in the camera housing can destroy the electronics. Always confirm the rating before using in very wet or dirty pipes.
Another common mistake is ignoring the battery level. Running out of power mid-inspection can waste time and cause you to miss problems.

Credit: gag-eden.co.il
Buying Or Renting: Which Is Better?
For homeowners, buying a camera makes sense if you have old pipes or frequent clogs. For occasional use, renting from a tool shop or plumbing supplier is often cheaper. Professionals and property managers usually benefit from owning, as they use the camera more often.
Renting can also be a good way to test different models before buying. Always inspect rental equipment for damage before using it.
Common Problems Found With Drain Cameras
Some of the most frequent pipe issues seen with inspection cameras include:
- Grease and Soap Buildup: Causes slow drains, especially in kitchen lines.
- Tree Roots: Roots seek out water, pushing into cracks and joints.
- Collapsed Pipes: Old clay or metal pipes can cave in.
- Corrosion: Metal pipes may develop rough, rusty areas that catch debris.
- Foreign Objects: Toys, jewelry, or small tools sometimes get stuck.
Spotting these early can help you fix problems before they become emergencies.
Credit: draininvader.com
Professional Vs. Diy Use
While many homeowners use drain cameras, professionals bring extra skills:
- Experience in diagnosis: Plumbers can spot subtle signs of trouble.
- Better equipment: Professionals may have longer cables, higher resolution, and locators.
- Safer techniques: Knowing when to stop, when to dig, and when to call for permits.
If you’re not confident or the problem is deep in the main sewer, hiring a pro is often the safest bet.
Extra Accessories That Help
Some useful add-ons for drain inspection cameras:
- Skid attachments: Help the camera glide over rough spots and stay centered in larger pipes.
- Locator beacons: Pair with above-ground receivers to find the camera’s exact location.
- SD cards or USB ports: Make it easy to transfer videos to a computer.
- Rotating camera heads: Allow you to look in all directions.
Environmental Benefits
Using a drain camera reduces the need for digging, which means less disruption to gardens, driveways, or city streets. It also helps avoid unnecessary pipe replacement—fix only what’s broken, not the whole line.
Where To Learn More
If you want more technical details or industry standards, the American Society of Plumbing Engineers offers a wealth of information on inspection technology. You can also visit Wikipedia for more background.
Frequently Asked Questions
What Size Camera Do I Need For My Home Drains?
For most home drains, a camera head of 8–12 mm is ideal. It fits easily in bathroom and kitchen pipes. For larger main sewer lines, a 16–23 mm camera is better.
How Far Can A Drain Inspection Camera See?
Most standard cameras have 10–30 meter cables. This is enough for most homes. For long commercial lines or city pipes, specialized cameras can reach 60 meters or more.
Can Drain Cameras See Through Water?
Yes, as long as the water is not too cloudy or full of debris. The camera’s LED lights help, but very dirty water can block the view. Try to run some clean water through the pipe first if possible.
Do I Need Special Training To Use A Drain Inspection Camera?
Basic models are easy to use with simple controls. However, understanding what you see on the screen takes practice. For complex problems or large systems, professional training is helpful.
Can I Rent A Drain Inspection Camera Instead Of Buying One?
Yes, many tool rental shops offer drain cameras by the day. This is a good option for one-time use or if you want to try different models before buying.
A drain inspection camera is a smart investment for anyone who deals with plumbing problems. It saves money, avoids guesswork, and helps you see inside your pipes without damage. By choosing the right features and learning the basics, you can handle most common issues yourself—or know when to call a pro.
With the right camera, even the darkest, deepest pipes are no longer a mystery.
