Last Updated: March 21, 2026
Have you ever faced a spill that a regular vacuum just can’t handle? That’s where your wet dry vacuum becomes a game changer.
Whether you’re dealing with water spills, sawdust, or stubborn dirt, knowing how to use this versatile tool can save you time and effort. But how exactly do you switch between wet and dry modes? What should you watch out for to avoid damaging your vacuum?
In this guide, you’ll discover simple steps to master your wet dry vacuum, making cleanup faster and more efficient. Ready to take control of messes like a pro? Let’s dive in and get your vacuum working exactly the way you need.
Choosing The Right Filter
Choosing the right filter for your wet dry vacuum is important for safe and effective cleaning. Different filters are designed for dry or wet use. Using the wrong filter can damage the vacuum or reduce its performance. This section explains how to set up filters for both dry and wet tasks.
Dry Filter Setup
Use the dry filter when vacuuming dust, dirt, or small debris. This filter usually looks like a paper or cloth bag inside the vacuum. It stops fine particles from reaching the motor. Before starting, check the filter for tears or clogs. Replace it if needed. Attach the filter securely to avoid dust leaks. You can also add a filter bag for easier disposal of dirt.
Wet Filter Setup
Remove the dry filter before vacuuming liquids. Wet vacuuming needs a foam sleeve or no filter at all. This prevents water from damaging the motor. Place the foam filter on the cage inside the tank. Make sure it fits snugly. The foam filter traps wet debris but lets water flow freely into the tank. Always empty the tank when full to keep the vacuum working well.
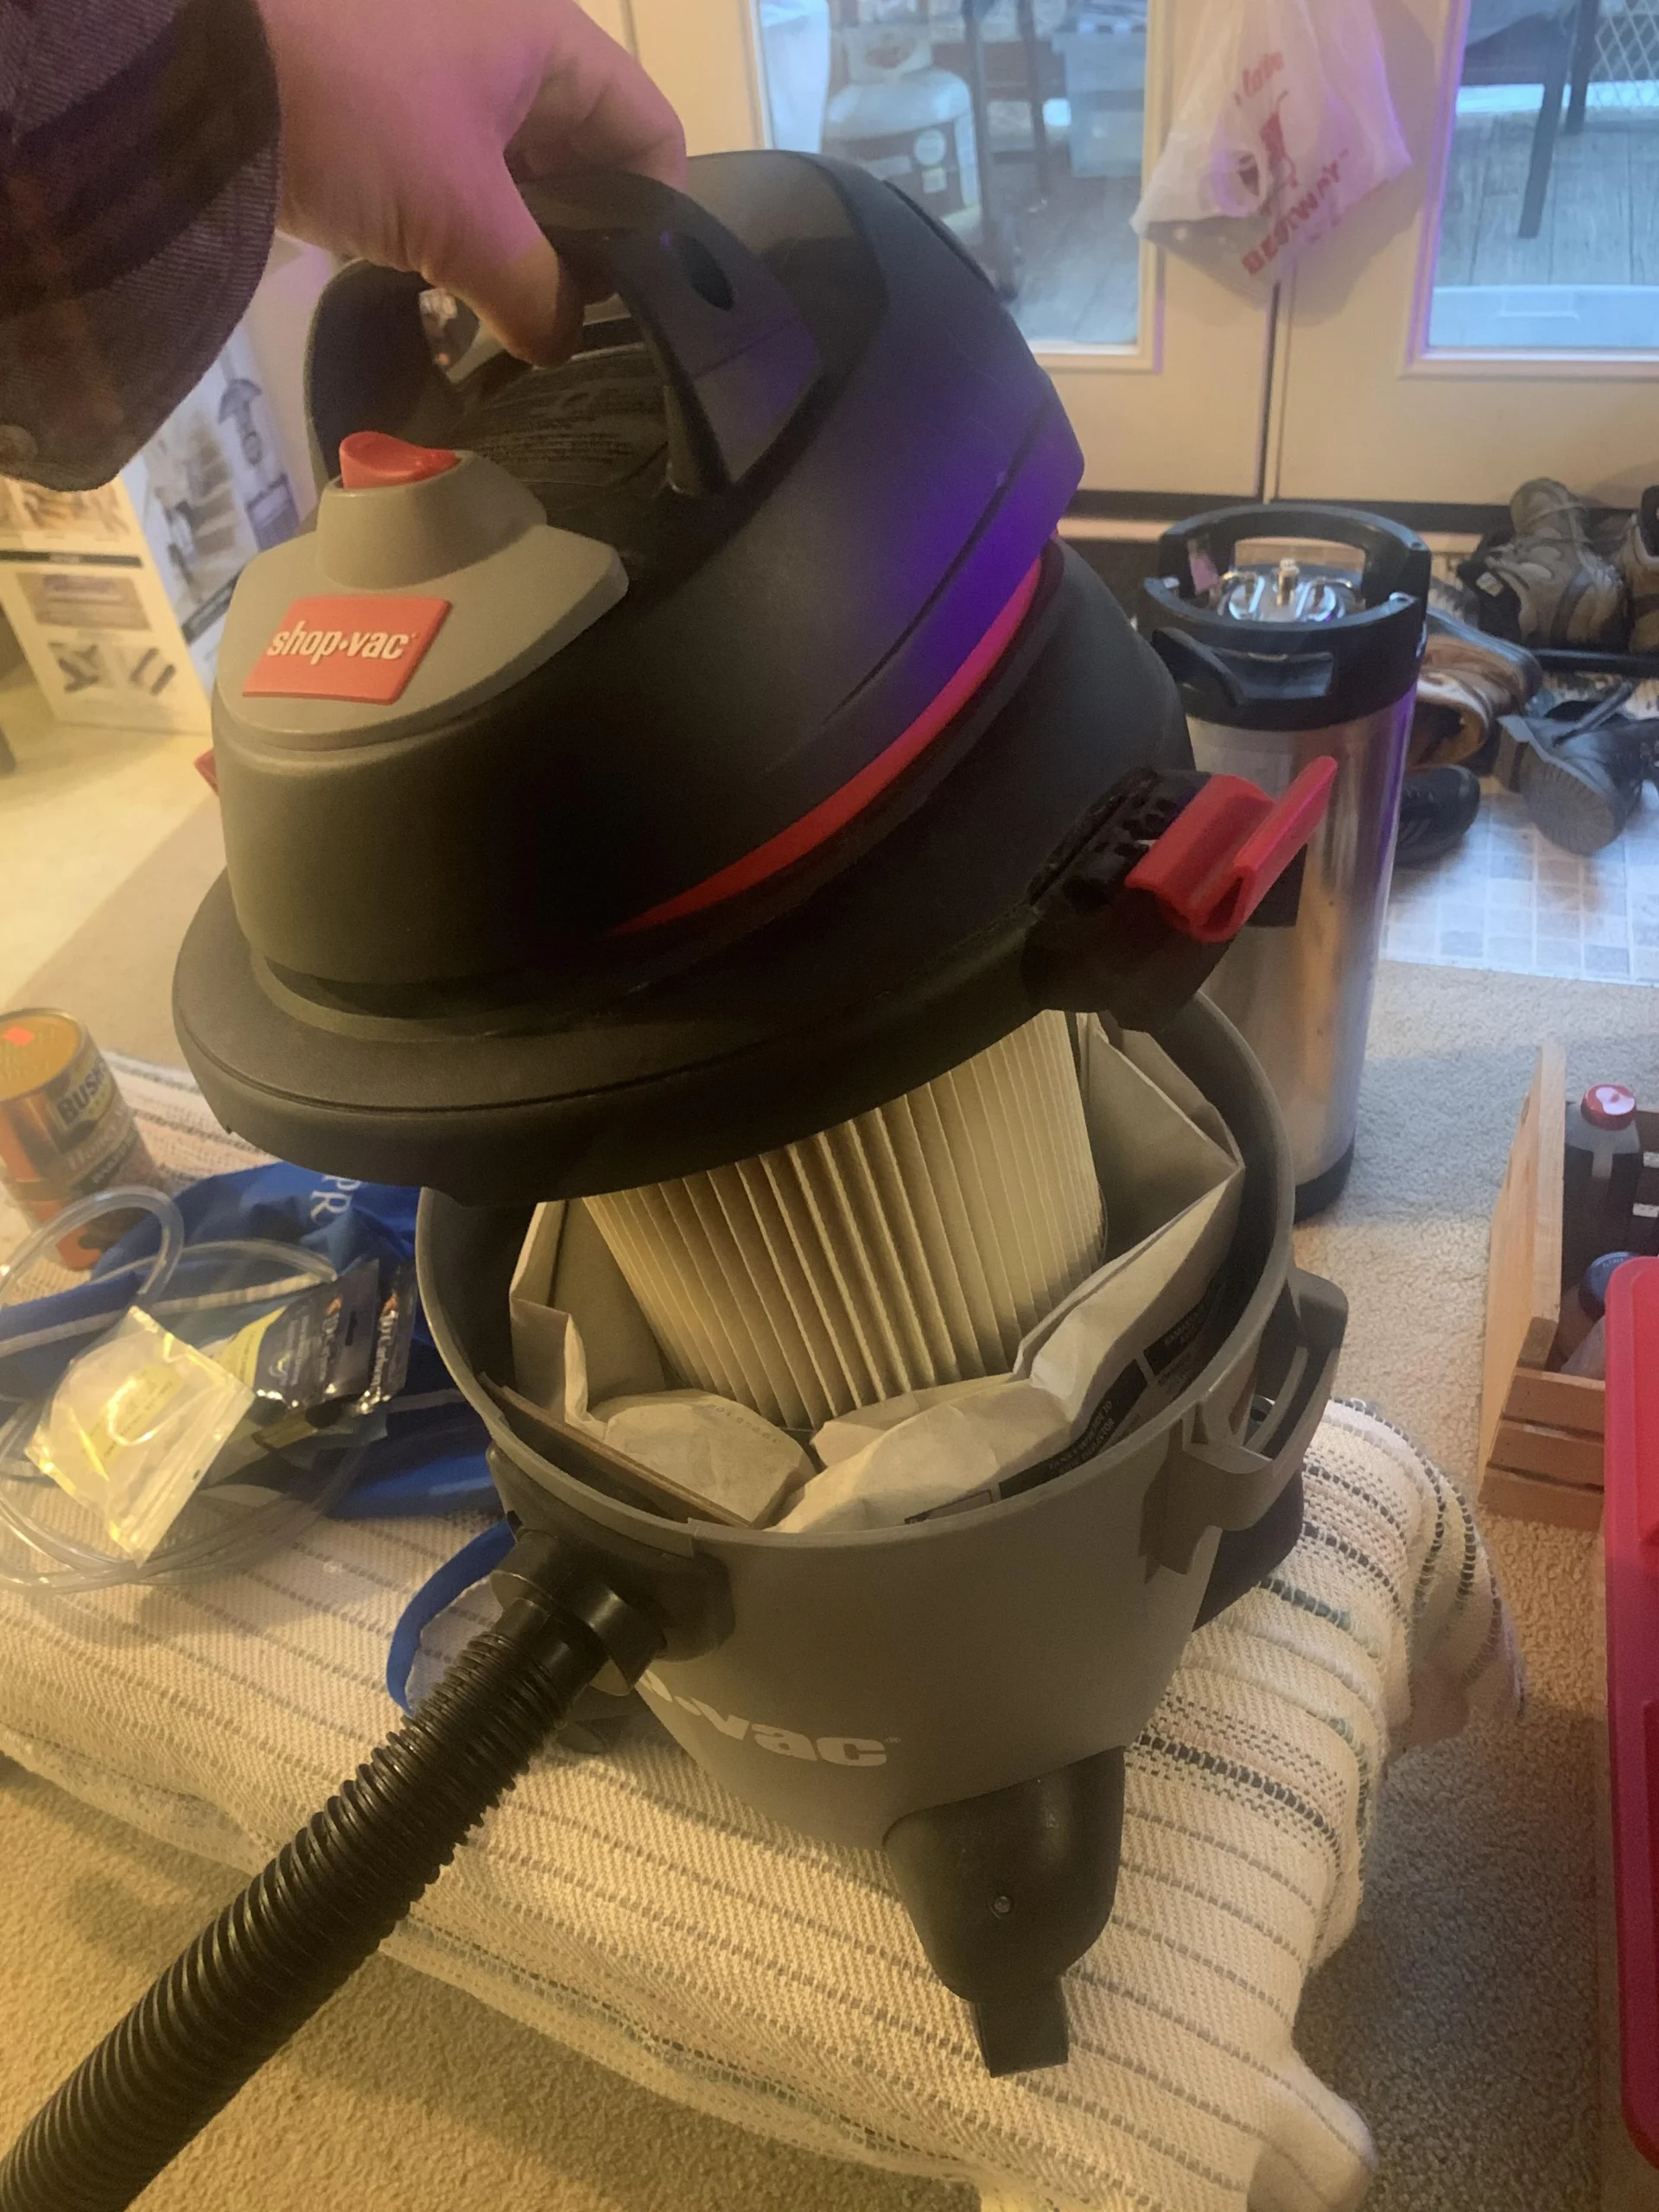
Credit: www.reddit.com
Preparing The Vacuum
Preparing the wet dry vacuum is the first step before cleaning. It ensures the vacuum works well and avoids damage. Setting up the vacuum properly saves time and effort. Follow the simple steps below to get ready.
Attaching Hose And Tools
Start by attaching the hose to the vacuum’s intake port. Push it firmly until it locks in place. Select the right tool for your task, such as a crevice tool or brush. Attach the tool to the end of the hose. Make sure all connections are tight to avoid air leaks.
Checking Power Source
Check the power cord for any damage before use. Plug the vacuum into a working electrical outlet. Avoid using extension cords if possible. Confirm the power switch is off before plugging in. This prevents the vacuum from starting unexpectedly.
Vacuuming Dry Debris
Vacuuming dry debris with a wet dry vacuum is simple and effective. This tool handles dust, dirt, and small particles with ease. Using the right settings and attachments ensures a clean space without damage. Learn how to prepare your vacuum for dry cleaning and which accessories work best for the job.
Selecting Dry Mode
Start by setting your vacuum to dry mode. This setting uses the dry filter or bag to trap debris. Never use the wet filter for dry cleaning. Dry mode prevents dust from escaping the vacuum. Ensure the filter is clean and correctly installed before use. This step protects the motor and improves suction power.
Best Attachments For Dry Cleaning
Choose the right attachment for the surface you clean. A wide nozzle works well on floors and carpets. Use a crevice tool to reach tight spaces and corners. A brush attachment loosens dust on upholstery and curtains. Attachments help remove debris gently and thoroughly. Switch tools as needed to cover all areas efficiently.
Vacuuming Wet Spills
Using a wet dry vacuum to clean wet spills is simple and effective. It removes water quickly from floors, carpets, and other surfaces. This tool works well for spills in the kitchen, garage, or workshop.
Before starting, prepare your vacuum by adjusting filters and attachments. Proper setup keeps the vacuum safe and working well during wet cleanup tasks.
Removing Dry Filters
First, remove the dry filter from the vacuum. Dry filters can get damaged or clogged by water. Take out any paper bags or cartridge filters inside the vacuum. These parts are only for dry debris and dust.
Once the dry filter is removed, check the vacuum’s interior for any leftover dust. Clean it out to avoid mixing wet and dry dirt. This step helps keep the vacuum running smoothly.
Using Foam Sleeves
Next, place a foam sleeve over the vacuum’s filter cage. Foam sleeves protect the motor from water damage. They also filter out small wet debris while allowing water to pass through.
Make sure the foam sleeve fits tightly and covers the entire filter area. Replace the foam sleeve if it looks worn or dirty. Clean foam sleeves improve suction and extend the vacuum’s life.
Emptying And Maintaining The Tank
Proper emptying and maintenance of the tank keeps your wet dry vacuum working well. Ignoring this step can lead to bad smells and poor suction. Clean tanks stop mold and bacteria growth. Regular care extends the vacuum’s life and saves money on repairs.
When To Empty
Empty the tank after every use, especially after wet pickups. Check the tank level often while cleaning. Stop vacuuming if you hear the motor change sound. This means the tank is full. Avoid overfilling to protect the motor and filters. For dry messes, empty the tank before it gets too heavy.
Cleaning The Tank
Rinse the tank with warm water after emptying. Use mild soap to remove dirt and grime. Scrub stubborn stains with a soft brush. Dry the tank completely to prevent mold. Remove and clean any filters before reinstalling. Store the vacuum with the lid off to let air circulate. This keeps the vacuum fresh and ready for the next use.
Credit: www.youtube.com
Switching Between Wet And Dry Modes
Switching between wet and dry modes on a wet dry vacuum is simple but important. The vacuum needs different setups for handling liquids and dry debris. Making these changes correctly keeps the vacuum working well and prevents damage. Follow the steps below to switch modes safely and easily.
Filter Changes
For dry vacuuming, use a paper or cloth filter. This filter traps dust and small particles. Remove the filter if you want to vacuum liquids. Instead, place a foam sleeve or no filter at all to avoid clogging. Always check the vacuum’s manual for the right filter type. Change the filter after heavy use or when it looks dirty. Clean filters help the vacuum run smoothly and last longer.
Attachment Adjustments
Use different attachments for wet and dry vacuuming. For dry messes, use a brush or crevice tool to reach tight spaces. For wet messes, use a wide nozzle or squeegee tool to pick up water efficiently. Make sure all attachments fit tightly onto the hose. Loose attachments reduce suction power. Check the vacuum’s hose and tools for cracks or damage before use. Replace any worn parts to maintain good suction.
Avoiding Common Mistakes
Using a wet dry vacuum can make cleaning easier and faster. Avoiding common mistakes keeps the vacuum working well and ensures safety. Learn what not to vacuum and how to protect yourself during use. These tips help you get the best results without damage or risk.
Items Not To Vacuum
Do not vacuum hot ashes or burning materials. These can damage the vacuum and cause fires. Avoid picking up sharp objects like glass or nails. They can tear the hose or filter. Do not vacuum flammable liquids such as gasoline or paint thinner. These are dangerous and can cause explosions. Avoid sucking up large debris that can clog the vacuum. Pick up big items by hand first.
Safety Precautions
Always unplug the vacuum before cleaning or changing filters. Use the right filter for wet or dry messes. Wet filters stop water from reaching the motor. Check the vacuum’s tank often to avoid overflow. Wear gloves if you vacuum hazardous or dirty materials. Keep the vacuum away from children and pets during use. Store it in a dry place to prevent damage.
Creative Uses For Wet Dry Vacuums
Wet dry vacuums are more than just tools for spills. They handle many cleaning tasks both inside and outside the home. Their versatility makes them ideal for creative uses beyond regular vacuuming.
Cleaning Carpets And Upholstery
Wet dry vacuums clean carpets deeply by removing dirt and liquid stains. They work well on upholstery, lifting dust and pet hair quickly. Using the right attachment helps reach narrow spaces and corners. The vacuum’s wet mode removes spills without damaging fabric. Regular use keeps carpets and furniture fresh and clean.
Outdoor And Workshop Applications
These vacuums excel in outdoor cleaning jobs like clearing leaves and debris. They easily pick up sawdust and small wood chips in workshops. The strong suction handles wet and dry messes in garages and patios. Using the vacuum outdoors saves time and effort compared to manual sweeping. It also helps keep workspaces tidy and safe.
:max_bytes(150000):strip_icc()/how-to-use-a-shop-vac-for-water-5081535-01-ba6add11c48944c7b18ca1a26c167b7f.jpg)
Credit: www.thespruce.com
Frequently Asked Questions
How Do I Use A Wet Dry Vacuum?
Remove the dry filter for wet use or keep it for dry. Attach the hose, plug in, and turn on. Vacuum debris or liquids carefully. Empty the tank when full or suction weakens.
Do You Remove The Filter When Using A Wet Dry Vac For Water?
Remove the dry filter before vacuuming water. Use the foam sleeve or no filter to protect the motor from moisture.
What Are The Two Holes For In A Wet Dry Vac?
The two holes on a wet dry vac serve as the intake for vacuuming debris and the exhaust for releasing air. One pulls in dirt or liquids, while the other vents filtered air to prevent overheating.
What Should You Not Vacuum With A Wet/dry Vac?
Do not vacuum flammable liquids, hot ashes, or large sharp objects with a wet/dry vac. Avoid vacuuming chemicals or toxic substances. These can damage the vacuum or cause hazards. Always follow manufacturer guidelines for safe use.
How Do You Switch Between Wet And Dry Modes On A Vacuum?
Remove the dry filter or bag for wet mode; insert the dry filter or bag for dry mode.
Conclusion
Using a wet dry vacuum is simple and effective for many cleaning tasks. Always check the filter before you start. Remove the dry filter for wet messes and use the dry filter for dust. Attach the hose and plug in the vacuum.
Move the nozzle slowly over the area to clean. Listen for changes in the motor sound; it means the tank is full. Empty the tank promptly to keep the vacuum working well. Regular care helps your vacuum last longer. This tool saves time and effort in your cleaning chores.
{ “@context”: “https://schema.org”, “@type”: “Article”, “headline”: “How Do You Use a Wet Dry Vacuum: Ultimate Guide for Perfect Cleaning”, “description”: “Learn how do you use a wet dry vacuum to effectively clean both liquid spills and dry debris with this versatile tool for home and workshop maintenance.”, “url”: “https://www.powertoolstoday.com/how-do-you-use-a-wet-dry-vacuum/”, “datePublished”: “2025-12-02”, “dateModified”: “2026-03-18”, “author”: { “@type”: “Organization”, “name”: “Power Tools Today”, “url”: “https://www.powertoolstoday.com” }, “publisher”: { “@type”: “Organization”, “name”: “Power Tools Today”, “url”: “https://www.powertoolstoday.com” }, “mainEntityOfPage”: { “@type”: “WebPage”, “@id”: “https://www.powertoolstoday.com/how-do-you-use-a-wet-dry-vacuum/” }, “image”: { “@type”: “ImageObject”, “url”: “https://www.powertoolstoday.com/wp-content/uploads/2025/11/how-do-you-use-a-wet-dry-vacuum.webp” } }{ “@context”: “https://schema.org”, “@type”: “Article”, “headline”: “How Do You Use a Wet Dry Vacuum: Ultimate Guide for Perfect Cleaning”, “description”: “Learn how do you use a wet dry vacuum to effectively clean both liquid spills and dry debris with this versatile tool for home and workshop maintenance.”, “url”: “https://www.powertoolstoday.com/how-do-you-use-a-wet-dry-vacuum/”, “datePublished”: “2025-12-02”, “dateModified”: “2026-03-19”, “author”: { “@type”: “Organization”, “name”: “Power Tools Today”, “url”: “https://www.powertoolstoday.com” }, “publisher”: { “@type”: “Organization”, “name”: “Power Tools Today”, “url”: “https://www.powertoolstoday.com” }, “mainEntityOfPage”: { “@type”: “WebPage”, “@id”: “https://www.powertoolstoday.com/how-do-you-use-a-wet-dry-vacuum/” }, “image”: { “@type”: “ImageObject”, “url”: “https://www.powertoolstoday.com/wp-content/uploads/2025/11/how-do-you-use-a-wet-dry-vacuum.webp” } }nn