Last Updated: March 20, 2026
If you own a reciprocating saw, you know how important it is to have the right blade for the job. But what happens when your blade gets dull or you need a different type?
Learning how to change the blade on your reciprocating saw is a simple skill that can save you time and frustration. In this guide, you’ll discover easy-to-follow steps that anyone can do, whether you’re a beginner or have some DIY experience.
Keep reading, and you’ll be cutting like a pro in no time. Your next project is waiting—don’t let a worn-out blade slow you down!
Credit: support.ryobi.com.au
Safety Tips Before Changing Blade
Changing the blade on a reciprocating saw requires careful attention to safety. Ignoring safety steps can cause serious injury. Always prepare before starting the blade change. The right precautions protect your hands and eyes. Follow these safety tips to ensure a smooth and safe blade replacement.
Turn Off And Unplug The Saw
Always turn off the saw before changing the blade. Unplug the power cord or remove the battery. This stops accidental starts that can cause injuries. Double-check that the saw is completely off and disconnected.
Wear Safety Gloves
Put on thick safety gloves to protect your hands. The blade edges are sharp and can cut skin easily. Gloves also improve grip when handling the blade. Never change blades with bare hands.
Use Eye Protection
Wear safety glasses or goggles to shield your eyes. Dust, debris, or blade fragments may fly during the blade change. Eye protection reduces the risk of eye injury. Always keep your glasses on until the job is done.
Work On A Stable Surface
Place the saw on a flat, stable surface before changing the blade. This prevents the saw from slipping or falling. A steady base makes the blade change safer and easier. Avoid changing blades while holding the saw in mid-air.
Read The Manufacturer’s Instructions
Check the user manual for blade change steps specific to your saw. Different models may have unique locking mechanisms. Follow the instructions exactly to avoid mistakes. Proper knowledge reduces accidents and tool damage.
Credit: www.youtube.com
Tools Needed For Blade Replacement
Changing the blade on a reciprocating saw requires a few basic tools. Having the right tools makes the process faster and safer. Prepare these tools before starting the blade replacement.
Safety Gloves
Wear safety gloves to protect your hands from sharp edges. Gloves also improve grip on the blade and saw. They reduce the chance of cuts during the process.
Allen Wrench Or Hex Key
Many reciprocating saws use an Allen wrench to loosen or tighten the blade clamp. Check your saw manual for the exact size needed. Keep the wrench handy for quick blade changes.
Screwdriver
Some saw models have screws holding the blade in place. A flathead or Phillips screwdriver may be needed. Use it to loosen or tighten these screws safely.
Replacement Blade
Choose the correct replacement blade for your saw and task. Blades vary in length, tooth count, and material. Using the right blade ensures better cutting performance.
Clean Cloth
Keep a clean cloth nearby to wipe dirt or sawdust off the blade holder. A clean surface helps the new blade fit properly. It also prevents damage to the saw parts.
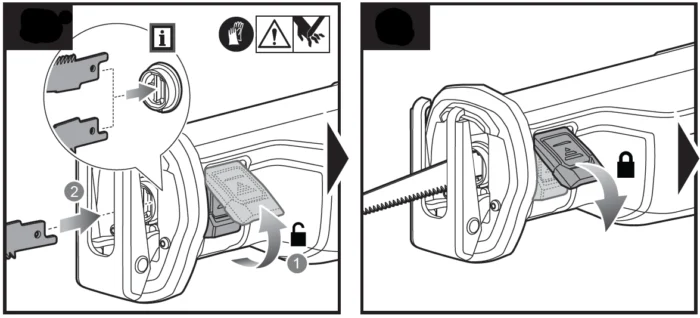
Releasing The Old Blade
Releasing the old blade is the first step in changing a reciprocating saw blade. This step ensures safety and prepares the saw for the new blade. Handling the blade carefully avoids injury and damage to the tool.
Before starting, unplug the saw or remove the battery. This prevents accidental starts. Always work on a stable surface and wear gloves for extra protection.
Locate The Blade Clamp
Find the blade clamp on the saw’s front. It holds the blade tightly in place. The clamp may have a lever, knob, or screw.
Activate The Blade Release Mechanism
Use the lever or knob to release the blade. Pull or twist it gently. This action loosens the blade for removal.
Remove The Old Blade Carefully
Pull the blade straight out from the clamp. Avoid sudden movements to prevent injury. Set the old blade aside safely.
Installing The New Blade
Installing the new blade on your reciprocating saw is a simple but important step. It ensures the saw cuts efficiently and safely. Follow these clear instructions to fit the blade correctly.
Prepare The Saw For The New Blade
First, unplug the saw or remove the battery. This prevents accidental starts. Locate the blade clamp or lever on the saw’s front end. Pull or twist this clamp to open the blade slot.
Insert The New Blade Correctly
Hold the new blade by its base, not the teeth. Align the blade’s shank with the slot in the clamp. Slide it in fully until it stops. Make sure the teeth point away from the saw’s handle.
Secure The Blade In Place
Release the blade clamp slowly to lock the blade. Tug gently on the blade to confirm it is tight. If the blade moves, reopen the clamp and reposition the blade. A secure blade prevents accidents and improves cutting.
Securing The Blade Properly
Securing the blade properly on a reciprocating saw is vital for safe and efficient cutting. A loose blade can slip or break, causing accidents or poor cuts. Take your time to attach the blade firmly to avoid any issues during use.
Check The Blade Clamp Mechanism
First, identify the blade clamp on your saw. Most models have a lever or a twist collar. Make sure the clamp is clean and free of debris. This ensures the blade fits tightly without wobbling.
Insert The Blade Correctly
Align the blade teeth in the correct direction, usually facing away from the saw handle. Slide the blade into the clamp fully. You should hear or feel a click when the blade locks in place.
Tighten The Clamp Securely
If your saw uses a lever, push it down firmly to lock the blade. For twist collars, turn them until the blade does not move. Test the blade by gently pulling it to confirm it stays locked.
Double-check Blade Stability
Hold the saw and move the blade slightly by hand. It should not shift or wiggle. A stable blade prevents accidents and allows for smooth cutting.

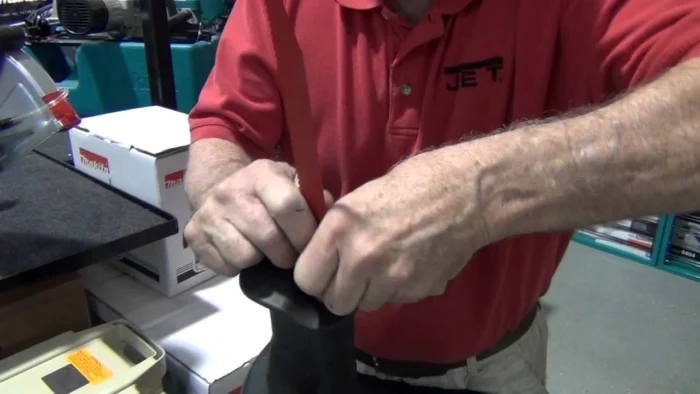
Credit: www.ezarctools.com
Testing The Reciprocating Saw
Testing the reciprocating saw after changing the blade ensures safe and proper operation. It helps identify any issues before starting your project. This step confirms the blade is installed correctly and the saw works as expected.
Preparing For The Test
Remove all debris from the saw and the new blade area. Check the blade clamp to make sure it is tight. Wear safety goggles and gloves to protect yourself during testing.
Powering On The Saw
Insert the battery or plug in the saw. Hold the saw firmly with both hands. Turn the saw on at a low speed to begin the test.
Checking Blade Movement
Observe the blade as it moves back and forth. The blade should move smoothly without wobbling. Listen for unusual sounds like grinding or clicking.
Testing Under Light Pressure
Apply light pressure against a scrap piece of wood or metal. The blade should cut cleanly without stalling. Stop immediately if the blade binds or stops moving.
Final Safety Check
Turn off the saw and unplug or remove the battery. Inspect the blade clamp and blade again. Make sure everything is secure before starting your main project.
Frequently Asked Questions
How To Put A Blade In A Dewalt Reciprocating Saw?
Remove the battery for safety. Pull up the yellow blade clamp lever. Remove the old blade. Lift the lever again. Insert the new blade fully into the slot. Release the lever to lock the blade in place.
Where Is The Spindle Lock?
The spindle lock is located near the saw’s blade housing. Press it to stop the blade for safe removal or installation.
When Changing The Blade On A Reciprocating Saw, It Is Important To?
Always disconnect power or remove the battery before changing the blade. Wear safety gear and securely engage the blade clamp. Insert the new blade fully, then lock the clamp firmly. Check blade stability before use to ensure safe operation.
How To Remove Blade From Blade Holder?
Turn off the tool and unplug it. Press or lift the blade clamp lever. Pull the blade out carefully from the holder.
How Do I Safely Remove A Reciprocating Saw Blade?
First, unplug the saw or remove the battery. Then, release the blade clamp and pull out the blade.
What Tools Are Needed To Change A Reciprocating Saw Blade?
Most saws require no extra tools; just use the blade release lever or knob on the saw.
Conclusion
Changing the blade on your reciprocating saw is simple with the right steps. Always ensure the saw is off and unplugged before starting. Use the blade clamp lever to remove the old blade safely. Insert the new blade firmly and lock it in place.
Regular blade changes keep your saw working smoothly and cuts precise. Practice these steps to save time and avoid mistakes. Now, you can confidently change blades and complete your projects faster.
{ “@context”: “https://schema.org”, “@type”: “Article”, “headline”: “How to Change Blade on Reciprocating Saw: Quick & Easy Guide”, “description”: “Learn how to change blade on reciprocating saw by understanding the toolu2019s design, blade types, and step-by-step replacement for safe and efficient use.”, “url”: “https://www.powertoolstoday.com/how-to-change-blade-on-reciprocating-saw/”, “datePublished”: “2025-11-12”, “dateModified”: “2026-03-18”, “author”: { “@type”: “Organization”, “name”: “Power Tools Today”, “url”: “https://www.powertoolstoday.com” }, “publisher”: { “@type”: “Organization”, “name”: “Power Tools Today”, “url”: “https://www.powertoolstoday.com” }, “mainEntityOfPage”: { “@type”: “WebPage”, “@id”: “https://www.powertoolstoday.com/how-to-change-blade-on-reciprocating-saw/” }, “image”: { “@type”: “ImageObject”, “url”: “https://www.powertoolstoday.com/wp-content/uploads/2025/11/How-to-Change-Blade-on-Reciprocating-Saw–1024×576.webp” } }nn