Last Updated: March 21, 2026
If you’re diving into woodworking, mastering how to cut a dado with a router is a game-changer. Whether you’re building shelves, cabinets, or any project that needs strong joints, dados provide the perfect groove for a tight fit.
But cutting them can seem tricky if you’re new to using a router. Don’t worry—this guide will walk you through simple steps to make clean, precise dado cuts every time. By the end, you’ll have the confidence and know-how to tackle your woodworking projects like a pro.
Ready to get started? Let’s dive in!
Choosing The Right Router Bit
Choosing the right router bit is key to cutting clean, precise dados. The bit controls the shape and size of the groove. Picking the correct bit helps avoid tear-out and ensures a snug fit for your joints. Not all router bits work well for dado cuts, so select carefully based on your project needs.
Types Of Router Bits For Dado Cuts
Straight bits are the most common choice for dados. They create flat-bottom grooves and come in various diameters. For wider dados, use a straight bit with the correct width or make multiple passes.
Raised panel bits or rabbeting bits can shape the edges of dados, but straight bits remain best for simple grooves. Choose bits with carbide tips for durability and cleaner cuts.
Bit Size And Width
Match the bit width to the dado width needed. A bit too narrow means multiple passes, which takes time. A bit too wide can cause rough edges and poor fitting joints.
Measure your material thickness and fit requirements before selecting the bit size. Standard dado widths range from 1/4 inch to 3/4 inch.
Material Considerations
Softwoods and hardwoods cut differently. Use sharper bits with harder woods to reduce splintering. For plywood, bits with an up-cut spiral help clear chips efficiently.
Consider the router speed and feed rate as well, adjusting to prevent burning or tear-out on delicate materials.
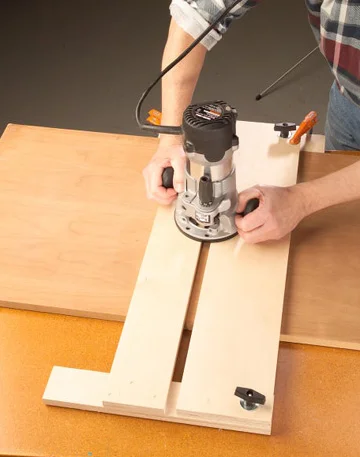
Credit: www.woodworkersjournal.com
Setting Up The Router And Fence
Setting up the router and fence is the first step to cut a clean dado. Proper setup ensures accuracy and safety. It also prevents mistakes and wood damage.
Take your time to adjust the fence and router depth. A steady hand and clear measurements make the cut perfect. Let’s explore how to prepare the router and fence properly.
Select a straight router bit matching your dado width. The bit size controls the groove width. Use a sharp bit for clean cuts. Avoid bits that are dull or chipped.
Adjusting The Router Depth
Set the router depth to match the dado depth needed. Use a ruler or caliper for precise measurement. Lock the depth to avoid changes during the cut. Test the depth on scrap wood first.
Aligning And Clamping The Fence
Position the fence along the cut line for guidance. Measure from the edge of the wood to the bit’s edge. Clamp the fence tightly to stop any movement. Confirm the fence is parallel to the cut line.
Measuring And Marking The Dado Location
Measuring and marking the dado location is the first step to a clean cut. Precise measurement ensures the dado fits perfectly. Take your time to measure twice before marking once. Accurate marking guides the router and prevents mistakes.
Use a reliable measuring tool like a ruler or tape measure. Check the dimensions of the wood piece carefully. Consider the width and depth of the dado to match your project needs. Mark the edges clearly for easy visibility during cutting.
Choosing The Right Measuring Tools
Select tools that give clear and exact readings. A steel ruler or a tape measure works best. Avoid worn or flexible rulers as they can cause errors. A combination square helps mark straight lines at right angles.
Marking The Dado Width And Depth
Mark the width of the dado with a pencil line. Use a marking knife or sharp pencil for clean edges. Mark the depth to control the router bit’s plunge. This prevents cutting too deep or too shallow.
Double-checking Measurements
Recheck all your measurements before cutting. Measure the distance from the edge of the wood twice. Confirm the width and depth marks are consistent. This step saves time and avoids costly errors.
Using A Straightedge For Accurate Lines
Place a straightedge or ruler along the mark lines. Draw sharp, straight lines to guide the router fence. Straight lines keep the dado clean and straight. Clamping the straightedge can help maintain stability.
Using A Dado Jig For Accuracy
Using a dado jig with a router helps achieve precise and clean dado cuts. The jig guides the router along a fixed path, reducing mistakes. It keeps the router steady, ensuring the dado width and depth are consistent.
This tool is especially useful for beginners or anyone who wants repeatable accuracy. Setting up a dado jig might take a little time, but it saves effort in the long run. It also makes the process safer by controlling the router’s movement.
What Is A Dado Jig?
A dado jig is a simple guide that holds the router in place. It attaches to the workpiece or the router base. The jig has slots or fences that direct the router bit along the dado line.
It can be made from wood or metal and often includes clamps. Some jigs allow easy adjustment of the dado width and depth. This flexibility helps cut dados for different projects.
How To Set Up A Dado Jig For Your Router
First, select the right router bit for the dado width. Next, attach the jig to the workpiece or router base firmly. Use measuring tools to mark the dado location clearly.
Adjust the jig’s fences or guides to the marked line. Double-check the setup to avoid uneven cuts. Secure the jig tightly to prevent any movement during routing.
Benefits Of Using A Dado Jig
The jig improves cut accuracy by guiding the router smoothly. It reduces the chance of slipping or wandering off the line. The consistent dado width helps with tight-fitting joints.
It speeds up the process by allowing faster, confident cuts. The jig also protects the workpiece from damage by controlling the router’s path. Overall, it produces cleaner and more professional results.
Step-by-step Cutting Process
Start by securing the wood piece firmly. Set the router depth and guide fence to the desired dado width. Slowly guide the router along the wood, making multiple passes until the dado reaches the correct depth.
Preparing The Workpiece And Router
Start by selecting the wood for your dado cut. Mark the exact position and length of the dado on the wood surface. Attach the straight router bit to your router, matching the width of your desired dado. Adjust the cutting depth carefully to avoid cutting too deep. Secure the workpiece firmly using clamps to keep it steady during routing.
Setting Up The Router Fence Or Guide
Attach a fence or edge guide to your router for straight cuts. Measure from the router bit to the fence edge to align with your marked line. Clamp the fence securely to prevent movement. Confirm the fence runs parallel to the cut line for accuracy. This setup ensures a clean and straight dado groove every time.
Making The Dado Cut
Switch on the router and let the bit reach full speed before cutting. Slowly push the router forward along the fence, following the marked line. Keep a steady pace to avoid burning the wood. For deeper dados, make multiple shallow passes instead of one deep cut. Check the depth after each pass and adjust as needed.
Cleaning Up The Dado Groove
After cutting, inspect the dado groove for smoothness and uniform depth. Use a chisel or sandpaper to remove any rough spots or tear-out. Test the fit with the mating piece to ensure it sits flush and snug. Make small adjustments by lightly trimming the edges if the fit is too tight.
Tips For Clean And Precise Cuts
Achieving clean and precise dado cuts with a router requires attention to detail. Minor mistakes can ruin the fit and weaken the joint. Follow simple yet effective tips to improve your results.
Preparation and steady control are key. The right setup helps guide the router smoothly. Consistency in depth and speed prevents rough edges.
Use A Sharp And Suitable Router Bit
Choose a straight bit that matches the dado width. A sharp bit cuts cleaner and reduces tear-out. Replace dull bits to keep cuts smooth.
Secure Your Workpiece Firmly
Clamp the wood to your workbench. Movement during cutting causes uneven grooves. A stable piece ensures accuracy and safety.
Set The Correct Cutting Depth
Adjust the router to the exact depth needed. Make shallow passes instead of cutting deep at once. This avoids splintering and bit strain.
Use A Guide Or Fence For Straight Cuts
Attach a fence or guide to the router base. This keeps the router aligned along the cut line. Straight cuts fit better and look cleaner.
Move The Router At A Steady Pace
Push the router evenly without rushing. Too fast causes rough edges; too slow burns the wood. Find a smooth, steady speed.
Clean The Cut Area Between Passes
Remove sawdust after each pass. Dust buildup hides the cut line and may cause the router to slip. Use a brush or compressed air.
Common Mistakes To Avoid
Cutting a dado with a router can be tricky. Avoiding common mistakes saves time and frustration. Mistakes often cause uneven cuts or damage to wood. Focus on accuracy and proper setup for best results.
Using The Wrong Router Bit
Choosing the right bit is crucial. A straight bit with a flat cutting edge works best. Avoid bits that are too small or not sharp enough. Dull bits make rough cuts and strain the router.
Skipping Test Cuts
Always make test cuts on scrap wood. This checks depth and width before cutting the final piece. Skipping tests risks ruining your workpiece. Adjust depth and fence position based on test results.
Not Securing The Workpiece
Clamp your wood firmly before routing. Moving wood causes uneven dadoes and safety hazards. Use clamps or a vise to keep the piece steady. Never hold the wood by hand while routing.
Ignoring Router Speed Settings
Set the router speed according to bit size and wood type. Too fast can burn the wood or damage the bit. Too slow causes rough edges. Find a balanced speed for smooth cuts.
Removing Too Much Material At Once
Cut the dado in multiple shallow passes. Removing too much wood in one pass strains the router and bit. Shallow cuts create cleaner edges and extend bit life. Take your time for a neat dado.
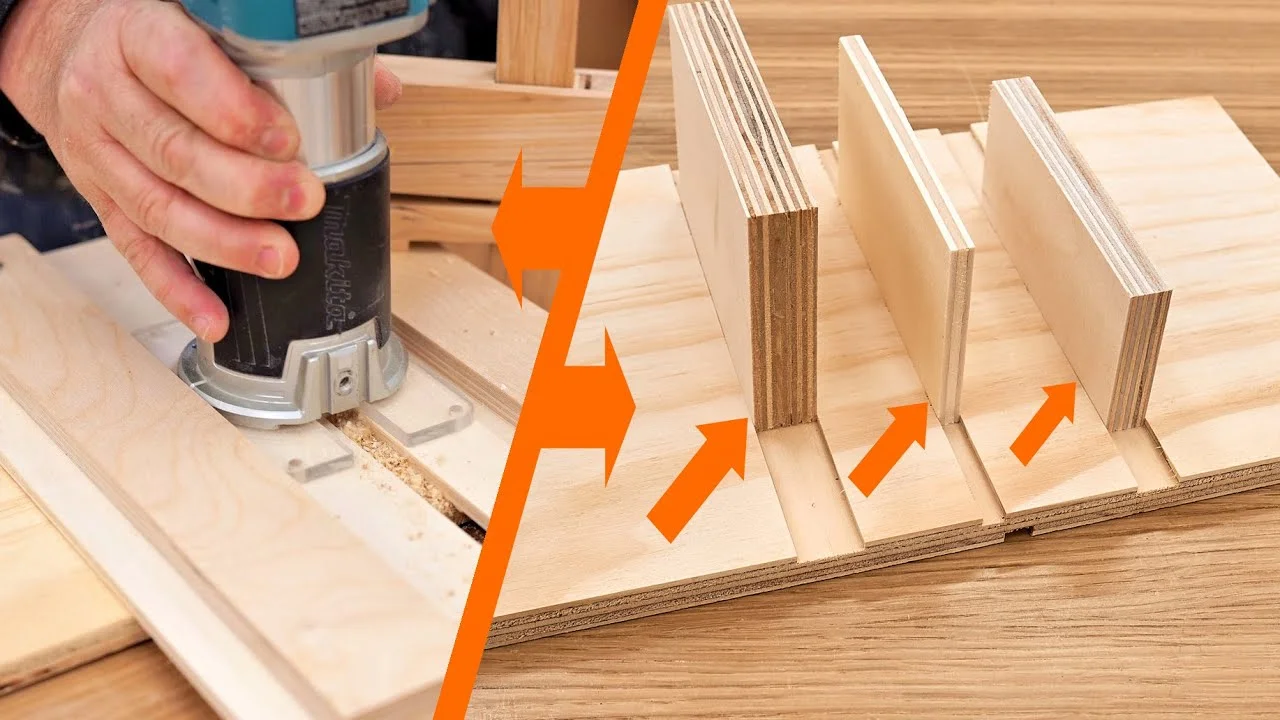
Credit: www.youtube.com
Comparing Router And Table Saw Dados
Choosing between a router and a table saw for cutting dados depends on your project needs. Both tools create grooves in wood, but they work differently. Understanding their strengths helps you pick the right method.
Each tool offers unique advantages for dado cuts. A router is versatile and precise. A table saw is fast and consistent. Let’s explore these differences in detail.
Precision And Control
Routers allow fine control over depth and width. You can adjust settings for custom cuts easily. This makes routers great for detailed work. Table saws offer less fine-tuning but keep cuts straight and uniform. They work well for repetitive dados of the same size.
Speed And Efficiency
Table saws cut dados faster on large pieces. Their fixed blade and fence speed up the process. Routers take more time, especially with complex jigs. However, routers provide better results on small or delicate wood pieces.
Setup And Safety
Router setups usually involve clamps and fences, which take time. They require careful handling to avoid mistakes. Table saws need precise blade height and fence settings. Safety guards on table saws protect fingers during cuts. Both tools demand safety gear and attention.
Cost And Space
Routers are often less expensive and more portable. They fit in small workshops easily. Table saws need more space and investment. They suit woodworkers with dedicated work areas and larger budgets.
Versatility Of Cuts
Routers can cut dados, rabbets, and decorative edges. Changing bits expands their use. Table saws mainly cut straight dados and grooves. They lack the same variety but excel in straight cuts.
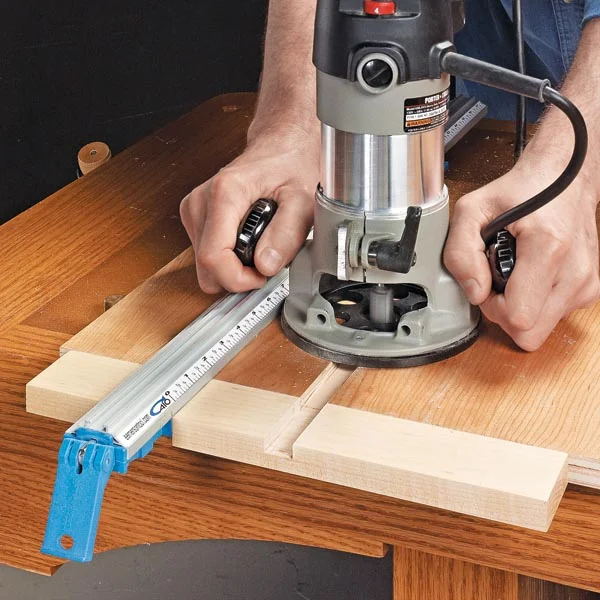
Credit: www.woodsmith.com
Frequently Asked Questions
Can You Do A Dado Cut With A Router?
Yes, you can cut a dado with a router using a straight or dado router bit. Clamp a fence to guide the cut precisely. Make multiple passes to reach the desired depth. This method works well for stopped or shallow dados in woodworking projects.
What Router Bit For Dado Cuts?
Use a straight router bit or a dovetail router bit for clean, precise dado cuts. Choose bit size matching dado width.
What Is The Proper Way To Cut A Dado?
Clamp a straight fence to your workpiece. Set the router bit depth. Make multiple shallow passes to reach full dado depth. Clean edges with a chisel if needed.
Is It Better To Cut Dado With A Router Or Table Saw?
Cutting dados with a table saw offers speed and uniformity for long cuts. Routers excel at precise, stopped, or curved dados. Choose based on project needs: table saw for straight, full-length dados; router for detailed, shorter, or intricate cuts.
Can You Cut A Dado With A Router?
Yes, a router can cut clean, precise dado grooves with the right bit and setup.
Conclusion
Cutting dados with a router brings precision and control to woodworking. Using the right bit and fence setup ensures clean, straight grooves. Take your time measuring and clamping the workpiece firmly. Practice on scrap wood to build confidence before the final cut.
This method suits both beginner and experienced woodworkers well. Keep safety in mind by wearing protective gear and following instructions. With patience and care, you can create strong, neat dado joints for your projects. Try this technique to improve the quality of your woodworking today.
Related reading: How to Cut an Angle on a Table Saw.
{ “@context”: “https://schema.org”, “@type”: “Article”, “headline”: “How to Cut a Dado With a Router: Expert Tips for Perfect Cuts”, “description”: “Learn how to cut a dado with a router by understanding the process of creating grooves in wood for strong joints and precise woodworking projects.”, “url”: “https://www.powertoolstoday.com/how-to-cut-a-dado-with-a-router/”, “datePublished”: “2026-01-14”, “dateModified”: “2026-03-18”, “author”: { “@type”: “Organization”, “name”: “Power Tools Today”, “url”: “https://www.powertoolstoday.com” }, “publisher”: { “@type”: “Organization”, “name”: “Power Tools Today”, “url”: “https://www.powertoolstoday.com” }, “mainEntityOfPage”: { “@type”: “WebPage”, “@id”: “https://www.powertoolstoday.com/how-to-cut-a-dado-with-a-router/” }, “image”: { “@type”: “ImageObject”, “url”: “https://www.powertoolstoday.com/wp-content/uploads/2025/11/how-to-cut-a-dado-with-a-router.jpg” } }{ “@context”: “https://schema.org”, “@type”: “Article”, “headline”: “How to Cut a Dado With a Router: Expert Tips for Perfect Cuts”, “description”: “Learn how to cut a dado with a router by understanding the process of creating grooves in wood for strong joints and precise woodworking projects.”, “url”: “https://www.powertoolstoday.com/how-to-cut-a-dado-with-a-router/”, “datePublished”: “2026-01-14”, “dateModified”: “2026-03-19”, “author”: { “@type”: “Organization”, “name”: “Power Tools Today”, “url”: “https://www.powertoolstoday.com” }, “publisher”: { “@type”: “Organization”, “name”: “Power Tools Today”, “url”: “https://www.powertoolstoday.com” }, “mainEntityOfPage”: { “@type”: “WebPage”, “@id”: “https://www.powertoolstoday.com/how-to-cut-a-dado-with-a-router/” }, “image”: { “@type”: “ImageObject”, “url”: “https://www.powertoolstoday.com/wp-content/uploads/2025/11/how-to-cut-a-dado-with-a-router.jpg” } }nnnn