Last Updated: March 20, 2026
Cutting angles on a table saw might seem tricky at first, but once you know the right techniques, it becomes simple and even enjoyable. Whether you’re working on a DIY project or a professional build, mastering angled cuts can take your woodworking skills to the next level.
In this guide, you’ll discover clear, step-by-step methods to cut perfect angles using your table saw safely and accurately. By the end, you’ll feel confident tackling bevel cuts, miter cuts, and even tapers without guesswork. Ready to sharpen your skills and make every cut count?
Let’s get started!
Credit: www.youtube.com
Blade Setup For Angled Cuts
Setting up the blade correctly is vital for precise angled cuts on a table saw. The blade angle affects the quality and accuracy of the cut. A proper blade setup ensures clean edges and reduces the chance of kickback or binding.
Adjust the blade tilt to match the desired angle before cutting. Most table saws have a bevel adjustment wheel or lever for this purpose. Make sure the blade is firmly locked at the angle to avoid shifts during the cut.
Checking The Blade Angle
Use a reliable angle gauge or digital bevel finder to set the blade angle. Place the gauge against the blade or the table saw’s miter slot. Verify the angle twice to ensure accuracy. This simple step prevents mistakes and wasted material.
Selecting The Right Blade
Choose a blade designed for angled cuts. Thin-kerf blades with many teeth work well for smooth bevel cuts. Avoid dull or damaged blades as they cause rough cuts and increase safety risks. A sharp blade makes cutting easier and safer.
Aligning The Blade With The Fence
Ensure the blade is parallel to the fence before cutting. Misalignment causes uneven cuts and can pinch the wood. Adjust the fence carefully and lock it in place. This alignment supports straight, clean angled cuts every time.
Safety Tips For Blade Setup
Always unplug the saw before adjusting the blade. Wear safety gloves to protect your hands. Check that the blade guard is in place and functioning. Keep fingers clear of the blade path during setup and cutting.
Using The Miter Gauge
The miter gauge is a key tool for cutting angles on a table saw. It helps guide the workpiece at a precise angle to the blade. Using the miter gauge allows for safe and accurate crosscuts. This tool is ideal for cutting angled edges and making miter joints.
Using the miter gauge requires setting the angle correctly. Most miter gauges have a scale that shows degrees. You can adjust the gauge to the desired angle and lock it in place. This setup ensures consistent cuts every time.
It is important to hold the workpiece firmly against the miter gauge fence. This prevents movement during the cut. Always keep your hands clear of the blade path. Using push sticks or blocks can improve safety when cutting small pieces.
Setting The Miter Gauge Angle
Loosen the knob on the miter gauge to adjust the angle. Rotate the gauge to the required degree marked on the scale. Tighten the knob to lock the angle in place. Double-check the angle with a protractor if needed. Accurate setup leads to clean, precise cuts.
Positioning The Workpiece
Place the wood flat against the miter gauge fence. Ensure the edge to be cut faces the blade. Keep the workpiece steady to avoid kickback. Use clamps if needed for extra stability. Proper positioning improves cut quality and safety.
Making The Cut Safely
Turn on the table saw and let the blade reach full speed. Slowly push the miter gauge and workpiece toward the blade. Maintain steady pressure and control. Do not force the wood. After the cut, pull the workpiece back before turning off the saw.
Crosscut Sled Techniques
Crosscut sled techniques improve the accuracy and safety of angled cuts on a table saw. A crosscut sled holds the workpiece firmly and guides it through the blade smoothly. This setup reduces movement, ensuring straight and clean cuts at precise angles. Using a sled also protects your hands from the blade, increasing safety during operation.
These sleds can be customized with adjustable fences and stops, making angle cuts easier and repeatable. They work well for cutting mitered corners, bevels, and compound angles. Learning the right sled techniques enhances your woodworking projects by providing consistent, professional results.
Building A Basic Crosscut Sled
Start with a flat base that fits your table saw. Add two runners underneath that slide in the table saw’s miter slots. Attach a fence perpendicular to the blade for straight cuts. Ensure the sled moves smoothly without wobbling.
This simple sled can cut 90-degree crosscuts safely and accurately. You can later add adjustable fences for angled cuts.
Adjusting The Fence For Angle Cuts
Loosen the fence and tilt it to the desired angle using a protractor or angle gauge. Tighten the fence securely to keep it in place. This setup guides the workpiece at the set angle as you slide the sled.
Make test cuts on scrap wood to check the angle before cutting your final piece. Small adjustments may be needed for perfect results.
Using Stops For Repeatable Cuts
Attach adjustable stops to the sled fence. Stops limit the movement of the workpiece, allowing you to make identical angled cuts multiple times. This is useful for projects needing several pieces with the same angle.
Measure and set the stop carefully. Check the cut length and angle with each use to maintain accuracy.
Safety Tips For Crosscut Sled Use
Keep your hands clear of the blade path when sliding the sled. Use push sticks or push blocks for small pieces. Wear safety glasses to protect your eyes from sawdust and debris.
Inspect the sled for damage before each use. A well-maintained sled helps prevent accidents and ensures clean cuts every time.
Tapering Jig Basics
Cutting an angle on a table saw involves tilting the blade or using a tapering jig. A tapering jig helps hold wood steady for smooth, angled cuts. This tool makes it easier to create precise, repeatable angled edges safely.
A tapering jig helps make angled cuts along the length of a board. It holds the wood steady and guides it through the blade at a set angle. This tool is useful for cutting tapers cleanly and safely.
Building or buying a tapering jig can save time and improve accuracy. The jig usually consists of a flat base and a fence that holds the board. The fence is set at the angle you want to cut.
How A Tapering Jig Works
The jig slides along the table saw’s fence, keeping the board at a steady angle. This movement controls the cut and prevents the wood from shifting. It also helps maintain consistent cuts on multiple pieces.
By adjusting the fence angle, you can change the taper’s width and length. This flexibility makes the jig useful for many projects like legs, trim, or decorative edges.
Making A Simple Tapering Jig
Start with a flat board as the base. Attach a fence at the desired angle using screws or clamps. The fence should be straight and firm to guide the wood accurately.
Add a stop block at the end of the jig to hold the board in place. This block helps keep the wood from sliding during the cut. Sand any rough edges to avoid splinters and ensure smooth movement.
Safety Tips Using A Tapering Jig
Always wear safety goggles and keep your hands clear of the blade. Use push sticks or push blocks to guide the wood safely. Check the jig’s stability before each cut to prevent slips.
Make sure the table saw blade is sharp and clean. A dull blade can cause rough cuts and increase the risk of kickback. Work slowly and steadily to keep control of the wood and jig.
Handling Acute Angles Safely
Cutting acute angles on a table saw can be tricky and risky. These angles are sharp and can cause the wood to slip or kick back. Taking safety steps is important to avoid accidents and get precise cuts.
Support for the workpiece is key. Without it, the wood may tilt or bind, leading to dangerous situations. Use extra pieces or jigs to keep the material stable. This helps the blade cut smoothly through the wood.
Always wear safety gear. Eye protection and hearing protection keep you safe from flying debris and loud noise. Stay focused and keep your hands clear of the blade at all times.
Use Support Blocks Or Sacrificial Boards
Attach a sacrificial board to the back of your workpiece. Use double-sided tape or clamps to fix it firmly. This creates a flat, stable surface that rides along the table saw fence.
Support blocks prevent the wood from tipping during the cut. They help maintain control and reduce the chance of kickback. This method is simple and improves safety greatly.
Adjust Blade Angle Properly
Set the blade to the correct bevel angle before starting. Use a reliable angle gauge to check the blade tilt. Incorrect blade angles can cause binding or rough cuts.
Slowly lower the blade into the wood. Make sure the blade is sharp and clean. A dull blade increases resistance and may cause the wood to catch.
Secure The Workpiece Firmly
Hold the wood firmly against the fence or jig. Use push sticks or push blocks to guide the material. Keep your hands away from the blade path.
Do not force the wood through the blade. Let the saw do the cutting at a steady pace. For long cuts, support the free end to avoid tipping.
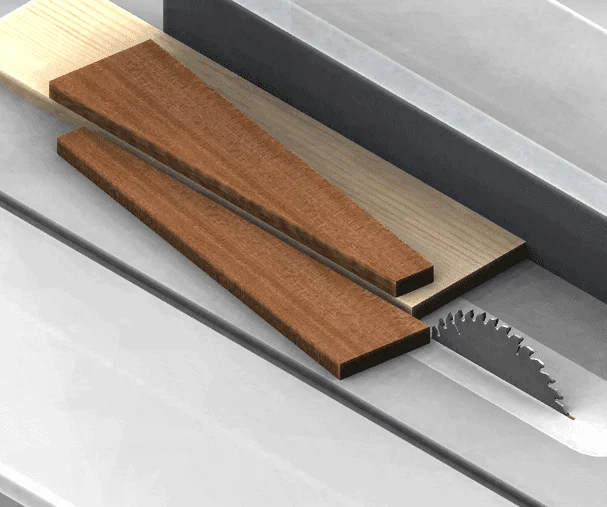
Credit: www.instructables.com
Diy Angle Jigs For Precision
DIY angle jigs help you achieve precise cuts on your table saw. These jigs hold the wood at a fixed angle, making your cuts more accurate. Building your own jig saves money and allows customization for different projects.
Using a homemade angle jig reduces errors and improves safety. It keeps the wood steady, preventing slips and uneven cuts. The process is simple and does not require complex tools.
Materials Needed For Diy Angle Jigs
Start with plywood or hardwood for a sturdy base. Use screws, wood glue, and clamps for assembly. A protractor or angle finder helps measure exact angles. Sandpaper smooths edges to prevent splinters.
Steps To Build A Basic Angle Jig
Cut a rectangular base the size of your table saw’s miter slot. Attach a fence at the desired angle using screws. Check the angle with a protractor before tightening. Add a stop block to hold the wood in place.
Tips For Using Diy Angle Jigs Safely
Always wear safety glasses and hearing protection. Secure the jig firmly to the table saw. Test the jig with scrap wood before cutting real pieces. Keep your hands away from the blade during cuts.
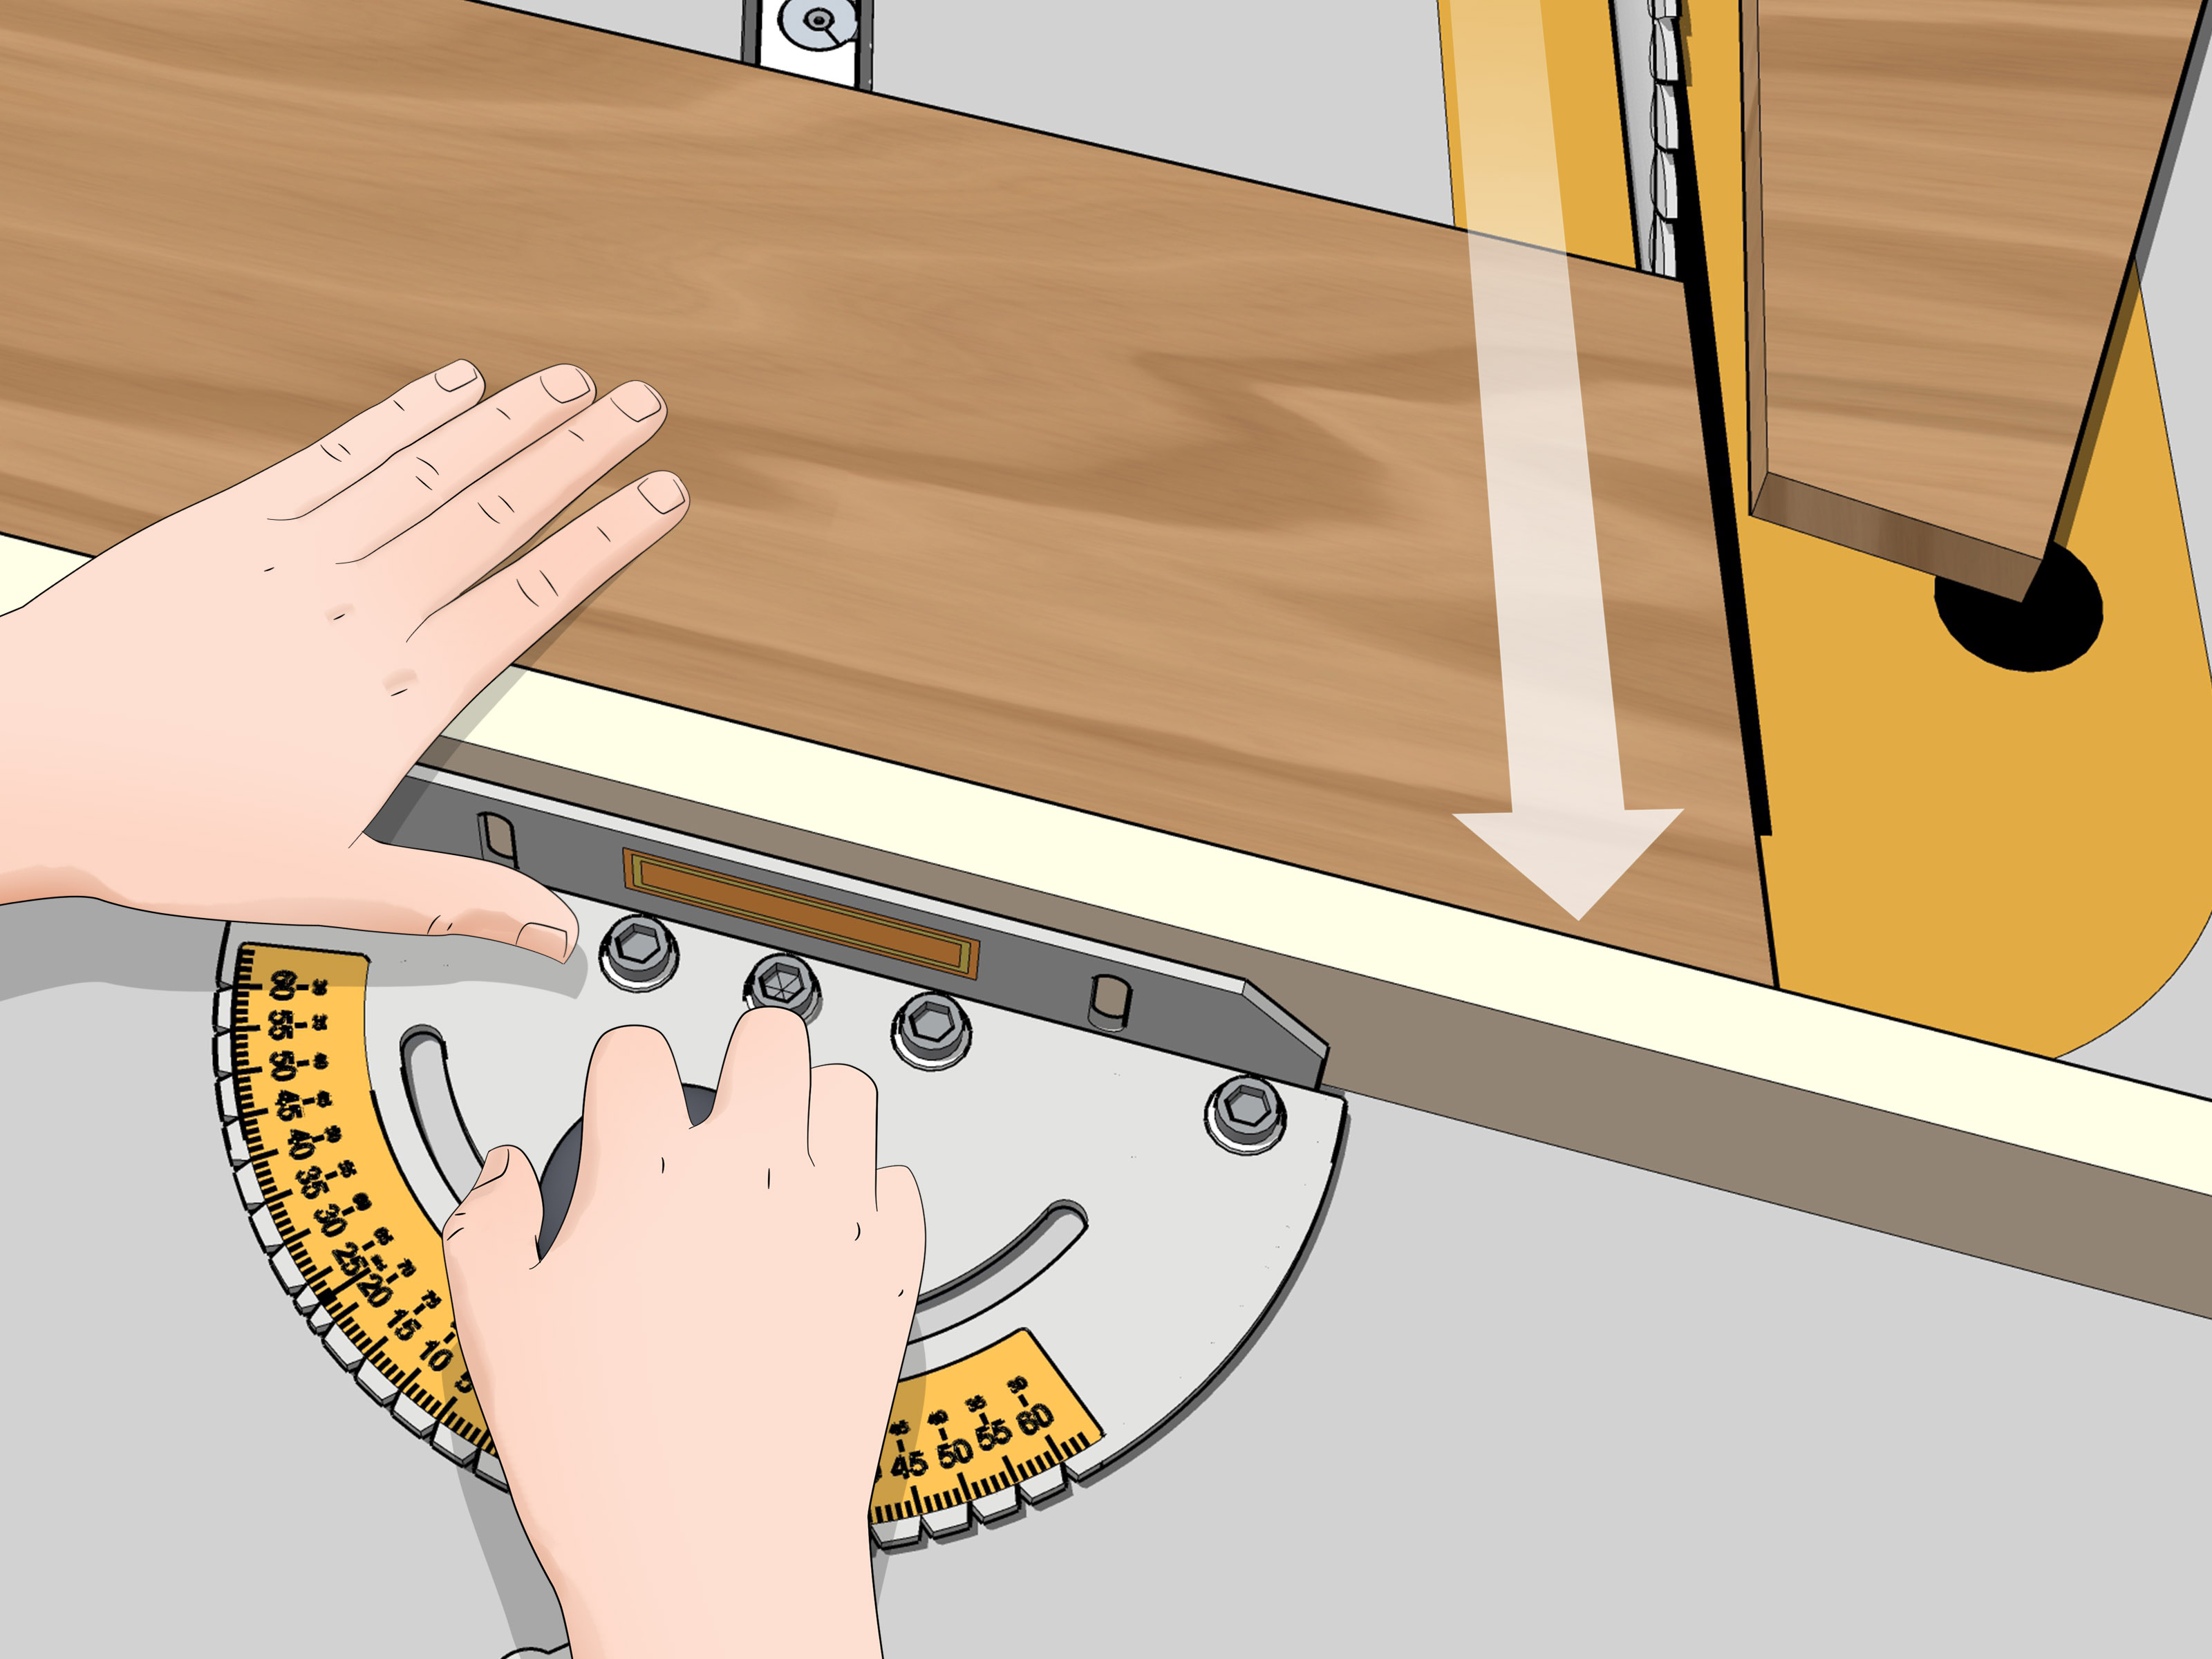
Credit: www.wikihow.com
Frequently Asked Questions
Can You Cut An Angle With A Table Saw?
Yes, you can cut angles with a table saw by tilting the blade for bevel cuts or using a miter gauge and jigs for angled crosscuts and tapers.
How To Cut A 60 Degree Bevel Angle On A Table Saw?
Set the table saw blade to a 60-degree bevel angle using the bevel adjustment. Secure the workpiece firmly. Slowly feed the wood into the blade, maintaining steady pressure. Use a push stick for safety. Check the cut angle with a protractor for accuracy.
How To Cut An Angle On Wood?
To cut an angle on wood, tilt the table saw blade to the desired bevel angle. Use a miter gauge or jig to guide the wood for accurate crosscuts or tapers. Secure the wood firmly and cut slowly for a clean, precise angled edge.
How To Get Perfect 45 Degree Cuts?
Set your table saw blade to 45 degrees. Use a miter gauge or angle jig to guide the wood steadily. Secure the workpiece firmly and cut slowly for precise, clean 45-degree angles every time.
Can You Cut Angled Bevels On A Table Saw?
Yes, tilt the blade to the desired angle for accurate bevel cuts on your table saw.
What Tools Help Cut Angles On A Table Saw?
Use a miter gauge, crosscut sled, or angle jig for precise and safe angled cuts.
Conclusion
Cutting angles on a table saw becomes easier with practice. Always set the blade angle carefully before starting. Use jigs or miter gauges for better control and safety. Keep the workpiece stable to avoid mistakes or accidents. Take your time and make small adjustments as needed.
With patience, your angled cuts will be clean and precise. Remember, safety gear is important every time you use the saw. Enjoy your woodworking and keep improving your skills step by step.
Related reading: how to make a table saw sled.
Related reading: what a hybrid table saw is.
{ “@context”: “https://schema.org”, “@type”: “Article”, “headline”: “How to Cut an Angle on a Table Saw: Expert Tips Made Easy”, “description”: “Learn how to cut an angle on a table saw by adjusting the blade tilt and fence to achieve precise angled cuts for woodworking and construction projects.”, “url”: “https://www.powertoolstoday.com/cut-angle-table-saw/”, “datePublished”: “2025-11-14”, “dateModified”: “2026-03-18”, “author”: { “@type”: “Organization”, “name”: “Power Tools Today”, “url”: “https://www.powertoolstoday.com” }, “publisher”: { “@type”: “Organization”, “name”: “Power Tools Today”, “url”: “https://www.powertoolstoday.com” }, “mainEntityOfPage”: { “@type”: “WebPage”, “@id”: “https://www.powertoolstoday.com/cut-angle-table-saw/” }, “image”: { “@type”: “ImageObject”, “url”: “https://www.powertoolstoday.com/wp-content/uploads/2025/11/How-to-Cut-an-Angle-on-a-Table-Saw-1024×576.webp” } }{ “@context”: “https://schema.org”, “@type”: “Article”, “headline”: “How to Cut an Angle on a Table Saw: Expert Tips Made Easy”, “description”: “Learn how to cut an angle on a table saw by adjusting the blade tilt and fence to achieve precise angled cuts for woodworking and construction projects.”, “url”: “https://www.powertoolstoday.com/cut-angle-table-saw/”, “datePublished”: “2025-11-14”, “dateModified”: “2026-03-19”, “author”: { “@type”: “Organization”, “name”: “Power Tools Today”, “url”: “https://www.powertoolstoday.com” }, “publisher”: { “@type”: “Organization”, “name”: “Power Tools Today”, “url”: “https://www.powertoolstoday.com” }, “mainEntityOfPage”: { “@type”: “WebPage”, “@id”: “https://www.powertoolstoday.com/cut-angle-table-saw/” }, “image”: { “@type”: “ImageObject”, “url”: “https://www.powertoolstoday.com/wp-content/uploads/2025/11/How-to-Cut-an-Angle-on-a-Table-Saw-1024×576.webp” } }nnnn