Last Updated: March 30, 2026
Are you tired of uneven, wobbly cuts ruining your woodworking projects? Cutting straight with a circular saw might seem tricky at first, but with the right tips and tricks, you can achieve clean, precise cuts every time.
Whether you’re building furniture, framing a wall, or tackling a DIY home project, knowing how to guide your saw properly makes all the difference. You’ll discover simple, practical methods to cut straight with a circular saw—no expensive guides or fancy tools needed.
Keep reading, and you’ll gain the confidence to make perfect cuts that look professional and save you time and material. Let’s get started!

Credit: www.youtube.com
Choosing The Right Circular Saw
Choosing the right circular saw is the first step to making straight cuts. The right saw gives control and accuracy. It also makes cutting easier and safer. Different saws have different features. Knowing what to pick helps you get the best results for your project.
Types of Circular Saws
There are corded and cordless circular saws. Corded saws offer constant power. Cordless saws provide more freedom of movement. Choose based on your work area and power needs. Some saws have special blades for different materials. Pick the type that matches your project.
Blade Size and Teeth Count
Blade size affects cutting depth. Common sizes are 6.5, 7.25, and 8.25 inches. Bigger blades cut thicker wood. Teeth count affects the cut quality. More teeth give smoother cuts but cut slower. Fewer teeth cut faster but rougher. Choose a blade size and teeth count for your cutting task.
Power and Speed
Look at the saw’s motor power, usually in amps or volts. Higher power means the saw can cut through tough wood better. Speed is measured in RPM (revolutions per minute). Faster RPMs can give cleaner cuts. Balance power and speed for the best control and smoothness.
Safety Features
Safety matters when cutting wood. Look for saws with blade guards and safety switches. Electric brakes stop the blade quickly. Some saws have anti-kickback features to prevent accidents. Choose a saw that helps keep you safe during use.
Preparing Your Workspace
Clear your workspace of clutter to create enough room for safe cutting. Secure the wood firmly with clamps to prevent movement. Check that your circular saw blade is sharp and set to the correct depth before starting.
Clear The Area
Start by removing all clutter from your workspace. A clean area helps you focus on the cut. It also lowers the risk of tripping or knocking things over. Keep tools and materials organized and out of the cutting path.
Set Up A Stable Surface
Place your wood on a flat, sturdy surface. A workbench or sawhorses work well. Make sure the surface will not move during cutting. Secure the wood with clamps to prevent shifting. Stability is key for straight cuts.
Check Lighting And Visibility
Good lighting helps you see your cutting line clearly. Work in a bright area or use extra lamps if needed. Avoid shadows on the cutting line. Clear visibility ensures accuracy and safety.
Prepare Your Circular Saw
Inspect your saw before starting. Check the blade for sharpness and proper installation. Adjust the blade depth to match the wood thickness. A well-prepared saw makes cleaner, straighter cuts.
Marking And Measuring For Accuracy
Marking and measuring are the first steps to cut straight with a circular saw. Accurate marks guide your saw and help avoid mistakes. Taking time to measure carefully saves wood and effort later.
Use a tape measure to check the length or width of the piece. Measure twice to be sure before marking. Even small errors in measurement can cause uneven cuts.
Choosing The Right Tools For Marking
Use a sharp pencil or a fine-tip marker for clear lines. A carpenter’s square or a straight edge ensures your lines are perfectly straight. Avoid using a thick marker that may blur the cut line.
How To Measure For Straight Cuts
Start measuring from a fixed edge of your wood. Mark the desired cut point clearly. Use a square to draw a line across the wood’s width. This line will be your cutting guide.
Double Checking Your Marks
Check the measurements again after drawing lines. Use your tape measure to verify distances from edges. Confirm the line is straight by placing a ruler or square on it. This step reduces the chance of crooked cuts.
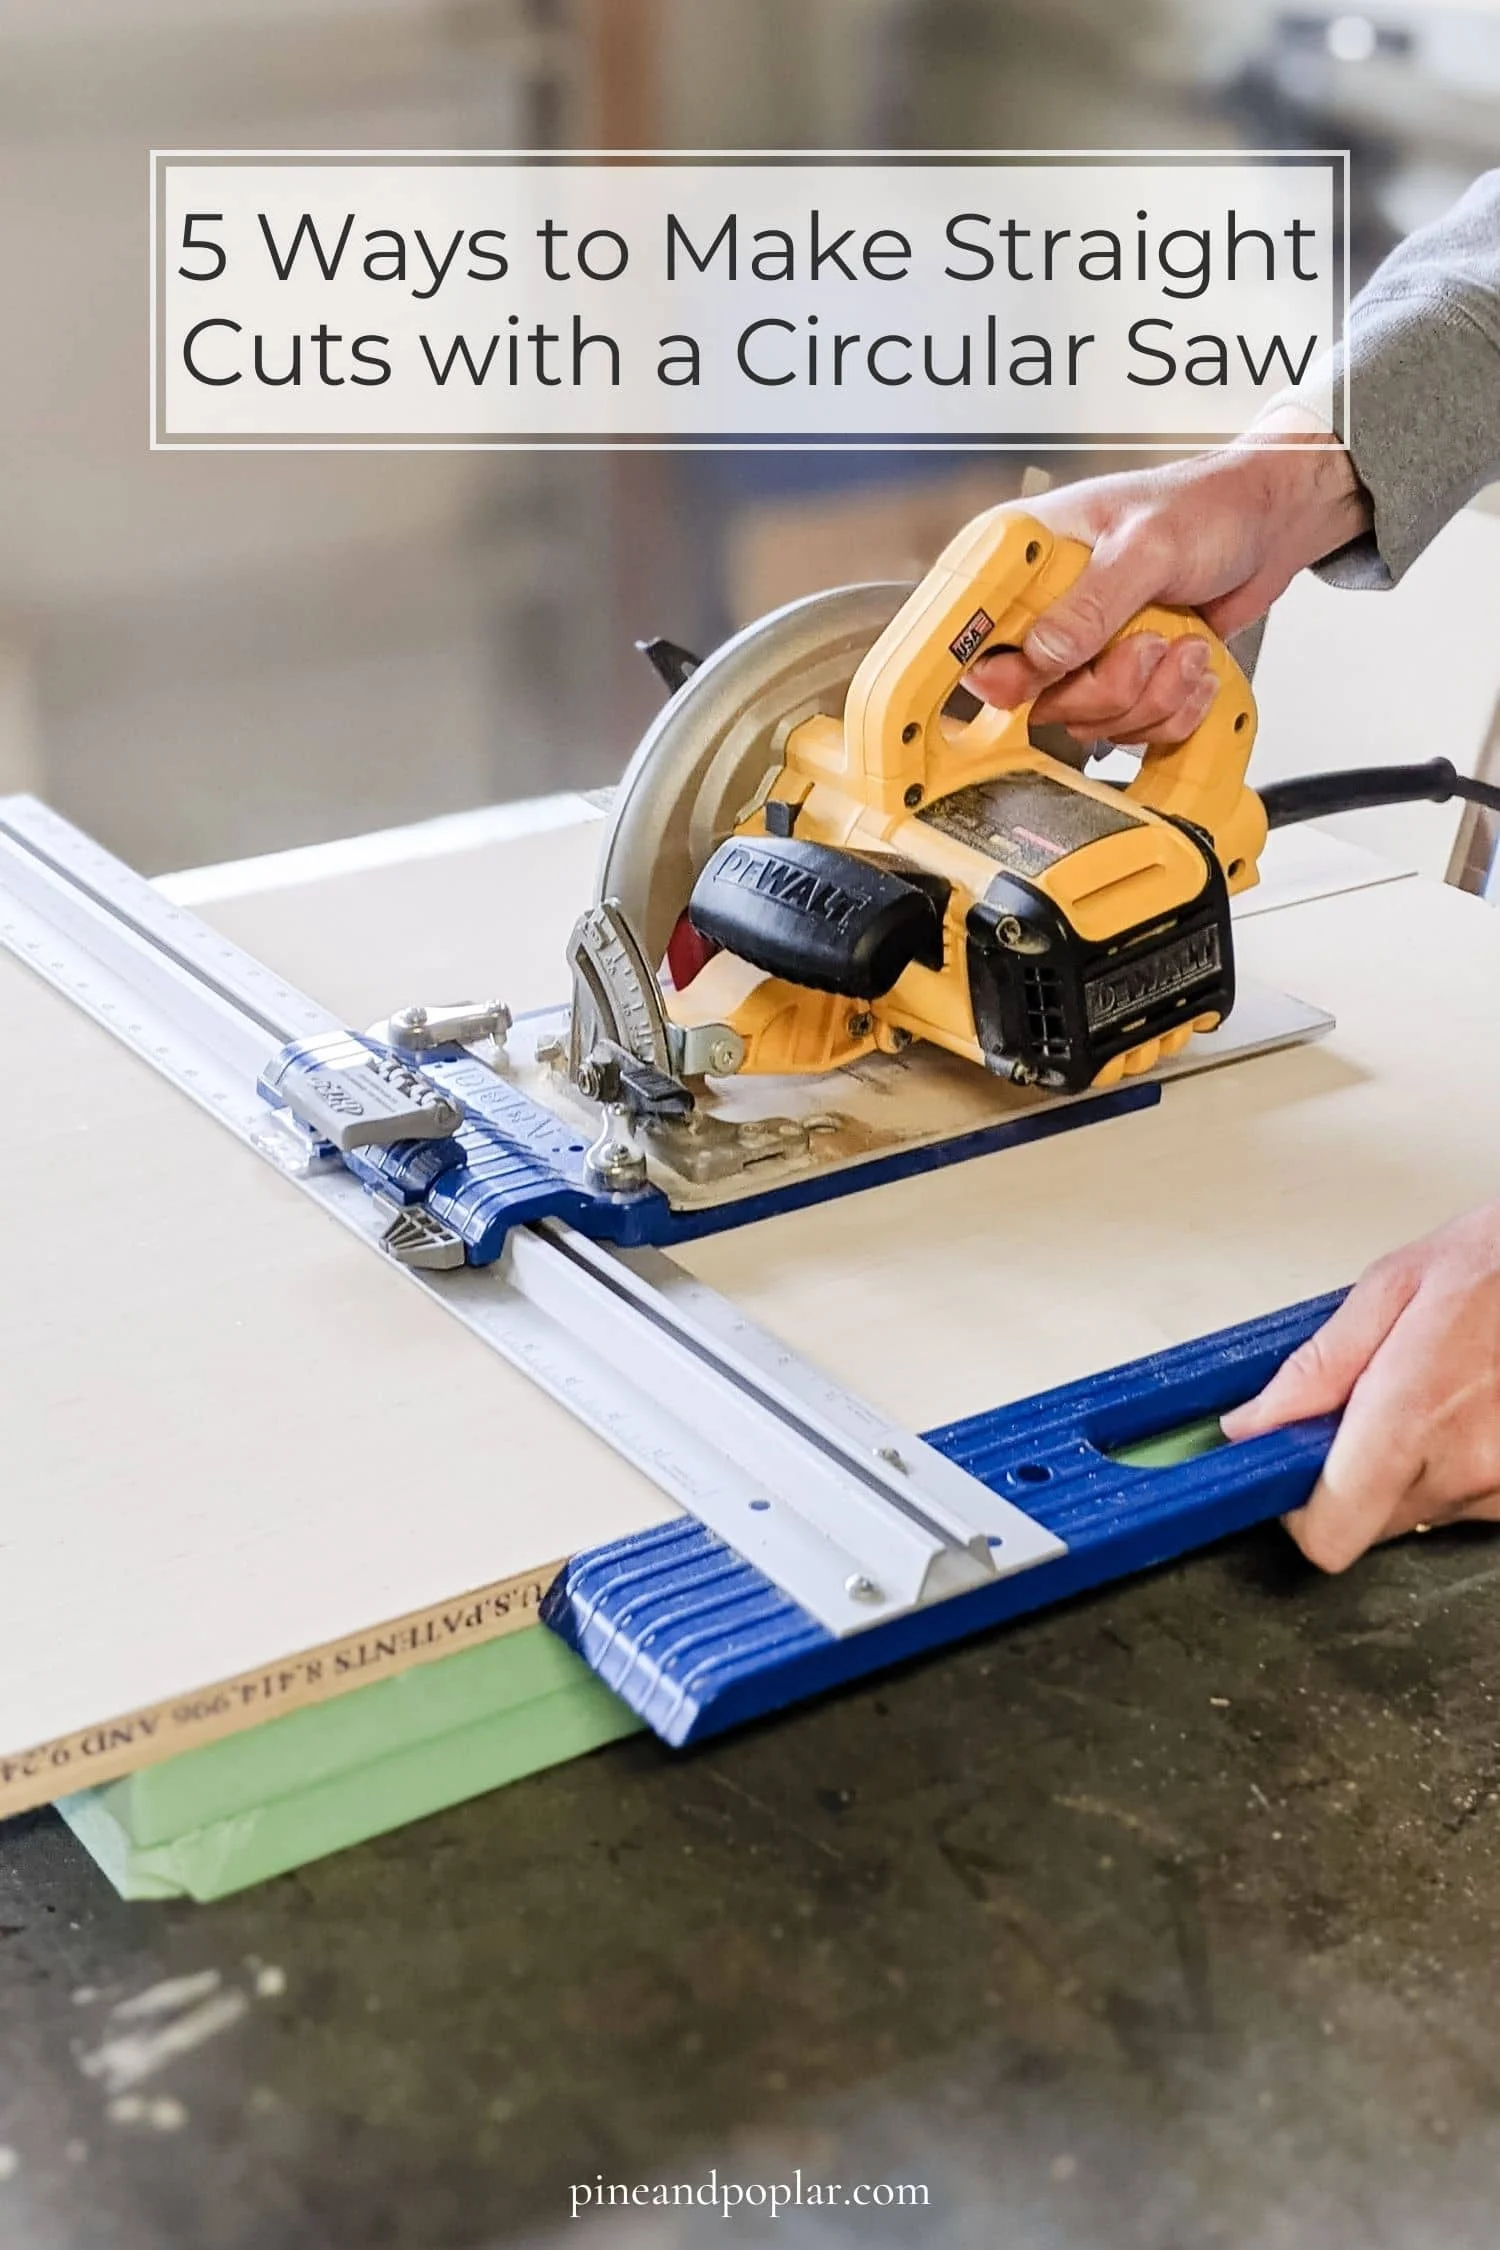
Credit: pineandpoplar.com
Using Guides And Clamps
Using guides and clamps improves the accuracy of your circular saw cuts. They help keep the saw steady and follow a straight line. Without these tools, freehand cuts often veer off course. Guides act as a fence that the saw base rides against, ensuring a clean edge. Clamps secure the guide and the workpiece, preventing any movement during the cut.
Choosing The Right Guide
Select a guide that matches your project size. Straight metal or wooden strips work well. Some saws come with built-in guide attachments. For longer cuts, use a straight edge or a commercial track guide. Test the guide’s straightness before clamping it down. A warped guide will cause uneven cuts.
Positioning The Guide For Accuracy
Place the guide next to your cut line. Measure the distance from the saw blade to the saw base edge. Align the guide so the saw blade stays exactly on the cut mark. Mark the guide position with a pencil. This helps to reposition it if it shifts before clamping.
Using Clamps To Secure The Guide
Clamp the guide firmly to the workpiece. Use quick-grip clamps or C-clamps for a solid hold. Check that the guide does not move when you push the saw against it. Avoid over-tightening which can damage thin workpieces. Secure both ends of the guide to prevent twisting or lifting.
Clamping The Workpiece For Stability
Clamp the wood to a stable surface like a workbench or sawhorses. This stops the wood from moving or vibrating during the cut. Position clamps so they do not interfere with the saw’s path. Use scrap wood underneath thin pieces to avoid tear-out. Proper clamping enhances both safety and cut quality.
Cutting Techniques For Straight Lines
Cutting straight lines with a circular saw requires careful technique and steady hands. Precise cuts improve your project’s look and fit. Using the right methods helps avoid mistakes and wasted materials. Below are key cutting techniques for straight lines that make your work cleaner and easier.
Preparing The Workpiece And Marking The Cut Line
Start by placing your wood on a flat surface. Use clamps to hold it steady and prevent movement. Measure carefully and mark the cut line with a pencil or chalk. A straight and clear line guides your saw for accuracy. Double-check the line before cutting to avoid errors.
Using A Guide For Straight Cuts
A guide helps keep your saw aligned with the cut line. Use a straight edge or a piece of scrap wood clamped to the workpiece. Position it so the saw base runs along the guide. This prevents the saw from drifting off course. Guides create smooth, straight edges without guesswork.
Setting The Saw Blade Depth Correctly
Adjust the saw blade depth to just slightly deeper than the thickness of the wood. This reduces kickback and improves control. If the blade is too deep, it can cause rough cuts and waste energy. Proper depth helps the saw cut cleanly along the line.
Maintaining A Steady Pace And Saw Position
Start the saw before it touches the wood. Move the saw forward slowly and steadily along the guide or line. Do not force the saw; let the blade do the work. Keep your body balanced and your arms steady. Pausing or rushing can cause uneven cuts.
Checking And Correcting The Cut
After cutting, inspect the edge for straightness. Use a square or straight edge to check alignment. Small mistakes can be fixed with sandpaper or a hand plane. Practice these steps regularly to improve your skill and confidence.
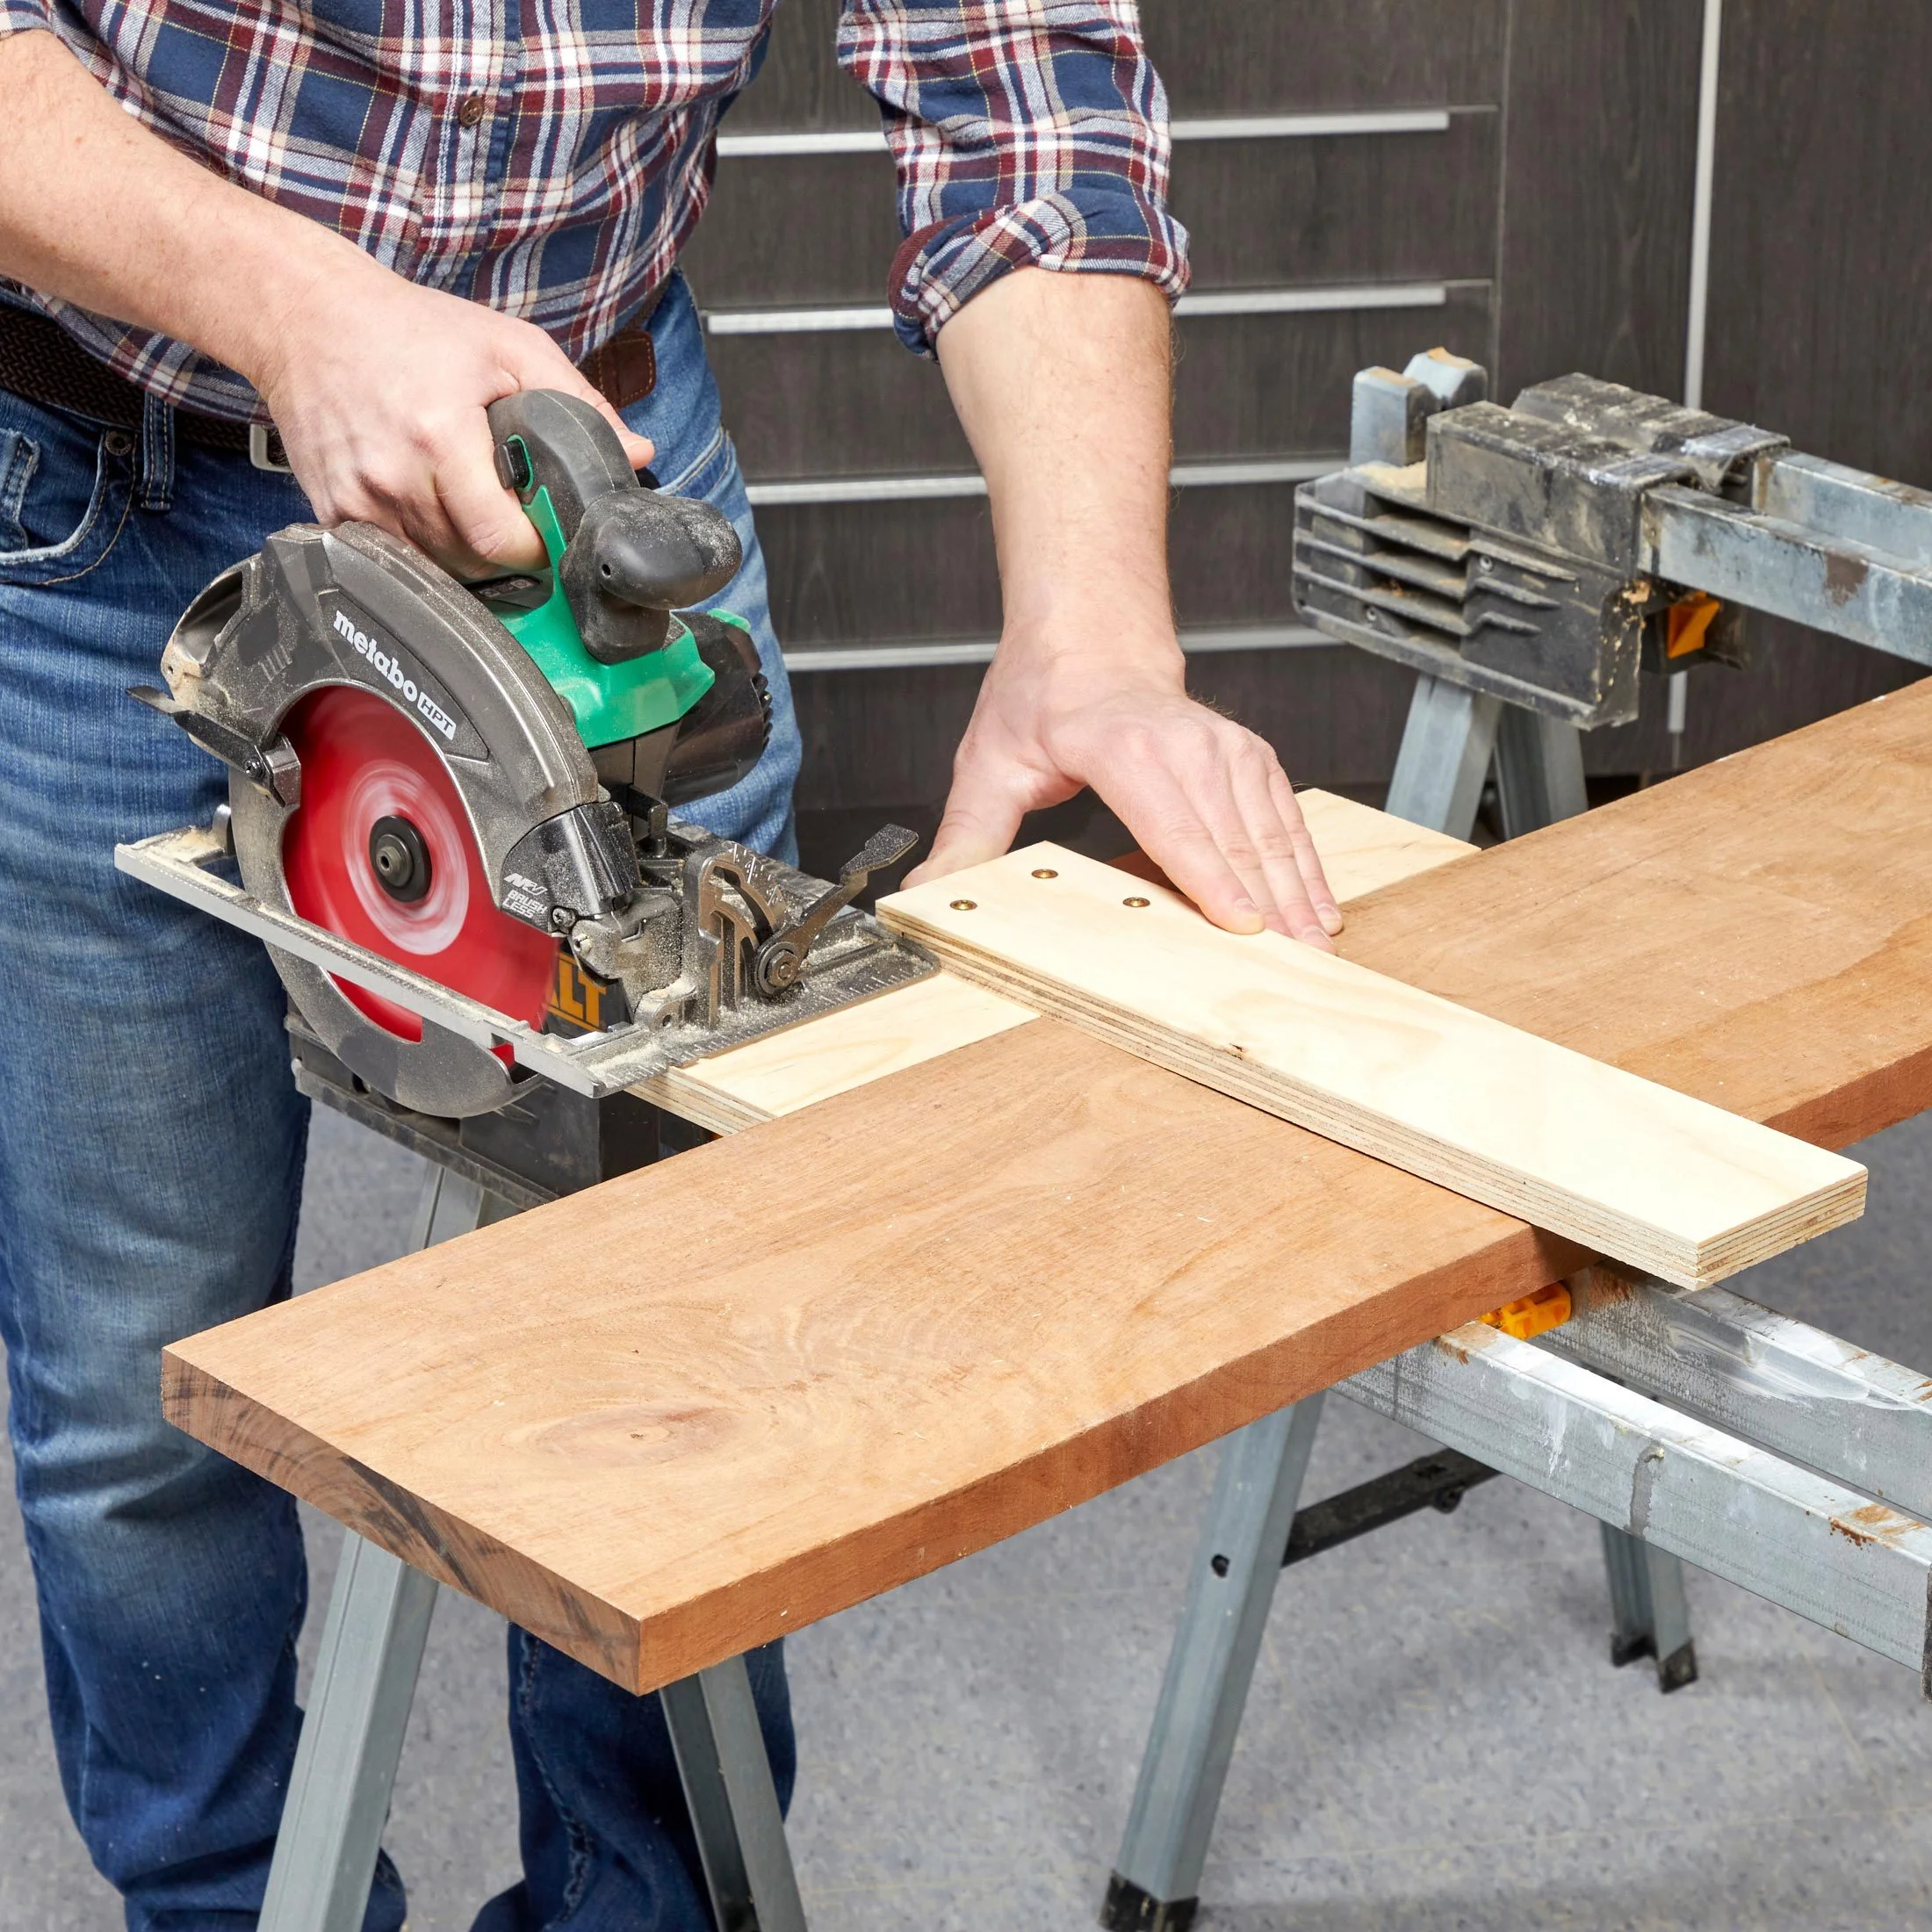
Credit: www.familyhandyman.com
Finishing And Checking Your Cuts
Finishing and checking your cuts is a key step after using a circular saw. It ensures the cut is clean, straight, and ready for your next task. Taking time to review your work prevents mistakes in your project.
Proper finishing also improves the look and fit of your materials. It helps avoid splinters, rough edges, or uneven lines. Checking your cuts carefully lets you fix any small errors before moving on.
Cleaning Up The Cut Edge
Remove any leftover sawdust or wood chips from the cut edge. Use a sanding block or sandpaper to smooth rough spots. Sand lightly along the edge to avoid changing the shape of the cut.
Cleaning the edge makes the wood safer to handle. It also helps paint or stain stick better. Take your time to get a smooth finish.
Measuring For Accuracy
Use a tape measure or ruler to check the length and straightness of the cut. Compare the cut piece with your original measurements. Make sure the line is straight and matches your mark.
Mark any areas that need trimming. Double-check before making any corrections. Accurate measuring helps keep your project on track.
Testing The Fit
Place the cut piece in its intended position. Check for gaps, misalignment, or uneven edges. The piece should fit snugly without forcing it.
Adjust or sand the edges if the fit is not perfect. Proper fitting saves time during assembly. It also improves the strength of the final product.
Frequently Asked Questions
How To Get A Perfect Straight Cut With A Circular Saw?
Align the saw blade with your cut mark. Clamp a scrap wood guide to the base plate. Cut steadily, following the guide for a perfect straight cut.
Can You Make Precise Cuts With A Circular Saw?
Yes, you can make precise cuts with a circular saw by using a guide track and steady hand. Align the blade accurately and clamp a straight edge for best results.
How To Cut Something Perfectly Straight?
Align your cutting tool precisely with a marked straight line. Use clamps or guides to secure the material firmly. Cut steadily without forcing the blade. Maintain consistent speed and pressure. Check your progress frequently to ensure accuracy and adjust as needed.
How To Cut Precise Angles With A Circular Saw?
Set the saw’s bevel angle precisely. Use a straight edge guide clamped firmly. Align the blade with your angle mark. Cut steadily along the guide. Finish edges with sandpaper for accuracy.
How Do I Start A Straight Cut With A Circular Saw?
Align the blade with your cut line and secure a straight edge as a guide.
What Tools Help Make Straight Cuts With A Circular Saw?
Use a straight edge, clamp guides, or a circular saw guide rail for accuracy.
Conclusion
Cutting straight with a circular saw takes practice and patience. Use guides or clamps to keep your wood steady. Always mark your cut line clearly before starting. Keep the saw base flat and move it slowly along the line. Check your progress often to stay accurate.
Safety gear is important to protect yourself. With these tips, your cuts will be cleaner and more precise. Keep practicing, and your confidence will grow. Straight cuts are possible for any skill level.
