Last Updated: March 20, 2026
You’ve got a picture, a shelf, or a decoration waiting to be hung, but the thought of hammering a nail into your wall feels tricky. What if you crack the plaster?
What if the nail bends or won’t go in straight? You’re not alone—many people struggle with this simple task, but it doesn’t have to be that way. With the right technique and a few smart tips, you can confidently hammer a nail into any wall without damage or frustration.
Keep reading, and you’ll learn exactly how to do it safely and effectively, so your walls stay intact and your items hang perfectly every time.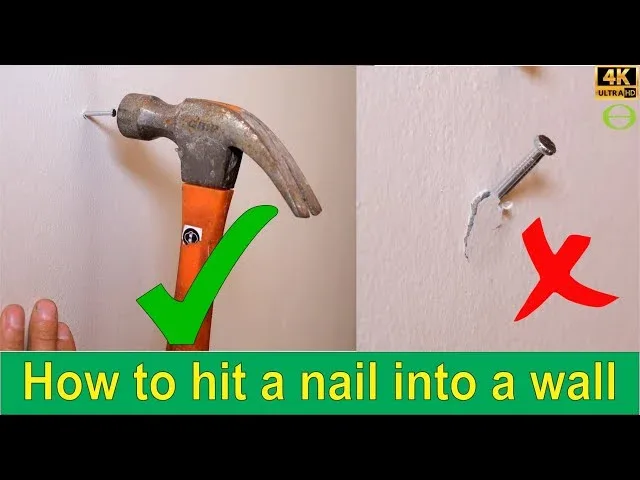
Credit: www.youtube.com
Gather Tools And Materials
Gathering the right tools and materials is the first step to hammer a nail into a wall safely and effectively. Having everything ready makes the process smoother and prevents mistakes. It also helps protect the wall from damage.
Each tool has a specific role. Using the correct materials ensures the nail holds firmly. Prepare a clean workspace to avoid losing small items and to work comfortably.
Essential Tools For Hammering A Nail
A hammer is the main tool. Choose one that feels comfortable and fits your hand well. A claw hammer is ideal for most wall projects. It helps you remove nails if needed.
A tape measure helps mark the exact spot on the wall. A pencil or marker will mark the nail position clearly. A level can check if your marks are straight.
Choosing The Right Nails
Select nails based on the wall type and the item you want to hang. For drywall, thin nails work well. For brick or concrete, use masonry nails or anchors. Avoid nails that are too long or too short.
Additional Safety Items
Safety glasses protect your eyes from dust or debris. Gloves keep your hands safe from accidental hits or splinters. A small step stool or ladder helps reach higher spots safely.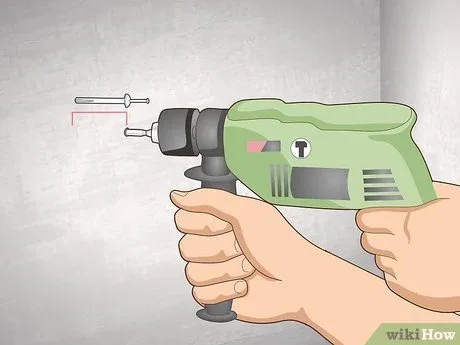
Credit: www.wikihow.com
Choose The Right Nail And Hammer
Choosing the right nail and hammer is the first step to hammering a nail into a wall successfully. Picking tools that match the job makes the task easier and prevents damage. The wrong nail or hammer can cause the wall to crack or the nail to bend. This section explains how to select the best nail and hammer for your project.
Choosing The Correct Nail Type
Select nails based on the wall material and the item weight. For drywall, small finishing nails work well. For plaster or brick walls, use masonry nails or anchors. Steel nails are strong and resist bending. Avoid long nails in thin walls to prevent cracks.
Selecting The Right Hammer Size
A claw hammer is best for most nail-hammering tasks. Choose a hammer weight that feels balanced in your hand. A 16-ounce hammer suits most users. Heavy hammers are harder to control. Light hammers may need more strikes to drive the nail.
Matching Hammer And Nail For Efficiency
Use a hammer head size that fits the nail head. Small nails need smaller hammer faces for accuracy. Large nails require bigger hammer faces for power. Matching tools help prevent bending nails and wall damage.
Prepare The Wall Surface
Preparing the wall surface is an important first step before hammering a nail. A clean, stable surface helps the nail hold firmly and prevents damage to the wall. Take time to check and ready the area for the best results.
Clear The Wall Area
Remove any dust, dirt, or grease from the wall. Use a dry cloth or mild cleaner. A clean surface allows the nail to grip better. Avoid wetting the wall too much to prevent damage.
Check For Studs Or Supports
Find the wooden studs behind drywall if possible. Nails hold stronger in studs than in drywall alone. Use a stud finder or tap the wall to listen for solid spots. Mark the stud location lightly with a pencil.
Inspect Wall Condition
Look for cracks, holes, or loose plaster. Avoid nailing into weak or damaged areas. Repair any damage with filler and let it dry. A smooth, solid surface supports the nail securely.
Mark The Nail Spot
Measure and mark the exact spot for the nail. Use a pencil to make a small dot. This helps guide the nail and keeps your project neat. Double-check the mark before you start hammering.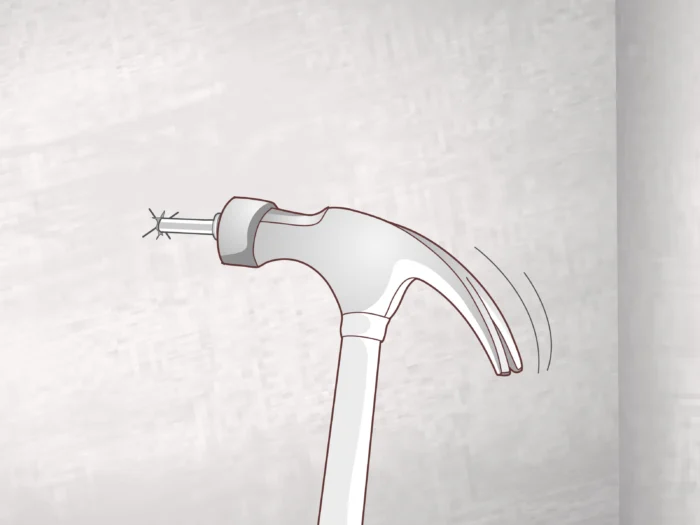
Credit: www.wikihow.com
Position And Hold The Nail
Positioning and holding the nail correctly starts your task well. This step helps avoid bent nails and wall damage. Hold the nail steady to keep it straight as you hammer.
Good positioning gives you control and makes hammering easier. Focus on accuracy before using force. A steady hand sets the nail firmly in place.
Choose The Right Spot On The Wall
Pick a spot free of cracks or soft areas. Avoid places with electrical wires or pipes behind. Look for a solid surface to support the nail well.
Hold The Nail Near The Top
Grip the nail close to its head with your thumb and index finger. This grip keeps the nail steady and guides the hammer’s strike. Keep your fingers clear of the hammer’s path.
Keep The Nail Straight
Hold the nail at a 90-degree angle to the wall. A straight nail goes in easier and holds better. Avoid tilting the nail to prevent bending or wall damage.
Start With Light Taps
Tap the nail gently at first to set it in place. Light taps hold the nail steady without pushing it too deep. Once set, increase hammer force carefully.
Hammer The Nail With Proper Technique
Hammering a nail into a wall requires the right technique for safety and success. Using proper technique helps avoid bending the nail or damaging the wall. It also makes the task faster and easier. Follow these simple steps to hammer a nail with confidence and accuracy.
Hold The Nail Correctly
Hold the nail near its top but not at the very tip. This grip gives better control and keeps your fingers safe. Position the nail perpendicular to the wall surface. A straight nail is less likely to bend or break.
Start With Gentle Taps
Begin by tapping the nail lightly to set it in place. Use small, soft hits to avoid pushing it too deep or bending it. Once the nail stands firm, increase the force gradually. This step ensures stability before driving the nail fully.
Strike The Nail Head Squarely
Aim to hit the center of the nail head with the hammer face. Hitting at an angle causes the nail to bend or miss. Keep the hammer face flat and aligned with the nail. This method drives the nail straight into the wall.
Use Your Wrist And Arm Together
Keep your shoulder, elbow, and wrist aligned when swinging. Use your wrist to control the hammer’s motion and power. This technique creates a smooth, controlled strike. Avoid wild or fast swings to prevent mistakes.
Focus On Control Over Speed
Slow, deliberate hits work better than fast, strong swings. Control keeps the nail steady and reduces wall damage. Take your time and concentrate on each strike. Accuracy leads to a clean and secure nail placement.
Handle Common Issues And Tips
Hammering a nail into a wall can seem simple but often brings small challenges. Handling these common issues improves your results and protects your walls. Simple tips help avoid mistakes like bent nails or cracked plaster. Follow these steps for smooth and safe nailing.
Preventing Nail Bending
Hold the nail near the top to keep it steady. Tap lightly at first to set the nail in place. Aim the hammer squarely on the nail head. Swing the hammer with control, not speed. Avoid hitting the nail at an angle. Use your wrist for a smooth, flat impact. Straight hits reduce bending and make driving easier.
Avoiding Wall Damage
Check the wall type before nailing. Plaster walls crack if hit too hard. Use a small pilot hole for harder surfaces like brick. Tap gently at first to avoid cracks. Use a nail size that fits the weight of what you hang. Avoid large nails in thin drywall to prevent holes. Protect the wall by working slowly and carefully.
Removing Stuck Or Bent Nails
Use the claw of your hammer to pull bent nails out. Place a small block of wood under the hammer to protect the wall. Pull nails out gently to avoid wall damage. If the nail is stuck, wiggle it slightly while pulling. Replace bent nails with new ones to ensure strong hold. Proper removal helps keep your wall intact.
Conclusion
Hammering a nail into a wall takes patience and care. Start with light taps to set the nail in place. Always hit the nail head squarely to avoid bending. Hold the nail near the top for safety. Use a guide like a piece of cardboard if needed.
After a few taps, move your hand away to avoid injury. Take your time and focus on control rather than speed. With these simple steps, you can hang pictures or decorations safely and securely. Practice makes perfect, so keep trying until you feel confident.
Frequently Asked Questions
You can hammer a nail straight into a wall by tapping lightly to set it, then striking squarely with controlled force. Use a suitable nail and hammer for stability. For tough walls, drill a pilot hole first to prevent bending or cracking.
Hold the nail near its head and tap lightly to set it. Swing the hammer squarely and steadily, striking the nail center. Use a thicker nail for tough walls. Avoid bending by controlling your wrist and arm movement. Ensure the wall is stable before hammering.
Tap the nail lightly to set it, then strike the center squarely with controlled, steady swings. Hold the nail near the head and use a guide for small nails. Use a suitable hammer and thicker nails for hard materials to prevent bending.
Hold the nail near its head and tap lightly to set it. Then hammer straight, hitting the nail center firmly. Use appropriate nails and stable walls. Avoid angled strikes to prevent bending or cracking. For hard walls, drill a pilot hole before nailing.
Begin by placing the nail tip on the wall. Tap lightly to set it before full swings.
A claw hammer with a smooth face works well for driving nails into walls.
