Last Updated: March 21, 2026
Are you ready to give your room a fresh, polished look but don’t have a nail gun? Installing baseboards might seem tricky without one, but you can absolutely do it yourself—and with great results.
Whether you’re a beginner or just looking for a simpler way, this guide will show you easy, effective methods to install baseboards without a nail gun. By the end, you’ll have the confidence and know-how to transform your space smoothly and professionally.
Keep reading, and discover how to tackle this project with tools you already have!
Tools And Materials Needed
Installing baseboards without a nail gun is simple with the right tools and materials. Prepare everything before you start. This saves time and avoids mistakes. The list below covers all basics for a smooth installation.
Measuring Tape And Pencil
Measure walls accurately with a tape measure. Mark cutting lines with a pencil. Precise measurements ensure baseboards fit perfectly.
Handsaw Or Miter Box Saw
Cut baseboards to size using a handsaw or miter box saw. These tools help make straight and angled cuts. No need for power tools.
Construction Adhesive
Use strong construction adhesive to stick baseboards to the wall. It holds pieces firmly without nails. Choose adhesive made for wood trim.
Caulk And Caulk Gun
Fill gaps between baseboards and walls with caulk. Use a caulk gun for smooth application. This step creates a clean, finished look.
Level And Sandpaper
Check baseboard alignment with a level. Sand rough edges or surfaces for a neat finish. Smooth surfaces help paint or stain adhere better.
Putty And Putty Knife
Cover nail holes or imperfections with wood putty. Apply with a putty knife and let dry. This hides flaws and improves appearance.
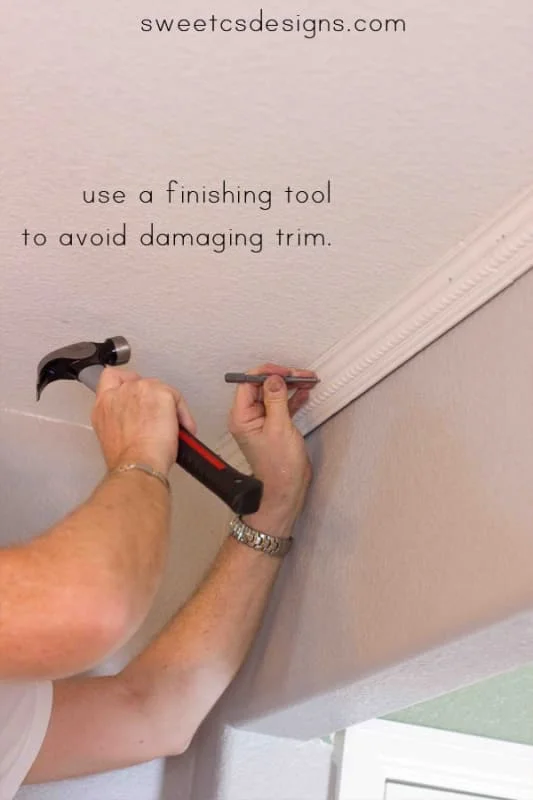
Credit: sweetcsdesigns.com
Preparing The Wall And Floor
Preparing the wall and floor is the first step in installing baseboards without a nail gun. This step ensures the baseboards fit perfectly and stay in place. Clean surfaces help adhesives or other fasteners hold better. Skipping this step can cause gaps or uneven edges.
Take time to check the wall and floor condition. Repair damage and remove any old baseboards or debris. Smooth and dry surfaces give the best results for a neat finish.
Cleaning The Wall Surface
Remove dust, dirt, and grease from the wall. Use a damp cloth or mild cleaner. Let the wall dry completely before starting. A clean wall helps glue stick strongly to the surface.
Checking For Wall Damage
Look for cracks, holes, or uneven spots on the wall. Fill holes with spackle or putty. Sand rough areas smooth after drying. A flat wall makes the baseboard fit tightly and look professional.
Preparing The Floor Area
Sweep or vacuum the floor near the wall. Remove any loose debris or dust. If the floor is uneven, consider using shims under the baseboard. This helps keep the baseboard straight and steady.
Removing Old Baseboards And Trim
Carefully pry off any old baseboards using a putty knife or pry bar. Take care not to damage the wall or floor. Clean any leftover nails or glue spots. This creates a smooth area for the new baseboards.
Measuring And Cutting Baseboards
Measuring and cutting baseboards is the first step to a perfect installation. Precise measurements ensure the baseboards fit snugly against walls and corners. Accurate cuts create clean edges and reduce gaps. Taking your time here saves effort later.
Measuring Baseboards Correctly
Start by measuring each wall section where the baseboard will go. Use a tape measure for accuracy. Write down each length carefully. Measure twice to avoid mistakes. Always measure along the floor, not the wall, for true length. Mark measurements on the baseboard before cutting.
Marking The Baseboards For Cutting
Place the baseboard on a flat surface. Use a pencil to mark the measured length. Mark clearly on the back side to avoid visible marks. For corners, mark the angle for miter cuts. Use a protractor or angle finder to get the exact angle. Double-check marks before cutting.
Cutting Baseboards Without A Nail Gun
Use a handsaw or miter box for straight and angled cuts. Cut slowly to keep edges smooth. Follow the pencil marks carefully. Sand the cut edges lightly for a clean finish. Test fit the baseboard before final installation. Adjust cuts if needed for a perfect fit.
Using Adhesive For Installation
Using adhesive for installing baseboards offers a simple and clean alternative to nails. It helps secure the boards firmly to the wall without damaging the wood. This method suits many types of walls and baseboard materials.
Adhesive installation is quiet and fast. It avoids the need for special tools and reduces wall damage. Proper adhesive choice and application ensure a strong hold that lasts for years.
Choosing The Right Adhesive
Select an adhesive designed for wood trim and molding. Construction adhesive or panel adhesive works well. Check that the product bonds well to both wood and your wall surface.
Avoid using regular glue that dries brittle or weak. Look for strong, flexible adhesives that resist shrinking and cracking.
Preparing The Wall And Baseboard
Clean the wall surface to remove dust and grease. Use a damp cloth and allow it to dry fully. Sand the back of the baseboard lightly to improve adhesion.
Measure and cut the baseboard accurately. Dry-fit the pieces before applying any adhesive to check placement.
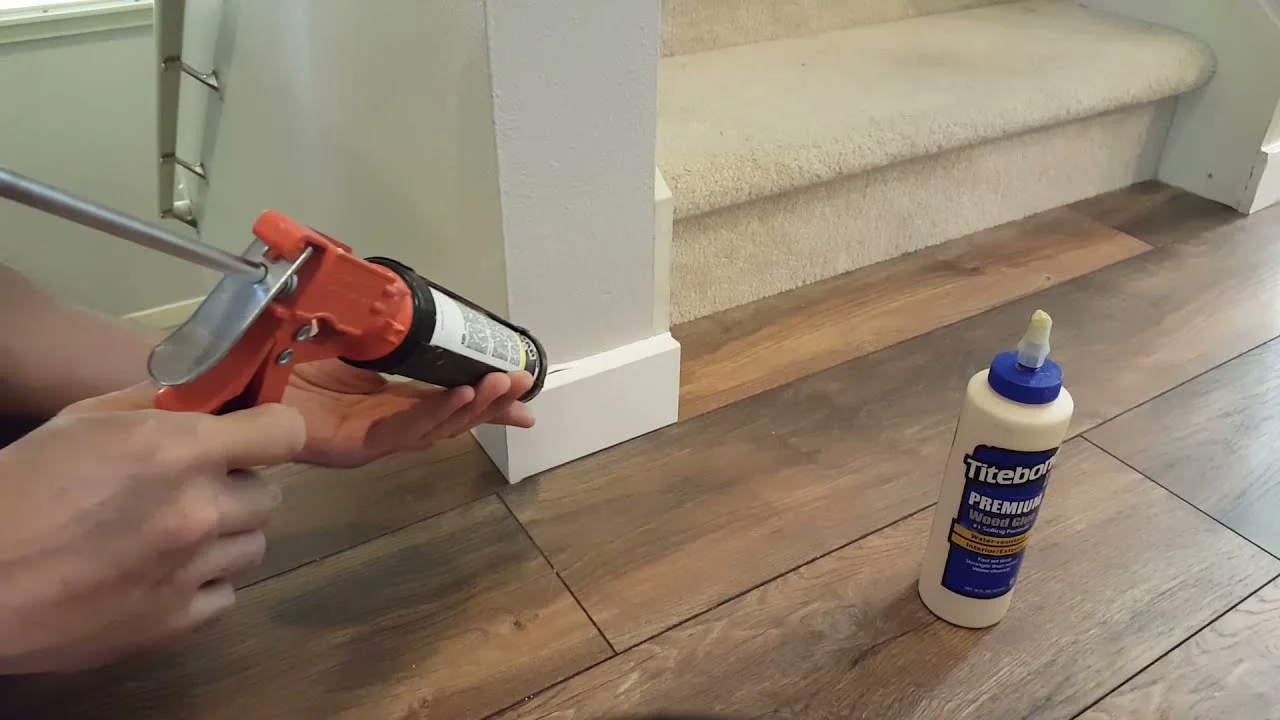
Applying Adhesive And Mounting
Apply adhesive in a zigzag or bead pattern on the back of the baseboard. Use enough to cover the surface but avoid excess that squeezes out.
Press the baseboard firmly against the wall. Hold it in place for a few minutes or use painter’s tape to secure it while the adhesive cures.
Follow the adhesive manufacturer’s instructions for drying time. Avoid touching or moving the baseboards until fully set.
Securing Baseboards With Hammer And Nails
Securing baseboards without a nail gun is simple and effective. Using a hammer and nails gives you control and precision. This method works well for most DIY projects and saves money on expensive tools.
Before nailing, prepare the baseboards and walls carefully. Mark nail spots and use the right type of nails for a strong hold. Follow these easy steps to attach baseboards firmly.
Choosing The Right Nails For Baseboards
Use finishing nails for a clean look. They are thin and leave small holes. Choose nails 1.5 to 2 inches long. This length holds the baseboard firmly without splitting the wood.
Marking Nail Positions On Baseboards
Measure and mark every 12 to 16 inches along the baseboard. Place marks near the studs in the wall. This ensures nails hold the board tightly to the wall frame.
Pre-drilling Holes To Prevent Wood Splitting
Drill small pilot holes at each nail mark. Use a drill bit slightly smaller than the nail thickness. This step stops wood from cracking and makes nailing easier.
Nailing Baseboards With A Hammer
Hold the baseboard in place. Start by nailing at one end, then work along the length. Tap nails gently at first to keep the board steady. Hammer nails fully to secure the baseboard to the wall.
Hiding Nail Holes For A Clean Finish
Fill nail holes with wood filler or putty. Use a putty knife to smooth the surface. Let it dry, then sand lightly. Paint or stain the baseboard to match the wall.
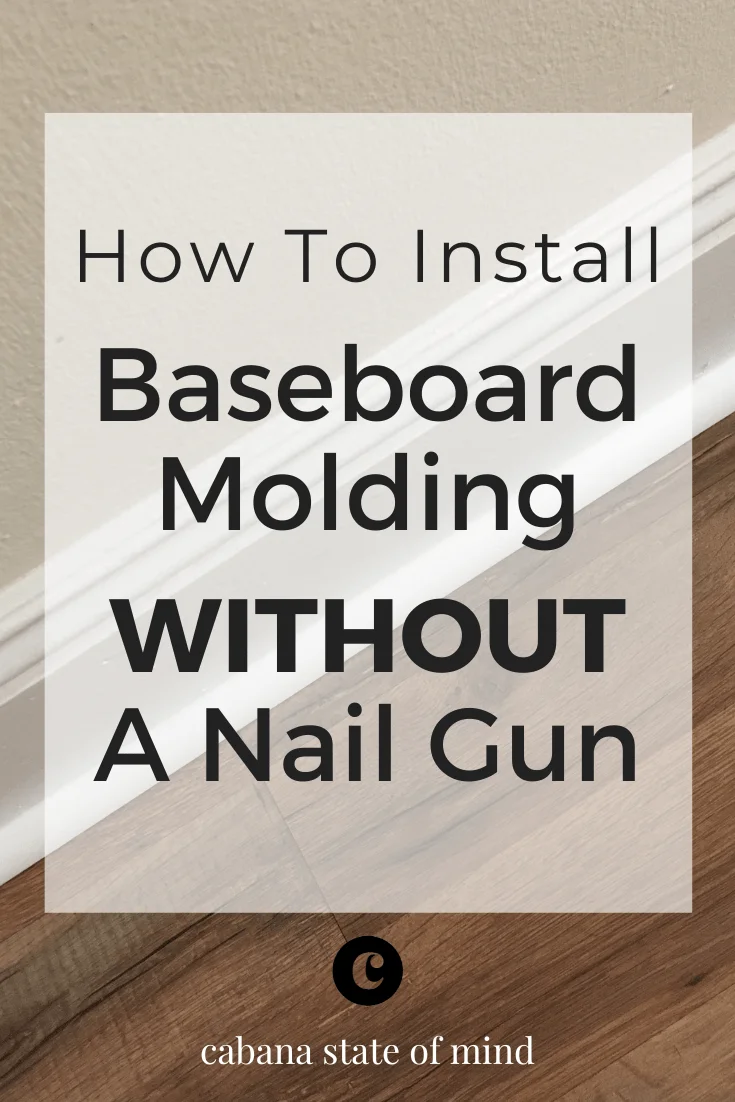
Credit: www.cabanastateofmind.com
Applying Caulk And Filling Gaps
Applying caulk and filling gaps is the final step in installing baseboards without a nail gun. This process ensures a smooth, clean look. It hides any small spaces between the baseboard and the wall or floor. Proper caulking also protects against dust and moisture.
Taking time to fill gaps well makes your baseboards look professional. It gives the whole room a polished finish. Even if the baseboards were installed with glue or adhesive, caulk helps seal and strengthen the edges. Let’s explore how to apply caulk and fill gaps properly.
Choosing The Right Caulk For Baseboards
Select a caulk made for trim work. Acrylic latex caulk is easy to apply and clean. It also paints well. Avoid silicone caulk because it does not stick well to paint. Look for a caulk labeled “paintable” and “flexible” for best results.
Preparing The Surface Before Caulking
Clean the area where the baseboard meets the wall. Remove dust and dirt with a damp cloth. Let the surface dry completely. This helps the caulk stick better. Remove any old caulk or loose paint before starting.
How To Apply Caulk Smoothly
Cut the caulk tube’s tip at a 45-degree angle. Use a small opening to control flow. Apply a steady bead of caulk along the gap. Hold the tube at a slight angle for even coverage. Work slowly for a neat line.
Smoothing The Caulk For A Clean Finish
Use a damp finger or a caulking tool to smooth the bead. Press gently to push the caulk into the gap. Wipe away extra caulk with a damp cloth. Smoothing makes the caulk blend into the baseboard and wall.
Filling Larger Gaps And Cracks
For bigger gaps, apply caulk in layers. Let the first layer dry before adding more. Use painter’s tape on each side of the gap for a clean edge. Remove the tape before the caulk dries fully.
Painting And Finishing Touches
Painting and finishing touches bring your baseboards to life. They protect the wood and create a polished look. A clean, smooth finish makes the room feel complete.
Before painting, ensure the baseboards are clean and free of dust. Use a damp cloth to wipe them down. Let them dry fully to avoid paint peeling.
Choosing The Right Paint
Pick paint designed for trim and woodwork. These paints are usually semi-gloss or gloss. They resist scuffs and are easy to clean. Use a color that matches or contrasts your walls for style.
Applying Primer For Better Coverage
Primer helps paint stick better to the baseboards. It also blocks stains and knots from showing through. Apply one thin coat and let it dry before painting. This step improves durability and finish quality.
Using Painter’s Tape For Clean Edges
Apply painter’s tape along the wall and floor edges. This protects surfaces from paint drips. Press the tape down firmly for sharp lines. Remove it carefully once the paint is dry to avoid peeling.
Painting Techniques For A Smooth Finish
Use a small angled brush for precise strokes. Paint in long, even strokes along the wood grain. Avoid overloading the brush to prevent drips. Apply two coats for full coverage, allowing drying time between coats.
Sealing And Protecting The Baseboards
Seal the paint with a clear polyurethane finish for extra protection. Choose water-based polyurethane for easy cleanup and low odor. Apply a thin coat and let it dry fully. This step extends the life of your baseboards.
Credit: www.youtube.com
Tips For A Professional Look
Installing baseboards without a nail gun can still yield a clean, professional finish. Small details make a big difference in how your baseboards look. Simple techniques and careful work give your room a polished appearance.
Focus on precision and neatness. Use the right tools to ensure tight seams and smooth surfaces. These tips help you achieve a great result even without power tools.
Use Quality Adhesive For Secure Attachment
Choose a strong construction adhesive made for wood or trim. Apply it evenly along the back of the baseboard. Press firmly against the wall and hold it in place until it sticks.
This method prevents gaps and keeps the baseboard firmly attached. Adhesive also reduces the chance of damage to walls.
Cut Baseboards Accurately For Tight Corners
Measure twice, cut once. Use a miter box or a miter saw for clean, angled cuts. Proper cutting ensures corners fit snugly without gaps.
Tight corners give a seamless, finished look. Avoid uneven edges or rough cuts that ruin the style.
Fill Gaps And Nail Holes Smoothly
Use wood filler or caulk to cover small gaps and holes. Smooth the filler with a putty knife and sand lightly after it dries. Paint over the patched areas for a uniform finish.
This step hides imperfections and blends the baseboard with the wall. It makes the installation look neat and professional.
Paint Or Stain Baseboards Before Installation
Apply paint or stain to baseboards before attaching them. This helps avoid drips or missed spots later. Touch up after installation for any areas that need it.
Pre-finishing saves time and ensures a smooth, even color. It also protects the wood and enhances its appearance.
Frequently Asked Questions
Can I Install Baseboards Without A Nail Gun?
Yes, you can install baseboards without a nail gun by using construction adhesive or hammer and finishing nails. Use a nail set to countersink nails for a clean finish.
What To Use If You Don’t Have A Nail Gun?
Use a hammer and finishing nails to install baseboards. Alternatively, apply strong construction adhesive for a nail-free option.
Is It Better To Nail Or Glue Baseboards?
Nailing baseboards ensures strong, lasting hold, especially on wooden walls. Glue works for smooth surfaces but may lack durability. For best results, use nails and glue together to secure baseboards firmly and prevent gaps or detachment.
What Is The 7% Rule For Baseboards?
The 7% rule for baseboards means baseboards should cover about 7% of the wall height for balanced proportions.
Can Baseboards Be Installed Without A Nail Gun?
Yes, baseboards can be installed using adhesive glue or a hammer and finishing nails.
Conclusion
Installing baseboards without a nail gun is simple and doable. Use strong adhesive and clamps to hold baseboards in place. Measure carefully and cut precisely to fit corners well. Take your time to avoid mistakes and gaps. This method saves money and works well for many homes.
With patience, your baseboards will look neat and secure. Try this approach for a clean finish without special tools.
Related reading: How to Cut a Straight Line With a Jigsaw.
{ “@context”: “https://schema.org”, “@type”: “Article”, “headline”: “How to Install Baseboards Without a Nail Gun: Easy DIY Tips”, “description”: “Learn how to install baseboards without a nail gun by using alternative methods like adhesive or manual nailing for a precise and secure fit.”, “url”: “https://www.powertoolstoday.com/how-to-install-baseboards-without-a-nail-gun/”, “datePublished”: “2025-12-08”, “dateModified”: “2026-03-18”, “author”: { “@type”: “Organization”, “name”: “Power Tools Today”, “url”: “https://www.powertoolstoday.com” }, “publisher”: { “@type”: “Organization”, “name”: “Power Tools Today”, “url”: “https://www.powertoolstoday.com” }, “mainEntityOfPage”: { “@type”: “WebPage”, “@id”: “https://www.powertoolstoday.com/how-to-install-baseboards-without-a-nail-gun/” }, “image”: { “@type”: “ImageObject”, “url”: “https://www.powertoolstoday.com/wp-content/uploads/2025/11/how-to-install-baseboards-without-a-nail-gun.jpg” } }{ “@context”: “https://schema.org”, “@type”: “Article”, “headline”: “How to Install Baseboards Without a Nail Gun: Easy DIY Tips”, “description”: “Learn how to install baseboards without a nail gun by using alternative methods like adhesive or manual nailing for a precise and secure fit.”, “url”: “https://www.powertoolstoday.com/how-to-install-baseboards-without-a-nail-gun/”, “datePublished”: “2025-12-08”, “dateModified”: “2026-03-19”, “author”: { “@type”: “Organization”, “name”: “Power Tools Today”, “url”: “https://www.powertoolstoday.com” }, “publisher”: { “@type”: “Organization”, “name”: “Power Tools Today”, “url”: “https://www.powertoolstoday.com” }, “mainEntityOfPage”: { “@type”: “WebPage”, “@id”: “https://www.powertoolstoday.com/how-to-install-baseboards-without-a-nail-gun/” }, “image”: { “@type”: “ImageObject”, “url”: “https://www.powertoolstoday.com/wp-content/uploads/2025/11/how-to-install-baseboards-without-a-nail-gun.jpg” } }nnnn