Last Updated: March 20, 2026
If you use a circular saw regularly, you know how important it is to keep the blade sharp and in good condition. But when it’s time to remove and replace that blade, the process can feel confusing or even risky if you don’t know the right steps.
You might worry about damaging your saw, or worse, hurting yourself. What if you could change your blade quickly, safely, and with confidence every time? This guide will walk you through each step, using simple instructions anyone can follow. By the end, you’ll feel ready to tackle your next project without hesitation.
Let’s get your circular saw running smoothly again!
Credit: www.youtube.com
Safety Precautions
Safety comes first when changing a circular saw blade. Taking the right precautions prevents accidents and injuries. Always prepare your workspace and tools before starting the job. Follow each step carefully to keep yourself safe.
Disconnect Power Source
Unplug the circular saw from the electrical outlet. If the saw is cordless, remove the battery pack. This stops the saw from turning on by accident. Never work on the blade while the saw is powered. Double-check that no power source is connected.
Wear Protective Gear
Put on safety glasses to shield your eyes from dust and debris. Wear sturdy gloves to protect your hands from sharp blade edges. Use ear protection if you plan to test the saw after blade replacement. Dress in close-fitting clothes to avoid getting caught in the tool. Proper gear keeps you safe during the whole process.
Locating Blade Components
Before removing or replacing a circular saw blade, you must locate the key blade components. Knowing these parts helps you work safely and efficiently. Each part has a role in holding the blade in place and keeping it stable during use.
Understanding where these components are makes the process smoother. It also prevents damage to the saw or the new blade. Start by identifying the spindle lock and then the arbor nut and washers.
Find The Spindle Lock
The spindle lock is a button or lever on the saw’s body. It stops the blade from turning when you loosen the arbor nut. Usually, it is near the blade guard or the blade itself. Pressing the spindle lock holds the blade steady.
Without this lock, the blade may spin and cause injury. Always make sure the spindle lock engages before trying to remove the blade. This simple step makes blade removal safer and easier.
Identify Arbor Nut And Washers
The arbor nut is the bolt that holds the blade on the saw. It sits in the center of the blade and screws onto the arbor shaft. You will need a wrench to loosen this nut.
Under the arbor nut, there are usually one or two washers. These washers keep the blade tight and secure. Remember their position before removal to reinstall them correctly later.
Check the direction of the nut’s threading. Most circular saws have a normal right-hand thread, meaning you turn it left to loosen. This detail helps avoid stripping the nut or damaging the saw.
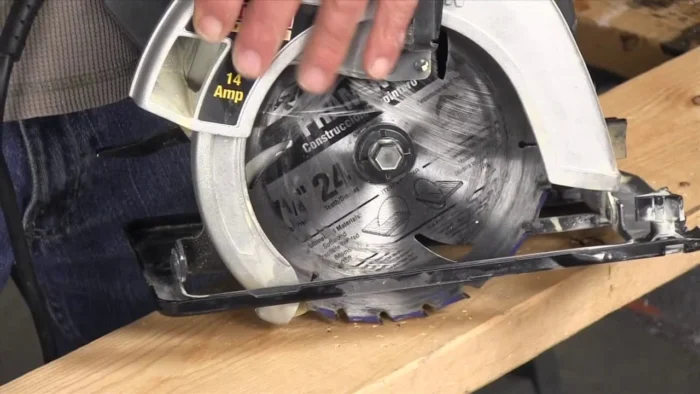
Removing The Old Blade
Removing the old blade from your circular saw is a simple process. It requires careful steps to ensure safety and efficiency. Start by preparing the saw and getting the right tools ready. Follow these steps to take out the old blade smoothly.
Engage Spindle Lock
First, unplug the saw or remove the battery to stop power flow. Locate the spindle lock button on the saw’s body. Press and hold the spindle lock to stop the blade from turning. This keeps the blade steady while you loosen the nut. Keep the lock engaged until the blade is free.
Loosen And Remove Arbor Nut
Use the correct wrench to turn the arbor nut. Turn it in the direction indicated on the saw, usually counterclockwise. The nut may be tight, so apply steady pressure. Once loose, remove the nut and any washers carefully. Set these parts aside where they won’t get lost.
Slide Out Old Blade
After the nut is removed, gently slide the blade off the arbor. Hold the blade by the edges to avoid cuts. Check the blade for damage or wear as you remove it. Place the old blade safely away from your workspace. This step clears the way for installing a new blade.
Credit: www.bobvila.com
Selecting The Right Replacement Blade
Selecting the right replacement blade is essential for safe and efficient cutting. The blade must fit your saw perfectly and suit the material you want to cut. Choosing the wrong blade can cause poor cuts and damage your tool. This section helps you pick the correct blade for your circular saw. Follow these simple steps for the best results.
Match Blade Size And Type
Always check the blade size before buying a replacement. The diameter should match your saw’s specifications exactly. Using a blade that is too large or small is unsafe. Also, pick the blade type that fits your cutting needs. There are blades for wood, metal, and other materials. Choose one designed for your project for clean and precise cuts.
Check Tooth Direction
The teeth on the blade must point in the right direction. Look for the arrow on the blade showing the rotation. This arrow must match the direction your saw spins. Installing the blade backwards can cause kickback and poor cutting. Always double-check the tooth direction before securing the blade in place.
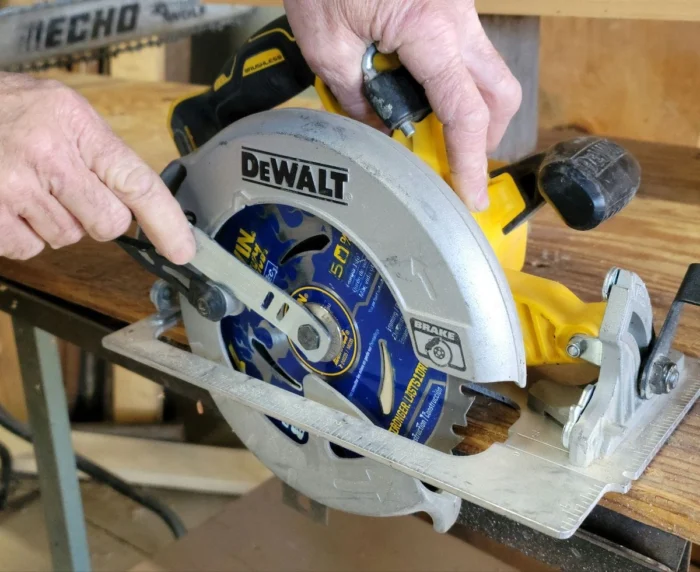
Installing The New Blade
Installing the new blade is a crucial step for safe and efficient cutting. Follow these simple steps to place the blade properly and secure it firmly. This ensures smooth operation and prevents accidents.
Position Blade Correctly
Place the new blade onto the arbor carefully. Make sure the teeth face the cutting direction. Check the arrow on the blade and match it with the saw’s rotation mark. Align the blade fully so it sits flat against the washer.
Reattach Washers And Arbor Nut
Put the washers back in their correct order. These hold the blade steady. Then screw the arbor nut onto the arbor by hand. Keep the blade centered while tightening. This avoids wobbling during use.
Tighten Securely
Use the correct wrench to tighten the arbor nut. Lock the spindle before turning the wrench. Turn the nut clockwise until it is firm. Do not overtighten to avoid damaging the blade or saw. A secure fit keeps the blade safe and stable.
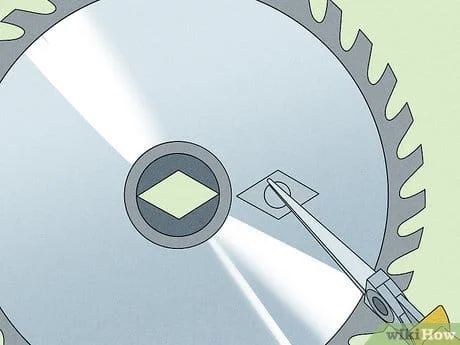
Credit: www.wikihow.com
Final Checks Before Use
Before starting your project, perform final checks on your circular saw. These checks ensure safety and proper function after blade replacement. Never skip this important step.
Ensure Blade Guard Functionality
Check the blade guard moves freely and covers the blade completely. It should spring back quickly after being lifted. A stuck or loose guard can cause serious injury. Clean any debris blocking the guard. Test it several times to confirm smooth operation.
Test Blade Stability
Hold the saw firmly and spin the blade by hand. It should not wobble or feel loose. Tighten the arbor nut securely using the correct tool. Loose blades can cause kickback or damage the saw. Double-check the blade teeth face the correct direction. Proper blade stability improves cut accuracy and safety.
Frequently Asked Questions
How To Take A Circular Saw Blade Off?
Unplug the saw or remove the battery to ensure safety. Press the spindle lock to stop the blade. Use a wrench to loosen the arbor nut by turning it in the blade’s rotation direction. Remove the nut, washers, then slide off the blade carefully.
Is A Circular Saw Blade Bolt Reverse Thread?
Circular saw blade bolts usually have standard right-hand threads. Turn clockwise to tighten and counterclockwise to loosen. Only miter saws often use reverse threads. Always check your saw’s manual to confirm the correct bolt direction.
Which Direction Does A Spindle Nut On A Circular Saw Loosen?
The spindle nut on a circular saw loosens by turning in the same direction as the blade rotates, usually clockwise. Always check the arrow on the saw guard for the exact loosening direction. This ensures safe and proper blade removal.
When Changing A Circular Saw Blade, Remember To?
Always disconnect power before starting. Engage the spindle lock to stop blade movement. Loosen the arbor nut using the correct wrench. Remove the old blade carefully. Install the new blade matching the rotation arrow. Tighten the arbor nut securely. Check blade alignment before use.
How Do I Safely Remove A Circular Saw Blade?
Always unplug the saw or remove the battery before starting blade removal.
What Tools Do I Need To Replace A Circular Saw Blade?
You typically need a wrench and a spindle lock to change the blade.
Conclusion
Removing and replacing a circular saw blade is simple with careful steps. Always start by unplugging the saw or removing the battery. Use the spindle lock to hold the blade steady. Loosen and remove the arbor nut, then take out the old blade.
Place the new blade with the teeth facing the right direction. Tighten the nut securely, but avoid over-tightening. Double-check everything before plugging the saw back in. Following these steps keeps you safe and your saw working well. Practice makes this task quick and easy over time.
{ “@context”: “https://schema.org”, “@type”: “Article”, “headline”: “How to Remove And Replace Circular Saw Blade: Quick & Easy Guide”, “description”: “Learn how to remove and replace circular saw blade with our quick and easy step-by-step guide. Keep your saw sharp and efficient.”, “url”: “https://www.powertoolstoday.com/how-to-remove-and-replace-circular-saw-blade/”, “datePublished”: “2025-11-16”, “dateModified”: “2026-03-18”, “author”: { “@type”: “Organization”, “name”: “Power Tools Today”, “url”: “https://www.powertoolstoday.com” }, “publisher”: { “@type”: “Organization”, “name”: “Power Tools Today”, “url”: “https://www.powertoolstoday.com” }, “mainEntityOfPage”: { “@type”: “WebPage”, “@id”: “https://www.powertoolstoday.com/how-to-remove-and-replace-circular-saw-blade/” }, “image”: { “@type”: “ImageObject”, “url”: “https://www.powertoolstoday.com/wp-content/uploads/2025/11/How-to-Remove-And-Replace-Circular-Saw-Blade-1024×576.webp” } }{ “@context”: “https://schema.org”, “@type”: “Article”, “headline”: “How to Remove And Replace Circular Saw Blade: Quick & Easy Guide”, “description”: “Learn how to remove and replace circular saw blade with our quick and easy step-by-step guide. Keep your saw sharp and efficient.”, “url”: “https://www.powertoolstoday.com/how-to-remove-and-replace-circular-saw-blade/”, “datePublished”: “2025-11-16”, “dateModified”: “2026-03-19”, “author”: { “@type”: “Organization”, “name”: “Power Tools Today”, “url”: “https://www.powertoolstoday.com” }, “publisher”: { “@type”: “Organization”, “name”: “Power Tools Today”, “url”: “https://www.powertoolstoday.com” }, “mainEntityOfPage”: { “@type”: “WebPage”, “@id”: “https://www.powertoolstoday.com/how-to-remove-and-replace-circular-saw-blade/” }, “image”: { “@type”: “ImageObject”, “url”: “https://www.powertoolstoday.com/wp-content/uploads/2025/11/How-to-Remove-And-Replace-Circular-Saw-Blade-1024×576.webp” } }nnnn