Last Updated: March 20, 2026
If you own a Makita demolition hammer, you know how powerful and efficient it is for heavy-duty jobs. But what happens when you need to change or remove the bit?
It can feel tricky if you’re not sure how to do it right. You don’t want to waste time struggling or risk damaging your tool. The good news is, removing the bit from your Makita demolition hammer is simple once you know the exact steps.
In this guide, you’ll learn a quick and safe way to release the bit, so you can get back to work faster and with confidence. Keep reading to make your bit removal process smooth and hassle-free!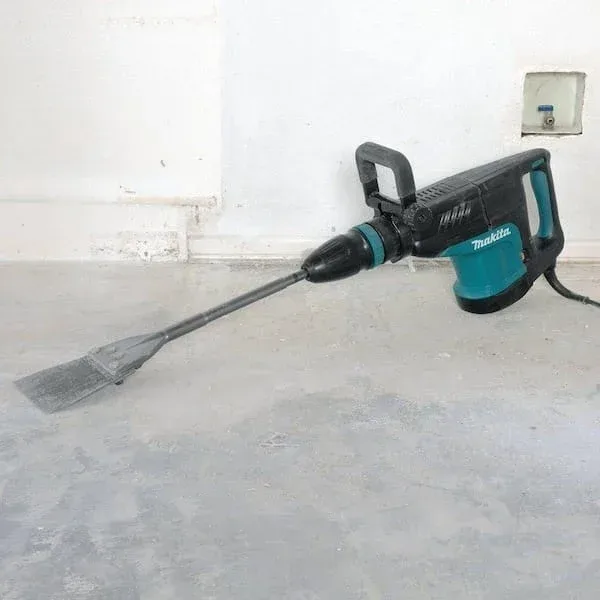
Credit: www.homedepot.com
Makita Demolition Hammer Basics
The Makita demolition hammer is a powerful tool for heavy-duty work. It breaks concrete, tiles, and other hard materials with ease.
This tool uses a special bit that fits into the hammer’s chuck. The bit does the actual breaking and chipping.
Understanding the basic parts helps in using and maintaining the tool properly. It also makes removing and changing bits easier.
Parts Of The Makita Demolition Hammer
The main parts include the handle, motor, chuck, and bit holder. The chuck holds the bit tightly during use.
The handle gives you control and reduces vibration. The motor powers the hammering action.
How The Bit Fits In The Tool
The bit slides into the chuck or bit holder. A collar or sleeve locks it firmly in place.
This locking mechanism prevents the bit from falling out during work. It also allows quick bit changes.
Safety Features To Know
Makita demolition hammers include safety locks to prevent accidental starts. Some models have vibration control features.
Wear protective gear like gloves and goggles. This protects you from flying debris and tool vibration.
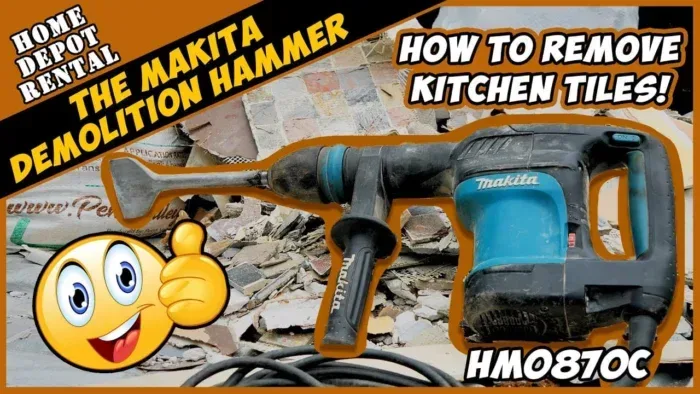
Credit: www.youtube.com
Locating The Bit Release Mechanism
Locating the bit release mechanism on a Makita demolition hammer is the first step to safely removing the bit. This mechanism holds the bit firmly in place during operation. Knowing its exact location helps you release the bit quickly and without damage.
The release mechanism usually sits near the tool’s front, around the chuck area. It may look like a collar, ring, or sleeve that you can pull or twist. Identifying this part lets you unlock the bit with minimal effort.
Identifying The Collar Or Sleeve
Most Makita demolition hammers use a collar or sleeve to lock the bit. This collar surrounds the bit holder. It often has ridges or grooves for grip. Pulling or sliding this collar back frees the bit.
Checking For A Locking Pin Or Button
Some models include a locking pin or button. This pin prevents the bit from moving during use. Pressing or pulling this pin releases the bit. Look closely around the chuck for this feature.
Using The Tool Manual For Reference
The user manual shows exact locations of the release mechanism. Manuals include clear diagrams and step-by-step guides. Refer to your Makita manual for the most accurate info.
Step-by-step Bit Removal
Removing the bit from your Makita demolition hammer is simple and quick. Following clear steps ensures safety and protects your tool. This guide breaks down the process into easy actions. Each step helps you remove the bit without damage or effort.
Prepare The Tool
First, unplug the demolition hammer. Safety comes first. Make sure the tool is off and cool. Wear protective gloves for a better grip and hand safety.
Locate The Bit Collar
Find the collar near the bit holder. This is the part that locks the bit in place. It usually has a textured surface for easy grip.
Pull Back The Collar
Firmly pull the collar towards the tool body. This action releases the lock on the bit. Keep the collar pulled while you remove the bit.
Remove The Bit
While holding the collar back, gently pull the bit straight out. Do not twist or force it. The bit should slide out smoothly.
Inspect The Bit And Tool
Check the bit for wear or damage. Also, look at the bit holder for dirt or debris. Clean if necessary before inserting a new bit.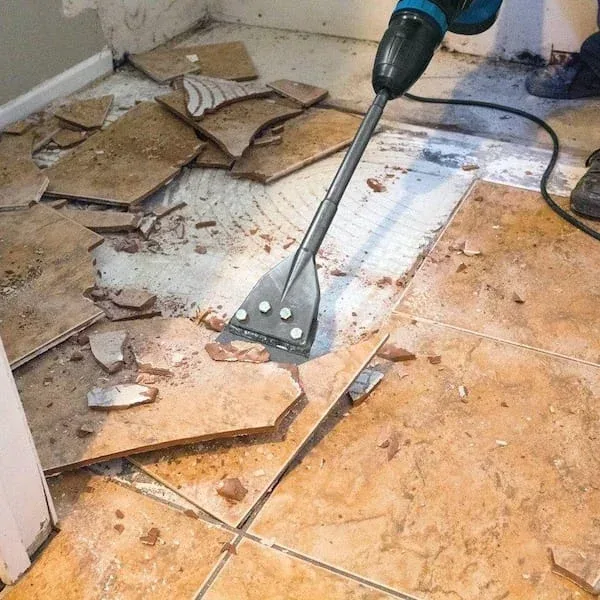
Credit: www.homedepot.com
Handling Stuck Bits Safely
Handling stuck bits in a Makita demolition hammer requires care. Bits can get jammed during heavy use or from debris buildup. Removing them without damage or injury is important. Follow safe methods to avoid tool damage and personal harm.
Use protective gloves to guard your hands. Ensure the hammer is unplugged or the battery is removed. This prevents accidental startup while working on the bit.
Use The Correct Release Mechanism
Locate the bit release collar on the hammer. Pull or slide the collar as the manual instructs. This usually loosens the bit’s grip. Avoid forcing the bit out as this can break the tool or bit.
Apply Gentle Tapping
Lightly tap the bit with a rubber mallet. This can help loosen stuck debris or rust. Tap around the bit’s base, not the shaft. Do not use excessive force to prevent damage.
Clean Around The Bit
Remove dirt or dust around the bit holder. Use a brush or compressed air to clear tight spaces. Clean surfaces improve grip release and reduce sticking.
Use Penetrating Oil Carefully
Apply a small amount of penetrating oil to the bit joint. Let it sit for a few minutes. Oil helps loosen rust or corrosion. Wipe away excess oil before removing the bit.
Seek Professional Help If Needed
If the bit remains stuck, do not force removal. Contact a Makita service center or a professional technician. They have the tools and expertise to safely remove stuck bits.
Maintaining The Bit Holder
Maintaining the bit holder of your Makita demolition hammer keeps the tool working well. A clean, well-lubricated holder makes bit removal easy. Dirt and rust cause sticking and damage. Regular care extends the tool’s life and saves time during bit changes.
Cleaning The Bit Holder
Remove dust and debris from the bit holder often. Use a dry cloth or soft brush to clean inside the holder. Avoid water to prevent rust. Clean after each use to stop buildup.
Lubricating The Bit Holder
Apply a small amount of machine oil to the bit holder. Oil helps the bit slide in and out smoothly. Wipe away extra oil to prevent dirt attraction. Lubricate before and after use for best results.
Inspecting For Wear And Damage
Check the bit holder for cracks or worn parts regularly. Damaged holders may cause bits to stick or fall out. Replace any broken parts immediately. This keeps your demolition hammer safe and reliable.
Proper Storage To Protect The Bit Holder
Store the hammer in a dry, dust-free place. Use the original case if possible. Avoid leaving bits in the holder during storage. Proper storage prevents rust and deformation of the holder.
Tips For Quick Bit Changes
Changing bits on a Makita demolition hammer can be fast and hassle-free. Quick bit changes save time and keep your work moving smoothly. Follow these simple tips to switch bits easily and safely. Proper technique helps avoid damage to the tool and bits.
Prepare The Tool For Bit Removal
Turn off the demolition hammer and unplug it. This stops accidental starts during bit removal. Clean the bit holder area to remove dust and debris. This ensures smooth operation and prevents jamming.
Use The Collar To Release The Bit
Locate the collar near the bit holder. Pull the collar back firmly to release the bit. Hold the bit steady with your other hand. Gently pull the bit out while holding the collar back.
Check For Stuck Bits
If the bit does not come out easily, avoid forcing it. Tap the bit lightly with a hammer to loosen it. Pull the collar back again and try removing the bit. Repeat this process until the bit slides out smoothly.
Insert The New Bit Correctly
Align the new bit with the holder slots. Push it in firmly until it clicks into place. Release the collar and check if the bit is locked securely. A loose bit can cause poor performance and safety risks.
Maintain Your Bits And Tool
Clean bits regularly to prevent rust and buildup. Store bits in a dry, organized case to avoid damage. Inspect the collar and bit holder for wear and tear. Replace worn parts to keep the tool working well.
Conclusion
Removing the bit from a Makita demolition hammer is simple and safe. Always pull the collar or change ring down fully before trying to take the bit out. Avoid forcing the bit to prevent damage to the tool or injury.
Keep your hands clear and follow these steps carefully each time. With practice, the process will become quick and easy. Proper removal also helps maintain the hammer’s performance and extends its life. Remember, safety first, and handle your equipment with care.
Frequently Asked Questions
Pull the collar or change ring down fully on your Makita jackhammer. Then, firmly pull the bit straight out to remove it.
Pull the collar or change ring on the Makita bit holder down fully. Then, firmly pull the bit straight out to remove it.
Pull the collar or change ring down fully on your Makita hammer drill. Then, firmly pull the drill bit straight out.
Pull the collar or change ring down fully. Then, firmly pull the bit straight out from the hammer drill.
Pull the collar or releasing cover back fully, then simply pull the bit out carefully.
Using your hand to pull the collar back usually works; a rubber mallet can help if stuck.
