Last Updated: March 20, 2026
Are you ready to tackle that stubborn tile removal project but unsure how to make it quick and hassle-free? Using a demolition hammer can turn a tough, time-consuming job into a surprisingly easy task—saving you hours of frustration and backache.
In this guide, you’ll discover step-by-step how to use a demolition hammer safely and effectively to remove tile from your floors or walls. Whether you’re renovating your bathroom, kitchen, or any tiled surface, mastering this tool will give you the power and control you need to get the job done right.
Keep reading, and soon you’ll be confidently breaking through tile like a pro!
Choosing The Right Demolition Hammer
Choosing the right demolition hammer is key to removing tile efficiently and safely. The tool you select affects the speed and ease of your project. Different hammers suit different tile types and floor materials. Understanding the options helps avoid damage and saves time. Below are three important types to consider.
Rotary Hammer Benefits
A rotary hammer works well for most tile removal tasks. It combines rotation with a hammering action. This breaks up tiles without harming the floor underneath. Rotary hammers use SDS bits that fit securely and transfer power efficiently. Many models offer a hammer-only mode, perfect for chiseling tiles loose. Corded rotary hammers supply steady power for long jobs.
Jackhammer For Tough Jobs
A jackhammer handles large or stubborn tile removal jobs. It delivers strong, rapid hammer blows. This breaks thick or glued-down tiles quickly. Jackhammers can be heavy and harder to control. They are best for professional use or very large areas. Choose one with adjustable power settings to avoid too much force.
Avoiding Inefficient Tools
Simple tools like sledgehammers or regular drills often waste time. They can damage the subfloor or create dust clouds. Using the wrong tool may tire you out quickly. Avoid tools without a hammering action designed for tile removal. Proper demolition hammers reduce effort and improve results. Invest in a tool made for the job to finish faster and cleaner.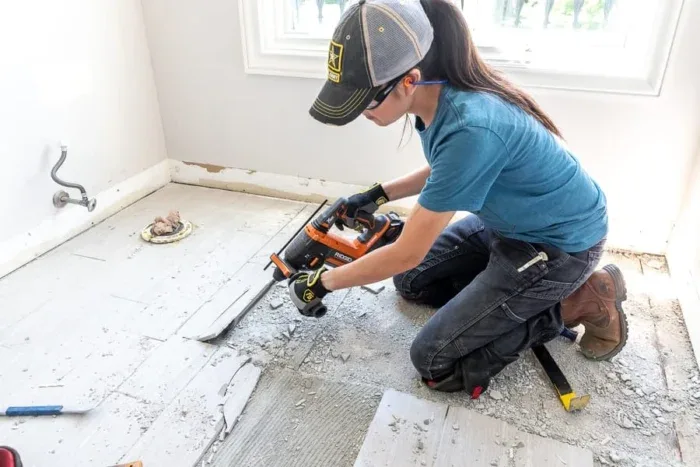
Credit: jenwoodhouse.com
Preparing Your Workspace
Preparing your workspace is crucial before using a demolition hammer to remove tile. A well-organized area makes the job safer and more efficient. Taking time to prepare helps avoid accidents and damage to your home. Follow these steps to create a clean, safe environment for your tile removal project.
Clearing The Area
Remove all furniture and items from the workspace. This prevents damage and gives you room to move freely. Take off rugs, mats, and decorations. Cover any fixed fixtures that cannot be moved. Clear pathways for easy access to tools and exits. A tidy area helps you focus on the task without distractions.
Protective Gear Essentials
Wear safety glasses to protect your eyes from flying debris. Use earplugs or noise-canceling headphones to shield your ears. Put on heavy-duty gloves to protect your hands from sharp edges. Choose a dust mask or respirator to avoid breathing in harmful dust. Wear sturdy boots to protect your feet. Safety gear is important for every step of tile removal.
Setting Up Dust Control
Tile removal creates a lot of dust and debris. Seal off doorways with plastic sheeting to contain dust. Use painter’s tape to secure plastic around the workspace. Place a fan near windows to blow dust outside. Wet the tiles lightly with water to reduce dust while working. Clean up often during the project to keep dust levels low.
Selecting The Proper Chisel Bit
Selecting the proper chisel bit is crucial when using a demolition hammer to remove tile. The right bit makes the job faster and safer. It helps you chip away tiles without damaging the surface underneath. Choosing the correct chisel bit depends on your hammer’s compatibility and the type of tile you want to remove. Maintaining and replacing bits keeps your tool working well and extends its life.
Sds Chuck Compatibility
Most demolition hammers use an SDS chuck to hold chisel bits. SDS stands for Slotted Drive System. It allows quick and secure bit changes without tools. Check your hammer’s specifications to confirm it supports SDS bits. Using the correct bit shank size ensures a tight fit. Loose bits reduce power transfer and increase the risk of accidents. SDS compatibility is essential for smooth operation and efficiency.
Types Of Chisel Bits
Different chisel bits serve different purposes in tile removal. A pointed chisel bit breaks hard tile and grout. It concentrates force on small areas for easy cracking. A flat chisel bit pries tiles off surfaces. Its wide edge slides under tiles to lift them cleanly. Wide flat chisels cover more area and remove thinset or adhesive. Choose bits based on tile type and surface condition. Using the right bit reduces effort and prevents damage.
Replacing And Maintaining Bits
Chisel bits wear out with use. Dull or damaged bits reduce hammer efficiency. Inspect bits regularly for cracks or bends. Replace bits that show signs of wear to maintain safety. Clean bits after use to prevent rust and debris buildup. Store bits in a dry place to keep them in good condition. Proper maintenance extends bit life and improves demolition results.
Techniques For Tile Removal
Removing tiles with a demolition hammer requires the right techniques to protect surfaces and work efficiently. Proper methods reduce damage to the floor or wall underneath. This section covers key ways to use the tool for smooth tile removal.
Using Hammer Mode Effectively
Set the demolition hammer to hammer-only mode. This setting delivers strong, fast impacts without rotating the bit. Use a chisel or flat blade attachment for best results. Hold the tool firmly and let the hammer do the work. Avoid forcing it, which can break tiles in unwanted ways. Take breaks to check progress and adjust your angle as needed.
Starting At Tile Edges
Begin removing tiles from the edges or corners. These areas are easier to lift and reduce stress on the tool. Insert the chisel under the tile edge and tap gently to loosen it. Work around the tile’s perimeter before trying to lift the whole piece. This method prevents cracking surrounding tiles and helps keep the surface intact.
Handling Stubborn Tiles
Some tiles stick tightly due to strong adhesive or grout. Increase hammer force slightly but stay careful. Use a pointed chisel to break grout lines first, then move under the tile. Work slowly to avoid damaging the base layer. If tiles remain stubborn, try heating them with a heat gun to soften adhesive before chiseling.
Minimizing Damage To Subfloor
Removing tile with a demolition hammer can be tough on the subfloor. Protecting the subfloor is important to avoid extra repairs. Careful handling and smart techniques help keep the subfloor intact. Follow these tips to minimize damage while removing tile.
Controlling Hammer Pressure
Use moderate pressure on the hammer. Pressing too hard can break the subfloor. Let the tool do the work. Keep your grip steady but gentle. Light taps help loosen tiles without deep damage.
Working In Small Sections
Break the job into smaller areas. Focus on one section at a time. This method gives more control over the hammer’s impact. Small sections reduce the chance of large cracks or gouges.
Inspecting Surface Regularly
Check the subfloor often while you work. Stop to look for cracks or holes. Early detection prevents bigger problems. Fix minor damage quickly to protect the floor below.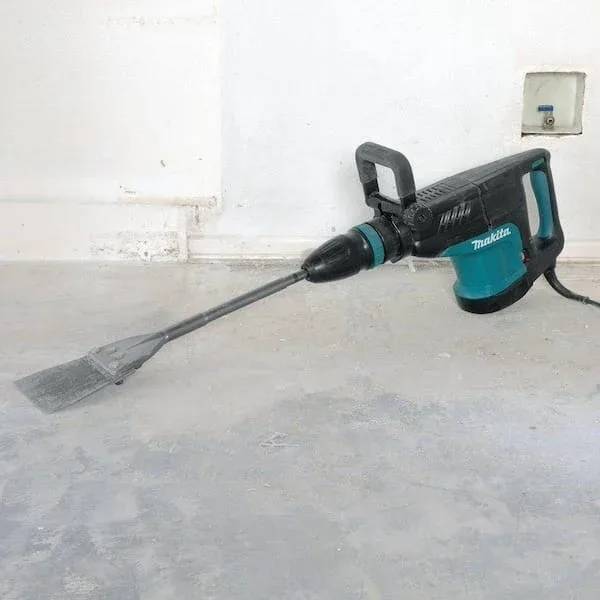
Credit: www.homedepot.com
Cleanup And Aftercare
After using a demolition hammer to remove tiles, cleanup and aftercare are vital. This step ensures your space is safe and ready for the next project. Proper cleanup also protects your tools and environment from damage and hazards.
Removing Debris Safely
Start by wearing protective gloves and a dust mask. Use a broom or vacuum to gather loose tile pieces and dust. Avoid using your hands directly to prevent cuts. Collect all debris in a sturdy container or heavy-duty bag. Check corners and edges for hidden shards. Clean the floor thoroughly to avoid slipping or injury.
Disposing Of Tiles
Do not throw tile debris into regular trash bins. Many tiles contain materials that require special disposal. Contact your local waste facility for guidelines on tile disposal. Some areas have recycling programs for construction debris. Separate tiles from other waste to make disposal easier. Proper disposal keeps your community clean and safe.
Tool Maintenance Tips
Unplug the demolition hammer before cleaning. Remove dust and debris from vents and moving parts with a brush. Check the chisel or bit for damage and replace if needed. Wipe the tool with a dry cloth to prevent rust. Store the hammer in a dry, cool place. Regular maintenance extends tool life and ensures safe operation.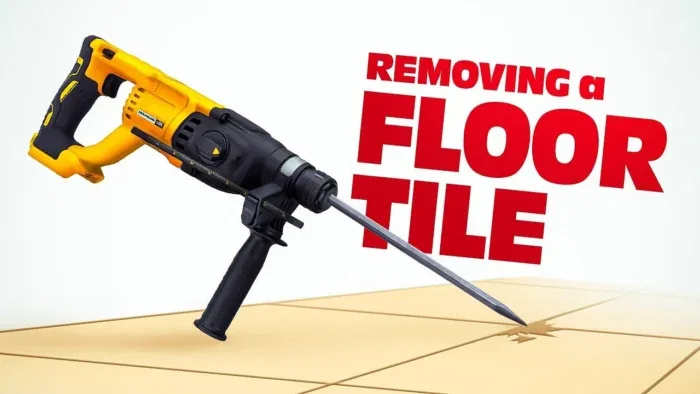
Credit: www.youtube.com
Conclusion
Using a demolition hammer makes tile removal faster and easier. Always wear safety gear to protect yourself. Start slow to avoid damaging the surface beneath. Keep the tool steady and work in small sections. Taking breaks helps maintain control and reduces fatigue.
With patience and care, you can remove tiles effectively. This method saves time and effort compared to manual tools. Remember, practice improves your skill and confidence. Follow these tips for a smooth tile removal project.
Frequently Asked Questions
Use the hammer’s claw to wedge between tile and wall. Pry gently, rocking to loosen and pop tiles off carefully.
The best demo hammer for tile removal is a rotary hammer with SDS chuck and hammer mode. It balances power and control, efficiently removing tiles without damaging the subfloor. For large, tough jobs, a jackhammer with a chisel attachment works well but requires careful handling.
A hammer drill is not ideal for tile removal. Use a rotary hammer or demolition hammer with a chisel bit instead.
A rotary hammer with SDS bits is best for tile removal. It delivers power and control to break and lift tiles efficiently. For large, stubborn jobs, a jackhammer with a chisel attachment works well. Avoid standard hammer drills and manual tools for faster, easier tile removal.
Wear safety glasses, gloves, ear protection, and a dust mask to protect yourself.
Clear furniture, cover nearby surfaces, and sweep dust to keep the area clean.
