Last Updated: March 21, 2026
Clogged toilets or sinks can turn a simple day into a frustrating mess. You might think plunging is straightforward, but using a plunger the right way can make all the difference between a quick fix and a bigger problem.
If you’ve ever struggled with a stubborn clog or worried you’re doing it wrong, this guide is made for you. Here, you’ll learn easy, step-by-step tips to use your plunger effectively, save time, and avoid unnecessary stress. Ready to master the art of plunging and keep your bathroom flowing smoothly?
Let’s dive in!
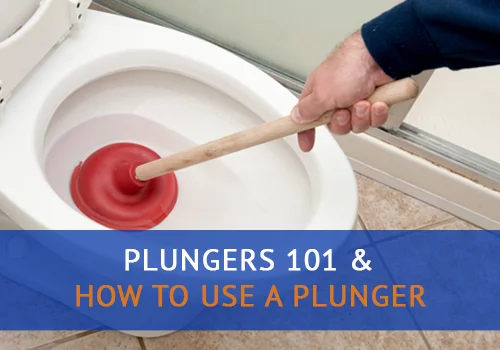
Credit: advancedsepticservicesfl.com
Choose The Right Plunger
Choosing the right plunger is key to clearing clogs quickly and easily. Different plungers work best for different drains. Picking the correct one saves time and effort.
Types Of Plungers
The two main types are cup plungers and flange plungers. Cup plungers have a simple rubber cup and work well on flat surfaces. Flange plungers have an extra rubber flap that fits into toilet drains. This design creates a better seal for toilets.
Which Plunger For Your Drain?
Use a cup plunger for sinks, tubs, and showers. It fits flat surfaces and pushes air and water to clear clogs. Use a flange plunger for toilets. The flange fits into the drain hole and stops air from escaping.
Material And Size
Look for a plunger with a sturdy wooden or plastic handle. The rubber part should be flexible but firm. A larger cup size works better for big drains. Smaller plungers fit better in kitchen sinks and small drains.
Plunger Quality Matters
A cheap plunger may tear or lose shape quickly. Invest in a well-made plunger for long-lasting use. A good seal helps create strong suction. This makes plunging more effective and less frustrating.
Prepare The Drain Area
Start by checking the water level in the drain to cover the plunger’s cup fully. Place a towel around the base to catch any spills and block overflow holes for better suction.
Clear The Surrounding Area
Remove any objects around the drain. This keeps the space safe and clean. Clear the floor of rugs or towels. Place old towels nearby to catch any spills. A clean area helps you work faster and easier.
Check Water Level In The Bowl
Look inside the toilet or sink bowl. Make sure the water covers the plunger cup fully. If water is low, add some to create a good seal. The water helps the plunger push and pull effectively.
Block Overflow Openings
Some toilets have overflow holes near the rim. Cover these holes with a wet cloth or tape. Blocking stops air from escaping. It improves suction and helps clear the clog faster.
Place the plunger cup directly over the drain hole. Make sure it fits snugly to form a tight seal. Angle the handle so the cup fills with water. This setup helps build pressure to push the clog away.
Check Water Level
Checking the water level in the toilet bowl is a key step before using a plunger. The water helps create a tight seal around the plunger cup. Without enough water, the plunger cannot push or pull effectively. This reduces the chance of clearing the clog.
Water also helps prevent air from escaping when you push down. Air leaks weaken the suction needed to dislodge the blockage. The right water level improves pressure and makes plunging easier.
Ensure Enough Water Covers The Plunger Cup
The water should cover the plunger cup fully. If the water is low, add some to the bowl. Use a bucket or cup to pour water slowly. This extra water helps form a strong seal for better plunging power.
Block The Overflow Hole
Some toilets have an overflow drain near the rim. Water can escape through this hole, reducing suction. Use a wet rag or cloth to cover the overflow hole. Blocking it keeps pressure inside the bowl and improves plunging results.
Place the plunger cup directly over the toilet drain hole. Tilt it slightly so water fills the cup. Push down gently to remove air from the cup before plunging hard. This ensures the water level helps maintain strong suction.
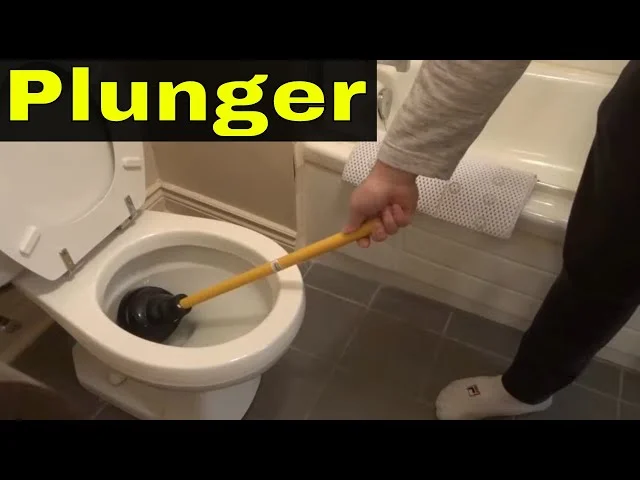
Credit: www.youtube.com
Position The Plunger Correctly
Positioning the plunger correctly is key to unclogging a toilet fast. Proper placement creates a strong seal. This seal lets you build pressure to push the clog through the pipes.
Without the right position, air escapes and plunging becomes less effective. Focus on placing the plunger where it covers the drain fully. The water in the bowl helps form a tight seal around the plunger cup.
Ensure The Plunger Cup Is Fully Submerged
Check the water level in the toilet bowl first. The plunger cup must be fully underwater. Add water if the level is too low. This water fills the cup and blocks air gaps. A good seal depends on it.
Block The Overflow Hole If Present
Some toilets have an overflow hole inside the bowl. This hole lets extra water escape. Cover the overflow hole with a wet rag or your hand. This keeps suction strong while you plunge.
Center The Plunger Over The Drain Hole
Place the plunger directly over the toilet’s drain hole. For flange plungers, make sure the flange fits inside the drain. This guides water and pressure straight to the clog. Misalignment wastes effort.
Angle And Press The Plunger Correctly
Hold the plunger handle upright. Tilt it slightly to fill the cup with water. Press down gently to push air out. Then plunge vertically up and down. Keep the seal tight with each push.
Create A Strong Seal
Creating a strong seal is the first key step to using a plunger effectively. A good seal ensures that pressure builds up in the drain. This pressure helps push the clog through the pipe.
Without a tight seal, air escapes and the plunger won’t work well. The seal forms between the plunger cup and the toilet surface. It must cover the drain hole completely.
Create A Watertight Seal
Make sure the toilet bowl has enough water to cover the plunger cup. The water helps fill the space and creates a tight seal. If the bowl is low, add water before plunging.
Position the plunger cup over the drain hole. Press down gently to remove air from the cup. This action forms a watertight seal for strong suction.
Block The Overflow Hole
Many toilets have an overflow hole to prevent flooding. Cover this hole with a wet rag or tape. Blocking it stops air from escaping, keeping pressure inside the drain.
Use The Right Angle
Hold the plunger vertically over the drain. Angle it slightly to let water enter the cup. This helps maintain the seal and improves plunging power.
Push down slowly at first to force air out. Then plunge up and down with steady force. Avoid breaking the seal by keeping the cup submerged.
Use Proper Plunging Technique
Using a plunger the right way is key to clearing clogs quickly. Proper technique creates strong suction and pressure. This helps push the blockage through the drain.
Many people plunge incorrectly, causing splashes or making the clog worse. Follow these steps to plunge effectively and safely.
Prepare The Toilet Bowl
Check that the toilet bowl has enough water to cover the plunger cup. Add water if needed to create a tight seal. Without enough water, the plunger cannot build pressure.
Place rags or towels around the toilet base to catch any spills. If the toilet has an overflow hole, block it with a wet rag to keep suction strong.
Use a flange plunger for toilets. Fit the extended flange inside the drain hole. The cup should cover the hole fully with no gaps.
Hold the plunger handle straight. Angle it slightly to let water enter the cup. This helps create a better seal for suction.
Perform The Plunging Motion
Start by pressing the plunger down gently to push air out. Then plunge up and down with steady, strong motions. Keep the cup sealed on the drain.
Do not lift the plunger completely out of the water. This breaks the suction and wastes effort. Continue plunging for 15 to 20 seconds.
Check For Drainage
Pull the plunger back carefully. Watch if the water drains freely. If the water level drops, the clog is clearing.
Repeat plunging if needed. After several tries, a stubborn clog may need a different tool like a toilet auger.
Test Drain Flow
Test drain flow by ensuring the plunger cup fully covers the drain hole. Push down gently, then plunge up and down firmly to clear clogs. Keep the seal tight to maintain suction and improve water flow.
Start by checking the water level in the bowl or sink. The water should cover the plunger cup completely. Without enough water, the plunger cannot create a proper seal. Add water if needed to ensure the cup is submerged. This helps build strong pressure for clearing the clog.
Observe Drain Movement
After plunging, watch the water flow carefully. If the water starts to drain slowly, the clog is loosening. Clear flow means the blockage is gone. If water remains still or rises, more plunging is necessary. This step shows if your effort is working or if another approach is needed.
Test Multiple Times
Try plunging and testing the drain several times. Each time, push and pull with steady force. Wait a moment after each attempt to see if water drains. Sometimes clogs take a few tries to clear. Be patient and keep testing the flow before stopping.
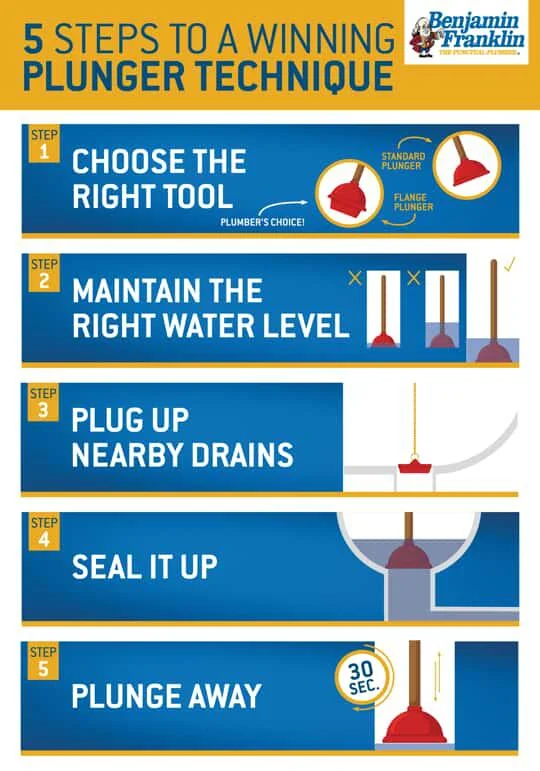
Credit: www.benjaminfranklinplumbing.com
When To Try Other Methods
Plunging works well for many clogs, but not all. Sometimes the blockage is too tough or deep. Trying other methods can save time and prevent damage.
Watch for signs that the plunger is not helping. Persistent slow drains or no change means another approach is needed.
Clog Remains After Multiple Plunges
Try plunging several times before changing methods. If water still drains slowly or not at all, the clog may be stubborn. This calls for stronger tools or techniques. A drain bladder is one effective tool for stubborn clogs.
Water Levels Keep Rising
If water rises close to the rim after plunging, stop. This means the clog blocks the flow completely. Using more force might cause an overflow and mess.
Plunger Does Not Create A Seal
A plunger needs a tight seal to work well. If water leaks or air escapes, it cannot clear the clog. Check your plunger type or try a different method.
Clogs Located Deep In Pipes
Some clogs sit far inside the pipe. A plunger may not reach or push them out. Tools like a toilet auger or drain snake work better in these cases.
Frequently Asked Questions
How Do You Use A Plunger Correctly?
Fill the bowl to cover the plunger cup. Block overflow holes if present. Position the plunger over the drain, push gently to expel air, then plunge vigorously up and down. Keep the seal and suction intact. Check if water drains; repeat or try other tools if needed.
How Do I Know If I’m Plunging Correctly?
Know you’re plunging correctly when the plunger forms a tight seal, moves water vigorously, and the clog clears after several attempts.
How To Unblock A Toilet With A Plunger?
Ensure the toilet bowl has enough water to cover the plunger cup. Position the plunger over the drain hole, create a tight seal, then push and pull vigorously. Keep the plunger submerged to maintain suction. Repeat until water drains freely.
Use a toilet auger if clog persists.
Do You Flush While Plunging?
Do not flush while plunging. Ensure the plunger cup is submerged and create a strong seal before plunging.
How Do I Use A Plunger To Unclog A Toilet?
Fill the bowl with water, place the plunger over the drain, and push up and down firmly.
Conclusion
Using a plunger correctly can clear most clogs quickly. Keep water in the bowl to create a good seal. Push and pull firmly without breaking the seal. Check if the water drains after several tries. If the clog stays, try other tools or call a plumber.
Regular plunging saves time and avoids bigger problems. Simple steps make this task easy and effective every time.
Related reading: How to Unclog a Toilet Without a Plunger.
{
“@context”: “https://schema.org”,
“@type”: “Article”,
“headline”: “How to Use a Plunger: Quick Tips to Unclog Drains Easily”,
“description”: “Learn how to use a plunger effectively to clear clogs by creating suction and pressure, a simple tool essential for maintaining drains and toilets.”,
“url”: “https://www.powertoolstoday.com/how-to-use-a-plunger/”,
“datePublished”: “2025-12-02”,
“dateModified”: “2026-03-18”,
“author”: {
“@type”: “Organization”,
“name”: “Power Tools Today”,
“url”: “https://www.powertoolstoday.com”
},
“publisher”: {
“@type”: “Organization”,
“name”: “Power Tools Today”,
“url”: “https://www.powertoolstoday.com”
},
“mainEntityOfPage”: {
“@type”: “WebPage”,
“@id”: “https://www.powertoolstoday.com/how-to-use-a-plunger/”
},
“image”: {
“@type”: “ImageObject”,
“url”: “https://www.powertoolstoday.com/wp-content/uploads/2025/11/how-to-use-a-plunger.webp”
}
}
{
“@context”: “https://schema.org”,
“@type”: “Article”,
“headline”: “How to Use a Plunger: Quick Tips to Unclog Drains Easily”,
“description”: “Learn how to use a plunger effectively to clear clogs by creating suction and pressure, a simple tool essential for maintaining drains and toilets.”,
“url”: “https://www.powertoolstoday.com/how-to-use-a-plunger/”,
“datePublished”: “2025-12-02”,
“dateModified”: “2026-03-19”,
“author”: {
“@type”: “Organization”,
“name”: “Power Tools Today”,
“url”: “https://www.powertoolstoday.com”
},
“publisher”: {
“@type”: “Organization”,
“name”: “Power Tools Today”,
“url”: “https://www.powertoolstoday.com”
},
“mainEntityOfPage”: {
“@type”: “WebPage”,
“@id”: “https://www.powertoolstoday.com/how-to-use-a-plunger/”
},
“image”: {
“@type”: “ImageObject”,
“url”: “https://www.powertoolstoday.com/wp-content/uploads/2025/11/how-to-use-a-plunger.webp”
}
}
nnnn
