Last Updated: March 27, 2026
Using a roofing nailer can save hours of hard work and make your roofing project go faster, but only if you know how to use it safely and correctly. Whether you’re a DIY homeowner or just starting out in construction, learning to operate a roofing nailer is a valuable skill.
However, many beginners rush the process and end up with crooked shingles, wasted nails, or even injuries. This guide will show you every step to get professional results, avoid common mistakes, and use your roofing nailer with confidence.
Understanding Roofing Nailers
A roofing nailer is a specialized tool used to drive nails through roofing materials like shingles into the roof deck. Unlike a hammer, a nailer is powered by compressed air, electricity, or batteries, making the process much quicker and more consistent. Most roofing nailers are coil-style, meaning they hold a large roll of nails, so you reload less often.
There are two main types of roofing nailers:
| Type | Power Source | Best For |
|---|---|---|
| Pneumatic | Air compressor | Professional, high-volume work |
| Cordless (Battery) | Rechargeable battery | Smaller jobs, hard-to-reach places |
Pneumatic nailers are the industry standard for most roofing jobs because they are powerful and reliable. Cordless options are more portable but may not have the same driving power.
Essential Safety Precautions
Roofing work can be dangerous, especially when using power tools at height. Before you start, always follow these safety measures:
- Wear protective gear – Use safety glasses, gloves, and a hard hat.
- Secure your footing – Work on a dry day and use roof brackets or harnesses if the roof is steep.
- Check your surroundings – Keep pets and children away from the work area.
- Inspect your nailer – Make sure the tool is in good condition, with no air leaks or damaged parts.
- Unplug or disconnect when loading – Never load nails while the nailer is connected to power or air.
One non-obvious safety tip: Always keep your free hand away from where the nail comes out. Accidental double-fires can happen, even to experienced users.
Choosing The Right Nails And Settings
Not all nails are the same. For roofing, you need galvanized roofing nails with wide heads, usually 1 to 1 ¼ inches long. Using the wrong size can lead to leaks or shingle blow-offs.
Check your local building codes for nail length and quantity. For example, most codes require at least four nails per standard shingle. In high-wind zones, you may need six nails per shingle.
Your nailer will have adjustable settings:
- Depth adjustment – Controls how deep the nail goes. Too deep and you’ll damage the shingle; too shallow and the nail won’t hold.
- Air pressure (for pneumatic models) – Usually between 70–120 psi. Test on a scrap shingle first.
| Nailer Setting | Result |
|---|---|
| Too deep | Nail sinks below surface, shingle weakens |
| Too shallow | Nail head sticks up, shingles won’t lay flat |
| Correct | Nail head flush with shingle, strong hold |
Preparing Your Workspace
Before you start nailing, set yourself up for success:
- Clear the roof of debris, old nails, and damaged shingles.
- Lay out your shingles in stacks near your work area for easy reach.
- Set up your compressor (if using a pneumatic nailer) on flat, stable ground.
- Connect hoses and power safely, keeping cords and hoses away from walkways.
- Practice on scrap material if this is your first time.
Many beginners forget to check the weather. Avoid roofing when it’s windy or wet—shingles won’t seal properly, and you’re more likely to slip.
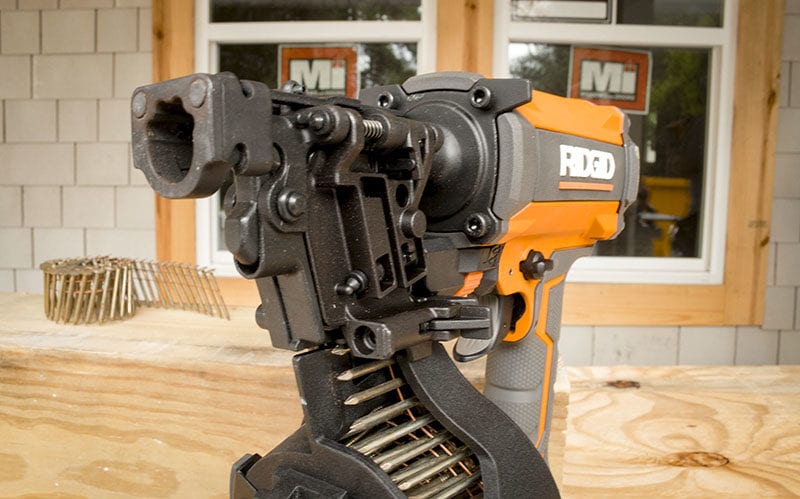
Credit: www.protoolreviews.com
Loading Nails Into The Roofing Nailer
Every roofing nailer is a little different, but the steps are similar:
- Disconnect power/air supply.
- Open the nail magazine. Most coil nailers have a latch or button.
- Insert the coil of nails. Make sure the nails are facing the correct direction.
- Feed the first nail into the firing chamber.
- Close and lock the magazine.
- Reconnect power or air supply.
If you’re unsure, check your nailer’s manual. Loading the coil backward is a common beginner mistake that causes jams.
Adjusting For Proper Nail Depth
Proper nail depth is critical for a watertight roof. Here’s how to adjust it:
- Test on a spare shingle: Fire a nail and check if the head is flush.
- Adjust depth dial: Most nailers have a wheel or slider near the nose.
- Change air pressure if needed: Too much pressure drives nails too deep.
A good tip: Roof decks vary in hardness. Plywood is softer than OSB or old wood, so you may need to adjust settings as you move across the roof.
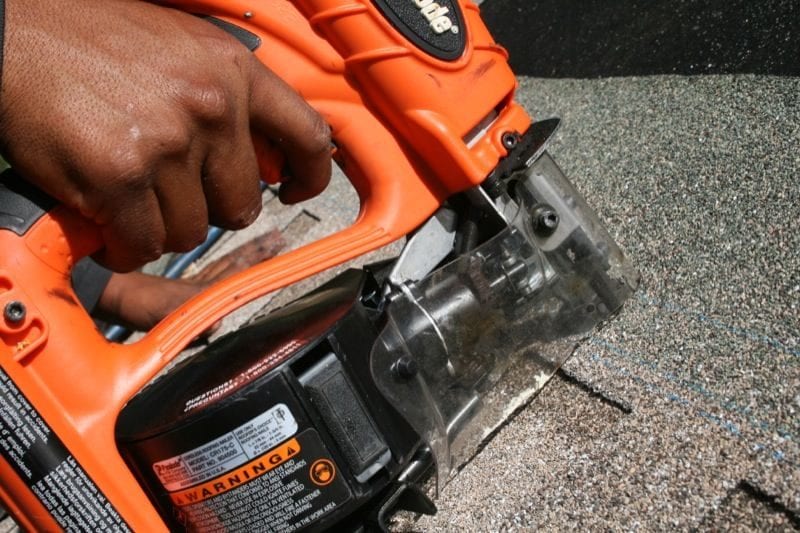
Credit: www.protoolreviews.com
Positioning The Shingles And The Nailer
Place the shingle on the roof, lining it up with the chalk line or previous row. Hold the nailer perpendicular to the roof surface. This ensures the nail goes straight in and holds the shingle tight.
Do not angle the nailer—angled nails can cut through shingles or fail to hold in strong winds. For most shingles, place nails about 1 inch above the cutout, spaced evenly.
Firing Nails Correctly
To drive a nail:
- Press the nailer’s nose firmly against the shingle.
- Pull the trigger (or bump the nose, depending on your model).
- Move to the next nail location.
Do not rush. Consistent spacing and depth are more important than speed. Watch out for “double-fires,” where two nails fire at once—this usually means you’re pressing too hard or moving too fast.
If your nailer has a bump fire mode, use it only after you’re comfortable. Beginners should start with single sequential mode for better control.
Working Efficiently And Safely
Roofing is tiring work, especially in the sun. Take breaks, stay hydrated, and keep your area organized.
- Work in sections: Finish one area before moving to the next.
- Keep nails and shingles nearby to avoid climbing up and down.
- Check your air hose: Make sure it doesn’t snag or pull the nailer off the roof.
One insight: Place your nails and tools on a roofing apron or pouch. This keeps your hands free and prevents tools from sliding off the roof.
Clearing Jams And Maintenance
Even top-quality nailers can jam. If your nailer stops firing or misfires:
- Disconnect power or air.
- Open the magazine.
- Remove jammed nails with pliers.
- Check for bent nails or debris.
- Reload and test.
To reduce jams:
- Use only compatible, clean nails.
- Keep the nailer clean and lubricate as recommended in the manual.
- Store the nailer in a dry place.
Regular maintenance, such as oiling pneumatic nailers, will extend the tool’s life. A dry, dirty nailer is much more likely to jam.
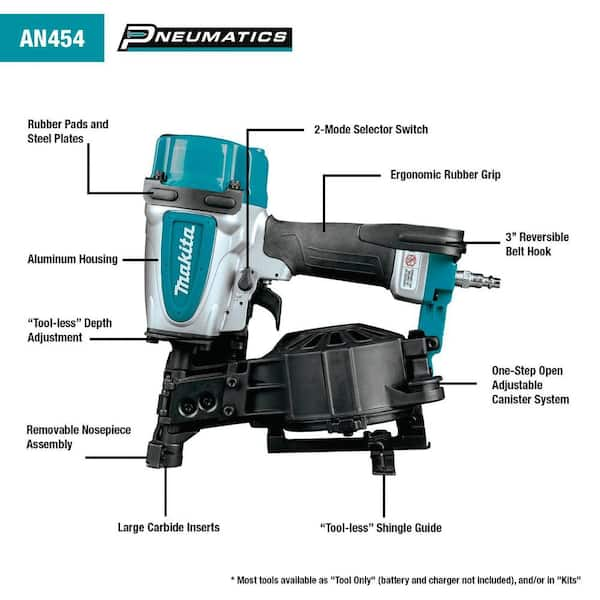
Credit: www.homedepot.com
Troubleshooting Common Problems
If your roofing nailer isn’t working right, try these solutions:
- Nails won’t feed: Check for jams or make sure the coil is loaded properly.
- Nail heads stick up: Increase depth or air pressure slightly.
- Nail sinks too deep: Decrease depth or air pressure.
- Air leaks: Check hoses and connections for damage.
If problems continue, consult the manufacturer’s manual or contact support.
Comparing Roofing Nailer Features
Choosing the right roofing nailer can make a big difference. Here’s a quick comparison of common features:
| Feature | Why It Matters | Ideal For |
|---|---|---|
| Tool-Free Depth Adjustment | Quickly set nail depth for different materials | Mixed roof decks |
| Magnesium Housing | Lighter weight for less fatigue | All-day jobs |
| Swiveling Air Connector | Prevents air hose tangles | Large roofs |
| Bump/Sequential Fire Mode | Choose between speed and control | Beginner or pro use |
Not all nailers have the same features, so pick one that matches the job and your experience level.
Expert Tips For Using A Roofing Nailer
- Keep your nails dry – Wet nails can rust quickly and jam the tool.
- Rotate your body, not your wrist – This helps keep the nailer straight.
- Check nail supply often – Running out mid-row can lead to missed nails and weak shingles.
- Plan your path – Start at the bottom and work up, so you’re not stepping on freshly nailed shingles.
- Label air hoses if you’re working with multiple tools to avoid mix-ups.
A detail many miss: If you see a shingle lift after nailing, it’s often because a nail missed the wood below. Lift the shingle, pull the bad nail, and re-nail properly.
When To Call A Professional
If you have a very steep roof, complex shapes, or need to remove and replace large sections of wood, consider hiring a professional roofer. Roofing is not only about nailing—proper underlayment, flashing, and ventilation are just as important. For large or high-risk jobs, professionals have the experience, tools, and insurance to handle the work safely.
For more on safe roofing practices, see this resource from OSHA.
Frequently Asked Questions
How Do I Know If My Nailer Is Set To The Right Depth?
Test on a scrap shingle and check if the nail head is flush with the surface. Adjust the depth setting and air pressure as needed. Nails set too deep or too shallow can cause leaks or shingle damage.
Can I Use A Roofing Nailer For Other Projects?
Roofing nailers are designed for shingles and thin materials. Using them on thick wood or siding can jam the nailer or damage materials. Use the right tool for the job.
What Should I Do If My Nailer Keeps Jamming?
First, disconnect the air or power. Open the magazine, remove any bent or stuck nails, and clean out debris. Make sure you’re using the correct nails for your model.
How Often Should I Oil My Pneumatic Roofing Nailer?
Most manufacturers recommend a few drops of pneumatic tool oil each day before use. This keeps the internal parts working smoothly and prevents jams.
How Do I Avoid Missing The Roof Decking With Nails?
Take your time to align each shingle and keep the nailer perpendicular to the roof. Practicing on scrap material helps build accuracy and confidence.
Roofing can be demanding, but with the right preparation and attention to detail, you can achieve professional results. Mastering the roofing nailer is a skill that pays off in both time saved and quality of work. By following these steps, safety tips, and practical insights, you’ll handle your roofing nailer like a pro.
