Last Updated: March 21, 2026
If you’ve ever struggled with stubborn bolts, slippery nuts, or tricky metal pieces, locking pliers can be your best friend. These handy tools grip tightly, giving you the power to hold, twist, or clamp objects with ease—saving you time and frustration.But how do you make the most of locking pliers? In this guide, you’ll discover simple, step-by-step tips to use locking pliers like a pro. Whether you’re fixing something around the house or tackling a tough project, mastering this tool will give you the confidence to get the job done right.Keep reading to unlock the full potential of your locking pliers!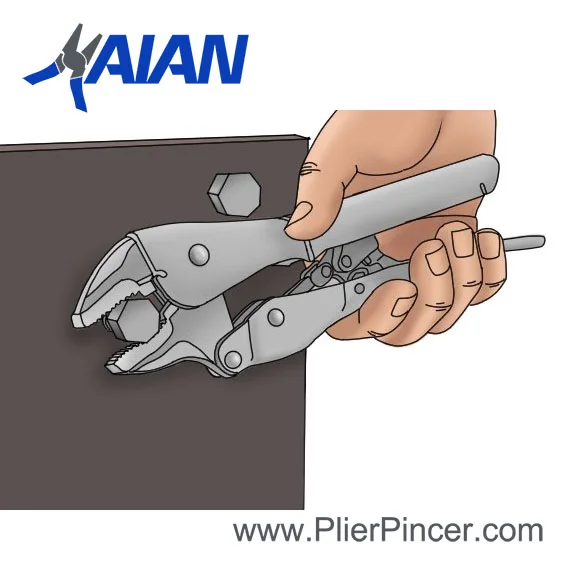 Credit: plierpincer.comTypes Of Locking PliersLocking pliers come in several types, each designed for specific tasks. Knowing these types helps you pick the right tool for your job. They lock firmly on objects, giving you a strong grip and better control.Different shapes and sizes suit different uses. Some are for general gripping, while others handle special shapes or delicate work. Here are common types of locking pliers you should know about.
Standard Locking Pliers
These have straight jaws for gripping flat or round objects. They work well on bolts, nuts, and pipes. The jaws lock tightly to hold items firmly in place. These pliers are the most common type in toolboxes.Curved Jaw Locking Pliers
The jaws curve to fit round objects better. This shape provides a stronger grip on pipes and rods. It also helps hold irregular shapes securely. Curved jaw pliers are useful for plumbing and mechanical tasks.Needle Nose Locking Pliers
These have long, thin jaws for tight spaces. They reach into narrow areas and grip small objects well. Needle nose pliers are ideal for electronics, jewelry, and delicate repairs. They lock firmly without slipping.Wire Cutter Locking Pliers
These combine gripping jaws with a built-in wire cutter. They cut wires while holding them steady. This type saves time and effort when working with cables or fencing. It is a versatile tool for electricians and DIYers.Welding Locking Pliers
Made for welding tasks, these pliers have special jaws to hold metal pieces. They resist heat and keep parts in place during welding. Welding pliers often have a longer handle for better leverage and safety.Adjusting The Jaw SizeAdjusting the jaw size of locking pliers is a simple yet vital step for effective use. It helps the tool grip objects firmly without slipping or damaging them. Proper adjustment also makes your work easier and safer.Locking pliers come with a screw or knob at the handle’s end. Turning this screw changes the jaw opening size. This lets you customize the grip to fit different objects, whether small or large.Locating The Adjustment Screw
Look at the handle’s end for a round screw or knob. This part controls the jaw size. You can turn it clockwise or counterclockwise to change the opening.Turning The Screw To Open Or Close The Jaws
Turn the screw clockwise to make the jaws smaller. This tightens the grip on small objects. Turn it counterclockwise to open the jaws wider for larger items.Testing The Jaw Fit Before Locking
Place the jaws around the object. Adjust the screw so the jaws just touch it. Avoid too tight or too loose fits. The right fit locks securely without slipping.Fine-tuning For A Secure Grip
After locking the pliers, check the hold. If it feels loose, release and adjust the screw slightly tighter. Repeat until the grip is firm but not damaging the item.Securing Objects FirmlyLocking pliers hold objects tightly for better control and safety. They clamp onto materials firmly, stopping movement. This grip helps during cutting, welding, or assembly tasks.Using locking pliers correctly ensures a steady hold. Adjust the jaws for a snug fit around the item. The pliers lock in place, freeing your hands for other work.Turn the screw at the handle’s end to set jaw width. Make the opening just wide enough for the object. A close fit prevents slipping and damage.Clamping Securely
Place the jaws around the item and squeeze the handles. You will hear a click when the pliers lock. Check the grip by trying to move the object gently.Releasing The Lock
Press the release lever near the handle to unlock the jaws. This lets you remove or reposition the pliers easily. Always unlock before removing to avoid damage.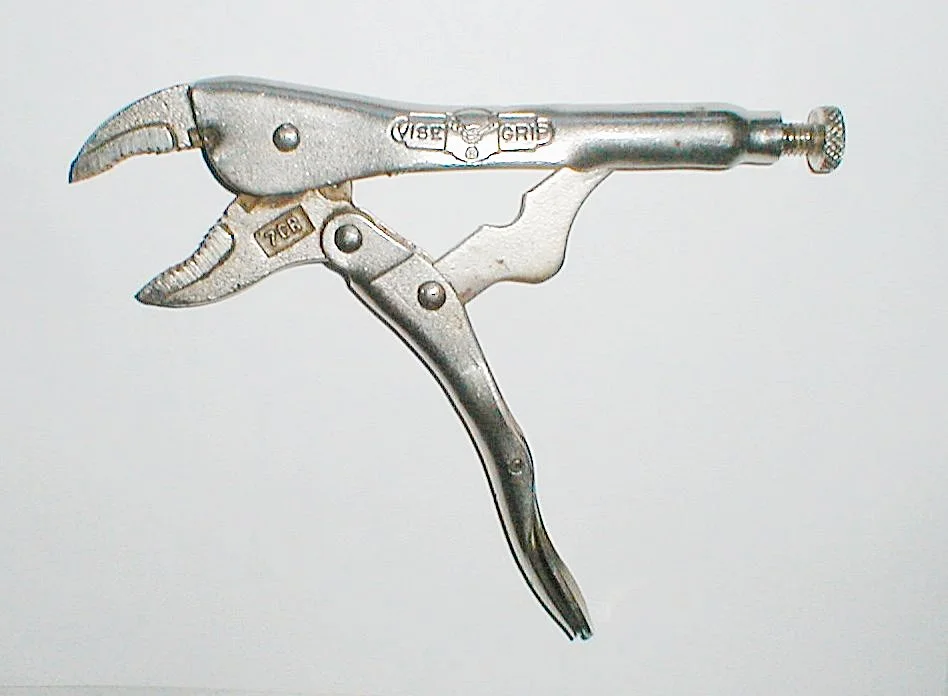 Credit: en.wikipedia.orgReleasing The GripReleasing the grip of locking pliers is simple but important. After using the pliers to hold or clamp an object, you need to let go safely. The tool locks tightly to keep a strong hold. Knowing how to release it correctly prevents damage to your work or the tool.Follow clear steps to unlock the jaws smoothly. This section explains the best way to release the grip of locking pliers without struggle or risk.
Locate The Release Lever
Most locking pliers have a small lever inside one handle. This lever unlocks the jaws. Find it by feeling inside the handle. It is usually near where your fingers rest. This lever is easy to push with your thumb or finger.Press The Release Lever
Use your thumb to press the lever firmly. This action frees the locking mechanism. The jaws will open slightly once the lever moves. Keep pressing until the jaws fully release. Don’t force the pliers open by pulling the handles apart.Open The Handles
After pressing the release lever, gently open the handles. The jaws will loosen their grip. Pull the handles apart slowly to remove the pliers from the object. Opening the handles fully helps reset the tool for the next use.Precision Grip TechniquesStart by adjusting the knob to fit the object’s size. Squeeze the handles until the pliers lock firmly in place. Release the grip by pressing the release lever for easy removal.Understanding The Precision Grip
Precision grip is key when using locking pliers. It helps hold objects firmly without slipping. Adjust the jaws carefully to fit the item’s shape. A good grip avoids damage and improves control.Adjusting The Jaw For Exact Fit
Turn the adjustment screw slowly. Stop when the jaws just touch the object. Test the fit by squeezing the handles gently. Tighten slightly more until the pliers lock in place.Using The Release Lever Smoothly
To unlock, press the release lever with your thumb. Do this gently to avoid sudden drops. Smooth release keeps your work safe and steady.Positioning For Maximum Control
Hold the handles close to your hand base. This gives better strength and precision. Align the jaws so they grip the object’s strongest parts. Keep your wrist straight to reduce fatigue.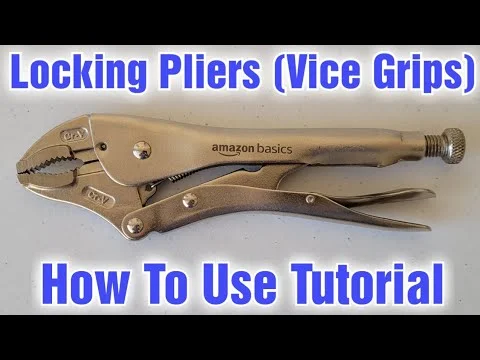 Credit: www.youtube.comCommon Uses And TipsLocking pliers are versatile tools in any toolbox. They hold objects firmly and free your hands. Knowing their common uses helps you work faster and safer. Simple tips improve your grip and protect the tool’s life.
Common Uses Of Locking Pliers
Locking pliers clamp tightly on different shapes and sizes. They hold nuts, bolts, and pipes for easy turning. They work as a temporary clamp during gluing or welding. Use them to pull out nails or remove stripped screws. They also help bend or twist metal without slipping.Tips For Using Locking Pliers Effectively
Adjust the screw knob to fit the object’s size. Close the handles slowly until you hear a click. Avoid over-tightening to prevent damage to the tool or workpiece. Release the pliers by pushing the release lever gently. Keep the jaws clean and dry to maintain a strong grip.Safety Tips When Using Locking Pliers
Wear gloves to protect your hands from pinches. Check the pliers for cracks or damage before use. Do not use locking pliers as a hammer or pry bar. Keep fingers away from the jaws when locking or unlocking. Store pliers in a dry place to avoid rust and wear.Frequently Asked Questions
How Do You Use A Locking Plier?
Adjust the screw to fit the object’s size. Squeeze the handles until the pliers lock tightly. Release by pressing the release lever. Use for gripping, clamping, or turning objects securely.How To Use Locking Wire Pliers?
Adjust the screw to fit the wire size. Clamp the wire with pliers, then twist or hold securely. Release using the lever.What Releases The Locking Pliers?
A release lever or by pulling the handles apart releases the locking pliers’ jaws.How To Properly Use Channel Lock Pliers?
Grip the object firmly with channel lock pliers. Adjust the sliding jaw for a tight fit. Pull handles to lock securely. Use the tool directionally, matching jaw position to grip shape. Release by squeezing the release lever or separating handles carefully.What Are Locking Pliers Used For?
Locking pliers grip objects tightly for turning, holding, or twisting without slipping.How Do You Adjust Locking Pliers Properly?
Turn the adjustment screw to fit the object’s size before locking the jaws.Conclusion
Locking pliers offer strong grip and control for many tasks. Adjust the screw for tightness before locking the jaws. Squeeze the handles firmly until you hear the click. Use the release lever to open the pliers safely. Practice these steps to handle tasks with ease.Keep your pliers clean and store them properly. Simple tools, great results.Related reading: How to Use a Socket Wrench.
{ “@context”: “https://schema.org”, “@type”: “Article”, “headline”: “How to Use Locking Pliers: Master Grip and Precision Tricks”, “description”: “Learn how to use locking pliers by understanding their design, adjustable grip, and common applications for holding or turning objects securely.”, “url”: “https://www.powertoolstoday.com/how-to-use-locking-pliers/”, “datePublished”: “2026-02-06”, “dateModified”: “2026-03-18”, “author”: { “@type”: “Organization”, “name”: “Power Tools Today”, “url”: “https://www.powertoolstoday.com” }, “publisher”: { “@type”: “Organization”, “name”: “Power Tools Today”, “url”: “https://www.powertoolstoday.com” }, “mainEntityOfPage”: { “@type”: “WebPage”, “@id”: “https://www.powertoolstoday.com/how-to-use-locking-pliers/” }, “image”: { “@type”: “ImageObject”, “url”: “https://www.powertoolstoday.com/wp-content/uploads/2025/11/how-to-use-locking-pliers.jpg” } }{ “@context”: “https://schema.org”, “@type”: “Article”, “headline”: “How to Use Locking Pliers: Master Grip and Precision Tricks”, “description”: “Learn how to use locking pliers by understanding their design, adjustable grip, and common applications for holding or turning objects securely.”, “url”: “https://www.powertoolstoday.com/how-to-use-locking-pliers/”, “datePublished”: “2026-02-06”, “dateModified”: “2026-03-19”, “author”: { “@type”: “Organization”, “name”: “Power Tools Today”, “url”: “https://www.powertoolstoday.com” }, “publisher”: { “@type”: “Organization”, “name”: “Power Tools Today”, “url”: “https://www.powertoolstoday.com” }, “mainEntityOfPage”: { “@type”: “WebPage”, “@id”: “https://www.powertoolstoday.com/how-to-use-locking-pliers/” }, “image”: { “@type”: “ImageObject”, “url”: “https://www.powertoolstoday.com/wp-content/uploads/2025/11/how-to-use-locking-pliers.jpg” } }nn