Last Updated: March 27, 2026
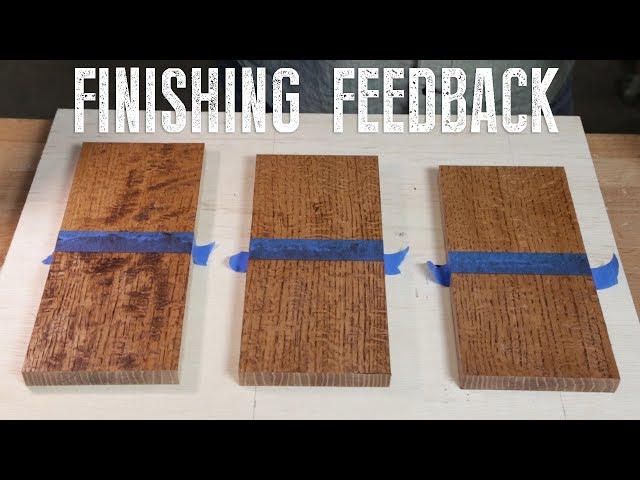
Sanding Vs Planing Wood: Which Method Is Best For Your Project?
When working with wood, achieving a smooth, flat surface is key to a beautiful and professional result. Two main ways to do this are sanding and planing. Both methods remove material from wood, but they do it in different ways and are suited to different situations. Choosing between sanding and planing can make a big difference to your woodworking experience, the look and feel of your finished project, and even the time you spend. Let’s explore how each method works, when to use them, and what you should consider before making your choice.
What Is Planing?
Planing is a woodworking process where you shave off thin layers of wood using a tool called a plane. The goal is to flatten, smooth, or reduce the thickness of a board. There are several types of planes:
- Hand planes: Used manually, perfect for small jobs or fine adjustments.
- Electric planers: Power tools that speed up the process, suitable for larger surfaces or frequent use.
- Jointer planers: Specialized machines for making boards flat and straight.
When you plane wood, you remove high spots quickly and create a very flat surface. Planing is often the first step after rough sawing because it can handle uneven boards with twist, bow, or cup.
When Should You Use A Plane?
Planing is ideal when:
- You need to remove a lot of material quickly.
- The wood surface is warped or uneven.
- You want a flat, level surface on large boards.
- Preparing rough-sawn lumber for furniture projects.
A plane works best on solid wood. It is not recommended for plywood, MDF, or veneered surfaces, as it can tear through thin layers.
What Is Sanding?
Sanding is the process of smoothing wood by rubbing it with an abrasive material, usually sandpaper. You can sand by hand, with a sanding block, or use power tools like orbital sanders and belt sanders. Sanding removes less material than planing, but it produces a very smooth finish.
Sanding is often the final step before staining, painting, or applying finish to wood. Sandpaper comes in different grits (coarseness levels), from rough (low number) to fine (high number). Coarse grits remove more material, while fine grits are for polishing.
When Should You Sand?
Sanding is the right choice when:
- The wood is already flat and level, but you want a smooth finish.
- Working with veneered, plywood, or MDF surfaces.
- Removing old finish, paint, or light scratches.
- Preparing for painting or staining.
Sanding is also used between coats of finish to create an ultra-smooth surface.
The Key Differences: Sanding Vs Planing
Both sanding and planing change the surface of wood, but they do so in different ways. Let’s look at the main differences in a simple comparison.
| Aspect | Planing | Sanding |
|---|---|---|
| Material Removal | Removes thick layers quickly | Removes thin layers gradually |
| Finish Quality | Very flat, can be glass-smooth | Very smooth, not always perfectly flat |
| Best For | Rough, uneven lumber | Already flat wood, surface prep |
| Tools Used | Hand or power planes | Sandpaper, sanders |
| Skill Needed | Moderate to high | Low to moderate |
| Common Mistakes | Tear-out, gouges | Swirl marks, uneven sanding |
Advantages Of Planing
Planing offers some unique benefits that make it the preferred method for many tasks.
- Speed: Planes remove material much faster than sandpaper, especially on rough wood.
- Flatness: A sharp plane can produce perfectly flat surfaces, which is hard to achieve with sanding alone.
- Less Dust: Planing creates shavings, not fine dust, so your workspace stays cleaner.
- Natural Look: Planed surfaces show the true color and figure of wood, often more clearly than sanded ones.
- Eco-Friendly: No sandpaper waste or dust particles that can harm your lungs.
However, planing requires a sharp blade and some skill to avoid tear-out, especially on woods with changing grain directions.
Advantages Of Sanding
Sanding has its own strengths, making it essential in many woodworking projects.
- Smooth Finish: Sanding can create a silky-smooth surface, ideal for fine furniture.
- Versatility: Works on wood, plywood, MDF, and even finishes and paint.
- Control: You can remove as little or as much as needed by changing grits.
- Detail Work: Sandpaper can reach tight spots where planes cannot go.
- Easy to Learn: Most people can sand well with a bit of practice.
Keep in mind, sanding produces a lot of dust, which can be messy and unhealthy if you do not use a dust mask or proper ventilation.
Common Mistakes And How To Avoid Them
Mistakes happen, especially if you are new to woodworking. Here are some common problems with each method and how to prevent them.
Planing Mistakes
- Tear-Out: This happens when the plane blade lifts and tears wood fibers, especially on changing grain. To avoid it, make sure your blade is sharp, take thin shavings, and try planing with the grain.
- Gouging: Pressing too hard or using a dull blade can leave deep marks. Keep the plane flat and let the tool do the work.
- Uneven Surfaces: Not checking your progress can lead to dips and waves. Use a straightedge or ruler to check flatness often.
Sanding Mistakes
- Swirl Marks: Power sanders can leave circular marks if you stay too long in one spot. Keep the sander moving and use the right grit.
- Over-Sanding Edges: Sanding edges too much can round them off. Use light pressure and check your work regularly.
- Skipping Grits: Moving from very rough to very fine sandpaper too quickly leaves scratches. Progress through grits step by step for the best result.
Credit: www.youtube.com
Real-world Examples
Let’s look at some common woodworking scenarios and see which method works best.
Example 1: Flattening A Rough Board
You buy a rough-sawn board that is warped and uneven. Planing is your best choice. Start with a hand or power planer to flatten the board and make it straight. After planing, finish with sanding for a smooth touch.
Example 2: Refinishing An Old Table
You want to remove old finish and scratches from a table before painting. Sanding is safer, especially if the table is veneer or MDF. Start with coarse sandpaper to strip the finish, then move to finer grits for smoothness.
Example 3: Making A Cutting Board
When making a cutting board from hardwood, use a plane to flatten and level the boards before gluing them together. After assembly, sand the entire surface for a food-safe, smooth finish.
Tools You Need For Each Method
You do not need a full workshop to get started, but the right tool makes a big difference.
Essential Planing Tools
- Block plane: Good for small pieces and end grain.
- Jack plane: Versatile, works on medium to large boards.
- Electric planer: Fast for large surfaces.
- Sharpening stone: Keeps blades razor sharp.
Essential Sanding Tools
- Sandpaper: Various grits (60, 120, 220, 320).
- Sanding block: Gives even pressure when sanding by hand.
- Orbital sander: For flat, large surfaces.
- Detail sander: For corners and tight spots.
- Dust mask: Protects your lungs from fine dust.
A beginner often misses the importance of keeping plane blades sharp and changing sandpaper grits frequently. Dull blades and worn sandpaper can ruin your work and waste time.
Cost Comparison
Many people wonder which method is cheaper in the long run. Here’s a quick look at basic costs.
| Tool Type | Initial Cost | Maintenance/Consumables |
|---|---|---|
| Hand Plane | $40–$150 | Sharpening stones ($20–$50), occasional blade replacement |
| Electric Planer | $70–$300 | Blade replacement ($15–$40) |
| Orbital Sander | $30–$120 | Sandpaper sheets ($5–$25 per pack) |
| Sandpaper (Hand) | $5–$20 | Frequent replacement needed |
Over time, planing may save money on consumables, but it requires a higher upfront investment. Sanding is cheaper to start, but you’ll buy more sandpaper as you go.
Health And Safety
Both methods come with safety considerations. With planing, the risk is mainly from sharp blades. Always use protective gloves when handling blades and keep hands away from the cutting area.
Sanding creates fine dust, which can be harmful when breathed in. Always wear a dust mask or respirator, and use a vacuum or dust collection system. Eye protection is also important, especially with power sanders.
A non-obvious insight: Dust from sanding some woods, like oak or walnut, can cause allergies or skin irritation. Planing creates fewer airborne particles, making it safer for people with sensitivities.
Environmental Impact
If you care about the environment, planing creates almost no waste except for wood shavings, which can be composted or used as mulch. Sanding creates non-recyclable sandpaper waste and lots of dust, which is harder to deal with. For sustainable woodworking, planing wins.
Which Method Should You Choose?
The best choice depends on your project, skill, and tools.
- Choose planing for flattening, straightening, or removing lots of material from solid wood.
- Choose sanding for smoothing, detail work, finishing, and working with engineered woods or old finishes.
Sometimes, the best results come from combining both methods: plane first for flatness, then sand for smoothness. This is the approach many professionals take.
Credit: thewoodwhisperer.com
Frequently Asked Questions
What Is The Main Difference Between Sanding And Planing?
The main difference is that planing removes thicker layers to flatten and straighten wood, while sanding removes thin layers to smooth the surface. Planing is for shaping and leveling; sanding is for finishing.
Can I Skip Sanding If I Use A Planer?
No, you usually need to sand after planing. Even with a sharp plane, tiny marks or ridges remain. A quick sanding with fine-grit sandpaper gives the best finish before applying stain or paint.
Is Planing Better Than Sanding For Hardwood?
For flattening and thicknessing, planing is faster and gives a flatter result on hardwood. But for the final smooth finish, sanding is still needed. Some woods are more likely to tear out with a plane, so always test first.

Credit: www.youtube.com
What Safety Equipment Should I Use For Sanding And Planing?
For sanding, always use a dust mask or respirator and safety glasses. For planing, use gloves when handling blades. Keep your workspace clean and tools sharp to avoid accidents.
Can I Use Both Methods On The Same Project?
Yes, and many woodworkers do. Plane to flatten and level, then sand for a smooth, ready-to-finish surface. Combining both methods gives professional results.
If you want to dive deeper into woodworking techniques, you can learn more at the Wikipedia page on woodworking.
Choosing between sanding and planing isn’t just about tools—it’s about understanding wood, your project needs, and the finish you want. With the right approach, you’ll get the best from both worlds and create wood projects you’ll be proud of.
