Last Updated: March 20, 2026
Are you ready to tackle your concrete project with confidence? Mixing concrete in a mixer might seem tricky at first, but once you know the right steps, it becomes straightforward and even satisfying.
Whether you’re building a patio, driveway, or a simple garden path, getting the mix just right is key to a strong, lasting result. In this guide, you’ll discover easy-to-follow instructions that will save you time and effort—no guesswork, no wasted materials.
By the end, you’ll feel like a pro ready to mix concrete like a seasoned builder. Let’s dive in and make your next project a success!
Choosing Mixer And Materials
Choosing the right mixer and materials is the first step in mixing concrete correctly. The mixer must suit the project size and type. Materials must be fresh and of good quality for strong concrete. Proper selection helps achieve a smooth, durable mix.
Choosing The Right Mixer
Select a mixer based on the volume of concrete needed. For small projects, a portable drum mixer works well. Larger jobs may need a heavy-duty, motorized mixer. The mixer should turn smoothly and mix all ingredients evenly. Check the mixer’s capacity to avoid overloading.
Selecting Quality Materials
Concrete needs cement, sand, gravel, and water. Use clean, dry sand and gravel free from dirt. Cement should be fresh and stored in a dry place. Water must be clean and free of oil or chemicals. Good materials create strong and lasting concrete.
Measuring Materials Accurately
Measure each material carefully for the right concrete mix. Too much water weakens the concrete. Too little water makes it hard to mix. Use a consistent ratio of cement, sand, gravel, and water. Accurate measuring prevents cracks and improves strength.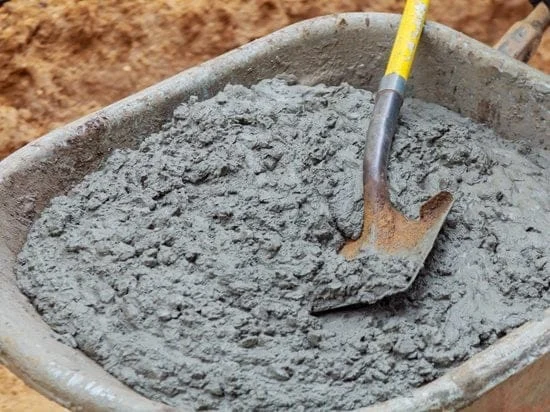
Credit: www.concretenetwork.com
Preparing The Mixer
Preparing the mixer is the first step to mix concrete properly. A well-prepared mixer ensures an even blend and saves time. Take a few moments to get the mixer ready before adding materials.
Check The Mixer’s Condition
Look over the mixer for any damage or dirt. Remove old concrete or debris from the drum. A clean drum prevents lumps and uneven mixing. Ensure the mixer rotates smoothly without strange noises.
Position The Mixer Correctly
Place the mixer on a flat, stable surface. This prevents tipping during use. Make sure it is close to the water source and materials. Position the mixer so you can easily add ingredients and pour out concrete.
Test The Mixer’s Rotation
Turn on the mixer to check its rotation. The drum should rotate steadily at a moderate speed. Avoid high speeds that can spill materials. Stop the mixer and prepare for the next step.
Prepare Water And Materials Nearby
Have water, cement, sand, and gravel ready near the mixer. This keeps the workflow smooth and quick. Measure materials carefully to keep the correct concrete mix ratio. Use a container to add water gradually during mixing.
Adding Ingredients Correctly
Adding ingredients correctly is key to mixing strong, workable concrete. Each component has a role. Proper order and measurements ensure a smooth mix. This step affects concrete’s strength and durability.
Careful measuring prevents weak or crumbly concrete. Too much water or cement changes the mix. Follow the right proportions for best results.
Measure Cement, Sand, And Gravel Accurately
Use a bucket or container to measure ingredients. Cement, sand, and gravel must be in correct ratios. Usually, one part cement, two parts sand, and three parts gravel work well. Precise measuring keeps the mix balanced and strong.
Add Dry Ingredients First
Put cement, sand, and gravel into the mixer before water. Mixing dry materials together first helps even distribution. It also stops clumps and lumps from forming. This step creates a uniform base for the concrete.
Pour Water Slowly While Mixing
Turn on the mixer and add water little by little. Adding water too fast makes the mix runny and weak. Pour just enough water to reach the right consistency. The concrete should be thick but workable, like thick oatmeal.
Mix Until The Blend Is Smooth
Let the mixer run for about three to five minutes. Watch the mixture closely. Stop when the concrete looks even and smooth. No dry patches or excess water should remain. Proper mixing time makes the concrete strong and easy to use.
Mixing Process Steps
Mixing concrete in a mixer is a simple task if you follow the right steps. Proper mixing ensures strong and durable concrete. This section explains the step-by-step process to mix concrete using a mixer.
Prepare The Mixer And Materials
First, clean the mixer to remove old concrete. This prevents clumps and weak spots. Gather all materials: cement, sand, gravel, and water. Measure them according to your recipe.
Add Water And Cement First
Start the mixer and add water into the drum. Then add cement slowly. Mixing water and cement first helps form a smooth paste. This paste coats the sand and gravel better.
Introduce Sand And Gravel
Next, add sand and gravel to the mixer. Add them slowly to avoid clumping. Let the mixer run to blend all dry materials with the cement paste. This creates a consistent mix.
Mix Until Uniform
Allow the mixer to run for about three to five minutes. Watch for a smooth, even texture with no dry patches. Stop the mixer and check the mix if needed. Add small amounts of water if the mix is too dry.
Unload The Concrete
Once mixed, tilt the drum to pour concrete into a wheelbarrow or container. Use the concrete quickly before it starts to harden. Clean the mixer immediately to keep it ready for the next job.
Checking Mix Consistency
Checking mix consistency is a vital step in mixing concrete properly. It ensures the concrete is workable and strong. The right mix consistency affects the final durability and finish of your project.
Too dry or too wet concrete can cause problems. Dry mix leads to poor bonding and cracks. Wet mix causes weak concrete and longer drying time. It is important to find the perfect balance for your mix.
Visual Inspection
Look at the concrete mix closely after mixing. It should look uniform and smooth without dry patches. The mix must not be crumbly or separate easily. A consistent grey color with no lumps shows good mixing.
Slump Test
The slump test measures concrete workability. Fill a cone-shaped mold with fresh concrete. Remove the cone and observe how much the concrete slumps. A moderate slump means good consistency. Too high or too low slump indicates incorrect water content.
Touch And Feel
Squeeze a handful of concrete to check texture. It should feel moist but not sticky or runny. The mix must hold shape without crumbling. This simple test helps confirm proper water-to-cement ratio.
Adjusting Mix Consistency
Add small amounts of water or dry mix to adjust consistency. Mix thoroughly after each addition. Avoid adding too much water as it weakens concrete. Make adjustments slowly and test often for best results.
Credit: nmreadymix.com
Cleaning And Maintenance Tips
Proper cleaning and maintenance keep your concrete mixer working well. Dirt, concrete residue, and moisture can cause damage and reduce its life. Regular care saves time and money by avoiding repairs.
Follow these simple tips for cleaning and maintaining your mixer after each use. Clean parts work better and mix concrete more evenly. Maintenance prevents rust and mechanical problems.
Cleaning The Drum After Use
Remove leftover concrete before it hardens inside the drum. Use water and a stiff brush to scrub the drum’s interior. Run the mixer with water for a few minutes to clear residue. Repeat if needed until the drum looks clean.
Lubricating Moving Parts
Keep all moving parts well-lubricated to avoid wear and tear. Apply grease to the drum pivot and motor bearings regularly. Check the mixer manual for the right type of lubricant. Lubrication helps the mixer run smoothly and quietly.
Inspecting For Wear And Damage
Look over the mixer for cracks, rust, or loose bolts. Tighten any loose parts immediately to prevent accidents. Replace worn-out parts like belts, blades, or seals on time. Early detection of problems keeps the mixer safe and reliable.
Storing The Mixer Correctly
Store the mixer in a dry, covered area to protect it from rain and dust. Cover the drum with a tarp if needed to keep moisture out. Keep the mixer off the ground to avoid rust and dirt buildup. Proper storage extends the life of your mixer.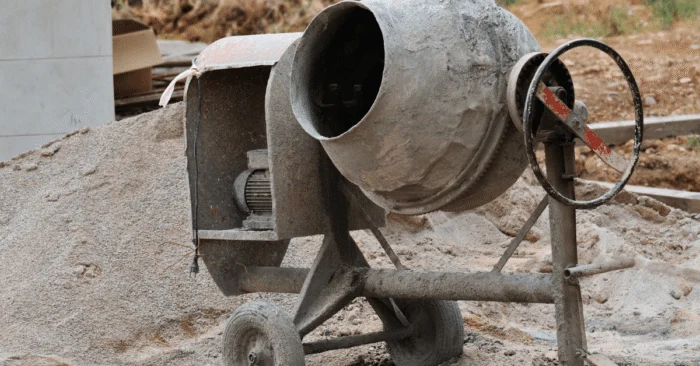
Credit: www.baseconcrete.co.uk
Conclusion
Mixing concrete in a mixer is simple with the right steps. Always measure your ingredients carefully for best results. Add water gradually to avoid a runny mix. Keep the mixer rotating until the concrete looks smooth and even. Clean your mixer right after use to prevent hard buildup.
Following these tips ensures strong, durable concrete every time. Practice makes mixing easier and more efficient. Ready to start your concrete project with confidence?
Frequently Asked Questions
Mix concrete in a mixer using a 1:2:3 ratio—one part cement, two parts sand, and three parts gravel. Add water gradually for desired consistency.
A typical 3-4 cubic feet mixer can handle 2 to 3 bags of 80lb concrete per batch. Avoid overloading for best results.
Add water to the mixer first, then pour cement and aggregates. Mix for 3-5 minutes until uniform. Avoid overloading the mixer. Adjust water for consistency. Stop mixing once the concrete is smooth and evenly blended.
The 4 2 1 rule for concrete means 4 parts aggregate, 2 parts sand, and 1 part cement by volume. Mix with water for desired consistency.
Use about 0. 45 parts water to 1 part cement for a workable concrete mix.
Mix concrete for 3 to 5 minutes until it is smooth and uniform.
Related reading: How to Mix Concrete in a Bucket Without a Mixer.
Related reading: How to Use a Demolition Hammer to Remove Tile.
{ “@context”: “https://schema.org”, “@type”: “Article”, “headline”: “How Do You Mix Concrete in a Mixer: Step-by-Step Guide for Perfect Mix”, “description”: “How do you mix concrete in a mixer explains the process of combining cement, water, and aggregates evenly for a consistent and workable concrete mixture.”, “url”: “https://www.powertoolstoday.com/how-do-you-mix-concrete-in-a-mixer/”, “datePublished”: “2025-11-09”, “dateModified”: “2026-03-18”, “author”: { “@type”: “Organization”, “name”: “Power Tools Today”, “url”: “https://www.powertoolstoday.com” }, “publisher”: { “@type”: “Organization”, “name”: “Power Tools Today”, “url”: “https://www.powertoolstoday.com” }, “mainEntityOfPage”: { “@type”: “WebPage”, “@id”: “https://www.powertoolstoday.com/how-do-you-mix-concrete-in-a-mixer/” }, “image”: { “@type”: “ImageObject”, “url”: “https://www.powertoolstoday.com/wp-content/uploads/2025/11/How-Do-You-Mix-Concrete-in-a-Mixer-Step-by-Step-Guide-for-Perfect-Mix-1024×576.webp” } }