Last Updated: March 20, 2026
Are your drill bits feeling dull and struggling to cut through materials? Instead of tossing them out and buying new ones, you can save time and money by sharpening them yourself—right at home, by hand.
You don’t need expensive machines or special tools to bring your drill bits back to life. With just a few simple steps and some patience, you’ll learn how to restore their sharpness and improve your drilling precision. Keep reading, and you’ll discover easy, practical techniques that anyone can master to make your drill bits work like new again.

Credit: www.wikihow.com
Tools Needed
Sharpening drill bits by hand needs a few simple tools. These tools help you work safely and get the best results. Prepare everything before you start. It saves time and makes the task easier.
Bench Grinder Or Hand File
A bench grinder is the best tool for fast sharpening. It spins the bit against a grinding wheel. If you do not have a grinder, use a hand file. A file takes more time but works well for small jobs.
Safety Goggles
Wear safety goggles to protect your eyes. Grinding or filing can send small metal pieces flying. Goggles keep your eyes safe from sparks and dust.
Work Gloves
Use gloves to protect your hands. Drill bits get hot while sharpening. Gloves also stop cuts from sharp edges.
Marker Or Pencil
Mark the drill bit edges with a marker or pencil. This helps you see where to sharpen. It keeps the angle even and accurate.
Clamp Or Vise
Hold the drill bit firmly with a clamp or vise. It keeps the bit steady during sharpening. This control prevents slips and injuries.
Credit: www.wikihow.com
Choosing The Right Angle
Choosing the right angle to sharpen your drill bits is key to effective drilling. The angle affects how the bit cuts through different materials. Selecting the correct angle improves cutting speed and extends the bit’s life. It also prevents overheating and dull edges. Understanding angles helps you sharpen drill bits by hand with precision and confidence.
Angles For Soft Materials
Use a sharper angle of about 118 degrees for soft materials. This includes wood, plastic, aluminum, brass, and copper. The sharper angle creates a more aggressive cutting edge. It allows the bit to cut quickly and cleanly. A steep angle reduces the chance of material tearing or melting. This angle helps you work faster on softer surfaces.
Angles For Hard Materials
For hard materials, choose a flatter angle near 135 degrees. This angle works well for steel, stainless steel, and cast iron. A flatter angle makes the cutting edge stronger and more durable. It spreads the cutting force over a larger area. This reduces wear and overheating during drilling. The flatter angle helps keep the drill bit sharp longer on tough materials.
Manufacturer Recommendations
Always check the drill bit manufacturer’s guidelines when possible. They provide specific angle recommendations for their bits. Following these suggestions ensures the best performance and safety. Manufacturers may also recommend angles for specialty drill bits. Using their advice helps maintain warranty and guarantees. Keep this information handy before sharpening any drill bit.
Preparing The Drill Bit
Preparing the drill bit is the first step to sharpen it by hand. This stage sets the foundation for precise and safe sharpening. Proper preparation helps extend the life of your drill bit and improves cutting performance. Take your time to ready the drill bit before you start grinding.
Securing The Bit
Hold the drill bit firmly to avoid slipping. Use a vise or clamp to secure it tightly. Keep the bit steady to ensure a consistent sharpening angle. A loose bit can cause uneven edges and reduce safety. Position the bit so the cutting edge faces you clearly.
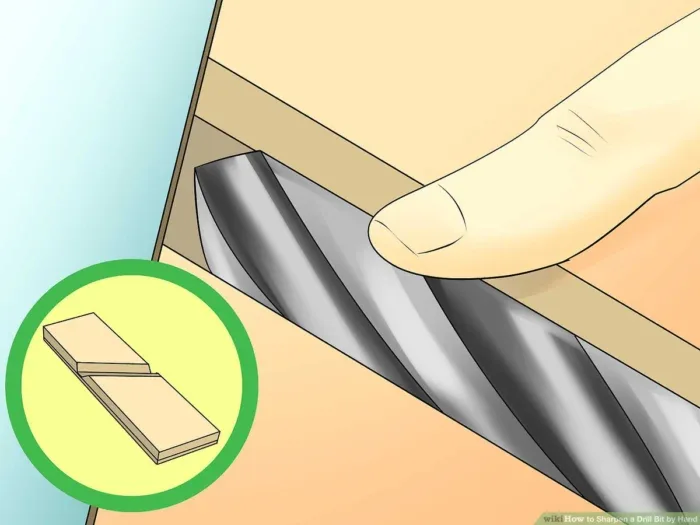
Inspecting The Cutting Edges
Check the cutting edges carefully before sharpening. Look for chips, dull spots, or uneven wear. Identify which edges need the most attention. Clean the bit to remove dirt and debris for a better view. A clear inspection helps guide the sharpening process effectively.
Credit: www.youtube.com
Sharpening Techniques
Sharpening drill bits by hand requires careful techniques to restore their cutting edge. The goal is to make the bit sharp enough for clean, precise holes. Proper sharpening increases the drill bit’s lifespan and improves performance.
Below are simple sharpening methods you can try at home. These focus on keeping control and accuracy during the sharpening process.
Using A Hand File
Select a fine-toothed hand file for best results. Hold the drill bit firmly in a vise or clamp. File the cutting edge gently, moving the file in one direction. Avoid using a back-and-forth sawing motion. Check the bit often to maintain the original shape. File both cutting edges evenly to balance the bit.
Maintaining Consistent Angles
Keep the drill bit at the correct angle to sharpen it well. The common angle is 118 degrees for general use. Use a protractor or angle guide to check the angle. Consistency helps the bit cut smoothly and lasts longer. Slight angle changes can cause poor drilling and bit damage.
Freehand Sharpening Tips
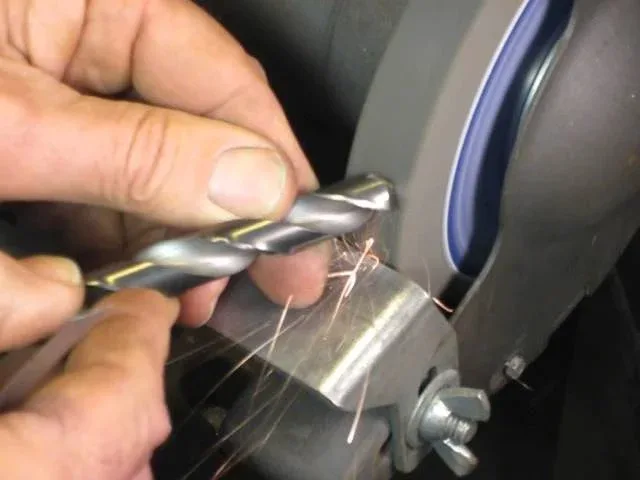
Freehand sharpening needs steady hands and focus. Use a small bench grinder or sharpening stone. Lightly touch the bit’s edge against the tool. Watch for sparks or bright spots; these show where you are grinding. Rotate the bit slowly to sharpen all edges. Rest often to avoid overheating the metal.
Checking Sharpness
Checking the sharpness of your drill bits is a vital step after sharpening. It ensures your work will be precise and efficient. Dull bits cause overheating and damage the material. Sharp bits cut cleaner and last longer. Use simple methods to test sharpness at home. These checks save time and improve your results.
Visual Inspection
Begin by closely examining the drill bit’s tip. Look for smooth, even edges on both cutting lips. The cutting edges should be symmetrical and free of chips or dents. Shiny spots or rough areas mean the bit needs more sharpening. Check the angle of the tip; it should match your desired sharpness angle. A consistent angle helps the bit cut properly and prolongs its life.
Testing The Bit
Next, test the drill bit on scrap material like wood or plastic. Hold the bit and apply light pressure while drilling. A sharp bit will bite into the material quickly and smoothly. If it skids or struggles, it needs more sharpening. Also, listen for a clean, steady sound without grinding or squealing. These signs show the bit is sharp and ready to use.
Safety Tips
Sharpening drill bits by hand can be simple and effective. Safety remains the top priority throughout the process. Taking proper precautions protects you from accidents and injuries. Follow these key safety tips to keep your work area safe.
Protective Gear
Always wear safety glasses to protect your eyes from metal shards. Use gloves to shield your hands from sharp edges. A dust mask helps prevent inhaling fine metal particles. Wear sturdy clothing to avoid cuts or burns. Proper gear reduces the risk of injury while sharpening.
Handling Sharp Tools
Hold the drill bit firmly but do not squeeze too hard. Keep fingers away from the grinding surface. Use steady, controlled movements to avoid slips. Never rush the sharpening process. Inspect tools before use to ensure they are in good condition. Careful handling ensures safe sharpening and better results.
Conclusion
Sharpening drill bits by hand saves money and extends tool life. Practice steady hand movements and check the angles often. Use a proper file or grinder for best results. Keep safety in mind to avoid injuries. Regular sharpening improves drilling speed and accuracy.
With patience, anyone can maintain sharp bits at home. Try it yourself and enjoy smoother, cleaner holes. Simple steps lead to better performance every time.
Frequently Asked Questions
Typically, sharpen at a 118-degree angle for general use and 135 degrees for harder materials.
Use a bench grinder with steady hands and wear safety goggles to protect your eyes.
Secure the drill bit in a vise. Use a hand file to sharpen the cutting edges at the correct angle. File evenly until sharp. Check symmetry and repeat as needed.
Sharpen drill bits at a 118-degree angle for general use. Use 135 degrees for harder materials like steel. Maintain the correct lip angle for efficient cutting.
Hold the drill bit firmly. Use a bench grinder or file at a 59-degree angle. Rotate the bit evenly. Watch for sparks to ensure proper sharpening. Stop frequently to check the edge.
The easiest way to sharpen a drill bit is by using a bench grinder or a sharpening tool. Secure the bit, hold it at a 59-degree angle, and gently grind the tip until sharp. Check for symmetry and remove burrs for best results.
Related reading: How to Sharpen Drill Bits on a Bench Grinder.
{ “@context”: “https://schema.org”, “@type”: “Article”, “headline”: “How to Sharpen Drill Bits by Hand: Easy Steps for Precision”, “description”: “Learn how to sharpen drill bits by hand with simple techniques that restore cutting edges and improve drilling precision for various materials.”, “url”: “https://www.powertoolstoday.com/how-to-sharpen-drill-bits-by-hand/”, “datePublished”: “2025-11-09”, “dateModified”: “2026-03-18”, “author”: { “@type”: “Organization”, “name”: “Power Tools Today”, “url”: “https://www.powertoolstoday.com” }, “publisher”: { “@type”: “Organization”, “name”: “Power Tools Today”, “url”: “https://www.powertoolstoday.com” }, “mainEntityOfPage”: { “@type”: “WebPage”, “@id”: “https://www.powertoolstoday.com/how-to-sharpen-drill-bits-by-hand/” }, “image”: { “@type”: “ImageObject”, “url”: “https://www.powertoolstoday.com/wp-content/uploads/2025/11/How-to-Sharpen-Drill-Bits-by-Hand-Easy-Steps-for-Precision-1024×576.webp” } }nn