Last Updated: March 21, 2026
Are your drill bits losing their edge and making your projects harder than they should be? You don’t have to toss them out or rush to buy new ones.
With a bench grinder and a little know-how, you can bring those dull drill bits back to life quickly and easily. Sharpening your own drill bits saves you money, boosts your tool’s performance, and gives you the confidence to tackle any task with precision.
Keep reading, and you’ll learn simple steps to sharpen your drill bits like a pro—right at your workbench.
Choosing The Right Grinder
Choosing the right grinder is the first step to sharpening drill bits effectively. The grinder you select affects the quality of your sharpening and the life of your drill bits.
A bench grinder designed for metalwork gives better control and precision. It also reduces the risk of overheating the drill bit, which can ruin its hardness.
Wheel Type And Grit
Pick a grinding wheel suitable for sharpening drill bits. A medium to fine grit wheel works best. It smooths the edges without removing too much metal.
Aluminum oxide wheels are common and good for most drill bits. Silicon carbide wheels work well for harder metals.
Motor Power And Speed
Choose a grinder with a motor powerful enough to handle drill bit sharpening. A motor with 1/3 to 1/2 horsepower is usually enough.
Look for a grinder with adjustable speed or a speed around 3,000 RPM. This helps avoid overheating the drill bits during sharpening.
Safety Features
Select a grinder with safety guards and eye shields. These protect you from sparks and debris.
Tool rests help keep drill bits steady while sharpening. They improve accuracy and reduce accidents.

Credit: www.youtube.com
Preparing Drill Bits
Preparing drill bits before sharpening ensures safety and better results. Proper preparation helps maintain the drill bit’s shape and cutting ability. Follow clear steps to get your drill bits ready for the bench grinder.
Inspect The Drill Bit
Check the drill bit for damage or wear. Look for chips, cracks, or uneven edges. Only sharpen bits that are still usable. Damaged bits may break during sharpening.
Clean The Drill Bit
Remove dirt, grease, and rust from the bit surface. Use a wire brush or cloth with a bit of oil. Clean bits sharpen more evenly and safely.
Secure The Drill Bit
Hold the drill bit firmly before sharpening. Use a clamp or vise if needed. A steady grip prevents accidents and improves precision.
Wear Safety Gear
Put on safety glasses and gloves. Protect your eyes from sparks and debris. Gloves shield your hands from heat and sharp edges.
Setting Grinder Speed And Wheel Type
Setting the right grinder speed and choosing the correct wheel type are key steps. These choices affect the quality and safety of sharpening drill bits on a bench grinder. The right speed prevents overheating and damage to the drill bit.
Selecting the proper grinding wheel helps remove metal evenly. It also extends the life of both the bit and the wheel. Understanding these factors improves sharpening results.
Choosing The Correct Grinder Speed
Most bench grinders have variable speeds. A speed between 3,000 and 3,600 RPM works well for sharpening drill bits. This speed balances fast metal removal and heat control.
Too high a speed causes the bit to overheat. Overheating can ruin the drill’s hardness. Too slow a speed makes sharpening take longer and may wear the wheel unevenly.
Selecting The Right Grinding Wheel
Grinding wheels come in different materials and grits. For drill bits, a wheel made of aluminum oxide is best. It works well on high-speed steel bits.
Choose a medium grit, around 60 to 80. This grit removes metal quickly but leaves a smooth edge. Avoid wheels that are too coarse; they can damage the bit.
For carbide bits, a silicon carbide wheel is better. It handles the hard material without dulling quickly. Always check the wheel’s compatibility with the bit material.
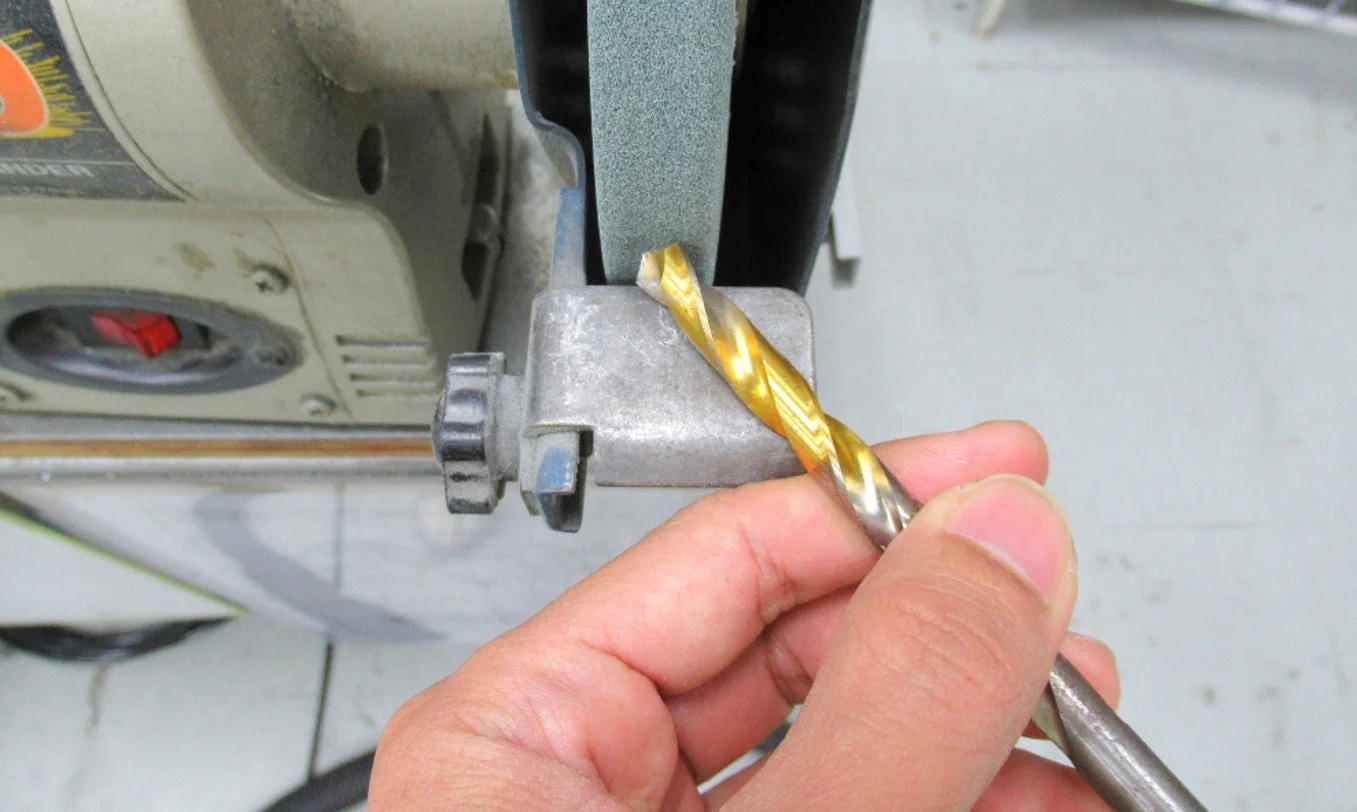
Positioning The Drill Bit Correctly
Positioning the drill bit correctly is vital for effective sharpening. The right angle and alignment ensure a sharp, balanced cutting edge. Poor positioning leads to uneven edges and weak drill bits.
Focus on holding the drill bit steady and close to the grinding wheel. The tip of the bit must face the wheel at the correct angle. This setup allows the wheel to remove material evenly from both cutting lips.
Aligning The Drill Bit Tip
Hold the drill bit so its tip is flat against the grinding wheel. The cutting edges should be horizontal and face the wheel directly. This position lets you grind the edges symmetrically.
Maintaining The Correct Angle
Set the drill bit at about 60 degrees to the grinding wheel. This angle matches the original cutting angle of most drill bits. Keep this angle steady throughout the sharpening process.
Using The Tool Rest For Support
Rest the drill bit on the grinder’s tool rest. This support keeps the bit stable during sharpening. Adjust the rest to match the angle of the drill bit tip for better control.
Rotating The Drill Bit Evenly
Turn the drill bit slowly as you grind. This rotation ensures both cutting edges get sharpened evenly. Avoid grinding too long on one side to maintain balance.
Sharpening At The Proper Angle
Sharpening drill bits at the proper angle is key to their performance. The right angle ensures the bit cuts smoothly and lasts longer. Too steep or too flat an angle can damage the bit or make drilling harder.
Most twist drill bits require a sharpening angle between 55 and 65 degrees. This angle helps the bit cut efficiently through wood, metal, or plastic. Maintaining this angle while grinding prevents overheating and dulling.
Proper angle sharpening keeps the cutting edges balanced. Balanced edges help the drill bit stay centered and reduce wobbling. It also lowers the risk of breaking the bit during use.
Understanding The Correct Sharpening Angle
Different drill bits need different angles. High-speed steel bits usually sharpen at about 60 degrees. Soft materials like wood may require a slightly sharper angle. Check the manufacturer’s recommendations for best results.
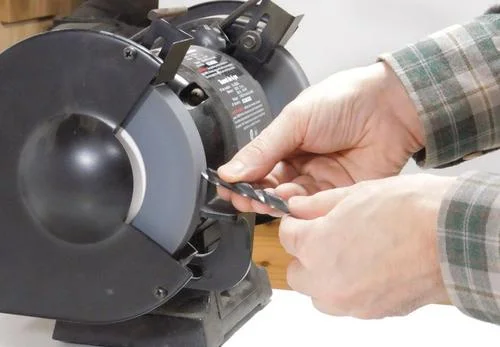
How To Hold The Drill Bit At The Right Angle
Hold the drill bit firmly and steady. Position it so the cutting edge meets the grinder wheel at the set angle. Use your hand or a jig to keep the bit steady. Move slowly to avoid mistakes and overheating.
Tips To Maintain The Angle During Grinding
Use light pressure on the drill bit against the grinder. Rotate the bit evenly to sharpen both edges. Stop often to check the angle and cool the bit if needed. A cooling break prevents damage from heat.
Credit: simpleweld.com
Maintaining Symmetry On Both Cutting Edges
Maintaining symmetry on both cutting edges is crucial for sharpening drill bits correctly. Symmetry ensures the drill bit cuts evenly, reducing wobble and improving drilling accuracy. Uneven edges cause the drill to wander, making holes less precise and increasing wear.
Pay attention to the shape and angle of each cutting edge. Both edges should be identical in size and angle for smooth, efficient drilling. This balance helps the drill bit remove material evenly and prevents overheating or damage.
Check The Angles Carefully
Use a simple angle gauge or protractor to measure the cutting edges. The typical angle for most drill bits is around 59 to 60 degrees. Match the angle on both edges to keep the bit balanced. Small differences can cause uneven drilling and shorten the bit’s life.
Grind Both Edges Equally
Hold the drill bit steady and grind one edge with light, even strokes. Then flip the bit and grind the other edge with the same pressure and time. This method keeps both edges symmetrical and sharp. Avoid grinding one edge more than the other to prevent imbalance.
Use A Marker To Track Progress
Mark the cutting edges with a permanent marker before grinding. The marker wears off as you grind, showing where material is removed. This helps keep track of the grinding area and maintain even sharpening on both edges. Stop grinding once the marker is gone evenly.
Cooling The Drill Bit While Grinding
Cooling the drill bit while grinding is a crucial step in the sharpening process. The friction from the bench grinder creates a lot of heat. This heat can damage the drill bit’s metal, making it less effective and prone to breaking. Proper cooling helps keep the bit strong and sharp.
Without cooling, the metal can become too hot and lose its hardness. This reduces the drill bit’s lifespan and cutting ability. Cooling also prevents warping and discoloration of the bit. It ensures the bit stays safe to use and performs well during drilling tasks.
Why Cooling Matters During Grinding
Grinding a drill bit generates heat quickly. High temperatures can ruin the metal’s structure. Cooling stops the bit from overheating. It keeps the bit’s edge sharp and durable. This step saves time and money by extending the bit’s life.
Methods To Cool The Drill Bit
Dip the drill bit in water frequently while grinding. Use a small container filled with water nearby. After a few seconds of grinding, cool the bit in water. Avoid soaking it for too long to prevent rusting. Some users prefer using cutting oil for better cooling and lubrication.
Signs The Drill Bit Needs Cooling
If the drill bit gets too hot, it may glow red or blue. This color change shows overheating. The bit may also feel very hot to touch. Stop grinding and cool the bit immediately. Cooling prevents damage and keeps the sharpening process safe.
Testing Sharpness And Final Touches
Testing the sharpness and adding final touches are crucial steps after sharpening drill bits on a bench grinder. These steps ensure the bit performs efficiently and safely. A sharp drill bit cuts cleanly and reduces effort during drilling.
After grinding, the bit may need slight adjustments. Checking sharpness helps confirm if the bit is ready for use or needs more work. Final touches improve durability and accuracy.
Checking The Cutting Edge
Hold the drill bit under bright light. Look closely at the cutting edges. Both edges should have a smooth and even finish. No chips or rough spots should appear. The edges must be symmetrical for balanced drilling.
Performing The Paper Test
Use a piece of paper to test sharpness. Gently press the drill bit against the paper. A sharp bit will cut or pierce the paper easily. If it drags or tears, it needs more sharpening. This simple test shows the cutting ability clearly.
Inspecting The Angle
Check the angle of the drill bit’s tip. The correct angle depends on the bit type but usually ranges between 59 to 65 degrees. A consistent angle improves drilling performance. Use a protractor or angle gauge for accuracy.
Smoothing Rough Spots
Use a fine-grit sharpening stone or sandpaper to smooth any rough areas. Lightly rub the cutting edges to remove burrs. This step prevents damage to work materials and extends bit life.
Cleaning The Drill Bit
Remove grinding dust and debris with a clean cloth. You can use a bit of oil to protect the metal from rust. Clean bits last longer and drill better.
Credit: woodgears.ca
Frequently Asked Questions
What Is The Best Way To Sharpen Drill Bits?
Use a bench grinder to sharpen drill bits by holding the bit at the correct angle and grinding evenly. Maintain the original tip angle, usually 118°. Cool the bit frequently to avoid overheating. Finish by sharpening both cutting edges symmetrically for efficient drilling.
Can You Sharpen A Drill Bit With An Angle Grinder?
Yes, you can sharpen a drill bit with an angle grinder. Use steady hands and maintain the correct angle for best results. Avoid overheating the bit to preserve hardness.
What Angle Do You Sharpen Drill Bits At?
Sharpen drill bits at a 118-degree angle for general use. For harder materials, use a 135-degree angle. Maintain consistent angle while sharpening.
How To Use Drill Bit Sharpener For Grinder?
Hold the drill bit at a 59-degree angle against the grinder wheel. Rotate it evenly to sharpen both edges. Cool frequently to avoid overheating.
How Do You Sharpen Drill Bits On A Bench Grinder Safely?
Hold the drill bit firmly and keep it cool by dipping in water often while grinding.
Conclusion
Sharpening drill bits on a bench grinder saves money and time. It keeps bits sharp for clean, precise drilling. Practice steady hand movements and correct angles for best results. Always wear safety gear to protect your eyes and hands. Regular sharpening extends bit life and improves performance.
Try this simple method to maintain your drill bits easily. The more you practice, the better your sharpening skills become. Give your drill bits a new edge today.
Related reading: what step drill bits are used for.
Related reading: Water Stone vs Oil Stone for Sharpening.
{ “@context”: “https://schema.org”, “@type”: “Article”, “headline”: “How to Sharpen Drill Bits on a Bench Grinder: Quick & Easy Guide”, “description”: “Learn how to sharpen drill bits on a bench grinder by understanding the process, tools, and techniques to restore cutting edges effectively and safely.”, “url”: “https://www.powertoolstoday.com/sharpen-drill-bits-bench-grinder/”, “datePublished”: “2025-12-25”, “dateModified”: “2026-03-18”, “author”: { “@type”: “Organization”, “name”: “Power Tools Today”, “url”: “https://www.powertoolstoday.com” }, “publisher”: { “@type”: “Organization”, “name”: “Power Tools Today”, “url”: “https://www.powertoolstoday.com” }, “mainEntityOfPage”: { “@type”: “WebPage”, “@id”: “https://www.powertoolstoday.com/sharpen-drill-bits-bench-grinder/” }, “image”: { “@type”: “ImageObject”, “url”: “https://www.powertoolstoday.com/wp-content/uploads/2025/11/how-to-sharpen-drill-bits-on-a-bench-grinder.jpg” } }{ “@context”: “https://schema.org”, “@type”: “Article”, “headline”: “How to Sharpen Drill Bits on a Bench Grinder: Quick & Easy Guide”, “description”: “Learn how to sharpen drill bits on a bench grinder by understanding the process, tools, and techniques to restore cutting edges effectively and safely.”, “url”: “https://www.powertoolstoday.com/sharpen-drill-bits-bench-grinder/”, “datePublished”: “2025-12-25”, “dateModified”: “2026-03-19”, “author”: { “@type”: “Organization”, “name”: “Power Tools Today”, “url”: “https://www.powertoolstoday.com” }, “publisher”: { “@type”: “Organization”, “name”: “Power Tools Today”, “url”: “https://www.powertoolstoday.com” }, “mainEntityOfPage”: { “@type”: “WebPage”, “@id”: “https://www.powertoolstoday.com/sharpen-drill-bits-bench-grinder/” }, “image”: { “@type”: “ImageObject”, “url”: “https://www.powertoolstoday.com/wp-content/uploads/2025/11/how-to-sharpen-drill-bits-on-a-bench-grinder.jpg” } }nnnn