Last Updated: March 21, 2026
Are you wondering if you can paint pegboard to give your space a fresh, personalized look? The answer is yes—and it’s easier than you might think.
Whether you want to brighten up a dull workshop wall or add a splash of color to your craft room, painting pegboard can transform it from plain to perfect. But before you dive in, there are a few simple steps you should know to make sure your paint job looks great and lasts long.
Keep reading to discover how you can paint your pegboard like a pro, avoid common mistakes, and get the best results every time. Your next DIY upgrade is just a few coats away!
Credit: www.thekitchn.com
Choosing Paint For Pegboard
Choosing the right paint for pegboard matters for durability and look. Pegboard is usually made of wood or fiberboard with many holes. This surface needs paint that sticks well and can handle wear. The paint also should protect the board from moisture and stains.
Not all paints work well on pegboard. Some paints can clog the holes or peel off easily. Picking the right type helps keep the pegboard functional and attractive for a long time.
Types Of Paint Suitable For Pegboard
Latex paint is a common choice for pegboard. It dries fast and cleans up with water. It also sticks well to wood surfaces. Glossy or semi-gloss latex paint adds a smooth finish that resists dirt.
Acrylic paint works well too. It is strong and flexible. Acrylic paint resists cracking and peeling. It also handles humidity better than many other paints.
Spray paint can give an even coat without clogging holes. Use spray paint designed for wood or multi-surfaces. It dries quickly and covers well in hard-to-reach spots.
Choosing The Right Finish
Glossy paint finish protects pegboard from moisture and stains. A shiny surface is easier to clean. Semi-gloss paint also offers good protection with less shine.
Matte or flat finishes absorb dirt and are harder to clean. These finishes can wear out faster on pegboards.
Pick a finish that balances appearance and durability. A smooth, shiny surface keeps pegboard looking new longer.
Preparing Pegboard For Painting
Clean the pegboard to remove dust and dirt. Use a damp cloth and let it dry. Sand the surface lightly for better paint adhesion.
Fill any rough spots with wood filler. Avoid filling the holes to keep pegboard functional. Prime the pegboard with a suitable wood primer to seal the surface.
Priming helps paint stick better and last longer. It also prevents wood stains from showing through the paint.
Preparing The Pegboard Surface
Preparing the pegboard surface is the key step before applying any paint. A clean and smooth surface helps the paint stick better and last longer. Take time to get rid of dust, smooth out rough areas, and protect the holes. These small efforts improve the final look and durability of the painted pegboard.
Cleaning And Dust Removal
Start by wiping the pegboard with a dry cloth to remove loose dust. Use a damp cloth to clean any sticky or oily spots. Avoid soaking the board to prevent warping. Let the pegboard dry completely before moving on. Clean surfaces allow the paint to bond properly and avoid peeling later.
Sanding For Better Adhesion
Lightly sand the pegboard with fine-grit sandpaper. Focus on rough or glossy spots that might resist paint. Sanding creates a slightly rough surface, helping the paint grip firmly. After sanding, wipe off the dust with a dry cloth. This step ensures the paint sticks evenly and reduces flaking.
Protecting Pegboard Holes
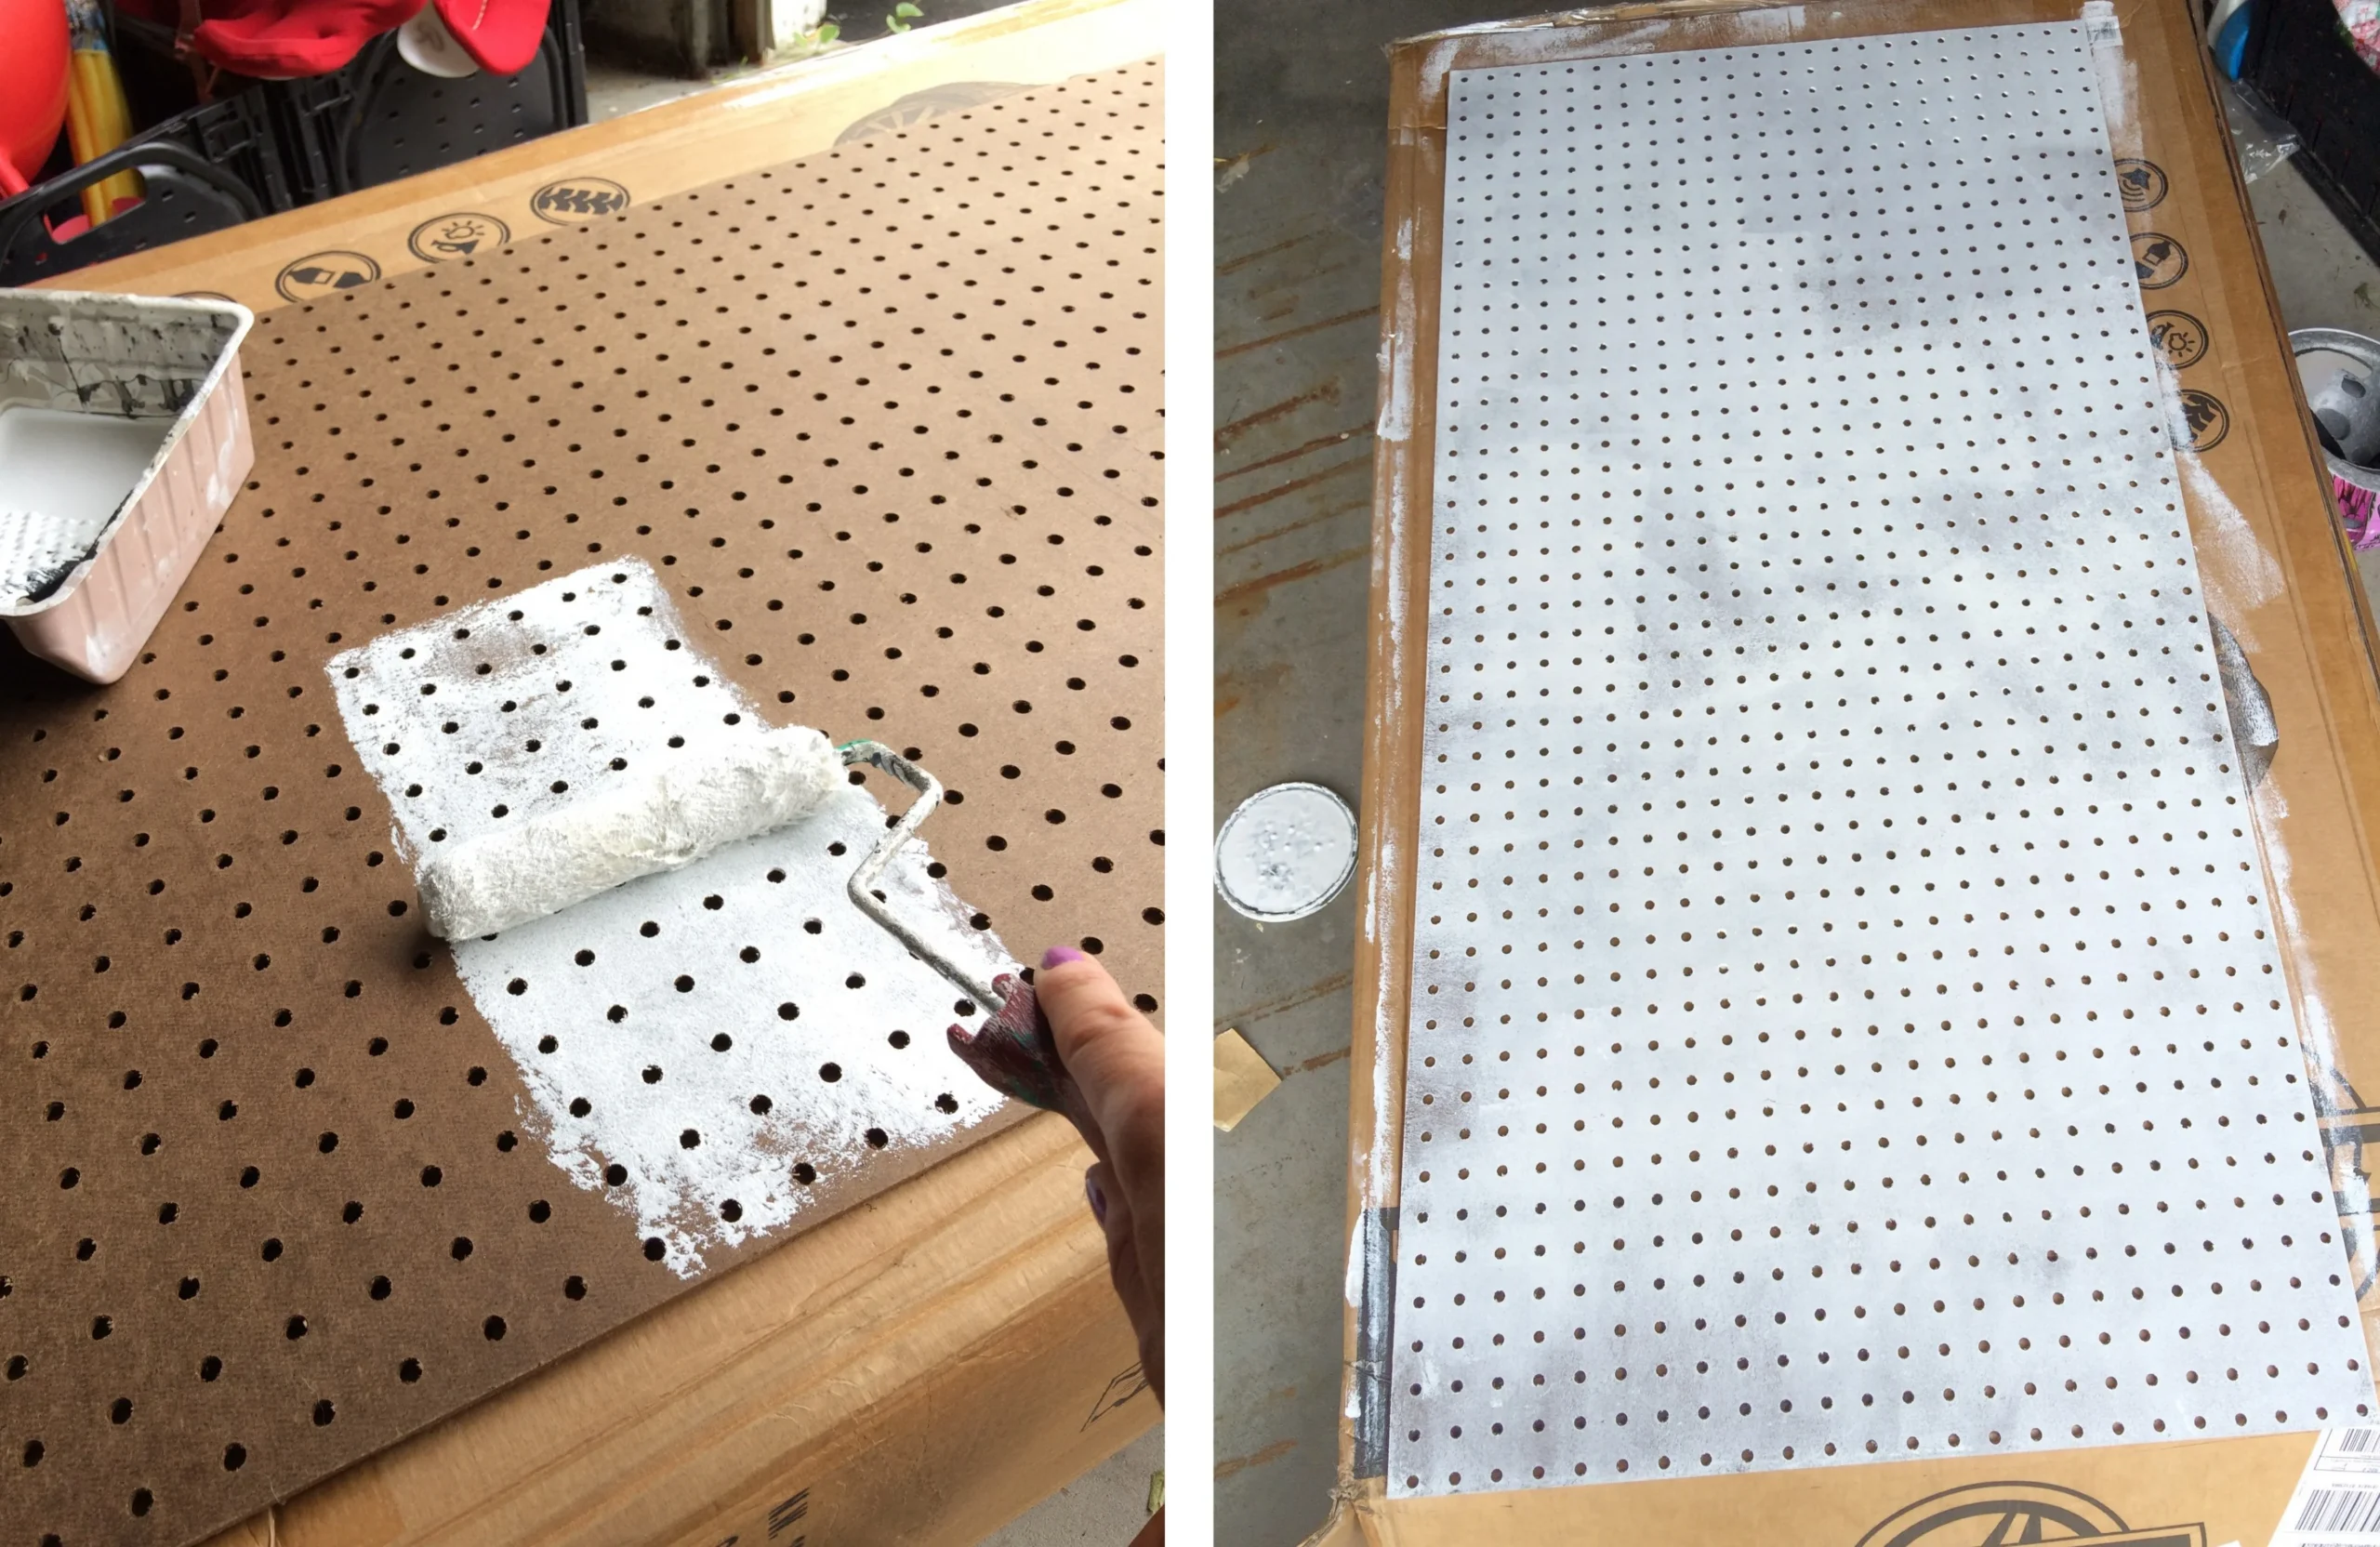
Cover the pegboard holes to keep paint out of them. Use painter’s tape or small pieces of tape over each hole. Press the tape firmly to seal the edges. This prevents clogs and keeps the holes clean for hooks and accessories. Remove the tape carefully after the paint dries.
Painting Techniques
Painting pegboard requires specific techniques for a smooth, durable finish. Proper methods prevent paint clogging in holes and ensure an even coat. Choose the right tools based on the look and effort you want. Here are effective painting techniques to try on your pegboard.
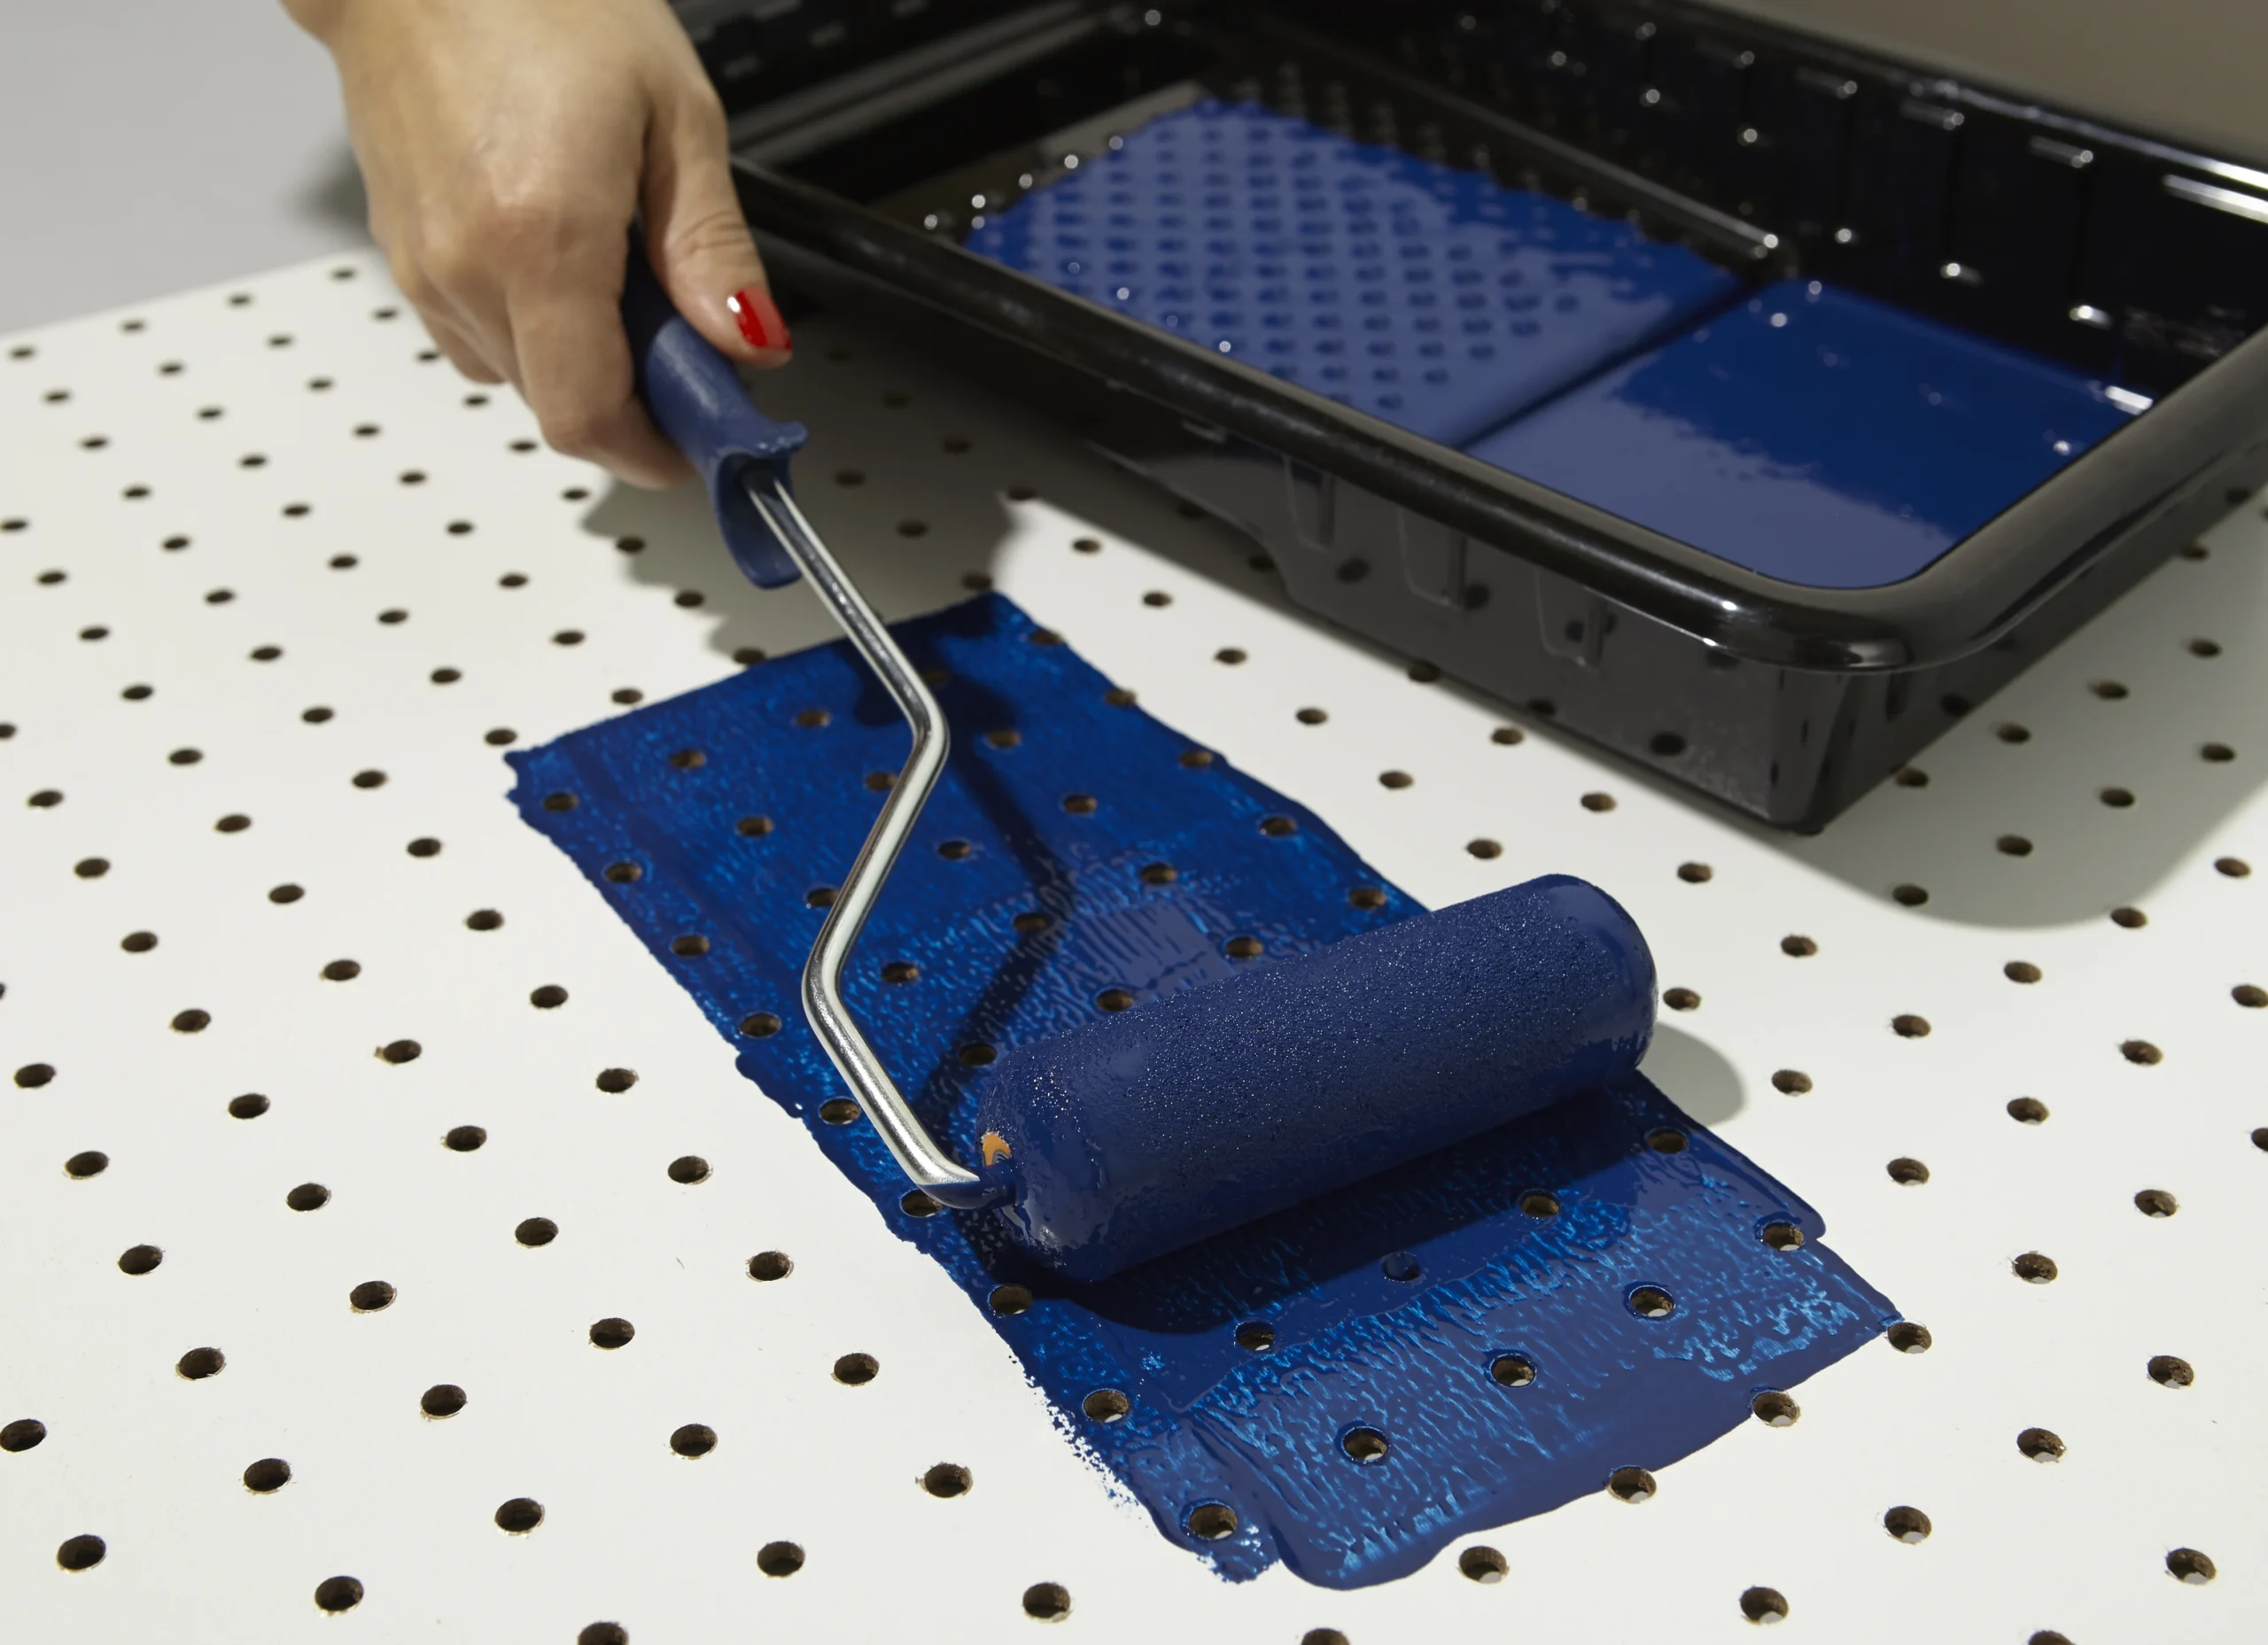
Using A Roller
A roller covers large pegboard areas quickly and evenly. Use a small foam roller to avoid paint buildup in holes. Roll gently to spread paint without pushing it inside holes. Allow the first coat to dry before applying a second for full coverage. This method gives a smooth finish and saves time.
Brush Application
A brush works well for detailed edges and corners. Use a flat or angled brush to paint around holes carefully. Apply thin coats to prevent drips and paint clogs. Brushes offer control but take more time than rollers. Good for touch-ups and small pegboard sections.
Spray Painting Tips
Spray painting provides fast, even coverage on pegboard surfaces. Use spray paint designed for wood or metal for best results. Hold the can 8-12 inches away and spray in light, steady passes. Mask areas you don’t want painted with tape and paper. Work in a well-ventilated space to avoid fumes and ensure quick drying.
Applying Multiple Coats
Applying multiple coats of paint on pegboard ensures a smooth and durable finish. Each layer adds depth and coverage, hiding any imperfections from the previous coat. Taking time between coats allows the paint to dry properly, preventing drips and uneven surfaces. Patience during this process results in a professional look that lasts longer. Follow simple steps to achieve the best results on your pegboard project.
Light Even Coats
Use light, even coats of paint for better control. Thick coats can cause drips and uneven texture. Apply thin layers and spread the paint smoothly. This method helps the paint dry faster and stick better. Multiple light coats build a solid color without hiding the pegboard’s holes. It keeps the board functional and attractive.
Sanding Between Coats
Sanding between coats creates a smooth surface. Use fine-grit sandpaper to gently rub the dried paint. This step removes bumps and rough spots. Clean the dust off before applying the next coat. Sanding helps the new layer stick well and improves the finish. It makes the pegboard look neat and polished.
Drying And Curing Time
Drying and curing time plays a big role when painting pegboard. It affects how well the paint sticks and how long the finish lasts. Understanding these times helps you plan your project and avoid damage.
Paint on pegboard needs enough time to dry on the surface. Drying means the paint feels dry to touch. Curing means the paint hardens fully underneath. Both steps matter for a strong, durable coat.
Drying Time For Different Paint Types
Water-based paints usually dry faster. They can feel dry in about 30 minutes to 1 hour. Oil-based paints take longer, often 6 to 8 hours to dry to touch.
Spray paints dry quickly, often within 15 to 30 minutes. But check the label for exact times. Drying time depends on temperature and humidity too.
How Long To Cure Painted Pegboard
Curing takes longer than drying. It can take 24 to 72 hours for paint to fully cure. Cured paint is harder and less likely to chip or scratch.
Leave the pegboard alone during curing. Avoid hanging heavy items or touching the surface. This helps the paint set strong and last longer.
Tips To Speed Up Drying And Curing
Use a fan or open windows for good airflow. Warm, dry air speeds up drying and curing times. Avoid painting in cold or humid places.
Thin paint coats dry faster than thick ones. Apply two or three thin coats instead of one thick coat. Let each coat dry fully before adding the next.
Adding A Protective Finish
Adding a protective finish to painted pegboard is a smart step. It guards the surface against wear and moisture. This finish keeps the pegboard looking fresh longer. Applying a clear top coat enhances durability. It also adds a subtle shine that improves appearance.
Choosing A Top Coat
Select a top coat that fits your pegboard use. Polyurethane is popular for tough protection. It dries clear and resists scratches. Water-based polyurethanes have low odor and clean up easily. Oil-based versions offer stronger durability but take longer to dry. Another option is clear acrylic spray. It provides a smooth, even finish and dries quickly. Test the top coat on a small area first. This step ensures compatibility with your paint type.
Water Resistance Benefits
Water resistance is crucial for pegboards in damp spaces. A good top coat prevents water from seeping into the board. This protection stops warping and swelling. It also reduces the chance of mold growth. Glossy finishes offer better water repellency than matte ones. Keeping your pegboard dry means it will last longer. This is especially useful in kitchens, garages, or workshops.
Framing And Mounting Ideas
Framing and mounting pegboard adds style and function to your space. It turns plain pegboard into a polished wall feature. Proper framing gives the board a finished look while making it easier to hang tools or decorations. Mounting the pegboard securely keeps it steady and safe to use.
Choosing the right frame and mounting method depends on your room’s style and how you plan to use the pegboard. Frames can be simple or decorative. Mounting can be flush against the wall or with space behind for cords and hooks.
Creating A Simple Wood Frame
Cut wood strips to fit the pegboard edges. Attach them with wood glue or small nails. Sand the frame smooth before painting. Choose a paint color that matches your room or contrasts for a bold look. This frame style is easy and affordable.
Using Metal Or Pvc Frames
Metal and PVC frames offer a modern, clean look. They resist moisture and last longer in humid areas. Snap or screw the frame pieces together around the pegboard. Paint the frame if desired. These frames work well in workshops or kitchens.
Mounting Pegboard With Spacers
Spacers create a gap between the pegboard and wall. This space allows hooks to fit behind the board. Use wooden blocks or special pegboard spacers. Attach the spacers to the wall first, then screw the pegboard on top. This method is great for hanging bulky items.
Flush Mounting For A Sleek Finish
Flush mounting keeps the pegboard flat against the wall. Use drywall anchors or screws to secure it tightly. This option saves space and looks neat. It is ideal for light to medium weight tools or craft supplies.
Credit: everydaydishes.com
Creative Pegboard Makeover Ideas
Transforming plain pegboard into a stylish and practical feature adds charm to any room. Creative pegboard makeover ideas help you customize and brighten your space. Painting pegboard offers endless possibilities for both looks and uses. Explore these ideas to inspire your next project.
Ombre And Color Effects
Ombre paint effects create a smooth color transition on pegboard. Start with a light shade at the top and gradually blend into a darker tone below. This technique adds depth and visual interest without complexity.
Use bright or pastel colors to match your room decor. Multiple colors can create stripes or geometric patterns. Acrylic or spray paint works well for even coverage. Painting pegboard with fun color effects makes it a focal point.
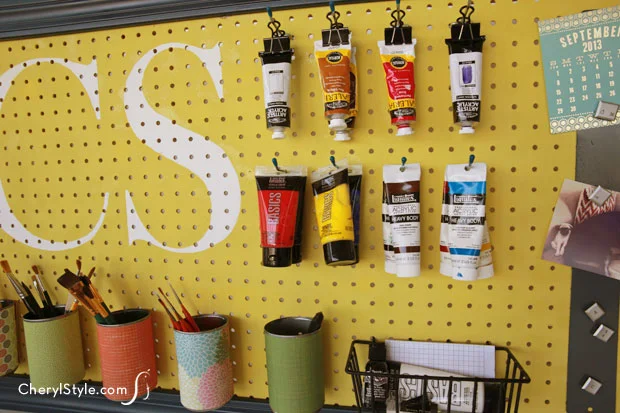
Functional And Decorative Uses
Painted pegboard is both useful and beautiful. Use it to hang tools, craft supplies, or kitchen utensils. Choose colors that contrast with your items to make them stand out.
Decorate pegboard with hooks, baskets, or shelves for extra storage. Paint can protect the surface from moisture and wear. A well-painted pegboard combines style and function in one piece.
Credit: jennaburger.com
Frequently Asked Questions
What Type Of Paint To Use On Pegboard?
Use glossy acrylic or enamel paint on pegboard for durability and water resistance. Apply multiple light coats for best results.
Can You Paint Pegboard With A Roller?
Yes, you can paint pegboard with a roller. Use a small foam roller and apply multiple light coats. Protect holes to avoid clogging. Sand the surface first for better paint adhesion.
What Kind Of Paint Do You Use On Foam Board?
Use acrylic paint on foam board. It adheres well and dries quickly without damaging the foam surface.
How To Paint Pegboards?
Clean and sand the pegboard lightly. Protect holes with paper to avoid clogging. Apply multiple thin coats using spray paint, roller, or brush. Let each coat dry before applying the next. Choose glossy paint for durability and moisture resistance. Remove hole protection while paint is still wet.
Can You Paint Pegboard To Improve Its Look?
Yes, pegboard can be painted to match your room or workspace decor easily.
Conclusion
Painting pegboard is a simple way to refresh any space. Choose glossy paint for water resistance and durability. Sand the surface lightly before applying paint for better grip. Use light coats and let each dry fully to avoid drips. Rollers, brushes, or spray paint all work well for this project.
With a little time, your pegboard will look clean and colorful. This small change can brighten your room and organize tools nicely. Give it a try and enjoy a fresh, personalized pegboard.
{ “@context”: “https://schema.org”, “@type”: “Article”, “headline”: “Can You Paint Pegboard: Easy Tips for a Stunning Makeover”, “description”: “Can you paint pegboard to customize its appearance? Yes, painting pegboard enhances durability and allows for personalized organization in workspaces and…”, “url”: “https://www.powertoolstoday.com/can-you-paint-pegboard/”, “datePublished”: “2025-12-02”, “dateModified”: “2026-03-19”, “author”: { “@type”: “Organization”, “name”: “Power Tools Today”, “url”: “https://www.powertoolstoday.com” }, “publisher”: { “@type”: “Organization”, “name”: “Power Tools Today”, “url”: “https://www.powertoolstoday.com” }, “mainEntityOfPage”: { “@type”: “WebPage”, “@id”: “https://www.powertoolstoday.com/can-you-paint-pegboard/” }, “image”: { “@type”: “ImageObject”, “url”: “https://www.powertoolstoday.com/wp-content/uploads/2025/11/can-you-paint-pegboard.webp” } }{ “@context”: “https://schema.org”, “@type”: “Article”, “headline”: “Can You Paint Pegboard: Easy Tips for a Stunning Makeover”, “description”: “Can you paint pegboard to customize its appearance? Yes, painting pegboard enhances durability and allows for personalized organization in workspaces and…”, “url”: “https://www.powertoolstoday.com/can-you-paint-pegboard/”, “datePublished”: “2025-12-02”, “dateModified”: “2026-03-19”, “author”: { “@type”: “Organization”, “name”: “Power Tools Today”, “url”: “https://www.powertoolstoday.com” }, “publisher”: { “@type”: “Organization”, “name”: “Power Tools Today”, “url”: “https://www.powertoolstoday.com” }, “mainEntityOfPage”: { “@type”: “WebPage”, “@id”: “https://www.powertoolstoday.com/can-you-paint-pegboard/” }, “image”: { “@type”: “ImageObject”, “url”: “https://www.powertoolstoday.com/wp-content/uploads/2025/11/can-you-paint-pegboard.webp” } }nn