Last Updated: March 21, 2026
If you’ve got a metal shed and want to turn it into a neat, organized workspace, attaching a pegboard is a smart move. But how do you secure a pegboard to metal walls without damaging your shed or struggling with tricky tools?
You’re about to discover simple, practical steps that make the process easy and effective. Whether you’re looking to hang tools, keep your garden supplies in order, or create a DIY haven, this guide will help you get your pegboard up fast and strong.
Keep reading to learn exactly how to attach pegboard to your metal shed and transform your space today!
Tools And Materials Needed
Attaching pegboard to a metal shed requires specific tools and materials. These help ensure a strong and secure installation. Having everything ready makes the process faster and smoother.
Choosing the right tools prevents damage to the shed or pegboard. The materials must withstand outdoor conditions if the shed is outside.
Tools Required
- Power drill with metal drill bits
- Measuring tape for accurate placement
- Level to keep the pegboard straight
- Marker or pencil for marking holes
- Screwdriver or impact driver
- Safety gloves and glasses for protection
Materials Needed
- Pegboard sized to fit the shed wall
- Self-drilling metal screws with rubber washers
- Furring strips or spacers to create gap
- Wall anchors, if extra support is needed
- Silicone sealant to prevent moisture
Why These Tools And Materials Matter
Drill bits designed for metal cut clean holes. Self-drilling screws fasten without pre-drilling. Rubber washers keep water out and avoid rust.
Furring strips create space for hooks. This stops pegboard from bending or warping. Sealant adds protection against weather damage.
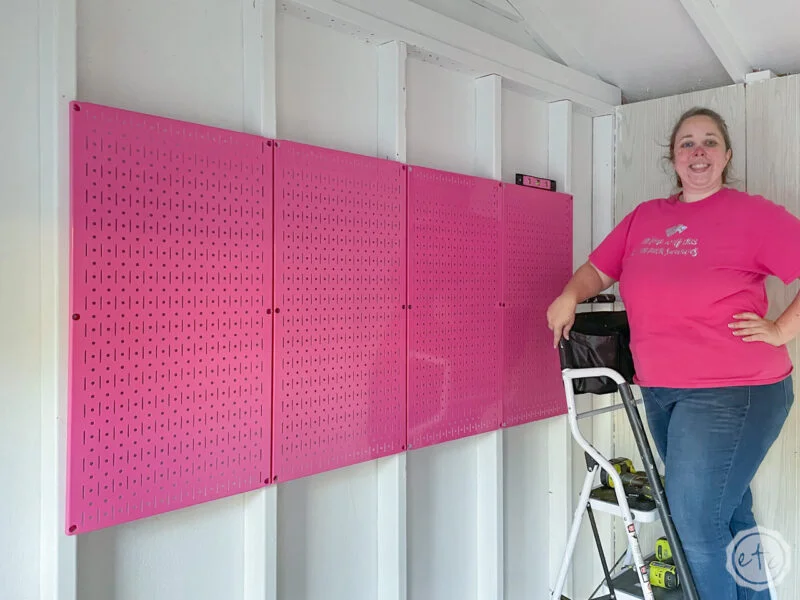
Credit: happilyeverafteretc.com
Choosing The Right Pegboard
Choosing the right pegboard is the first step to a neat, functional shed wall. The pegboard must suit the metal shed’s surface and your storage needs.
Different pegboard materials offer different strengths. Picking the right one helps hold tools securely and last longer.
Types Of Pegboard Materials
Wood pegboards are classic and easy to cut. They work well but may warp in damp sheds.
Metal pegboards are strong and resist moisture. They fit well on metal sheds but can be heavy.
Masonite pegboards are smooth and affordable. They may not hold very heavy tools.
Size And Thickness
Choose pegboard thickness to support your tool weight. Thicker boards hold more weight without bending.
Match the pegboard size to your shed wall space. Avoid pieces that are too small or too large.
Hole Size And Spacing
Standard pegboards have 1/4 inch holes spaced 1 inch apart. This size fits most hooks and accessories.
Larger holes or different spacing may limit hook options. Stick to standard sizes for flexibility.
Surface Finish And Durability
Look for pegboards with smooth finishes for easy cleaning. Painted or coated boards resist rust and wear.
Durable surfaces last longer in outdoor or humid shed environments.
Preparing The Metal Shed Wall
Preparing the metal shed wall is the first step to attach pegboard securely. It ensures a strong hold and a neat finish. Proper preparation helps avoid damage to the shed and pegboard.
Metal walls can be slippery and thin. They need special care before mounting. Cleaning, measuring, and marking are essential tasks in this phase.
Cleaning The Metal Surface
Start by wiping the wall with a damp cloth. Remove dust, dirt, and grease spots. Use mild soap if needed. Dry the surface completely to prevent rust and ensure adhesion.
Checking For Structural Support
Metal sheds often have vertical or horizontal supports behind the panels. Use a stud finder or tap the wall to locate these. Mark the support spots with a pencil. Attaching pegboard to supports adds strength.
Measuring And Marking
Measure the area for the pegboard carefully. Mark the pegboard size on the metal wall with a pencil. Double-check measurements to avoid mistakes. This step guides drilling and mounting.
Drilling Pilot Holes
Drill small pilot holes at the marked points. Use a drill bit suitable for metal. Pilot holes make screwing easier and prevent metal from bending. Wear safety glasses to protect your eyes during drilling.
Marking Pegboard Placement
Marking pegboard placement is a key step before attaching it to a metal shed. It helps ensure the pegboard fits perfectly and stays secure. Careful marking avoids mistakes and saves time during installation.
Start by deciding the exact spot where the pegboard will go. Consider the height and width to make the most of your space. Marking these points clearly guides the next steps.
Measure The Metal Shed Wall
Use a tape measure to find the area for the pegboard. Measure the width and height of the wall section. Write down these numbers for accuracy. Check twice to avoid errors.
Mark Stud Or Frame Locations
Metal sheds often have metal studs or frames behind the wall. Use a stud finder to locate them. Mark these spots lightly with a pencil. Attaching the pegboard to studs makes it stronger.
Outline The Pegboard Size
Place the pegboard against the wall. Use a pencil to trace its edges on the metal shed. This outline shows exactly where the pegboard will sit. It helps keep the board straight and level.
Mark Drill Hole Points
Mark where screws will go through the pegboard into the shed wall. Space the marks evenly, about every 12 inches. Make sure marks align with studs or solid parts of the wall. This step ensures firm attachment.
Installing Furring Strips For Support
Installing furring strips is a key step to attach pegboard to a metal shed. Metal walls often lack the right surface for screws or nails. Furring strips add a wooden layer, giving the pegboard a strong base to hold onto.
These strips create space between the pegboard and metal wall. This gap helps with ventilation and prevents moisture buildup. It also allows easy mounting of hooks and accessories on the pegboard.
Choosing The Right Furring Strips
Select strips made from durable wood like pine or cedar. They should be straight and free of knots. Typical dimensions are 1 inch by 2 inches. The length depends on the shed wall size.
Preparing The Metal Wall Surface
Clean the metal surface thoroughly before installation. Remove dirt, rust, and grease with a cloth and mild cleaner. Dry the surface completely to ensure good adhesion.
Attaching Furring Strips To The Metal Shed
Use self-drilling screws designed for metal. These screws pierce the sheet metal without pre-drilling. Place rubber washers under the screw heads to prevent leaks. Space the strips evenly, about 16 inches apart.
Checking For Level And Secure Fit
Use a level to keep strips straight. Tighten screws until strips are firmly attached. Avoid over-tightening, which can damage the metal or wood. Confirm strips do not move when pressed.
Attaching Pegboard With Screws
Attaching pegboard to a metal shed with screws is a reliable way to create strong support for your tools and accessories. This method ensures the pegboard stays firmly in place, even under heavy loads. Using the right screws and proper technique prevents damage to the metal surface and keeps the pegboard stable.
Follow clear steps to achieve a secure installation. Prepare the metal surface, select suitable screws, and carefully fasten the pegboard. This approach works well for most metal sheds and offers a neat, durable finish.
Choosing The Right Screws
Select self-drilling screws designed for metal surfaces. These screws can penetrate sheet metal without pre-drilling holes. Look for screws with rubber washers to prevent water leaks. The washers create a tight seal around the screw head, protecting your shed from moisture.
Preparing The Metal Shed Surface
Clean the metal surface before attaching the pegboard. Remove dirt, rust, and oil using a cloth and mild cleaner. A clean surface helps screws grip better. Mark the pegboard position on the shed wall with a pencil to guide your installation.
Attaching The Pegboard Securely
Hold the pegboard against the metal wall. Use a drill with the correct bit to drive screws through the pegboard into the metal. Space screws about 12 inches apart for strong support. Tighten screws until snug but avoid over-tightening to prevent damage to the pegboard or metal.
Alternative No-drill Mounting Methods
Attaching pegboard to a metal shed does not always require drilling. No-drill mounting methods offer easy and damage-free alternatives. These options help keep your shed’s metal walls intact. They are perfect for renters or those wary of drilling holes.
These methods use strong adhesives, clamps, or magnetic strips. Each has unique benefits and suits different shed types. Choose the method that fits your pegboard size and weight.
Using Heavy-duty Adhesive Strips
Heavy-duty adhesive strips hold pegboards without screws or nails. They stick firmly to smooth metal surfaces. Clean the area well before applying strips. Press the pegboard firmly against the wall. Wait for the adhesive to set before hanging tools. This method works best for lightweight pegboards.
Magnetic Mounting With Strong Magnets
Strong magnets can attach pegboards to metal sheds easily. Attach magnets to the pegboard’s corners or edges. Place the pegboard on the metal wall where magnets hold tight. This method is simple and leaves no marks. It suits small to medium pegboards and lighter tools.
Using Clamps Or Brackets
Clamps or brackets secure pegboards without drilling. Clamp edges of the pegboard and hook onto the shed’s frame. Use adjustable clamps for a tighter fit. This method holds heavier pegboards safely. It also allows easy removal or repositioning of the pegboard.

Credit: www.reddit.com
Tips For Organizing Tools On Pegboard
Organizing tools on a pegboard in your metal shed improves efficiency and saves space. A well-arranged pegboard lets you find tools quickly. It also keeps your workspace clean and safe. Follow simple tips to make the most of your pegboard.
Group Similar Tools Together
Keep all screwdrivers, wrenches, and pliers in separate sections. Grouping tools by type reduces searching time. This method also helps you see if any tool is missing.
Use Hooks And Holders
Select hooks that fit each tool’s shape and size. Use holders for drills, hammers, and tape measures. Proper holders prevent tools from falling off or getting damaged.
Label Each Spot
Label pegboard spots with simple tags or stickers. Labels help everyone know where each tool belongs. This keeps the pegboard neat and tools easy to return.
Keep Frequently Used Tools Accessible
Place the tools you use the most at eye level. Tools used less often can go higher or lower. This setup saves time and effort during work.
Arrange Tools By Size
Put small tools together and larger tools apart. This arrangement prevents clutter and makes the pegboard look tidy. Size order also helps to quickly spot the tool you need.

Credit: www.workshop.bunnings.com.au
Frequently Asked Questions
How To Attach Things To A Metal Shed?
Use self-drilling screws with rubber washers to attach items to a metal shed. Pre-drill if needed. Alternatively, use adhesive hooks or magnetic strips for non-drilling options. Secure pegboards by framing with timber and screwing through steel studs. Always seal holes to prevent leaks.
Can You Screw Into A Metal Shed?
Yes, you can screw into a metal shed using self-drilling screws with rubber washers. They ensure a secure, weather-tight seal.
How To Hang Things In A Metal Shed Without Drilling?
Use strong adhesive hooks, magnetic strips, or heavy-duty Velcro to hang items on metal shed walls without drilling.
How To Install Peg Board In Shed?
Measure and mark stud locations on shed walls. Attach wooden furring strips to studs. Secure pegboard to strips using screws. Use self-drilling screws for metal sheds. Ensure pegboard is level and firmly fixed for stable storage.
How Do I Attach Pegboard To A Metal Shed Wall?
Use self-drilling screws with rubber washers to fix the pegboard securely on the metal surface.
Conclusion
Attaching pegboard to a metal shed improves your storage space. Use the right tools and fasteners for a secure fit. Measure carefully and mark where to place the pegboard. Drilling pilot holes helps prevent damage to the metal surface. Self-drilling screws with rubber washers keep the pegboard stable and weatherproof.
Take your time to align everything evenly. This simple project organizes tools and keeps your shed neat. With these steps, you can add pegboard easily and efficiently. Enjoy a tidy shed and quick access to your tools.
Related reading: how to use locking pliers.
Related reading: how to use a socket wrench.
Related reading: how to use a strap wrench.
Related reading: how to cut pegboard.
{ “@context”: “https://schema.org”, “@type”: “Article”, “headline”: “How to Attach Pegboard to Metal Shed: Easy & Secure Steps”, “description”: “Learn how to attach pegboard to metal shed walls by using proper tools and fasteners to create organized storage with durable support and easy access.”, “url”: “https://www.powertoolstoday.com/how-to-attach-pegboard-to-metal-shed/”, “datePublished”: “2025-12-06”, “dateModified”: “2026-03-18”, “author”: { “@type”: “Organization”, “name”: “Power Tools Today”, “url”: “https://www.powertoolstoday.com” }, “publisher”: { “@type”: “Organization”, “name”: “Power Tools Today”, “url”: “https://www.powertoolstoday.com” }, “mainEntityOfPage”: { “@type”: “WebPage”, “@id”: “https://www.powertoolstoday.com/how-to-attach-pegboard-to-metal-shed/” }, “image”: { “@type”: “ImageObject”, “url”: “https://www.powertoolstoday.com/wp-content/uploads/2025/11/how-to-attach-pegboard-to-metal-shed.jpg” } }{ “@context”: “https://schema.org”, “@type”: “Article”, “headline”: “How to Attach Pegboard to Metal Shed: Easy & Secure Steps”, “description”: “Learn how to attach pegboard to metal shed walls by using proper tools and fasteners to create organized storage with durable support and easy access.”, “url”: “https://www.powertoolstoday.com/how-to-attach-pegboard-to-metal-shed/”, “datePublished”: “2025-12-06”, “dateModified”: “2026-03-19”, “author”: { “@type”: “Organization”, “name”: “Power Tools Today”, “url”: “https://www.powertoolstoday.com” }, “publisher”: { “@type”: “Organization”, “name”: “Power Tools Today”, “url”: “https://www.powertoolstoday.com” }, “mainEntityOfPage”: { “@type”: “WebPage”, “@id”: “https://www.powertoolstoday.com/how-to-attach-pegboard-to-metal-shed/” }, “image”: { “@type”: “ImageObject”, “url”: “https://www.powertoolstoday.com/wp-content/uploads/2025/11/how-to-attach-pegboard-to-metal-shed.jpg” } }nnnn