Last Updated: March 21, 2026
If you’ve ever admired the strength and beauty of dovetail joints, you might be wondering how to create them yourself using a router. Cutting dovetail joints with a router can seem tricky at first, but with the right approach, you can achieve precise, professional results that make your woodworking projects stand out.
In this guide, you’ll discover step-by-step techniques to cut clean, tight-fitting dovetails using a router and a jig. Whether you’re a beginner or looking to improve your skills, learning this method will save you time and give your work that handcrafted look you desire.
Ready to master dovetail joints and impress with your craftsmanship? Let’s dive in!
Choosing The Right Router And Jig
Choosing the right router and jig is crucial for cutting precise dovetail joints. The right tools make your work easier and improve joint quality. Selecting a router with good control and power ensures clean cuts. A suitable jig holds the wood firmly and guides the router accurately.
Choosing The Ideal Router
Select a router with adjustable speed settings. This helps control the cutting depth and finish. A router with a comfortable grip reduces hand fatigue. Compact routers are easier to handle for detailed work. Look for routers with a reliable base for stability. A router with variable speed fits different wood types well.
Picking The Best Dovetail Jig
Choose a jig that fits your project size. A jig with adjustable guides offers more flexibility. Ensure the jig clamps tightly to prevent movement. Look for jigs with clear markings for easy setup. Some jigs come with templates for different dovetail sizes. Select a jig made of durable materials for long use.
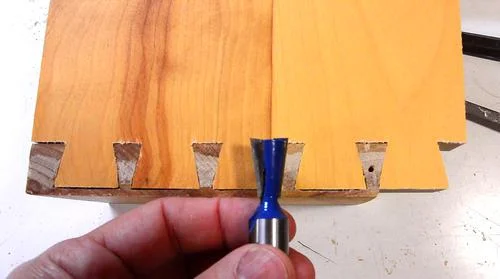
Credit: woodgears.ca
Selecting Dovetail Router Bits
Selecting the right dovetail router bit is key to cutting precise joints. The bit controls the shape and fit of your dovetail. Choosing the wrong bit can lead to poor fits or extra work. Focus on quality, size, and compatibility with your router and jig. Consider the type of wood and the joint style you want to create. A good bit makes the cutting process smoother and the result stronger.
Selecting The Right Angle
Dovetail bits come in different angles, usually between 7 and 14 degrees. The angle affects how the tails and pins fit together. A common choice is 14 degrees for strong joints. Use a smaller angle for delicate or decorative work. Match the bit angle to your jig for best results. Consistency in angle keeps joints tight and neat.
Choosing The Bit Size
Bit size matters for the joint’s strength and appearance. Larger bits cut wider tails and pins. Smaller bits make finer, more delicate joints. Select a size that fits your project’s scale. Make sure the bit matches your jig’s size limits. Correct size helps avoid gaps and weak joints.
Material And Coating Of Bits
Bits come in various materials like carbide or high-speed steel. Carbide bits last longer and stay sharp. They cut cleanly through hardwood and softwood. Look for coated bits for extra durability. A sharp bit reduces tear-out and gives smooth edges. Invest in good quality bits for better results.
Compatibility With Router And Jig
Check that the bit fits your router collet size. Most routers use 1/4-inch or 1/2-inch shanks. Choose bits that match your router’s shank size. Also, ensure the bit works with your dovetail jig. Some jigs require specific bit shapes or sizes. Proper fit ensures safety and accuracy during routing.
Setting Up The Router Table
Setting up the router table correctly is crucial for cutting precise dovetail joints. A well-prepared router table ensures stability and accuracy during the cutting process. The setup involves adjusting the router height, securing the dovetail bit, and arranging the fence for perfect cuts. This section guides you through each step to prepare your router table for dovetail joints.
Adjusting The Router Height
Start by loosening the router height adjustment knob. Raise or lower the router bit to match the depth needed for your dovetail cuts. Use a depth gauge or ruler for accuracy. Tighten the knob firmly to lock the router bit in place. Double-check the height before proceeding.
Installing The Dovetail Bit
Choose a dovetail router bit that fits your joint design. Insert the bit into the router collet fully. Leave a small gap to prevent overheating. Tighten the collet nut securely. Inspect the bit for sharpness and damage before starting.
Setting The Router Table Fence
Position the fence so it supports your workpiece during cuts. Align the fence parallel to the router bit. Adjust the fence distance for the width of your dovetail tails or pins. Clamp the fence tightly to avoid movement. Test the setup with scrap wood to confirm alignment.
Securing The Workpiece
Use featherboards or clamps to hold the wood firmly against the fence and table. Proper holding prevents shifting and ensures clean cuts. Check that the workpiece moves smoothly along the fence without gaps. Safety and precision depend on a stable workpiece.
Marking And Preparing The Wood
Marking and preparing the wood is the first step to cut perfect dovetail joints. Clear and accurate marks guide the router for clean cuts.
Proper preparation ensures the wood pieces fit tightly together. It saves time and reduces mistakes during routing.
Choosing And Measuring The Wood
Select wood that is straight and free from defects. Use a ruler or measuring tape to check thickness and length.
Cut the wood to size using a saw. Smooth the edges with sandpaper to avoid splinters.
Marking The Tail Layout
Use a marking gauge to draw shoulder lines on the wood’s end grain. These lines show where the dovetails will stop.
Draw the tail outlines with a sharp marking knife. Make clear, thin lines to guide the router bit.
Transferring Tail Marks To The Pin Board
Place the tail board on the pin board, aligning edges carefully. Use a fine knife to trace the tail shapes onto the pin board.
Mark the waste areas with an “X” to avoid confusion. This helps keep cuts clean and precise.
Checking And Securing The Wood
Double-check all marks before routing. Use clamps to hold the wood firmly in place during cutting.
Secure wood prevents movement, ensuring smooth and accurate router cuts for tight-fitting dovetails.
Cutting The Tails With The Router
Cutting the tails is the first step in creating strong dovetail joints with a router. This process shapes one side of the joint, which will fit perfectly with the pins on the other piece of wood. Precise cutting ensures tight and clean joints that hold well over time.
Using a router for the tails saves time and improves accuracy compared to cutting by hand. Setting up the router and jig correctly is key to getting smooth and even tails. Below are the main steps to cut the tails efficiently.
Setting Up The Router And Jig
Start by securing the dovetail jig to your workbench. Make sure it is stable to avoid movement during cutting. Attach the router with the dovetail bit that matches your jig size. Adjust the depth of cut to match the thickness of your wood.
Place the board firmly in the jig. Align it so the edges are flush with the jig’s guides. Tighten the clamps to hold the board steady. Double-check all settings before switching on the router.
Cutting The Tail Slots
Turn on the router and slowly guide it along the jig fence. Move steadily to avoid chipping the wood edges. The router bit will cut the angled tails into the board. Use multiple passes if needed to reach full depth without straining the tool.
Keep your hands clear of the bit and maintain a firm grip on the router. After cutting, turn off the router and wait for the bit to stop spinning before removing the board. Inspect the tails for clean edges and consistent shape.
Cleaning Up The Tails
Use a sharp chisel to remove any small wood fibers or rough spots left by the router. Lightly pare the edges to improve the fit with the pins. Test the tails against the pins board to check for tightness. Adjust with the chisel if necessary for a snug joint.
Careful cleanup ensures the dovetail joint fits well and looks professional. With practice, the router will create smooth tails quickly and accurately.
Cutting The Pins Accurately
Cutting the pins accurately is a vital step in making strong dovetail joints. The pins must fit perfectly with the tails to create a tight joint. Precision and steady hands make a big difference here. Using a router can speed up the process but requires careful setup and control.
Start by setting your router bit to the right size for the pins. The bit should match the angle and width of the tails. Use a dovetail jig to hold the wood securely and guide the router. This helps keep your cuts straight and clean.
Setting Up The Dovetail Jig For Pin Cuts
Place the board in the jig with the end grain facing up. Adjust the jig so the router bit lines up with the layout lines. Tighten the clamps to hold the board firmly in place. Double-check the position before cutting to avoid mistakes.
Controlling The Router For Clean Pins
Hold the router steady and move it slowly along the jig. Let the bit do the cutting without forcing it. Make shallow passes if needed to keep control. Smooth, even movement ensures clean edges on each pin.
Checking Pin Fit And Making Adjustments
Test fit the pins with the tails frequently. Check for tightness and alignment. Slight sanding or careful trimming can fix small gaps. Adjust the router depth or jig position if pins don’t match perfectly.
Cleaning And Refining The Joints
Cleaning and refining dovetail joints is a key step after cutting them with a router. It ensures the joint fits tightly and looks neat. Proper finishing removes any rough edges and leftover material. This makes the joint stronger and more attractive.
Small adjustments can improve the joint’s fit and durability. Taking time to clean the joint helps avoid gaps and misalignment. A smooth surface also makes glue spread evenly. Follow these simple steps to perfect your dovetail joints.
Removing Excess Material
Start by checking the joint for any leftover wood or chips. Use a sharp chisel to carefully trim away excess material. Work slowly to avoid cutting too much. Focus on the edges and corners where the router may have left rough spots. A clean cut will help the pieces fit tightly.
Sanding The Joint
Lightly sand the joint with fine-grit sandpaper. This removes small bumps and splinters. Sand only the areas that contact the other piece. Avoid sanding the entire surface to keep the joint strong. Smooth surfaces allow the glue to bond better and create a clean look.
Checking The Fit
Dry fit the joint by pressing the pieces together without glue. Check for tightness and alignment. If gaps exist, trim or sand the problem areas gently. The joint should slide in with slight resistance. A perfect fit means the joint will hold firmly once glued.
Final Touches
After fitting, clean the joint with a soft brush to remove dust. Apply glue carefully to avoid excess squeeze-out. Clamp the joint firmly and let the glue dry fully. Inspect the joint again for any rough edges. A well-finished dovetail joint looks clean and fits perfectly.
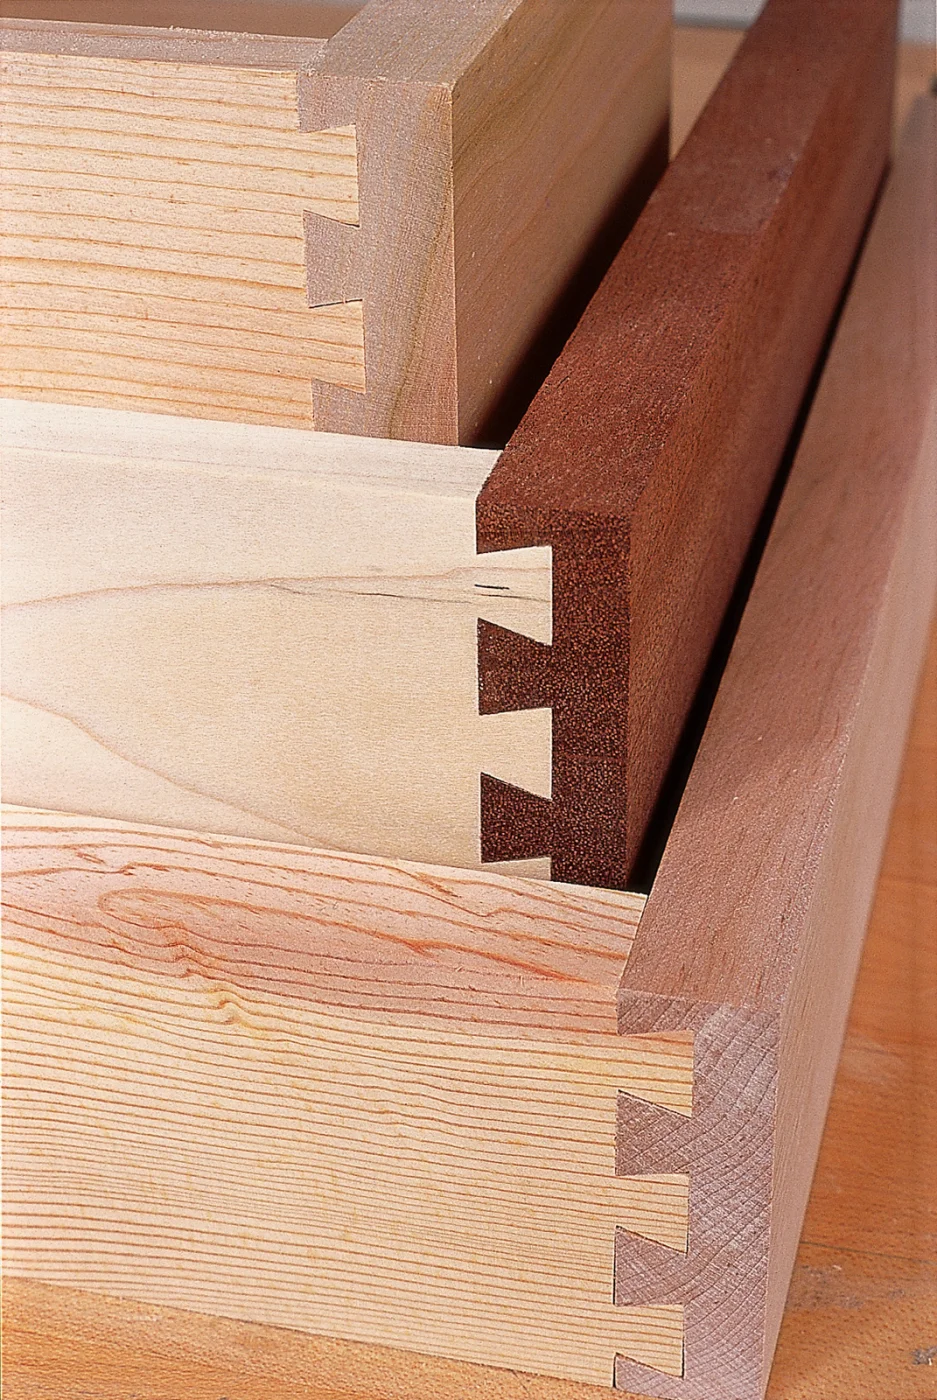
Credit: www.popularwoodworking.com
Testing Fit And Making Adjustments
Testing the fit of your dovetail joint is a vital step after cutting with a router. This process helps ensure the pieces fit tightly without gaps. Making adjustments improves the joint’s strength and appearance. Taking time here saves frustration later.
Start by gently assembling the two pieces. Avoid forcing them together. Check for any tight spots or gaps. Note where the joint does not fit smoothly. This observation guides your adjustments.
Checking The Joint Fit
Look closely at the joint edges and corners. The tails and pins should meet evenly. Gaps weaken the joint and spoil the look. Tight but not forced fit is ideal. Slight resistance is good, but not too much.
Adjusting Tight Spots
Use a sharp chisel or fine sandpaper to trim tight areas. Remove small amounts at a time. Test the fit often to avoid over-cutting. Focus on high points that block assembly. Work slowly and carefully for the best results.
Correcting Loose Fits
Loose joints need filling or tightening. Add thin wood shims or glue to fill gaps. Clamp the joint firmly while glue dries. This strengthens the joint and reduces movement. Avoid large gaps by trimming precisely during cutting.
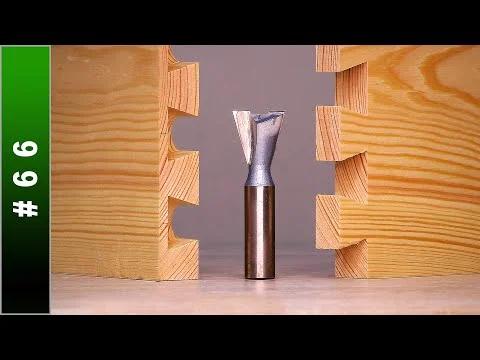
Credit: www.youtube.com
Frequently Asked Questions
Can Dovetail Joints Be Cut With A Router?
Yes, dovetail joints can be cut with a router using a dovetail jig and the correct dovetail router bit.
What Router Bit To Use With Dovetail Jig?
Use a 14-degree dovetail router bit designed specifically for your dovetail jig. It ensures precise, tight-fitting joints. Choose carbide-tipped bits for durability and smooth cuts. Match the bit size to your jig’s specifications for best results.
What Is The Best Way To Cut Dovetails?
Use a marking knife to outline tails and pins precisely. Saw carefully with a sharp dovetail saw. Remove waste with a chisel for clean, tight joints. Test fit and adjust for perfect alignment. This hands-on method ensures strong, accurate dovetail joints.
What Accessory Is Necessary To Cut A Dovetail Joint With A Router?
A dovetail jig is necessary to cut a dovetail joint accurately with a router. It guides the router for precise cuts.
Can I Cut Dovetail Joints Using A Router At Home?
Yes, routers can cut dovetail joints with the right jig and router bit.
Conclusion
Cutting dovetail joints with a router takes patience and practice. Start with clear markings and use the right router bit. Work slowly to ensure clean, tight-fitting joints. Keep your tools sharp and check your progress often. This method saves time and produces strong, attractive joints.
Enjoy crafting your woodworking projects with confidence and precision.
{ “@context”: “https://schema.org”, “@type”: “Article”, “headline”: “How to Cut Dovetail Joints With a Router: Expert Tips & Tricks”, “description”: “Learn how to cut dovetail joints with a router by understanding the process, tools needed, and techniques for precise, strong woodworking connections.”, “url”: “https://www.powertoolstoday.com/how-to-cut-dovetail-joints-with-a-router/”, “datePublished”: “2025-12-18”, “dateModified”: “2026-03-18”, “author”: { “@type”: “Organization”, “name”: “Power Tools Today”, “url”: “https://www.powertoolstoday.com” }, “publisher”: { “@type”: “Organization”, “name”: “Power Tools Today”, “url”: “https://www.powertoolstoday.com” }, “mainEntityOfPage”: { “@type”: “WebPage”, “@id”: “https://www.powertoolstoday.com/how-to-cut-dovetail-joints-with-a-router/” }, “image”: { “@type”: “ImageObject”, “url”: “https://www.powertoolstoday.com/wp-content/uploads/2025/11/how-to-cut-dovetail-joints-with-a-router.jpg” } }{ “@context”: “https://schema.org”, “@type”: “Article”, “headline”: “How to Cut Dovetail Joints With a Router: Expert Tips & Tricks”, “description”: “Learn how to cut dovetail joints with a router by understanding the process, tools needed, and techniques for precise, strong woodworking connections.”, “url”: “https://www.powertoolstoday.com/how-to-cut-dovetail-joints-with-a-router/”, “datePublished”: “2025-12-18”, “dateModified”: “2026-03-19”, “author”: { “@type”: “Organization”, “name”: “Power Tools Today”, “url”: “https://www.powertoolstoday.com” }, “publisher”: { “@type”: “Organization”, “name”: “Power Tools Today”, “url”: “https://www.powertoolstoday.com” }, “mainEntityOfPage”: { “@type”: “WebPage”, “@id”: “https://www.powertoolstoday.com/how-to-cut-dovetail-joints-with-a-router/” }, “image”: { “@type”: “ImageObject”, “url”: “https://www.powertoolstoday.com/wp-content/uploads/2025/11/how-to-cut-dovetail-joints-with-a-router.jpg” } }nnnn