If you’re serious about woodworking, having a router table can change the game for your projects. But instead of spending a fortune on a ready-made one, why not build your own?
Building a router table gives you full control over its size, features, and quality—all tailored to your needs. In this guide, you’ll discover simple steps to create a sturdy, functional router table using basic materials and tools. By the end, you’ll have a workspace that makes routing easier, safer, and more precise.
Ready to upgrade your workshop and bring your woodworking skills to the next level? Let’s get started!
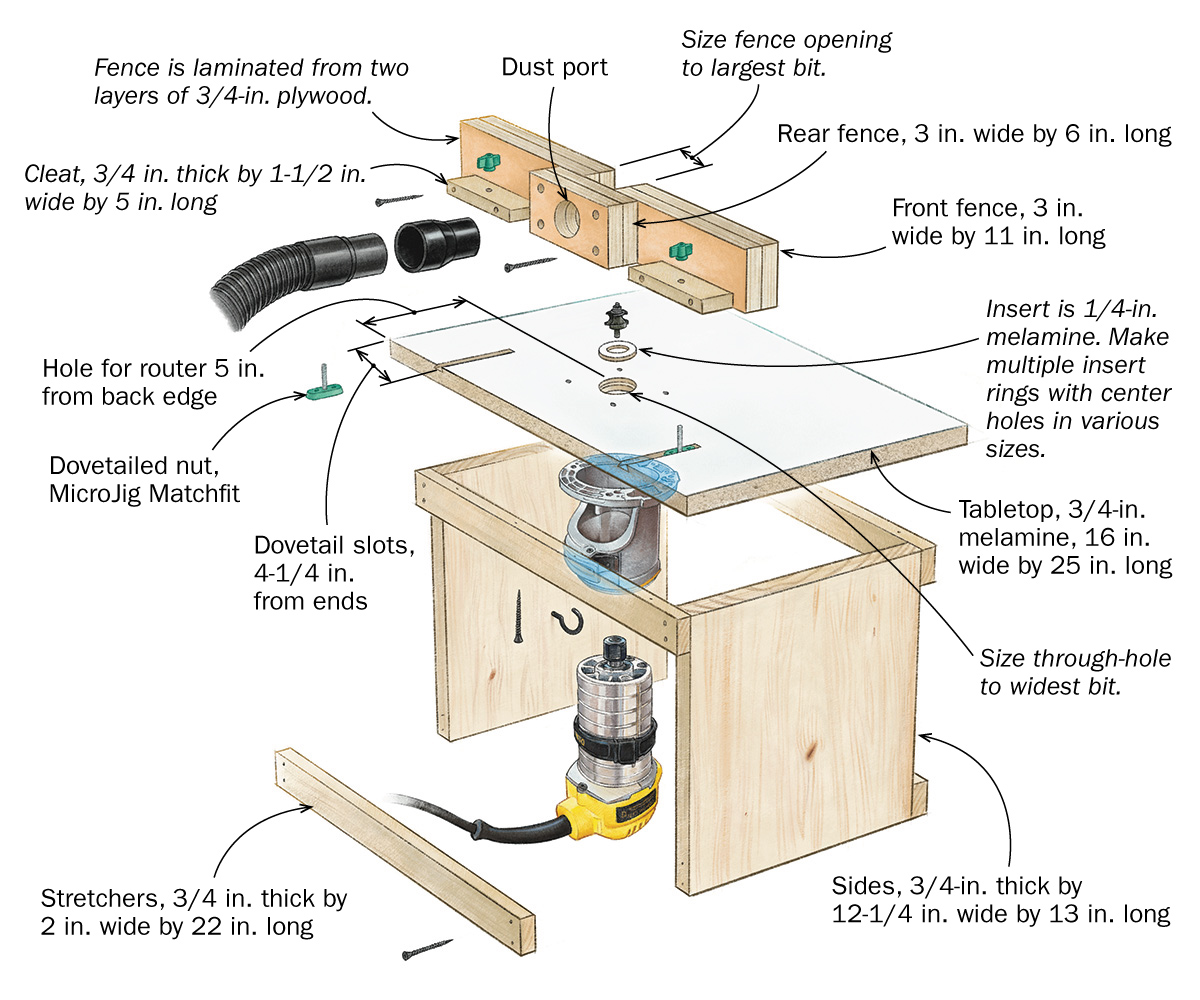
Credit: www.finewoodworking.com
Materials And Tools
Building a router table starts with gathering the right materials and tools. These items ensure your project is strong, safe, and easy to use. Choosing good quality wood and proper hardware makes a big difference. Having the right tools helps you work faster and with more accuracy.
Keep your workspace organized. This way, you can focus on building without interruptions. Below, find a list of essential materials and tools for making a sturdy router table.
Materials Needed For A Router Table
Start with a flat and stable table top. MDF or plywood works well because they are smooth and durable. Use hardwood for the frame to support weight and resist wear.
Pick screws and bolts that fit your wood thickness. Insert plates help mount the router securely. You will also need wood glue for strong joints and sandpaper to smooth rough edges.
Essential Tools For Building A Router Table
A drill with various bits is key for making holes and driving screws. A circular saw or jigsaw helps cut wood to size. Use clamps to hold pieces steady while gluing or screwing.
A screwdriver set and a measuring tape are necessary for precise assembly. A router itself is needed to test the fit of the insert plate and fence. Safety glasses and ear protection keep you safe during work.
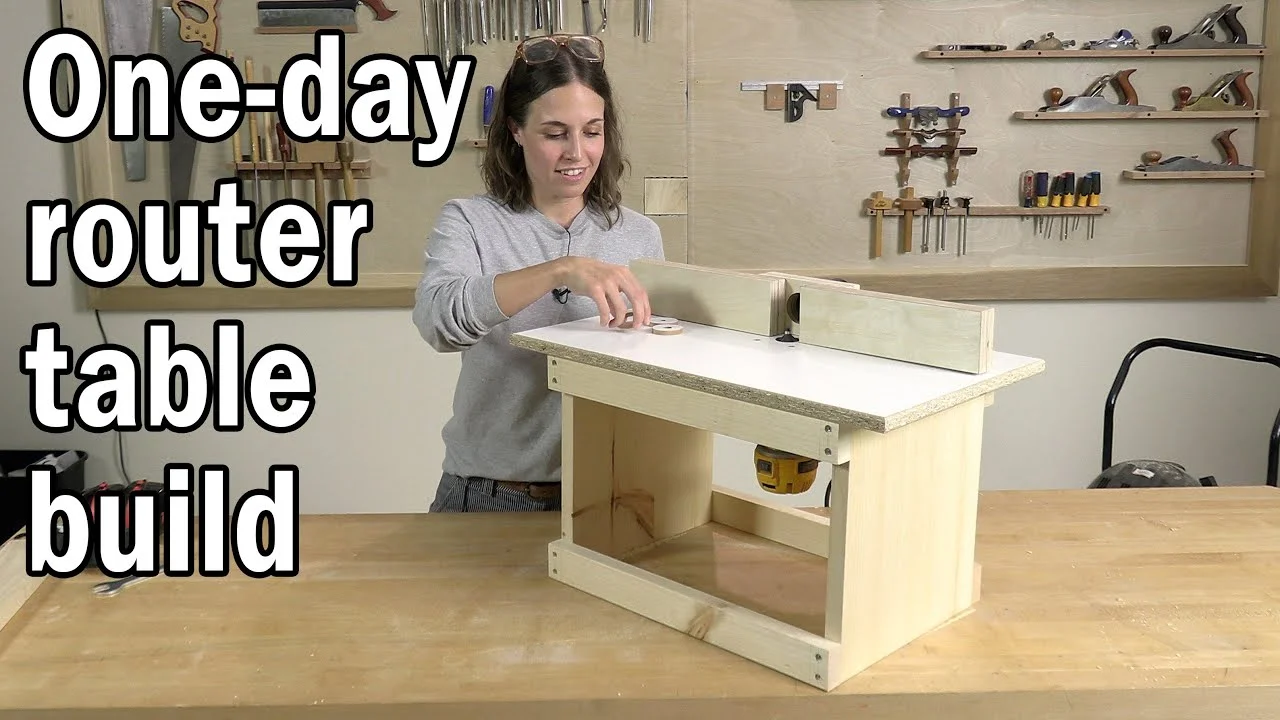
Credit: www.youtube.com
Choosing The Table Top
Choosing the table top is a key step in building a router table. The table top must be strong, flat, and smooth to support your workpieces. It also needs to hold the router securely and allow easy adjustments. A good table top ensures precise cuts and safe operation.
Various materials work well for router table tops. Each has pros and cons. Consider durability, weight, and cost before deciding. The right choice depends on your workshop setup and how often you use the router table.
Choosing The Right Material
Materials like MDF, plywood, and hardwood are common choices. MDF is smooth and flat but can be heavy. Plywood is lighter and strong but might have rough spots. Hardwood is durable and stable but often costs more. Pick a material that fits your budget and needs.
Table Thickness And Stability
The table top should be thick enough to stay flat under pressure. Thickness between 3/4 inch and 1 inch works well. Thicker tops resist warping and provide a solid base. Stability is crucial to avoid vibrations that affect cut quality.
Surface Finish And Flatness
A smooth, flat surface helps the wood slide easily and improves accuracy. Sand the top well and apply a finish like wax or polyurethane. This reduces friction and protects against moisture. Check the surface with a straight edge for flatness before use.
Building The Frame
Building the frame is the first step to creating a solid router table. A sturdy frame supports the router and the table top. It keeps your work stable and safe. The frame must be strong and well-balanced. This ensures smooth and accurate cuts every time.
Start by choosing the right materials. Plywood and hardwood are popular choices. Plywood is affordable and strong. Hardwood adds extra durability. Avoid soft woods that can warp or bend easily. Using quality wood will make your table last longer.
Choosing The Wood For The Frame
Select plywood with a thickness of at least 3/4 inch. It resists bending and holds screws well. Hardwood like oak or maple is good for legs and braces. These woods handle weight and stress better. Avoid particleboard as it can crumble under pressure.
Cutting The Frame Pieces
Measure and mark all parts carefully. Use a saw to cut straight edges. Cut two side panels, one back panel, and a bottom shelf. Each piece should fit snugly without gaps. Smooth the edges with sandpaper to prevent splinters.
Assembling The Frame
Start by attaching the side panels to the back panel. Use wood glue and screws for a strong bond. Make sure the corners form right angles. Add the bottom shelf between the side panels. This adds stability and storage space. Check the frame for wobble and fix if needed.
Installing The Router Plate
Installing the router plate is a key step in building a router table. The plate holds the router securely under the table. It also allows easy height adjustment of the router bit. A proper installation ensures safety and accuracy during use.
Take your time to fit the router plate correctly. Check the alignment before fixing it permanently. The router plate must sit flush with the table surface. This prevents material from catching on edges while routing.
Preparing The Router Plate Cutout
Mark the area on the tabletop where the router plate will sit. Use the router plate as a template for this. Cut the hole slightly smaller than the plate size. This helps to get a tight fit. Use a jigsaw or router to make the cut. Sand the edges smooth to remove any rough spots.
Attaching The Router Plate
Place the router plate into the cutout. Check that it fits flush with the tabletop surface. Drill pilot holes through the plate screw holes into the tabletop. Use screws to secure the plate firmly. Avoid overtightening to prevent cracking the tabletop or plate.
Mounting The Router To The Plate
Detach the router base from the router motor. Align the router base holes with the plate holes. Use the correct screws to attach the router base to the plate. Tighten screws evenly to keep the base stable. Test the router height adjustment and make sure it moves smoothly.
Constructing The Fence
The fence is a key part of your router table. It guides the wood and keeps cuts straight. Building a strong, adjustable fence improves safety and accuracy. This section explains how to construct a reliable fence for your router table.
Choosing The Right Materials
Use sturdy, flat wood like plywood or MDF for the fence. These materials resist warping and provide a smooth surface. Avoid soft woods that can dent or wear quickly. The fence should be at least 3/4 inch thick for stability.
Cutting And Assembling The Fence
Cut two fence boards to the table’s width. One board will hold the router bit, and the other acts as a dust shield. Attach them together with screws or wood glue, keeping the edges flush. Sand all surfaces smooth to reduce friction.
Adding Fence Adjustments
Drill holes to attach the fence to the table with bolts. Use wing nuts for quick adjustments. Add a T-track or slot to mount featherboards or hold-down clamps. This setup lets you move and lock the fence easily during work.
Installing A Dust Collection Slot
Cut a narrow slot along the fence near the router bit. Connect this slot to your dust collection system. It helps remove sawdust and keeps the work area clean. A clean fence improves visibility and safety.
Adding Dust Collection
Adding dust collection to your router table keeps your workspace clean and safe. Router work creates a lot of fine dust and wood chips. Collecting this dust improves visibility and reduces breathing hazards. A good dust collection system also helps maintain your tools and extends their life.
Choosing The Right Dust Collection Port
Select a dust port that fits your vacuum or dust collector hose. Most router tables have a 2-1/2 inch or 4 inch port. Check your dust collector hose size before buying. You can find adapters if sizes do not match. Position the port under the router plate for best suction.
Installing A Dust Hood Around The Router Bit
A dust hood captures dust close to the router bit. It fits around the bit and connects to the dust port. Use clear plastic or metal to build the hood. Make sure the hood does not block your work or fence adjustments. Secure it firmly but allow easy removal for bit changes.
Sealing Gaps To Improve Dust Collection
Seal gaps around the router plate and fence to improve suction. Use weather stripping or foam tape to close openings. This stops dust from escaping the collection system. Check seals regularly and replace if worn out. Tight seals make dust collection more effective.
Using A Shop Vacuum Or Dedicated Dust Collector
Connect your dust port to a shop vacuum or dust collector. Shop vacuums are affordable and easy to use. Dust collectors offer stronger suction for larger shops. Choose one with a fine dust filter to trap small particles. Empty the dust bag or bin often to maintain airflow.
Fine-tuning Adjustments
Fine-tuning adjustments are essential for a precise and safe router table operation. They ensure your cuts are clean and consistent. Small changes can make a big difference in your woodworking projects. Taking time to adjust the components improves overall control and accuracy.
Adjusting The Router Height
Start by setting the router height. This controls how deep the bit cuts into the wood. Use the height adjustment knob or screw under the table. Move the router bit up or down slowly for fine control. Lock it firmly to avoid shifts during use. Check the height by making test cuts on scrap wood.
Aligning The Fence
The fence guides the wood as you push it past the router bit. Make sure it is square and parallel to the bit. Use a ruler or square to check the distance. Adjust the fence until it is perfectly straight. Tighten the fence clamps to hold it steady. This prevents wood from slipping or chattering.
Calibrating The Insert Plate
The insert plate holds the router and fits into the table top. It must sit flush with the surface. Check for any gaps or uneven edges around the plate. Use shims or sand the edges if needed. A level insert plate avoids snags and tear-out. Secure it tightly after adjustments.
Setting The Featherboards
Featherboards press the wood against the fence or table. They improve safety and cut quality by holding the wood firmly. Position featherboards so they apply light pressure. Adjust them to fit different wood thicknesses. Make sure they do not block your view or interfere with the cut.
Common Mistakes To Avoid
Building a router table can be rewarding. Avoiding common mistakes saves time and frustration. These errors often cause poor performance and safety risks. Knowing what to avoid helps create a strong, reliable table.
Incorrect Table Height
Choosing the wrong height makes work uncomfortable. The table surface should align with your waist or slightly below. A bad height causes back pain and poor control of the router.
Using Weak Materials
Cheap or thin materials lead to a wobbly table. Use thick plywood or MDF for the top and solid wood for the base. Strong materials improve stability and reduce vibrations.
Poor Router Mounting
Improper mounting makes the router unstable and unsafe. Ensure the router is firmly attached and the base plate fits snugly. Loose mounting can cause uneven cuts or accidents.
Ignoring Dust Collection
Failing to add dust collection creates a messy and unsafe workspace. Plan for dust ports near the router and fence. Clean work areas improve visibility and reduce health risks.
Skipping Fence Adjustment
A fixed fence limits the table’s versatility. Build an adjustable fence to handle different cuts. This allows better control and accuracy during routing tasks.
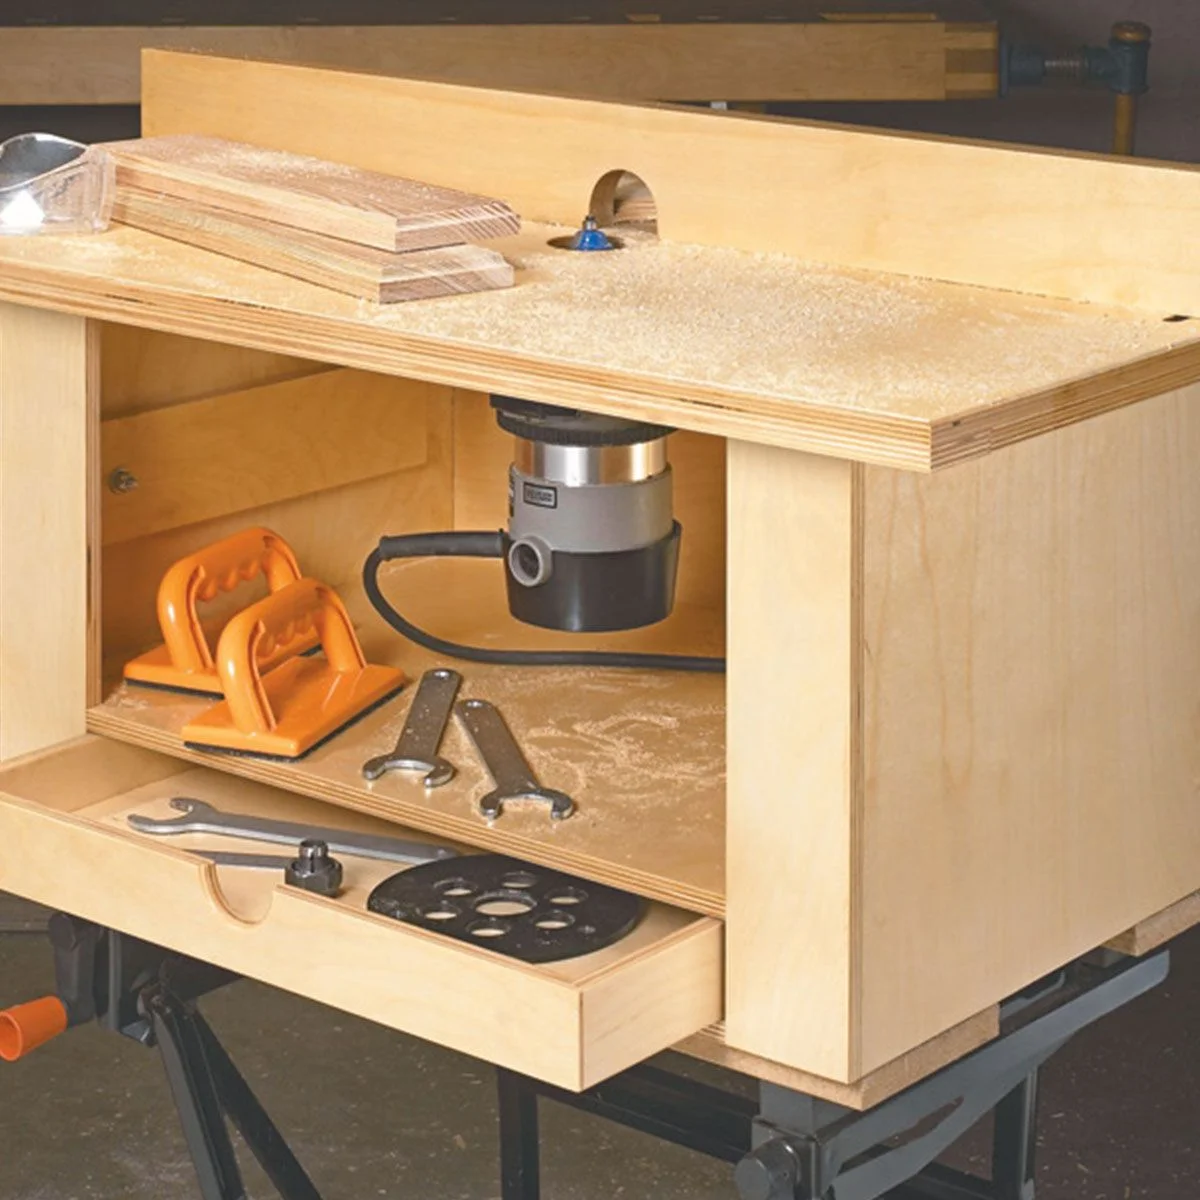
Credit: www.woodpeck.com
Frequently Asked Questions
What Are Common Router Table Mistakes?
Common router table mistakes include poor fence alignment, weak table top, inadequate dust collection, improper router mounting, and neglecting safety guards.
How Thick Should A Router Table Top Be?
A router table top should be at least 3/4 inch thick to ensure stability and support. Thicker tops, like 1 to 1. 5 inches, provide extra durability and reduce vibration. Choose sturdy materials like plywood or MDF for a smooth, flat surface that withstands heavy use.
What Materials Are Best For A Router Table?
The best materials for a router table include MDF, plywood, and melamine. These provide stability, smoothness, and durability. MDF offers a flat, smooth surface; plywood adds strength; melamine resists wear and moisture. Combining these materials ensures a sturdy, long-lasting router table top.
Is Mdf Good For A Router Table?
MDF is good for a router table top due to its smooth surface and stability. It resists warping and provides a flat work area. However, seal edges to prevent moisture damage. Overall, MDF offers an affordable, durable base ideal for router table construction.
What Materials Are Best For Building A Router Table?
Plywood and MDF are common choices for router tables due to strength and smooth surfaces.
Conclusion
Building your own router table saves money and boosts workshop efficiency. Start with simple tools and basic materials. Take your time to measure and assemble carefully. This project improves your woodworking skills step by step. A sturdy, well-made router table gives better control and safety.
Enjoy the satisfaction of creating a useful, custom tool. Keep practicing and improve your designs over time. Your workshop will thank you for this smart addition.
