Last Updated: March 21, 2026
Are you ready to speed up your next project and work like a pro? Learning how to load a nail gun correctly is the first step to making your DIY tasks easier and safer.
If you’ve ever fumbled with nails or struggled to get your nail gun ready, this guide is made just for you. By the end, you’ll handle your nail gun with confidence, save time, and avoid common mistakes that slow you down.
Let’s dive in and get your nail gun loaded the right way, so you can focus on building, fixing, or creating without hassle.
Credit: www.youtube.com
Gather Necessary Tools
Before loading a nail gun, gather all necessary tools. Having the right tools ensures smooth operation and safety. Missing tools can cause delays or mistakes. Prepare your workspace by collecting everything needed.
Safety Gear
Wear safety glasses to protect your eyes from flying nails. Use ear protection if the nail gun is loud. Gloves help protect your hands from sharp nails and splinters.
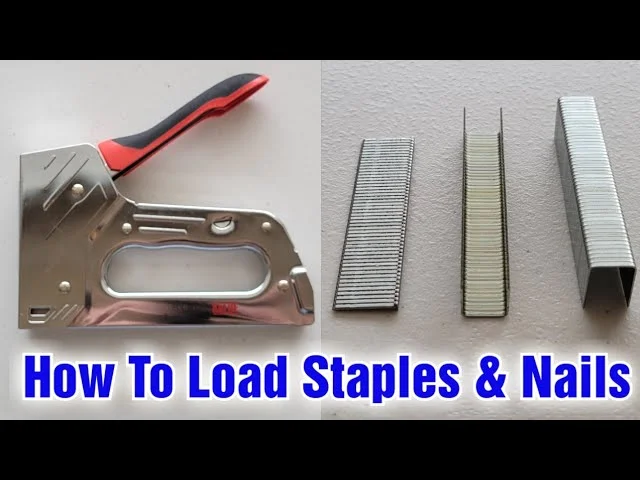
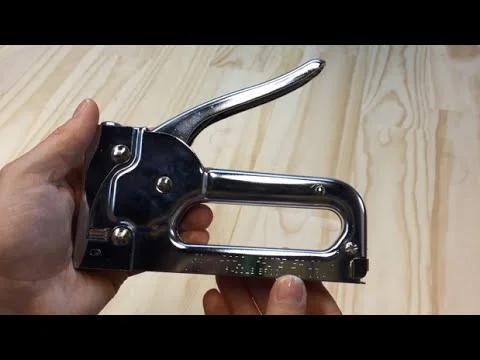
Nail Gun
Check your nail gun model and type. Different guns use specific nails. Make sure your nail gun is clean and in good working order before loading.
Nails
Use nails designed for your nail gun. Check the size and type printed on the nail box. Avoid mixing nails from different brands or sizes.
Compressed Air Or Battery
If your nail gun is pneumatic, prepare an air compressor with the correct pressure. For cordless models, ensure the battery is fully charged. Proper power supply helps the gun work effectively.
Choose Correct Nails
Choosing the correct nails is the first step in loading a nail gun properly. The right nails ensure strong holds and prevent jams. Using wrong nails can damage the tool or ruin your work.
Consider nail length, diameter, and type before buying. Each nail gun works best with specific nails designed for it.
Check Nail Length
Match nail length to your project needs. Short nails work for thin materials. Long nails are better for thick wood or framing. Avoid nails too long for your nail gun’s capacity.
Match Nail Diameter
Use nails that fit your nail gun’s gauge size. Thin nails are for light work and small materials. Thick nails provide more strength but need a compatible gun. Wrong diameter nails may cause jams or misfires.
Choose The Right Nail Type
Select nails based on material and finish type. Common types include smooth, ring shank, and spiral nails. Ring shank nails hold better in softwood. Spiral nails resist pull-out in hardwood. Some jobs need stainless steel or galvanized nails for rust resistance.
Use Compatible Nail Strips Or Collation
Nail guns often require nails in strips or coils. Check if your gun uses paper, plastic, or wire collation. Using the wrong collation type can block the gun or cause poor feeding.
Disconnect Power Source
Before loading your nail gun, it is important to disconnect its power source. This step keeps you safe from accidental firing. It also protects the tool from damage during loading. Always treat the nail gun as if it could fire at any moment. Disconnecting the power source stops the flow of energy. This makes the nail gun safe to handle and load.
Disconnect The Air Hose Or Remove The Battery
If your nail gun uses air power, start by disconnecting the air hose. Grip the connector firmly and pull it off the gun. For cordless models, remove the battery pack. Press the release button and slide the battery out. This stops the nail gun from receiving power.
Check The Trigger And Safety Mechanisms
After disconnecting power, press the trigger to release any remaining pressure. This step helps to clear the nail gun’s chamber. Also, make sure the safety lock is engaged. This prevents the gun from firing accidentally while loading nails.
Work In A Well-lit And Clear Area
Choose a clean workspace with good lighting before you start loading. This reduces the risk of dropping nails or missing steps. Clear the area of any distractions or clutter. A tidy space helps you focus on safely loading the nail gun.

Credit: www.wikihow.com
Open The Magazine
Opening the magazine is the first step to load your nail gun safely. This part holds the nails and feeds them into the tool. Understanding how to open it correctly helps avoid jams and damage.
Most nail guns have a slide or latch to open the magazine. You might need to press a button or pull a lever. Always check your model’s instructions to know exactly how to open it.
Make sure the nail gun is turned off or disconnected from power. This prevents accidental firing while you open the magazine. Safety first.
Locate The Magazine Release
Find the release mechanism on your nail gun. It is often near the handle or along the side. This release keeps the magazine locked during use.
Press or slide the release to unlock the magazine. You should feel or hear it pop open slightly. Do not force it if it does not move easily.
Slide Out The Magazine
Once unlocked, pull the magazine out gently. It usually slides backward or downward. Be careful not to drop any old nails inside.
Keep the magazine level as you slide it out. This helps nails stay in place and prevents bending or falling out.
Inspect The Magazine For Debris
Check inside the magazine for dust or stuck nails. Clean it with a dry cloth if needed. A clean magazine allows nails to feed smoothly.
Look for any broken or bent nails. Remove them before loading new nails. This step avoids jams and keeps your nail gun working well.
Insert Nail Strips
Inserting nail strips into a nail gun is a key step for smooth operation. Proper placement ensures nails feed correctly and the gun fires without jams. This step requires careful handling to avoid damage or misalignment.
First, locate the magazine release or latch on your nail gun. Press or slide it to open the magazine. The magazine is where nail strips go. It usually slides out or flips open.
Align The Nail Strip
Take a strip of nails and hold it so the pointed ends face out. Place the strip into the magazine channel. Make sure the nails fit snugly and line up with the driver blade inside.
Secure The Nail Strip
Push the nail strip all the way in until it stops. Close the magazine carefully. Listen for a click or feel resistance, showing the strip is locked in place.
Credit: www.youtube.com
Secure The Magazine
Securing the magazine of your nail gun is a key step in loading nails safely and effectively. The magazine holds the nails and feeds them into the gun. A loose magazine can cause jams or misfires. Follow these simple steps to secure the magazine properly.
Open The Magazine Fully
Start by unlocking the magazine latch. Pull the magazine out until it stops. This position allows easy loading of nails. Make sure it is fully extended to avoid damage.
Insert Nails Correctly
Place the nail strip in the magazine with the points facing down. Align the nails with the magazine track. Check that nails fit snugly and sit flat.
Close And Lock The Magazine
Push the magazine back gently but firmly. Listen for a click sound. This means the magazine is locked in place. Ensure it does not wiggle or slide out.
Check Magazine Security
Give the magazine a light shake. It should stay firm and not move. Confirm nails feed smoothly by pressing the trigger without firing. This test avoids problems during work.
Reconnect Power Source
After safely loading nails into your nail gun, restoring its power is the next essential step. Reconnecting the power source ensures the tool functions correctly and is ready for use. This step varies depending on the type of nail gun you have, such as pneumatic, electric, or cordless models.
Reconnect An Air Hose For Pneumatic Nail Guns
Locate the air compressor hose and check for any damage. Firmly attach the hose to the nail gun’s air inlet. Ensure the connection is tight to prevent air leaks. Turn on the air compressor to supply pressure to the nail gun. Confirm that the nail gun is receiving air by listening for a hissing sound.
Plug In Electric Nail Guns
Find a suitable power outlet near your workspace. Insert the electric nail gun’s power cord into the outlet. Check that the cord is not damaged or frayed. Switch on the power source if needed. Test the nail gun by pulling the trigger briefly to confirm it powers up.
Attach Battery For Cordless Nail Guns
Locate the battery compartment on your nail gun. Slide the battery pack into the slot until it clicks securely. Make sure the battery is fully charged for optimal performance. Avoid forcing the battery in if it does not fit easily. Turn on the nail gun and check for power by pressing the trigger.
Test Nail Gun Operation
Testing the nail gun operation is a crucial step after loading it. It ensures the tool works safely and correctly before starting your project. A quick test helps avoid jams and misfires that can slow work or cause injury.
Always wear safety glasses during the test. Keep the nail gun pointed away from yourself and others. This simple precaution protects you from accidental nail discharge.
Check Air Pressure Or Power Source
Confirm the nail gun’s air pressure or battery is connected properly. For pneumatic guns, the air compressor must provide the correct pressure. Battery-powered guns need a full charge to work well.
Test Fire On A Scrap Piece
Use a scrap piece of wood to test fire the nail gun. This avoids damage to your project materials. Press the trigger gently and observe the nail drive. The nail should go in smoothly and flush with the surface.
Listen For Unusual Sounds
Pay attention to the sounds during firing. A smooth, consistent noise means proper function. Any grinding, clicking, or hesitation signals a problem. Stop and inspect the gun if you hear odd sounds.
Inspect Nail Placement
Check how the nail sits after firing. It should be straight and secure. Bent or partially driven nails indicate a loading or mechanical issue. Correct these before continuing work.
Repeat Until Confident
Fire a few nails to confirm consistent operation. Each nail should drive cleanly without jams. When the nail gun works well, you are ready to proceed with your project.
Frequently Asked Questions
How To Use A Nail Gun For Beginners?
Connect the nail gun to a power source or air compressor. Load nails into the magazine with heads facing up. Hold the gun firmly, press the tip against the work surface, and pull the trigger. Always wear safety gear and follow the manufacturer’s instructions.
Practice on scrap wood first.
What To Use To Fill Nail Gun Holes?
Use wood filler or putty to fill nail gun holes. Apply with a putty knife, let dry, then sand smooth. For painted surfaces, choose paintable filler.
How To Load Porter And Cable Nail Gun?
Pull back the magazine latch on the Porter-Cable nail gun. Insert the nail strip with heads facing up. Release the latch to secure nails. Connect the gun to the air compressor. Press the nose against the surface and pull the trigger to fire.
How To Load A Dewalt Nail Gun?
Slide the nail strip into the magazine with nails facing up. Press the spring-loaded clamp to secure nails. Ensure the nail gun is disconnected from power before loading.
How Do I Safely Load A Nail Gun?
Always disconnect power or air supply before loading nails to avoid accidents.
Conclusion
Loading a nail gun is simple once you know the steps. Always check the nail type and size before loading. Insert the nails carefully, ensuring they face the right way. Secure the magazine properly to avoid jams or misfires. Practice safety by keeping your hands clear while loading.
With these tips, you can work faster and safer. Enjoy your projects with confidence and ease.
{ “@context”: “https://schema.org”, “@type”: “Article”, “headline”: “How to Load a Nail Gun: Quick and Easy Step-by-Step Guide”, “description”: “Learn how to load a nail gun safely by understanding its components and steps to insert nails for efficient and secure fastening in construction tasks.”, “url”: “https://www.powertoolstoday.com/how-to-load-a-nail-gun/”, “datePublished”: “2025-12-04”, “dateModified”: “2026-03-18”, “author”: { “@type”: “Organization”, “name”: “Power Tools Today”, “url”: “https://www.powertoolstoday.com” }, “publisher”: { “@type”: “Organization”, “name”: “Power Tools Today”, “url”: “https://www.powertoolstoday.com” }, “mainEntityOfPage”: { “@type”: “WebPage”, “@id”: “https://www.powertoolstoday.com/how-to-load-a-nail-gun/” }, “image”: { “@type”: “ImageObject”, “url”: “https://www.powertoolstoday.com/wp-content/uploads/2025/11/how-to-load-a-nail-gun.webp” } }{ “@context”: “https://schema.org”, “@type”: “Article”, “headline”: “How to Load a Nail Gun: Quick and Easy Step-by-Step Guide”, “description”: “Learn how to load a nail gun safely by understanding its components and steps to insert nails for efficient and secure fastening in construction tasks.”, “url”: “https://www.powertoolstoday.com/how-to-load-a-nail-gun/”, “datePublished”: “2025-12-04”, “dateModified”: “2026-03-19”, “author”: { “@type”: “Organization”, “name”: “Power Tools Today”, “url”: “https://www.powertoolstoday.com” }, “publisher”: { “@type”: “Organization”, “name”: “Power Tools Today”, “url”: “https://www.powertoolstoday.com” }, “mainEntityOfPage”: { “@type”: “WebPage”, “@id”: “https://www.powertoolstoday.com/how-to-load-a-nail-gun/” }, “image”: { “@type”: “ImageObject”, “url”: “https://www.powertoolstoday.com/wp-content/uploads/2025/11/how-to-load-a-nail-gun.webp” } }nnnn