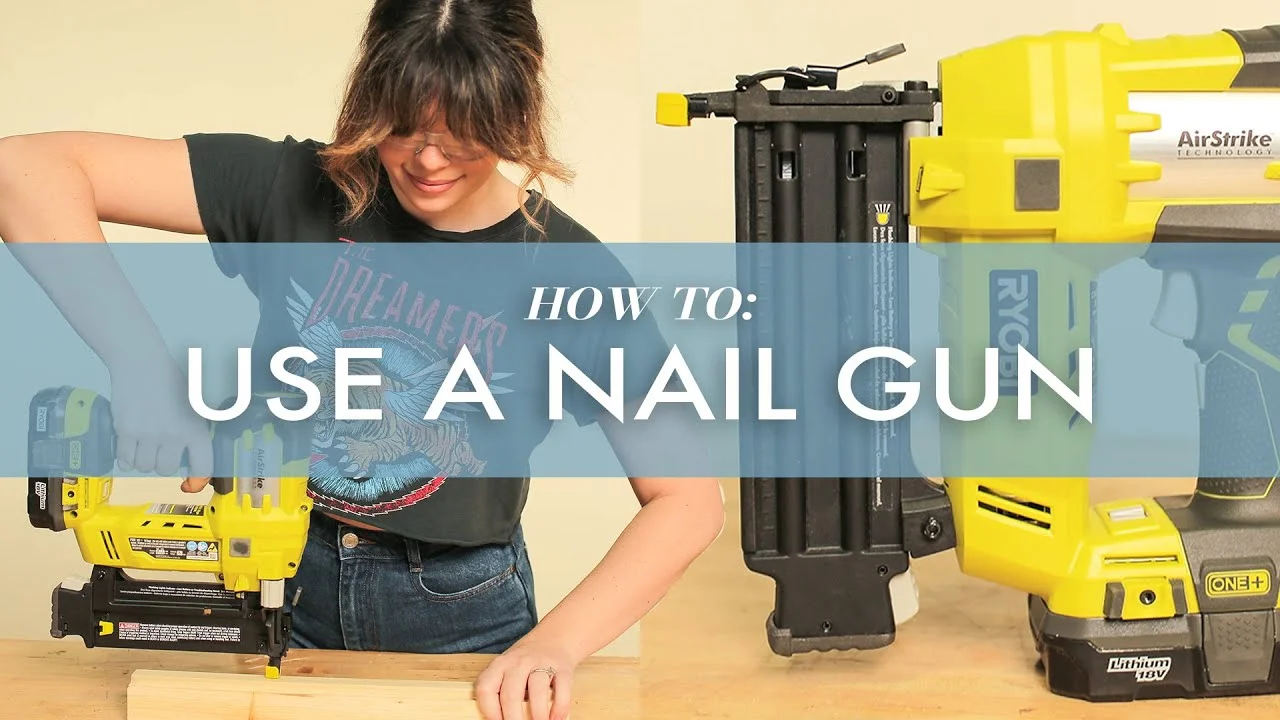
Ready to tackle your next woodworking or home improvement project faster and with professional results? Learning how to use a nail gun is a game-changer that will save you time and effort.
But before you pull the trigger, it’s crucial to understand the basics to stay safe and get the job done right. In this guide, you’ll discover simple, step-by-step instructions that will boost your confidence and help you master your nail gun like a pro.
Stick with me, and you’ll be nailing it in no time!
Credit: www.wikihow.com
Types Of Nail Guns
Nail guns come in different types, each designed for specific tasks. Choosing the right nail gun makes your work easier and more precise. Understanding these types helps you use the tool safely and effectively.
Pneumatic Nail Guns
Pneumatic nail guns use compressed air to drive nails. They need an air compressor to work. These guns are powerful and fast. They suit large projects like framing and roofing. Pneumatic nail guns are light but require hoses, limiting movement.
Electric Nail Guns
Electric nail guns run on batteries or plug into power outlets. They are easier to move around since they have no hoses. These guns work well for light to medium jobs like trim and molding. Battery-powered models offer good portability and convenience.
Gas-powered Nail Guns
Gas-powered nail guns use fuel cells and batteries together. They offer cordless freedom and strong power. These guns suit outdoor work and heavy tasks. They are quieter than pneumatic guns but need regular refueling. Gas models balance power and mobility well.
Strip Nail Guns
Strip nail guns hold nails in a long strip. They fire nails quickly and in a row. These guns are common in framing and decking. The strip design helps you work faster without reloading often. Good for repetitive nailing jobs.
Coil Nail Guns
Coil nail guns carry nails in a coil shape. They hold many nails at once, ideal for large projects. These guns reduce reload time significantly. Coil nails work well for roofing and siding. They offer high capacity and efficiency.
Brad Nailers
Brad nailers use small, thin nails called brads. They are perfect for delicate work like trim and furniture. Brad nailers minimize wood splitting. They provide clean, precise nailing for fine finishes. Great for detailed carpentry.
Finish Nailers
Finish nailers use slightly bigger nails than brad nailers. They work well for baseboards, molding, and cabinets. Finish nailers hold nails firmly in place. They offer a strong hold without damaging the wood. Ideal for finishing touches.
Credit: www.youtube.com
Essential Safety Gear
Using a nail gun can speed up your projects. Safety is the top priority. Wearing the right gear protects you from injury. Essential safety gear keeps your eyes, ears, and hands safe while working. It also helps prevent accidents that could cause serious harm.
Eye Protection
Always wear safety glasses or goggles. Nail guns can send small nails or debris flying. Protect your eyes from flying particles. Choose glasses with impact resistance for best safety. Clear lenses work well for indoor jobs. Tinted lenses help when working outside in bright sunlight.
Hearing Protection
Nail guns make loud noises that can damage your ears. Use earplugs or earmuffs to protect your hearing. Choose hearing protection that fits comfortably. Keep it on during the entire project. This will reduce the risk of long-term hearing loss.
Hand Protection
Wear sturdy work gloves to protect your hands. Gloves help prevent cuts and bruises. They also improve your grip on the nail gun. Choose gloves that allow you to handle the tool easily. Avoid gloves that are too bulky or slippery.
Proper Footwear
Wear closed-toe shoes or work boots. Protect your feet from falling nails and heavy objects. Shoes with slip-resistant soles provide better stability. Avoid sandals or open shoes on the job site. Good footwear helps you stay steady and safe.
Preparing The Nail Gun
Preparing the nail gun is the first step before starting any nailing project. It ensures safety and efficiency during use. Taking time to prepare the tool helps avoid jams and misfires. This section explains how to load nails correctly and adjust nail depth.
Loading Nails
Start by unplugging or disconnecting the nail gun from power. Open the magazine by pressing the release latch. Insert the correct size of nails into the magazine track. Make sure the nails align with the driver blade. Close the magazine until it clicks securely. Check that nails feed smoothly without obstruction.
Adjusting Nail Depth
Most nail guns have a depth adjustment knob or dial. Turn the knob to set how deep the nail will go into the material. Test the depth on a scrap piece of wood first. Adjust until nails sink just below the surface without splitting wood. Proper depth prevents damage and ensures a clean finish.
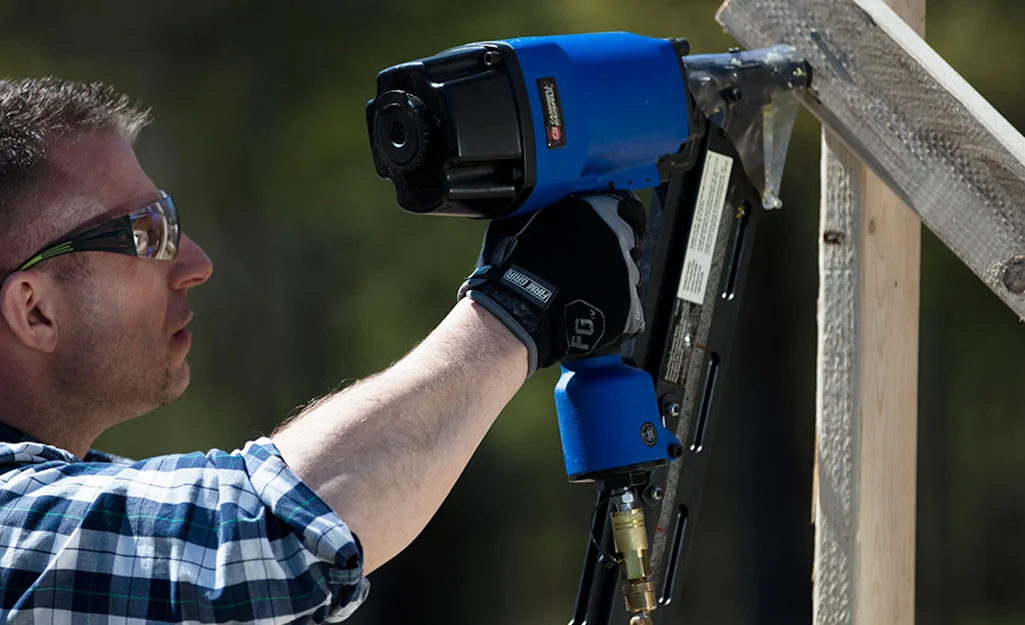
Correct Handling Techniques
Using a nail gun safely and effectively starts with correct handling techniques. Proper handling reduces the risk of accidents and ensures precise nailing. It also helps control the nail gun’s power and speed. Focus on how you hold and operate the tool for best results.
Proper Grip
Hold the nail gun firmly with your dominant hand. Grip it near the handle, not too tight or too loose. A steady grip helps control the direction and force of each nail. Keep your wrist straight to avoid strain. Support the tool’s weight evenly. This balance improves accuracy and comfort.
Trigger Control
Use your index finger to press the trigger gently. Avoid pulling it abruptly. Slow trigger control allows nails to fire smoothly. Do not rest your finger on the trigger when not nailing. This prevents accidental shots. Release the trigger fully after each nail. Controlled trigger use keeps your work safe and precise.
Positioning And Aiming
Positioning and aiming a nail gun correctly ensures strong, clean nailing. Proper handling reduces the risk of mistakes and material damage. Focus on steady control and accurate placement before firing nails.
Aligning The Nail Gun
Hold the nail gun perpendicular to the surface. This angle helps nails go in straight. Align the tip with the desired nail spot. Check that the gun’s nose is flat against the material. Firm contact prevents nails from bending or misfiring. Keep your hand steady to maintain alignment. Take a moment to confirm the position before pressing the trigger.
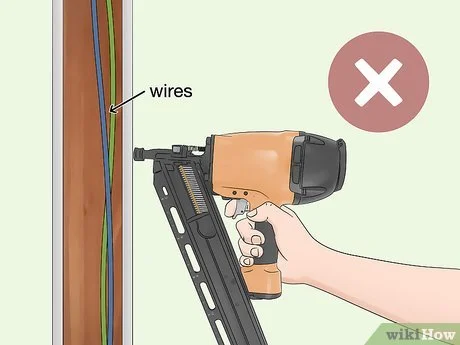
Avoiding Material Damage
Press the nail gun gently against the surface. Avoid too much force, which can dent or crack the material. Use the correct nail length for the job. Too long nails may split wood or cause damage. Consider using a nailer with adjustable depth settings. This feature controls how deep nails go in. Always test on scrap material to perfect your technique. Careful aiming keeps your project neat and strong.
Credit: www.homedepot.com
Common Issues And Fixes
Using a nail gun is a quick way to finish projects. Yet, common issues can slow work down. Knowing how to fix these problems helps keep the job moving. This section covers the main issues and how to solve them safely and fast.
Clearing Jams
Jams happen when nails get stuck inside the gun. First, always unplug the nail gun or disconnect the air hose. Open the magazine by pressing the release latch. Remove any bent or stuck nails carefully. Use a small tool like pliers to clear tight jams. After clearing, close the magazine securely. Test the gun before starting again to ensure smooth operation.
Troubleshooting Misfires
Misfires occur when the gun does not shoot nails properly. Check if the nails are the right size and type. Poor quality nails can cause trouble. Ensure the air pressure is correct for pneumatic guns. Clean the nail gun regularly to avoid dirt build-up. If the gun still misfires, inspect the trigger and safety mechanism. Replace worn parts or seek professional help if needed.
Maintenance Tips
Proper maintenance keeps your nail gun working well and safe. Regular care prevents jams and extends tool life. Follow simple steps to clean and lubricate your nail gun.
Cleaning
Remove dust and debris after each use. Open the magazine and clear any stuck nails. Use a soft brush or compressed air to clean inside parts. Wipe the exterior with a dry cloth. Avoid water or harsh chemicals that damage the tool.
Lubrication
Apply a few drops of oil to moving parts. Use oil made for pneumatic tools if your nail gun is air-powered. Lubricate the piston and trigger areas to reduce wear. Do this before starting work and after long breaks. Proper oiling keeps the nail gun running smoothly and stops rust.
Best Practices For Projects
Using a nail gun can speed up your projects and give a clean finish. Following best practices helps you get the most from your tool. Safety and efficiency go hand in hand. Knowing how to choose the right nails and adding wood glue can improve your results.
Choosing Nails
Select nails based on your project material and nail gun type. Use the correct length to avoid splitting wood or weak joints. Match the nail gauge to your tool specifications. Different nails serve different purposes, like finishing or framing. Always check the nail gun manual for recommended nail sizes. Using the wrong nails can cause jams or damage.
Using Wood Glue
Wood glue strengthens joints and reduces nail stress. Apply glue to surfaces before nailing for a tighter hold. It helps prevent wood from splitting under nail pressure. Glue also fills small gaps, improving durability and appearance. Allow glue to dry properly for best results. Combining glue with nails creates a lasting bond.
Frequently Asked Questions
How Do You Use A Nail Gun Step By Step?
Hold the nail gun firmly and align it with the work surface. Press the safety tip against the material. Pull the trigger to fire a nail. Release and reposition for the next nail. Always wear safety gear and follow the manufacturer’s instructions.
Is A Nail Gun Easy To Use?
A nail gun is generally easy to use with basic safety knowledge. It requires steady hands and proper handling to operate safely and effectively.
How To Aim A Nail Gun?
Hold the nail gun firmly and place its tip flush against the wood surface. Align slightly off the mark to counter wood pull. Apply steady pressure, then squeeze the trigger to fire the nail accurately.
What Causes A Nail Gun To Not Fire?
A nail gun may not fire due to jams, empty magazines, low air pressure, safety triggers not engaged, or faulty components. Clear jams, check air supply, reload nails, and ensure safety mechanisms are properly set to fix the issue.
What Safety Gear Is Needed When Using A Nail Gun?
Wear safety glasses and hearing protection to protect your eyes and ears from injury.
Conclusion
Using a nail gun saves time and effort in many projects. Always wear safety gear to protect yourself. Keep the tool steady and press firmly before firing. Check for jams regularly to avoid problems. Practice on scrap wood to build confidence.
With care and attention, you can work safely and efficiently. Nail guns make tasks easier when used correctly. Stay patient and take your time for best results.
Related reading: how to load a nail gun.
Related reading: how to install baseboards without a nail gun.
