Last Updated: March 20, 2026
Looking to organize your space with a pegboard but worried about making holes in your walls? You’re not alone.
Drilling can be messy, damaging, and sometimes just not an option—especially if you’re renting or have delicate surfaces. But what if you could mount your pegboard quickly and securely without drilling a single hole? In this guide, you’ll discover simple, effective ways to hang your pegboard using easy-to-find tools like heavy-duty adhesive strips and peel-and-stick panels.
Keep reading, and you’ll learn how to transform your wall into a stylish, functional storage solution—without the hassle or damage. Your perfect pegboard setup is closer than you think!
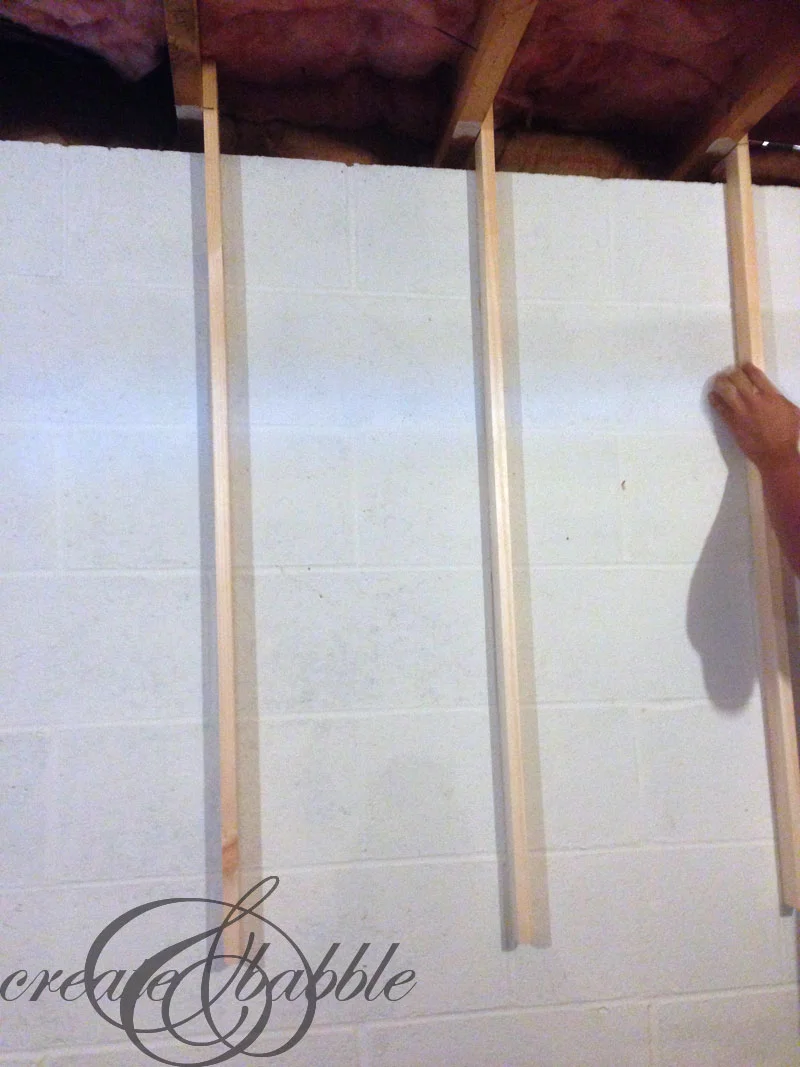
Credit: createandbabble.com
Adhesive Strips For Pegboard
Adhesive strips offer a simple way to mount pegboards without drilling holes. They work well on smooth, clean surfaces and hold the pegboard firmly in place. This method saves time and keeps your walls damage-free. Perfect for renters or anyone avoiding tools.
Choosing the right adhesive strips is key to a secure pegboard setup. Follow these steps to ensure a strong, lasting hold.
Choosing The Right Strips
Select heavy-duty adhesive strips designed for wall mounting. Look for strips that can support weight up to 5 pounds or more. Command strips are a popular choice because they remove cleanly without residue. Avoid strips made for light objects only. Check product labels for weight limits and surface compatibility.
Preparing Surfaces
Clean the wall and pegboard surfaces with rubbing alcohol. Avoid using soap or water as they leave residue. Make sure both surfaces are dry before applying strips. Remove dust and dirt to improve adhesion. Press a clean cloth firmly for best results.
Step-by-step Application
First, attach adhesive strips to the back corners of the pegboard. Press each strip firmly for 30 seconds. Next, press the pegboard against the wall with even pressure. Hold for 1 minute to secure the bond. Wait one hour before hanging any tools or items. This helps the adhesive reach full strength.
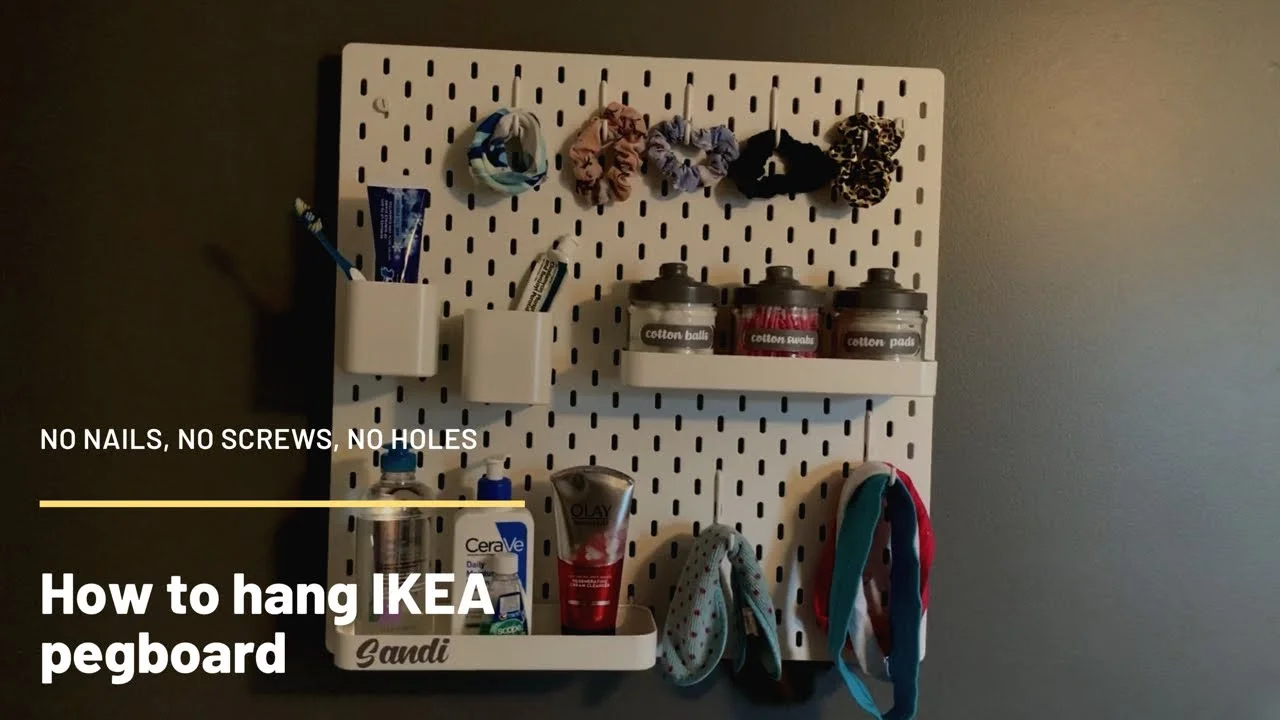
Credit: www.youtube.com
Peel-and-stick Pegboard Panels
Pegboard is perfect for organizing tools, craft supplies, and more. Peel-and-stick pegboard panels offer a no-drill option. They stick directly to smooth walls or surfaces. This makes them ideal for renters or anyone avoiding wall damage. Installation is quick and clean without tools or screws.
Types Of Panels
Peel-and-stick panels come in plastic and vinyl forms. Plastic panels are sturdy and hold heavier items. Vinyl panels are thinner and flexible but less strong. Some panels have a glossy finish, others matte. Choose panels based on the weight of items you want to hang. Many brands offer white, black, or natural wood colors.
Installation Tips
Clean the wall surface before applying panels. Use rubbing alcohol for best results. Make sure the surface is dry and smooth. Peel off the backing slowly to avoid wrinkles. Press firmly from top to bottom to secure. Hold the panel in place for a few seconds. For extra security, use double-sided mounting tape on edges.
Best Uses
Peel-and-stick pegboards suit light to medium storage needs. Perfect for craft rooms, offices, and small kitchens. Great for hanging keys, scissors, or small tools. Avoid heavy items like power tools or large gardening tools. Ideal for dorm rooms or apartments. Easy to remove without wall damage when needed.
Freestanding Pegboard Systems
Freestanding pegboard systems offer a practical way to mount pegboards without drilling. These systems stand on their own and do not require wall attachment. They provide flexibility for organizing tools, crafts, or office supplies in any room or workspace.
These pegboards are ideal for renters or anyone avoiding damage to walls. They create a neat storage solution that can move with you. The design and portability make them a popular choice for many tasks.
Design Options
Freestanding pegboard systems come in various styles and sizes. Some have a simple frame with a single pegboard panel. Others include multiple panels or shelves for extra storage space.
Materials range from wood to metal and plastic. Choose one that fits your room’s style and your storage needs. Some designs include wheels for easier movement. Others have built-in hooks and bins for added functionality.
Assembly Instructions
Most freestanding pegboard systems are easy to assemble. Start by unpacking all parts and checking the instructions. Attach the pegboard panels to the frame using screws or clips provided.
Connect any shelves or additional components. Make sure the structure is stable and stands firmly on the floor. No drilling into walls or using heavy tools is necessary. Assembly usually takes less than an hour.
Portability Benefits
One key advantage is portability. You can move the pegboard to different rooms or locations easily. This feature is helpful for temporary workspaces or changing storage needs.
Freestanding pegboards also allow quick setup for events or projects. They avoid wall damage and leave no marks behind. This makes them perfect for renters or shared spaces.
Using Command Strips For Heavy Pegboards
Using Command Strips for heavy pegboards offers a simple, drill-free mounting option. These strips create a strong bond between the pegboard and the wall. They work well on smooth, clean surfaces and avoid wall damage. This method suits renters or anyone avoiding holes in walls. Proper use ensures your pegboard stays secure while holding tools or decorations.
Weight Limits
Command strips have specific weight limits. Each strip can hold about 4 pounds. Use multiple strips to increase strength. For heavy pegboards, apply strips evenly across the back. Check the combined weight capacity before mounting. Overloading strips can cause the pegboard to fall. Always follow the product’s weight guidelines to stay safe.
Securing The Pegboard
Clean the wall surface with rubbing alcohol first. This removes dust and oils for better grip. Press the command strips firmly on the pegboard edges. Wait one hour before mounting the pegboard on the wall. Press the pegboard against the wall for 30 seconds. Use extra strips in the center for added support. Make sure the pegboard is level before securing.
Maintenance Tips
Check the strips regularly for signs of wear or loosening. Avoid hanging very heavy items that exceed the weight limit. Remove the pegboard gently to replace strips if needed. Keep the pegboard dry to maintain strip adhesion. Store extra command strips for quick repairs. Clean the wall and pegboard surface before reapplying strips.
Mounting On Different Wall Surfaces
Mounting a pegboard without drilling depends heavily on the type of wall surface. Different walls require different approaches to ensure the pegboard stays secure. Understanding the surface helps choose the best no-drill method. This section explains how to mount pegboards on various wall types safely and effectively.
Drywall Considerations
Drywall is common in many homes and offices. It is smooth and fragile, so heavy adhesives may not hold well. Use strong, double-sided mounting tape designed for drywall. Clean the wall surface before applying tape for better grip. Avoid pressing too hard to prevent damage. Lightweight pegboards work best on drywall without drilling.
Cinder Block And Brick
Cinder block and brick walls are rough and uneven. Adhesive strips often fail on these surfaces. Use heavy-duty hooks or mounting brackets that use tension or clamps. Another option is adhesive hooks made for masonry walls. Clean the wall to remove dust and dirt before mounting. Avoid placing too much weight on pegboards mounted this way.
Smooth Vs Textured Walls
Smooth walls allow better adhesion for tapes and strips. Textured walls make it hard for adhesives to stick properly. On textured walls, try using mounting strips with strong glue or adhesive putty. Test a small area first to check adhesion. For better results, mount a thin board first, then attach the pegboard to it using no-drill methods.
Alternative No-drill Hooks And Hangers
Mounting a pegboard without drilling saves your walls from damage. Alternative no-drill hooks and hangers offer simple and quick solutions. These options fit various pegboard sizes and weights. You can choose hooks or hangers based on your needs and wall type. Below are three popular choices that keep installation easy and mess-free.
Magnetic Hooks
Magnetic hooks stick firmly to metal surfaces. They hold tools, keys, or lightweight items securely. These hooks work well if your pegboard has a metal backing or frame. No nails, screws, or adhesives are needed. Magnets allow easy repositioning. They are perfect for renters or temporary setups.
Over-the-door Hangers
Over-the-door hangers fit on the top edge of doors. They provide a sturdy base for your pegboard. This method does not touch the walls at all. It uses the door’s strength to support weight. You can hang tools or craft supplies without drilling. These hangers are ideal for dorm rooms or small spaces.
Removable Adhesive Hooks
Removable adhesive hooks use sticky pads to attach to walls. They hold lightweight pegboards well. These hooks peel off easily without leaving marks. The adhesive works best on smooth, clean surfaces. They allow quick installation and removal. Adhesive hooks are great for renters and temporary displays.
Creative Damage-free Pegboard Ideas
Creative damage-free pegboard ideas let you organize without hurting walls. These methods are perfect for renters or those who avoid drills. They keep surfaces clean while offering flexible display options.
Choose a style that fits your space and needs. Each idea is simple and uses common tools or materials. Your pegboard can be up and ready quickly with no marks left behind.
Using Tension Rods
Tension rods work well between two walls or inside a frame. Place rods vertically or horizontally to hold the pegboard in place. No holes or adhesives are needed with this easy setup. Adjust rods to fit snugly and support the pegboard weight. This method is fast and leaves no damage after removal.
Lean-to Pegboard Displays
Lean your pegboard against a wall or furniture piece. Use a sturdy support at the back to prevent slipping. This style is portable and does not require wall mounts. Perfect for small areas or temporary setups. It lets you move and change locations with ease.
Clamping Methods
Clamps can secure pegboards to tables or shelves without drilling. Use C-clamps or spring clamps for strong, damage-free holds. They are easy to adjust and remove whenever needed. This method works well for workbenches or craft tables. Clamping saves wall space and keeps your pegboard stable.
Tips For Long-term Pegboard Stability
Maintaining pegboard stability without drilling requires some care. Proper steps ensure your pegboard stays secure and functional for a long time. Use the right methods and regular checks to avoid unexpected falls or damage.
Regular Adhesion Checks
Check the adhesive strips or mounting tape often. Look for signs of peeling or weakening. Replace worn strips immediately to keep the pegboard firmly attached. This prevents sudden drops and damage to your wall or items.
Avoiding Overloading
Do not hang heavy tools or items on the pegboard. Overloading stresses the adhesive and the board itself. Spread out your items evenly to balance the weight. Lighter loads help maintain stability and extend pegboard life.
Seasonal Adjustments
Temperature and humidity affect adhesive strength. In dry or cold seasons, adhesives may shrink or lose grip. In warm or humid times, they may soften. Check and adjust the pegboard mounting accordingly to keep it secure all year round.

Credit: www.youtube.com
Frequently Asked Questions
Can Command Strips Hold A Pegboard?
Command strips can hold lightweight pegboards on smooth, clean surfaces. Use heavy-duty strips for better support. Avoid heavy or large pegboards, as strips may fail. For stronger hold, choose mounting hardware or drill into studs.
Can You Hang Pegboard Directly On Studs?
Yes, you can hang pegboard directly on studs. Secure it with screws for strong support and stability.
Can I Hang A Pegboard On Drywall?
Yes, you can hang a pegboard on drywall using heavy-duty adhesive strips or anchors. Secure it to studs for better support.
What Is The Best Way To Hang Pegboard?
The best way to hang pegboard is to mount it on wall studs using screws and spacers for stability and airflow. Use a level to align it properly. Secure screws tightly and test the board’s connection to ensure it holds firmly.
Can I Mount Pegboard Without Drilling Into Walls?
Yes, use strong adhesive strips or mounting tape to attach pegboard without drilling holes.
Conclusion
Mounting a pegboard without drilling saves time and protects walls. Using adhesive strips or hooks works well for light to medium loads. These methods leave no holes and keep your space neat. Choose the right mounting option based on your pegboard size and weight.
Always follow product instructions for the best results. Enjoy organizing your tools or decor without damage or hassle. Simple, clean, and effective — a smart way to hang pegboards.
{ “@context”: “https://schema.org”, “@type”: “Article”, “headline”: “How to Mount Pegboard Without Drilling: Easy Damage-Free Hacks”, “description”: “Learn how to mount pegboard without drilling by using adhesive strips or hooks, ideal for damage-free wall organization and easy tool access.”, “url”: “https://www.powertoolstoday.com/how-to-mount-pegboard-without-drilling/”, “datePublished”: “2025-11-24”, “dateModified”: “2026-03-18”, “author”: { “@type”: “Organization”, “name”: “Power Tools Today”, “url”: “https://www.powertoolstoday.com” }, “publisher”: { “@type”: “Organization”, “name”: “Power Tools Today”, “url”: “https://www.powertoolstoday.com” }, “mainEntityOfPage”: { “@type”: “WebPage”, “@id”: “https://www.powertoolstoday.com/how-to-mount-pegboard-without-drilling/” }, “image”: { “@type”: “ImageObject”, “url”: “https://www.powertoolstoday.com/wp-content/uploads/2025/11/how-to-mount-pegboard-without-drilling.webp” } }nnnn