Last Updated: March 21, 2026
If you’ve ever faced a rough piece of wood or an uneven surface, you know how frustrating it can be to get it smooth and ready for your project. That’s where a belt sander becomes your best friend.
But how do you use this powerful tool correctly without ruining your work or risking injury? In this guide, you’ll discover simple, clear steps to master your belt sander like a pro. From choosing the right belt to moving it smoothly along the grain, you’ll learn the secrets that make sanding easier and your results flawless.
Ready to save time, avoid common mistakes, and achieve a perfect finish every time? Keep reading, because mastering your belt sander starts right here.
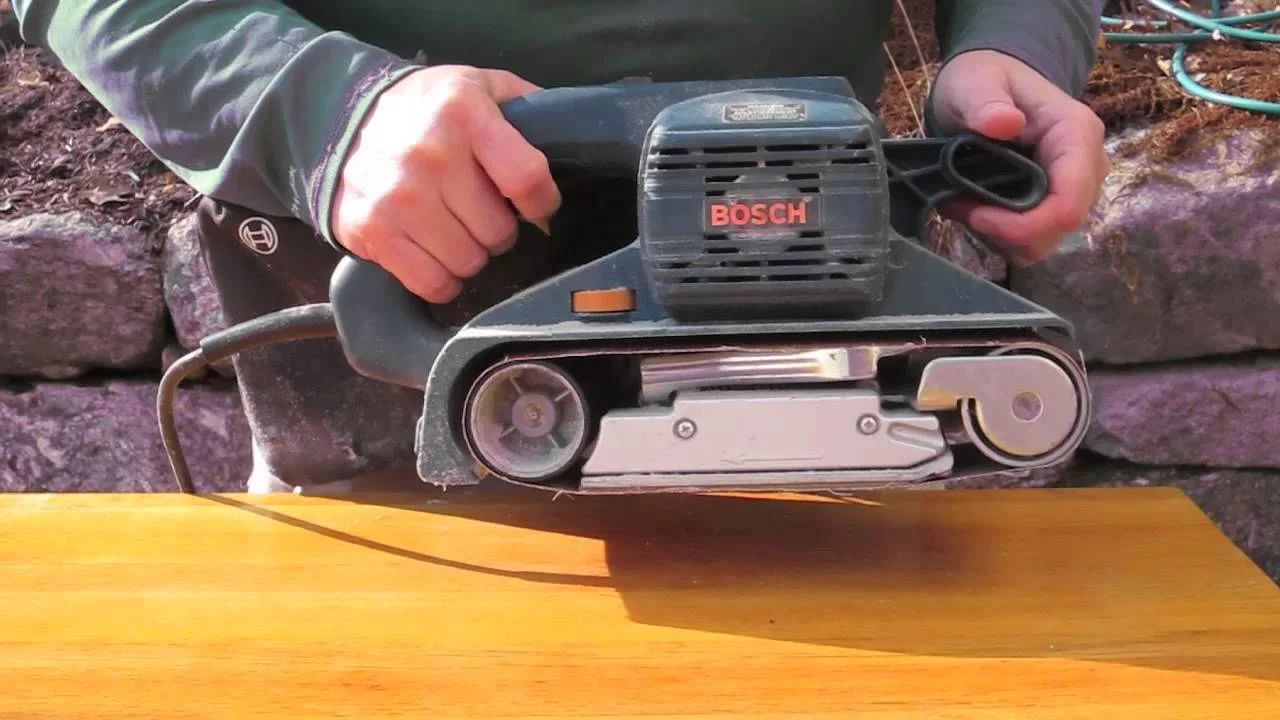
Credit: www.youtube.com
Choosing The Right Belt Sander
Choosing the right belt sander sets the foundation for a smooth sanding job. Each project demands a tool that fits the task. Picking the proper sander saves time and effort.
Different belt sanders offer unique features. Understanding these helps match the tool to the work. This section breaks down the key points to consider.
Types Of Belt Sanders
There are handheld and stationary belt sanders. Handheld models are portable and good for small jobs. Stationary sanders handle bigger, heavier materials. Choose based on the size and type of project.
Belt Size And Speed
Belt size affects sanding area and control. Larger belts cover more surface quickly. Smaller belts allow for precision in tight spots. Speed controls help adjust sanding intensity. Variable speed is useful for different materials.
Power And Motor Strength
Motor power determines sanding efficiency. Higher power means faster material removal. Lower power works well for delicate tasks. Match motor strength to the project’s needs for best results.
Dust Collection Features
Dust collection keeps the workspace clean. Some belt sanders have built-in dust bags or ports. This reduces mess and improves air quality. Consider a model with good dust control if you work indoors.
Comfort And Ergonomics
Comfort is key for long sanding sessions. Look for a sander with a comfortable grip. Lightweight tools reduce hand fatigue. Balanced design helps maintain control during use.
Essential Safety Gear
Using a belt sander can speed up your woodworking projects. Safety must come first. Wearing the right gear protects your body from dust, noise, and accidents. This gear helps you work comfortably and avoid injuries.
Eye Protection
Always wear safety goggles or glasses. They shield your eyes from flying wood chips and dust. Clear vision is key to precise sanding. Choose goggles with a snug fit to prevent debris from entering.
Hearing Protection
Belt sanders are loud tools. Use earplugs or earmuffs to protect your hearing. Prolonged noise exposure can cause hearing loss. Keep hearing gear handy whenever you use power tools.
Dust Mask Or Respirator
Sanding creates fine dust that can harm your lungs. Wear a dust mask or respirator to breathe safely. Choose masks rated for wood dust. This gear keeps your airways clean and healthy.
Gloves
Wear work gloves to protect your hands. They guard against splinters and minor scrapes. Use gloves that offer good grip and flexibility. Avoid loose gloves that could get caught in the sander.
Proper Clothing
Wear close-fitting clothes to prevent fabric from catching. Avoid jewelry or loose sleeves near the sander. Choose sturdy shoes to protect your feet from dropped tools or wood pieces. Dress for safety and comfort.
Preparing Your Workpiece
Preparing your workpiece is the first step before using a belt sander. This step ensures smooth sanding and prevents damage to the material. A properly prepared workpiece saves time and improves results.
Start by cleaning the surface of your workpiece. Remove dust, dirt, or grease that could clog the sanding belt. A clean surface allows the sander to work efficiently and produce an even finish.
Next, check the workpiece for any nails, screws, or staples. These metal objects can damage the sanding belt and cause injury. Remove or cover them before sanding.
Secure your workpiece firmly. Use clamps or a stable workbench to keep it from moving. A steady workpiece helps maintain control and avoid uneven sanding.
Inspecting The Surface
Look closely at the surface for cracks, knots, or rough spots. Identify areas needing extra attention during sanding. Knowing these spots helps you adjust your technique.
Marking The Workpiece
Use a pencil or chalk to mark areas that require more sanding. This visual guide keeps your work organized. It helps focus on problem spots without missing them.
Choosing The Right Grit
Select the correct sandpaper grit before starting. Coarse grit removes material fast but can leave scratches. Fine grit smooths the surface gently. Match grit to your project needs.
Credit: engineerwarehouse.com
Setting Up The Sander
Setting up a belt sander correctly ensures smooth and safe operation. This step prepares the tool for efficient sanding and protects both you and your workpiece. Take time to check every part before you start.
Checking The Power Source
Plug the sander into a grounded outlet. Make sure the cord is undamaged and not tangled. Avoid extension cords for better power flow. Confirm the switch works properly before use.
Installing The Sanding Belt
Unplug the sander first. Open the belt cover by releasing the latch or screws. Align the sanding belt so the arrows match the sander’s rotation. Fit the belt tightly on the rollers and close the cover securely.
Adjusting The Belt Tracking
Turn the tracking knob slowly while running the sander. Watch the belt’s position and center it on the rollers. Proper tracking prevents the belt from slipping off during use. Stop and readjust if the belt moves sideways.
Securing The Work Area
Clear your workspace from clutter and loose items. Clamp or fix your workpiece firmly to avoid movement. Ensure good lighting to see sanding progress clearly. Wear safety gear like goggles and a dust mask.
Basic Sanding Techniques
Basic sanding techniques form the foundation for using a belt sander effectively. Understanding these methods helps achieve smooth, even surfaces. It also prevents common mistakes like uneven sanding or gouging the material. Below are simple steps to guide your sanding process.
Hold The Sander Firmly And Steady
Grip the belt sander with both hands. Keep your hold firm but relaxed. This control helps guide the tool evenly across the surface. Avoid pushing down hard; let the sander’s weight do the work. Pressing too much can damage the wood or tool.
Move The Sander Along The Grain
Always sand in the direction of the wood grain. Moving against the grain can cause scratches and rough spots. Keep the sander flat and level with the surface. This technique produces a smooth and clean finish.
Keep A Consistent Speed And Pressure
Maintain a steady pace as you move the sander. Do not rush or stop suddenly. Smooth, even movements prevent uneven sanding marks. Use light, uniform pressure to avoid digging into the wood.
Overlap Each Pass Slightly
When sanding, overlap each pass by a few inches. This overlap blends the edges of each sanding track. It creates a consistent texture across the entire surface. Overlapping avoids lines or patches that look unfinished.
Check Your Progress Often
Pause regularly to inspect the work. Look for any rough spots or uneven areas. Adjust your technique if needed. Frequent checks help you achieve the best finish without over-sanding.
Avoiding Common Sanding Mistakes
Using a belt sander can speed up your woodworking projects. Avoiding common sanding mistakes helps you get smooth, even surfaces. Small errors can leave marks or damage your wood. Understanding these mistakes improves your results and saves time.
Maintaining Proper Pressure
Pressing too hard makes uneven surfaces. Let the sander’s weight do the work. Light, steady pressure prevents gouges and scratches. Too much force wears out the sandpaper faster.
Keeping The Sander Moving
Stopping in one spot creates dips and burns. Move the sander evenly along the grain. Avoid sanding in circles or across the grain. Constant motion helps avoid rough patches.
Choosing The Right Grit
Using too coarse sandpaper can leave deep scratches. Start with a medium grit and finish with fine grit. Changing grits gradually smooths the surface better. Using wrong grit wastes time and effort.
Securing The Workpiece
Loose wood can shift and cause uneven sanding. Clamp your workpiece firmly before sanding. Stability helps you control the sander better. It reduces risks of mistakes or accidents.
Advanced Finishing Tips
Advanced finishing with a belt sander improves your woodwork’s look and feel. These tips help create smooth, even surfaces without damage.
Control and technique matter most. Small adjustments give big results in the final finish.
Choosing The Right Grit For Final Passes
Use finer grit sandpaper as you near the end. Start with 120 grit, then move to 180 or 220 grit. This reduces scratches and creates a polished surface.
Change belts often to avoid clogging and uneven sanding.
Maintaining Steady Pressure And Speed
Keep the sander moving at a steady pace. Avoid pressing too hard; let the tool do the work. Too much pressure causes gouges and uneven spots.
Use low to medium speed settings for better control and smoother finishes.
Using Sanding Blocks For Edges And Corners
Belt sanders work best on flat surfaces. Use sanding blocks or hand sanding for edges and corners. This prevents over-sanding and preserves detail.
Blend the edges gently with the flat surfaces for a uniform look.
Cleaning The Surface Before Staining Or Sealing
Remove all dust after sanding. Use a vacuum or tack cloth to clean the surface thoroughly. Dust can ruin paint or stain adhesion.
Check the surface under bright light for missed spots or scratches.
Maintaining Your Belt Sander
Maintaining your belt sander keeps it working well for a long time. Proper care prevents damage and costly repairs. Simple steps help you avoid common problems and improve sanding results.
Regular checks and cleaning protect the motor and belt. Lubricating moving parts reduces wear and tear. Replace worn belts to keep sanding smooth and even.
Cleaning The Belt And Drum
Remove dust and debris after each use. Use a brush or compressed air to clean the belt. Wipe the drum to prevent buildup that can cause slipping. A clean belt and drum improve sanding efficiency.
Checking And Replacing The Sanding Belt
Inspect the belt for tears or worn spots. Replace the belt if it shows damage or loss of grit. A fresh belt sands better and reduces surface scratches. Always match the belt size to your sander model.
Lubricating Moving Parts
Apply lubricant to the sander’s bearings and rollers. Use oil recommended by the manufacturer. Lubrication reduces friction and noise. It helps the belt run smoothly and extends the tool’s life.
Inspecting The Power Cord
Look for cuts or frays in the power cord. Replace a damaged cord to avoid electrical hazards. Secure the cord away from the sanding area during use. This prevents accidental trips or damage.
Storing Your Belt Sander Properly
Store in a dry, clean place after use. Keep it away from moisture to prevent rust. Use a case or cover to protect it from dust. Proper storage maintains tool condition and readiness.

Credit: www.youtube.com
Frequently Asked Questions
How Do You Use A Belt Sander For Beginners?
Hold the belt sander firmly and keep it moving smoothly along the wood grain. Avoid pressing down hard. Secure your workpiece before starting. Wear safety gear like goggles, ear protection, and a dust mask. Check the belt for damage and never adjust the sander while it’s running.
What Are Some Common Mistakes People Make With Sanding?
Common sanding mistakes include sanding unevenly, applying too much pressure, sanding against the grain, using the wrong grit, and moving the sander too fast.
How To Use A Belt Sander On A Floor?
Move the belt sander smoothly along the floor, following the wood grain direction. Apply light pressure and keep the sander moving evenly to avoid scratches. Use overlapping strokes and sand in long, straight passes for best results.
How To Use A Belt Sander Safely?
Wear safety gear: goggles, hearing, and dust protection. Secure the workpiece firmly. Keep hands clear of the moving belt. Inspect the belt before use. Turn off and unplug the sander before changing belts or making adjustments.
How Do You Use A Belt Sander For Beginners?
Move the sander along the wood grain smoothly. Avoid pressing down hard or staying in one spot.
Conclusion
Using a belt sander can make your woodworking smoother and faster. Always move the sander evenly along the wood grain. Avoid pressing down hard; let the tool do the work. Keep your work area clean and wear safety gear. Regular practice helps you improve your control and finish.
Remember these tips to sand safely and efficiently every time.
{ “@context”: “https://schema.org”, “@type”: “Article”, “headline”: “How to Use a Belt Sander: Expert Tips for Perfect Finishing”, “description”: “Learn how to use a belt sander by understanding its function for smoothing surfaces and removing material efficiently in woodworking and metalworking projects.”, “url”: “https://www.powertoolstoday.com/how-to-use-a-belt-sander/”, “datePublished”: “2025-12-01”, “dateModified”: “2026-03-18”, “author”: { “@type”: “Organization”, “name”: “Power Tools Today”, “url”: “https://www.powertoolstoday.com” }, “publisher”: { “@type”: “Organization”, “name”: “Power Tools Today”, “url”: “https://www.powertoolstoday.com” }, “mainEntityOfPage”: { “@type”: “WebPage”, “@id”: “https://www.powertoolstoday.com/how-to-use-a-belt-sander/” }, “image”: { “@type”: “ImageObject”, “url”: “https://www.powertoolstoday.com/wp-content/uploads/2025/11/how-to-use-a-belt-sander.webp” } }{ “@context”: “https://schema.org”, “@type”: “Article”, “headline”: “How to Use a Belt Sander: Expert Tips for Perfect Finishing”, “description”: “Learn how to use a belt sander by understanding its function for smoothing surfaces and removing material efficiently in woodworking and metalworking projects.”, “url”: “https://www.powertoolstoday.com/how-to-use-a-belt-sander/”, “datePublished”: “2025-12-01”, “dateModified”: “2026-03-19”, “author”: { “@type”: “Organization”, “name”: “Power Tools Today”, “url”: “https://www.powertoolstoday.com” }, “publisher”: { “@type”: “Organization”, “name”: “Power Tools Today”, “url”: “https://www.powertoolstoday.com” }, “mainEntityOfPage”: { “@type”: “WebPage”, “@id”: “https://www.powertoolstoday.com/how-to-use-a-belt-sander/” }, “image”: { “@type”: “ImageObject”, “url”: “https://www.powertoolstoday.com/wp-content/uploads/2025/11/how-to-use-a-belt-sander.webp” } }nn