If you’ve ever wanted to achieve smooth, professional-looking finishes on your projects, learning how to use Dremel sanding discs is a game changer for you. These small but powerful accessories can help you sand wood, metal, plastic, and more with precision and ease.
Whether you’re a hobbyist or tackling a DIY task, mastering the right technique will save you time and effort while giving your work that polished edge. In this guide, you’ll discover simple steps to attach, operate, and get the best results from your Dremel sanding discs—so you can confidently bring your creative ideas to life.
Ready to transform rough surfaces into smooth masterpieces? Let’s dive in.
Choosing The Right Sanding Disc
Choosing the right sanding disc is key to effective sanding with a Dremel tool. The correct disc ensures smooth results and protects your workpiece. Understanding different types helps you pick the best one for your task.
Material Of The Sanding Disc
Sanding discs come in various materials like aluminum oxide, silicon carbide, and zirconia alumina. Aluminum oxide is durable and works well on wood and metal. Silicon carbide suits soft materials such as plastic and glass. Zirconia alumina is strong and ideal for heavy-duty sanding on hard metals.
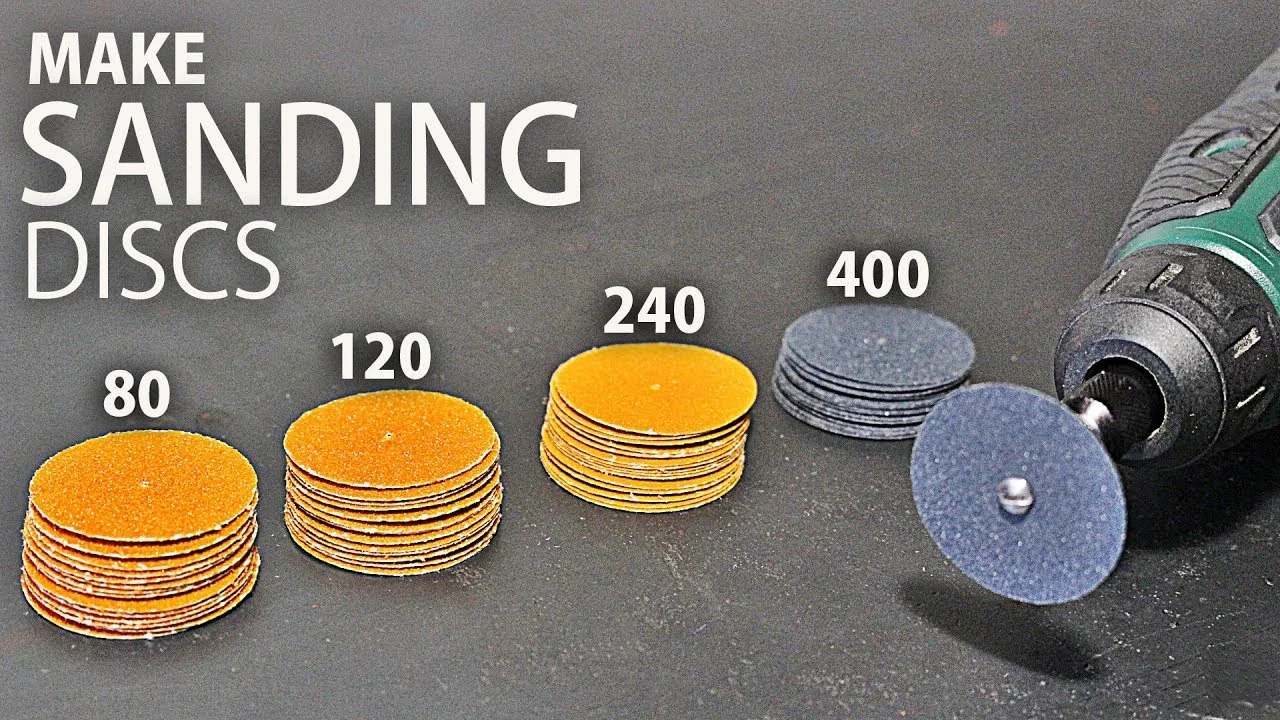
Grit Size And Its Importance
The grit size of a sanding disc tells you how coarse or fine it is. Lower numbers mean coarse grit for fast material removal. Higher numbers mean fine grit for smooth finishes. Choose coarse grits for shaping and fine grits for polishing.
Disc Diameter And Compatibility
Check the disc diameter before buying. Dremel sanding discs come in sizes like 1 inch and 1.5 inches. Make sure the disc fits your Dremel model and sanding attachment. Using the right size avoids damage and ensures safe operation.
Velcro Vs. Adhesive Backing
Velcro-backed discs attach quickly and are easy to change. Adhesive-backed discs stick firmly but take more time to replace. Velcro discs are good for frequent disc changes. Adhesive discs work better for precise or long sanding sessions.
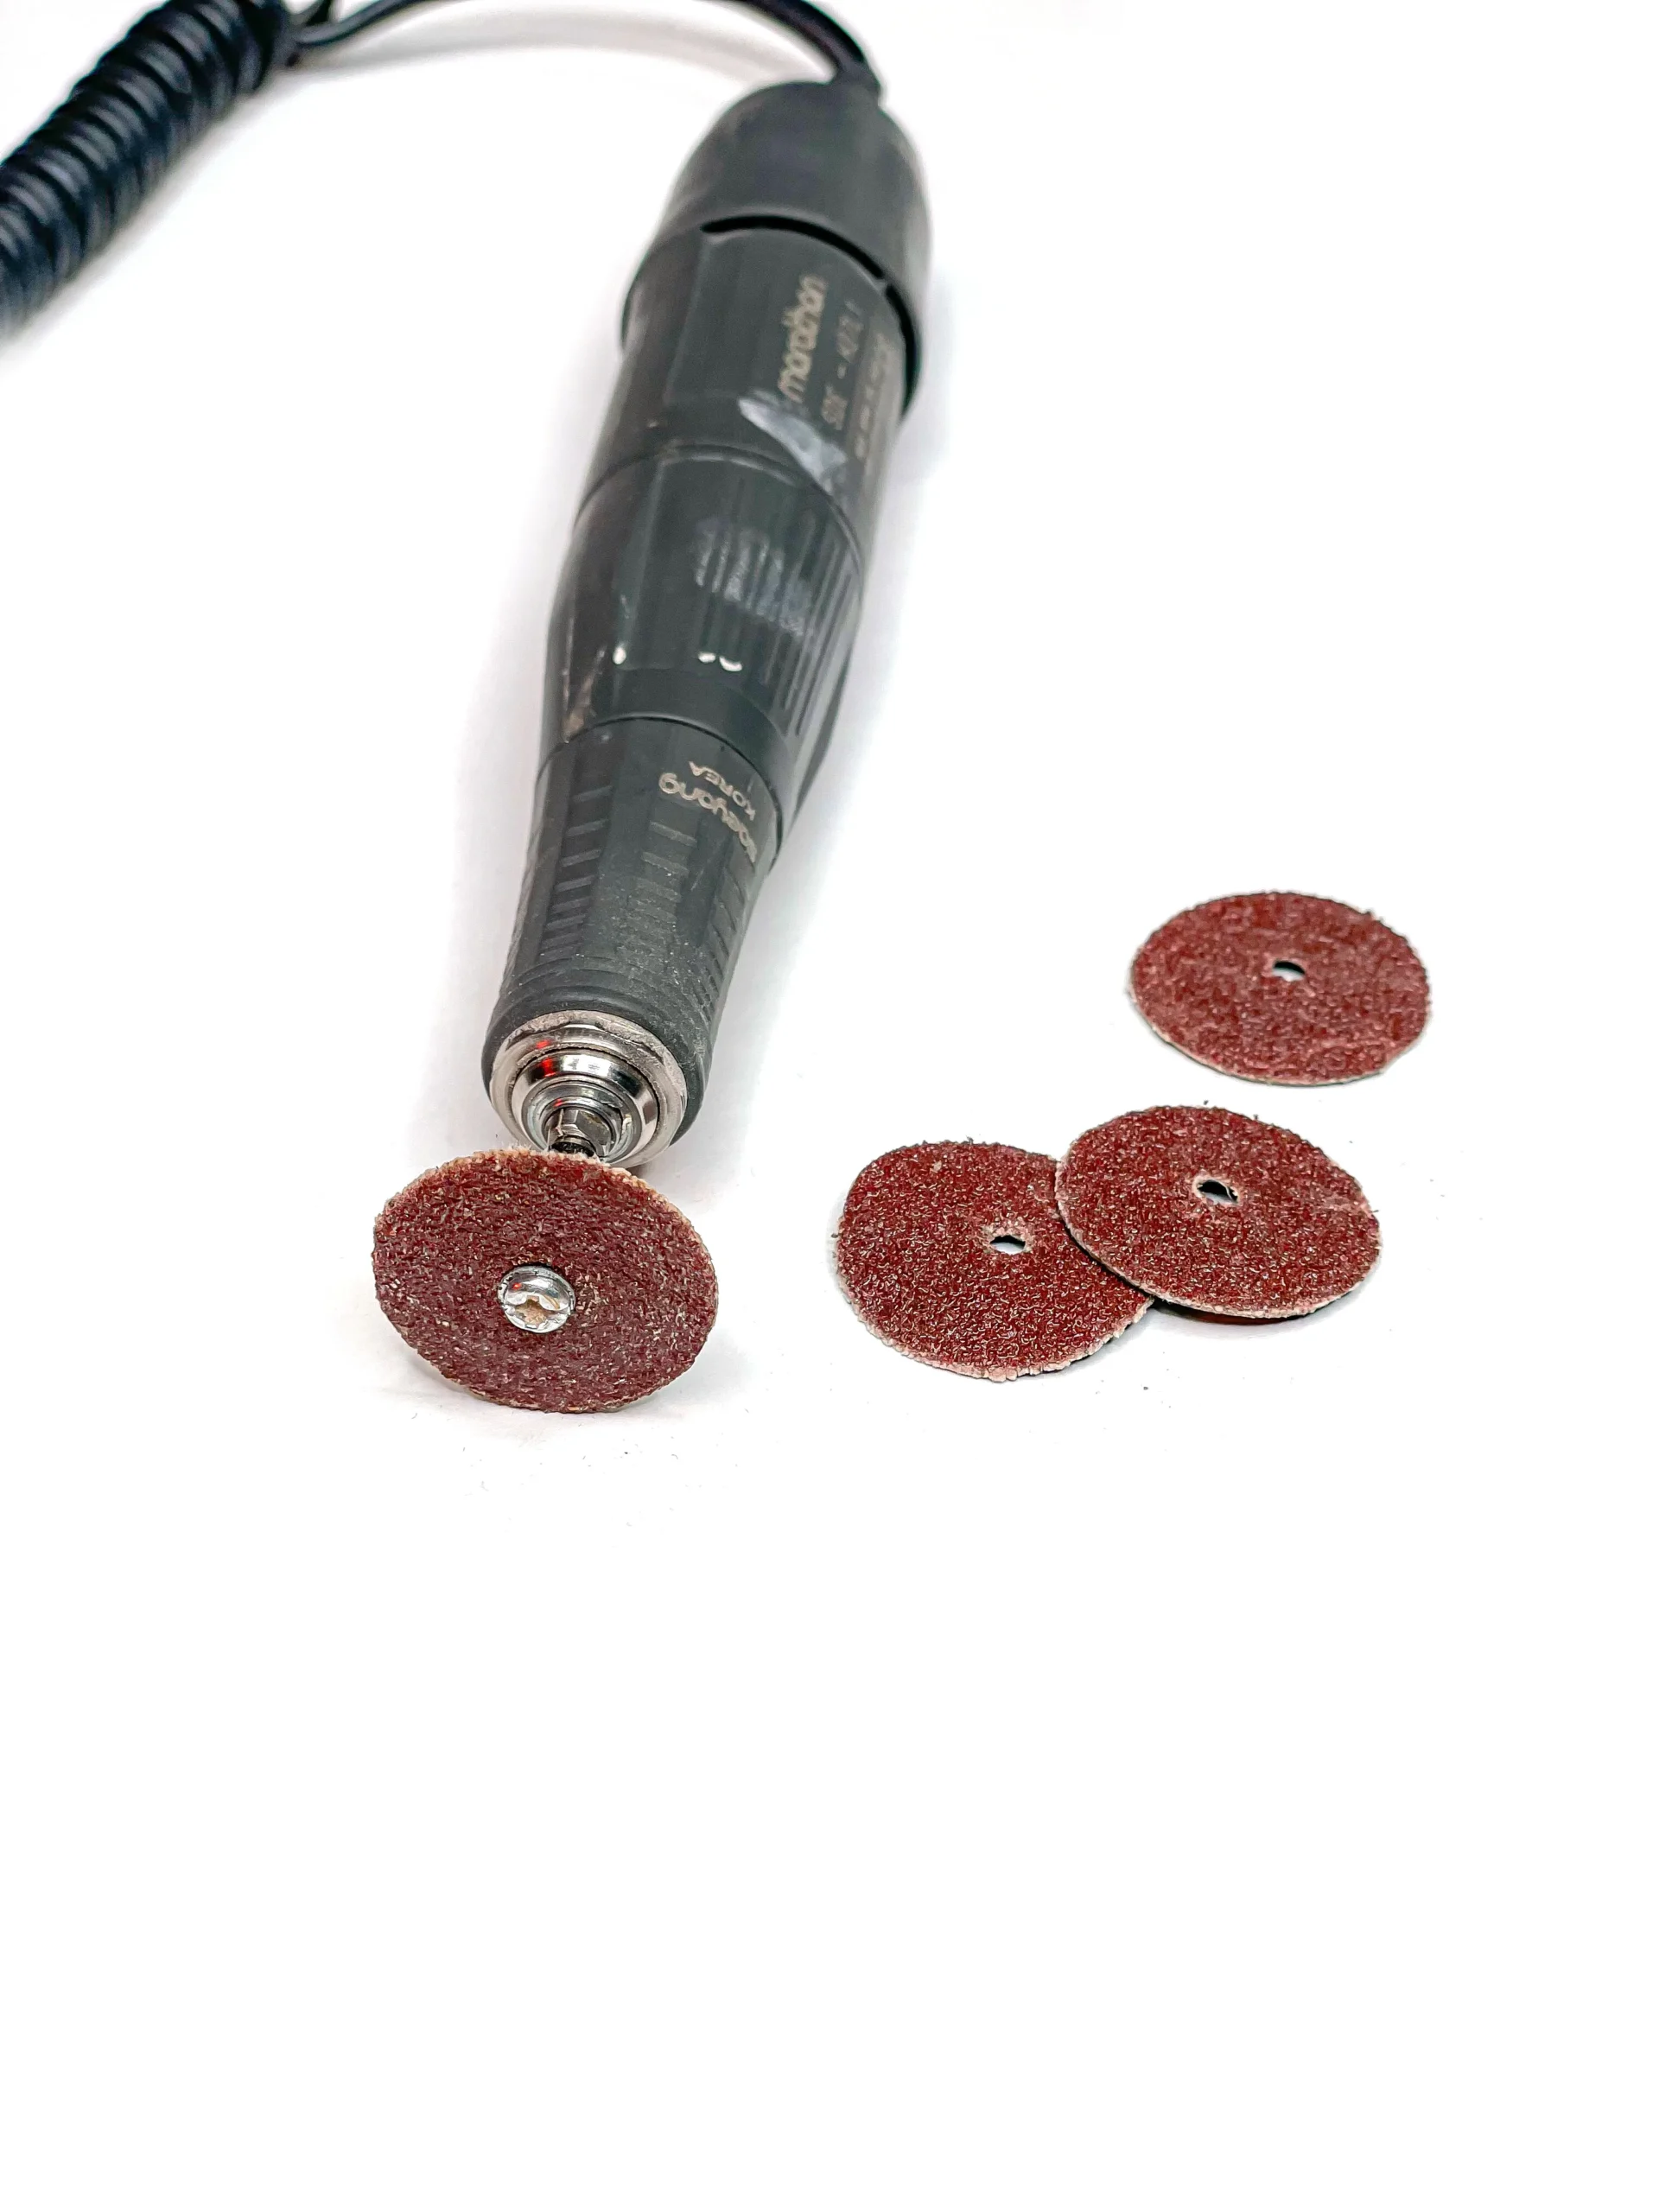
Attaching Sanding Discs To Your Dremel
Attaching sanding discs to your Dremel is a simple but essential step. Proper attachment ensures smooth sanding and safety during use. Follow clear steps to secure the disc firmly to your tool. This way, you get the best results without disc slippage or damage.
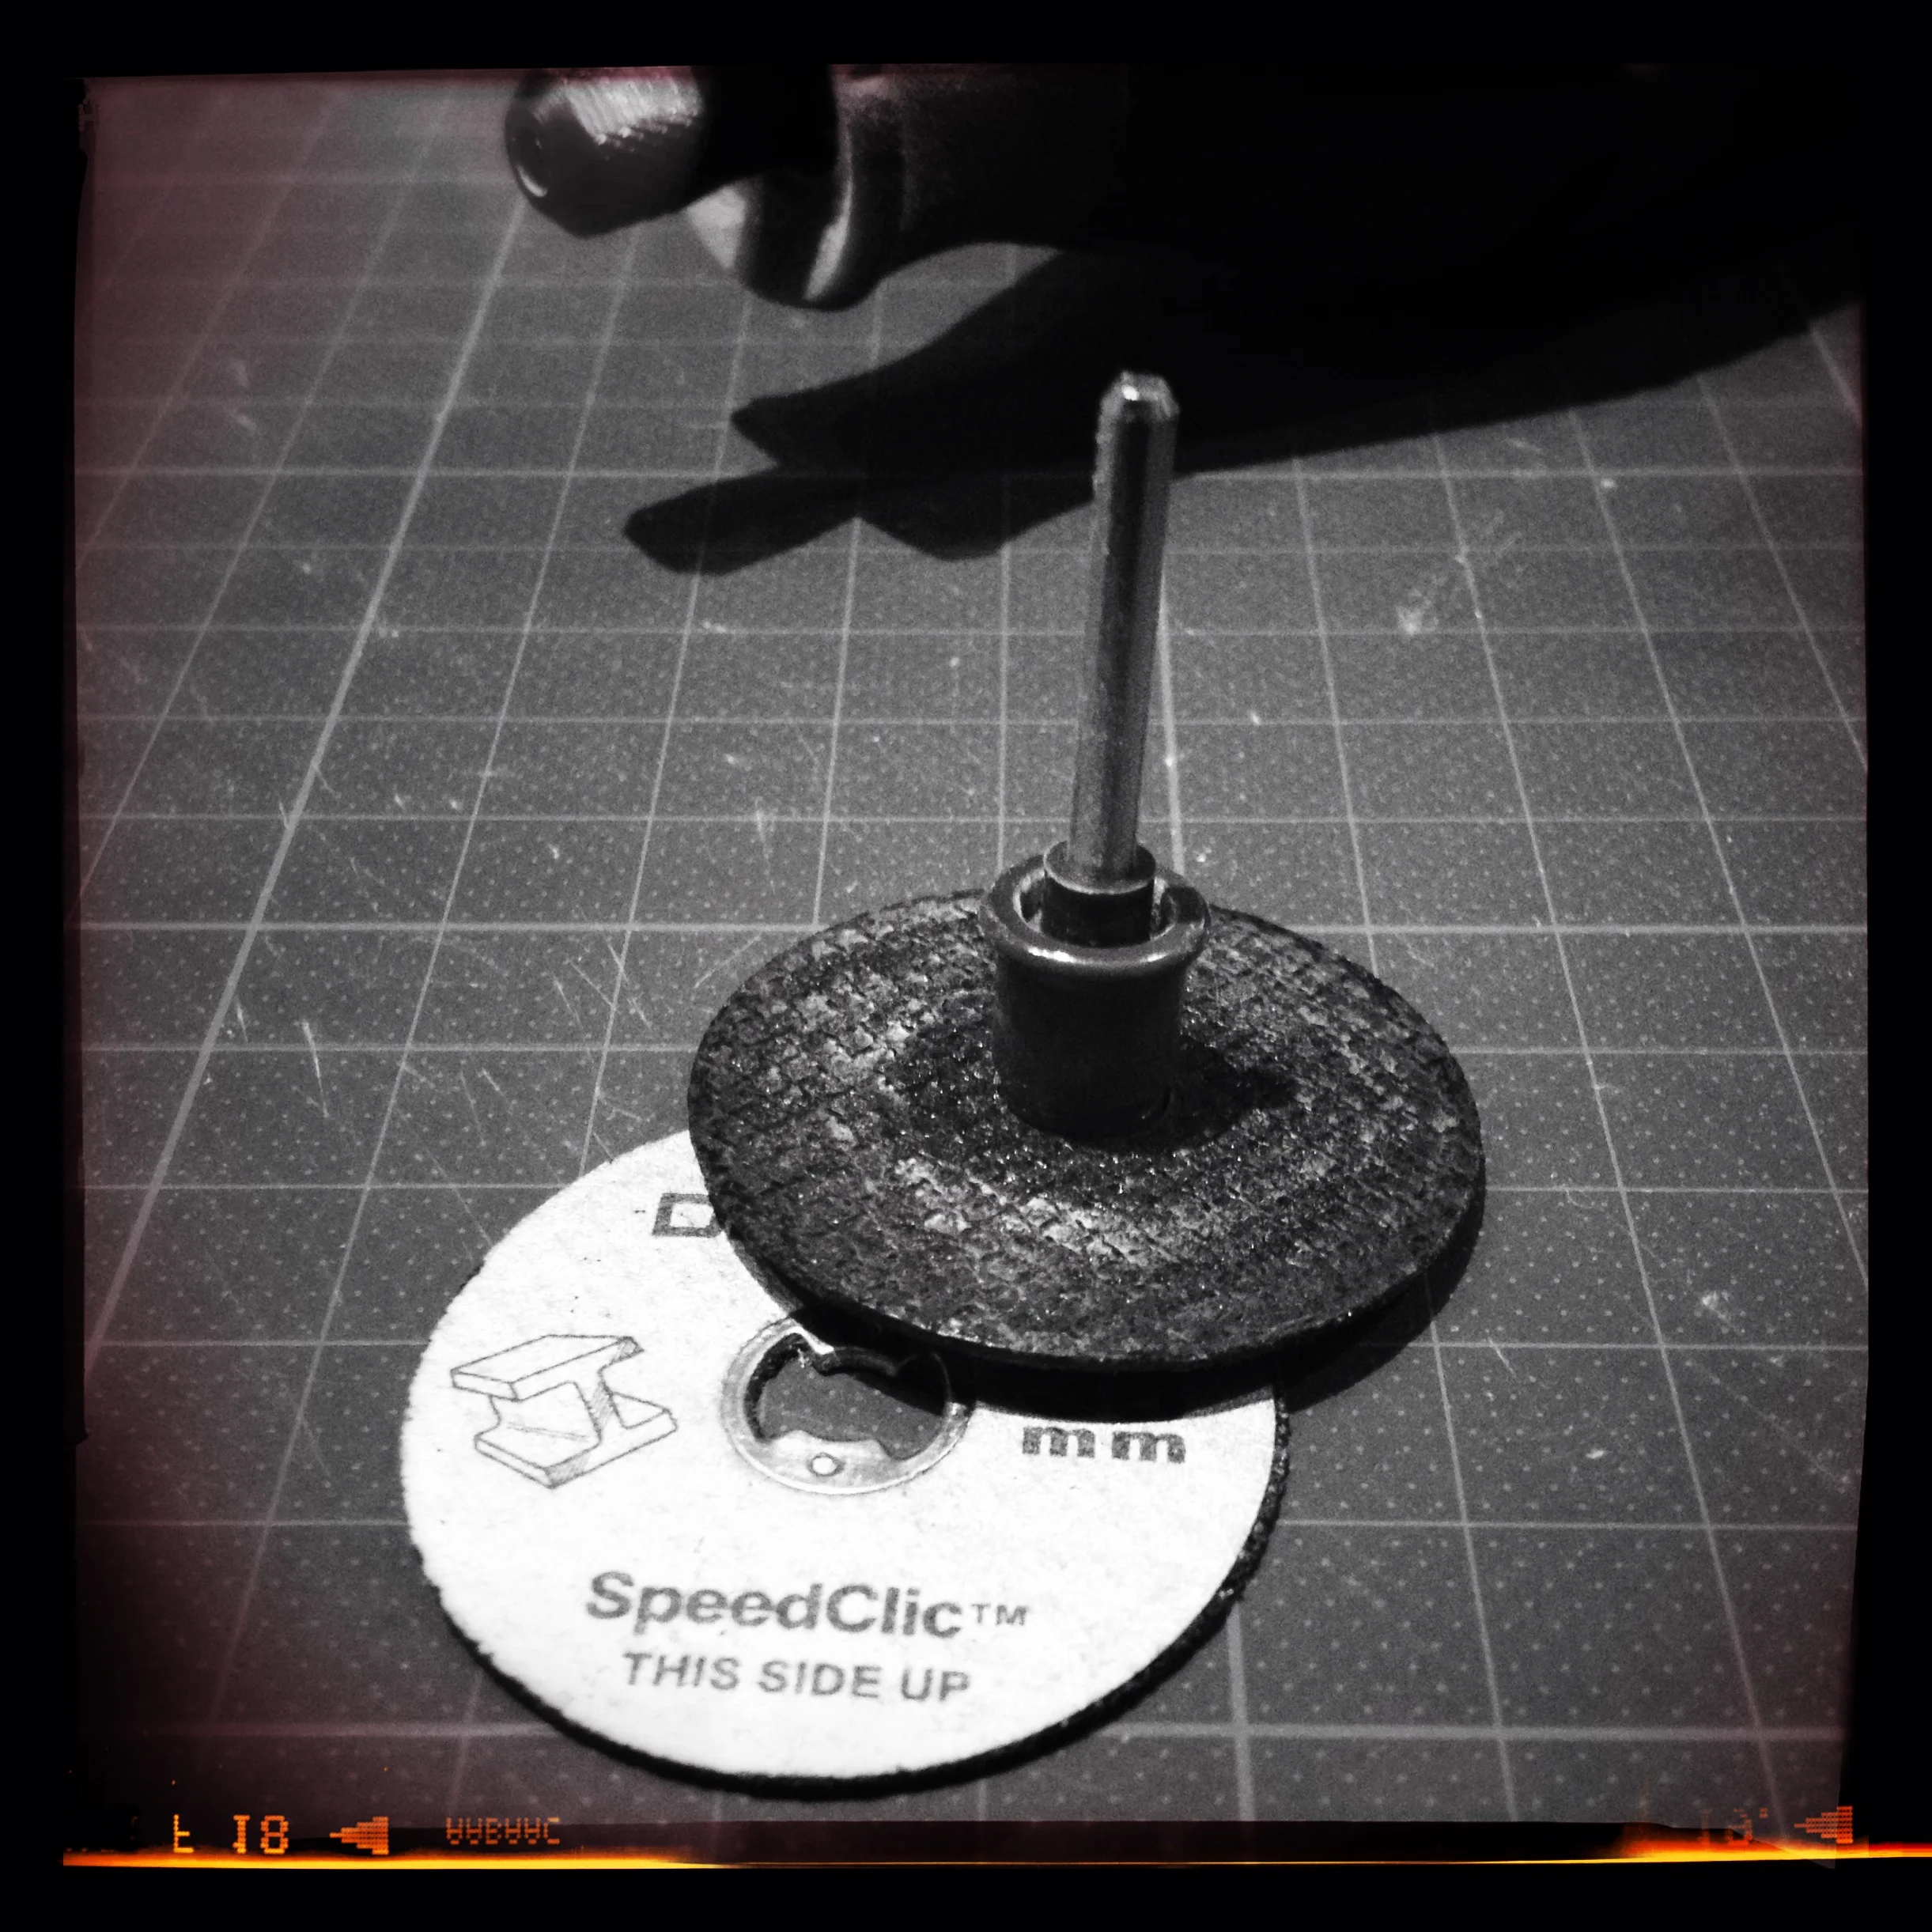
Choosing The Right Mandrel For Sanding Discs
Start by selecting the correct mandrel for your sanding disc size. Dremel mandrels come in different diameters. Match the mandrel to the disc hole size for a snug fit. Using the wrong mandrel can cause wobbling or disc damage.
Securing The Mandrel In The Dremel Tool
Insert the mandrel into the collet or chuck of the Dremel tool. Hold down the spindle lock button to keep the shaft steady. Tighten the collet nut or chuck firmly with a wrench or by hand. Make sure the mandrel is secure before adding the disc.
Attaching The Sanding Disc To The Mandrel
Place the sanding disc onto the mandrel shaft. Push it until it sits flat against the mandrel’s base. Use the small screw or clamp on the mandrel to lock the disc in place. Check that the disc does not move or wobble.
Testing The Attachment Before Use
Turn on the Dremel tool at low speed first. Observe the sanding disc for any signs of looseness or vibration. Stop immediately if the disc wobbles or feels unstable. Reattach the disc properly before proceeding with sanding.
Setting The Optimal Speed
Setting the optimal speed is crucial for effective sanding with Dremel discs. The right speed ensures smooth results and protects your workpiece. It also extends the life of your sanding discs.
Using too high a speed can cause overheating and damage the surface. Too low a speed might slow down your progress and reduce sanding quality. Adjusting the speed according to the material helps achieve the best finish.
Understanding Your Dremel’s Speed Settings
Most Dremel tools offer variable speed control. Speeds usually range from 5,000 to 35,000 RPM. Lower speeds suit soft materials like plastic and wood. Higher speeds are better for hard materials such as metal and glass.
Choosing Speed Based On Material
Softwood requires a lower speed to avoid gouging the surface. Hardwood needs a medium speed for even sanding. Metal demands a higher speed to remove rust or paint efficiently. Always test on a scrap piece to find the perfect speed.
Tips For Maintaining Optimal Speed
Start sanding at a low speed and increase gradually. Watch for signs of burning or disc wear. Avoid pressing too hard; let the tool do the work. Clean the sanding discs regularly to prevent clogging and maintain speed.
Credit: www.youtube.com
Preparing Your Workpiece
Preparing your workpiece is a crucial step before using Dremel sanding discs. A clean and stable surface ensures better sanding results. It also helps avoid damage to both the workpiece and the sanding disc.
Take time to inspect the material for any dirt, grease, or loose parts. Removing these elements improves sanding quality. It also protects the sanding disc from unnecessary wear.
Cleaning The Surface
Start by wiping the surface with a dry cloth. Remove dust and loose debris carefully. For sticky or oily spots, use a mild cleaner. Make sure the surface is dry before sanding.
Securing The Workpiece
Fix the workpiece firmly in place. Use clamps or a vise to prevent movement. This keeps your hands free and increases safety. A stable workpiece allows precise and even sanding.
Marking The Areas To Sand
Identify the parts that need sanding. Use a pencil or chalk to mark these areas. Clear markings help you focus on the right spots. It also prevents over-sanding or missing sections.
Techniques For Effective Sanding
Effective sanding with Dremel sanding discs requires proper techniques. These methods help achieve smooth, even surfaces without damaging the material. Understanding how to handle different shapes and materials is key to good results. Below are proven techniques for various sanding tasks.
Sanding Flat Surfaces
Start with a coarse disc to remove rough spots quickly. Hold the Dremel tool steady and move it in slow, circular motions. Keep the disc flat against the surface to avoid gouging. Apply light pressure; let the tool do the work. Change to finer grit discs for a smooth finish. Clean the surface often to check progress.
Sanding Curves And Edges
Use smaller sanding discs or sanding drums for curves and edges. Follow the contour gently without forcing the tool. Move the Dremel along the shape in smooth strokes. Avoid staying in one spot to prevent uneven sanding. Choose flexible discs that adapt to rounded surfaces. Work slowly and carefully for best results.
Working On Delicate Materials
Choose fine grit sanding discs to protect delicate materials. Use the lowest speed setting on your Dremel. Test on a small area before sanding the whole piece. Hold the tool lightly and avoid pressing hard. Keep the tool moving to prevent overheating or burning. Patience is important for delicate sanding tasks.
Maintaining And Replacing Discs
Proper care of your Dremel sanding discs ensures smooth sanding and extends disc life. Maintaining discs keeps them effective and safe. Replacing worn discs prevents damage to your work and tool.
Cleaning Your Sanding Discs
Remove dust and debris from discs after each use. Use a soft brush or cloth to wipe the surface. Avoid using water or harsh chemicals on discs. Clean discs work better and last longer.
Inspecting For Wear And Tear
Check discs regularly for cracks, tears, or worn spots. Replace any discs that show damage to avoid poor sanding results. Worn discs can cause uneven sanding and may break during use.
Removing Used Discs Safely
Turn off and unplug your Dremel before removing discs. Hold the sanding pad firmly and gently pull off the disc. Avoid using excessive force to prevent damage to the tool.
Choosing The Right Replacement Discs
Select discs that fit your Dremel model and the job type. Use the correct grit size for your sanding needs. Coarser grits remove material faster; finer grits smooth surfaces.
Installing New Sanding Discs
Align the new disc carefully with the sanding pad. Press it firmly to ensure it sticks well. Check that the disc is secure before turning the tool on.
Safety Tips For Sanding
Sanding with Dremel sanding discs can improve your project’s finish. Safety during sanding is essential. Following simple safety tips keeps you safe and your work precise.
Wear protective gear to avoid dust and debris. Keep your workspace clean and organized. Handle the tool carefully to prevent accidents.
Wear Protective Eyewear And Masks
Always wear safety goggles. They protect your eyes from dust and tiny particles. Use a dust mask to avoid breathing in harmful dust. This keeps your lungs safe and healthy.
Secure Your Workpiece
Clamp your project firmly before sanding. This stops it from moving. A steady workpiece helps you sand evenly and safely.
Use The Right Speed Settings
Set your Dremel tool to the correct speed for sanding. High speeds can cause overheating. Low speeds give better control and reduce risk.
Keep Hands And Fingers Clear
Keep your hands away from the sanding disc. Use a firm grip on the tool. Avoid wearing loose clothing or jewelry that can catch on the disc.
Work In A Well-ventilated Area
Sanding creates dust that can be harmful. Work in an open space or near a window. Use a fan or ventilation system if possible.
Credit: www.bearwood.com
Troubleshooting Common Issues
Troubleshooting common issues with Dremel sanding discs helps keep projects smooth. Problems may arise due to improper use or worn accessories. Knowing how to fix these problems saves time and frustration. The following tips address frequent difficulties users face.
Worn Out Or Clogged Sanding Discs
Sanding discs wear down with use, reducing effectiveness. Replace discs regularly to maintain good sanding results. Clogged discs slow down sanding and cause uneven surfaces. Clean discs by tapping or brushing off dust. Avoid pressing too hard to prevent quick wear.
Disc Not Staying Secure On The Tool
Loose sanding discs cause wobbling and unsafe operation. Ensure the disc is properly attached to the mandrel or pad. Tighten the chuck and spindle lock firmly. Check for damaged or worn attachment parts and replace if needed. Use the correct disc size for your Dremel model.
Uneven Sanding Or Gouging The Surface
Uneven sanding happens when the tool moves too fast or with too much pressure. Hold the Dremel steady and let the disc do the work. Move the tool evenly across the surface in smooth strokes. Practice on scrap material to control speed and pressure.
Overheating Of The Sanding Disc
Overheating can damage the disc and the workpiece. Avoid running the Dremel at maximum speed for long periods. Take breaks to let the disc cool down. Use the recommended speed for the material being sanded. Proper ventilation helps reduce heat buildup.
Credit: dremelamateur.wordpress.com
Frequently Asked Questions
How Do You Use The Sanding Discs On A Dremel?
Open the chuck and insert the sanding disc onto the mandrel. Tighten the spindle lock to secure it. Adjust speed and sand gently on the surface. Move the tool steadily for even results. Wear eye protection for safety.
How To Put A Sanding Pad On A Dremel?
Open the Dremel chuck and insert the sanding pad mandrel. Tighten the chuck securely. Attach the sanding disc or sleeve onto the mandrel. Ensure it fits snugly before use.
Can A Dremel Be Used As A Sander?
Yes, a Dremel can be used as a sander. It works well for detailed, small, and hard-to-reach areas using sanding attachments.
Which Dremel Bits Are Used For What?
Dremel sanding sleeves smooth edges and contours. Sanding discs shape and finish flat surfaces. Abrasive buffs polish irregular shapes. Cutting bits slice metal or wood. Grinding stones sharpen or remove rust. Engraving bits carve detailed designs. Each bit suits specific materials and tasks.
How Do You Attach Sanding Discs To A Dremel Tool?
Open the chuck, insert the sanding disc, hold the spindle lock, and tighten it securely.
Conclusion
Using Dremel sanding discs helps you shape and smooth many materials. Choose the right disc for your project. Secure your workpiece before sanding for safety and control. Start with a coarse grit, then switch to finer grits for a smooth finish.
Move the tool gently to avoid damage. Keep your discs clean and replace them when worn out. Practice makes sanding easier and more precise. With simple steps, you can improve your DIY and craft projects effectively.
