If you want smooth, professional-looking surfaces without spending hours sanding by hand, an orbital sander is your best friend. But how do you use this powerful tool correctly to get the results you want?
Whether you’re tackling a woodworking project or prepping a surface for painting, knowing the right techniques can save you time and frustration. In this guide, you’ll discover simple, step-by-step tips that make using an orbital sander easy and effective—no experience needed.
Ready to transform your projects with less effort and better results? Let’s dive in and get your sanding skills up to speed!
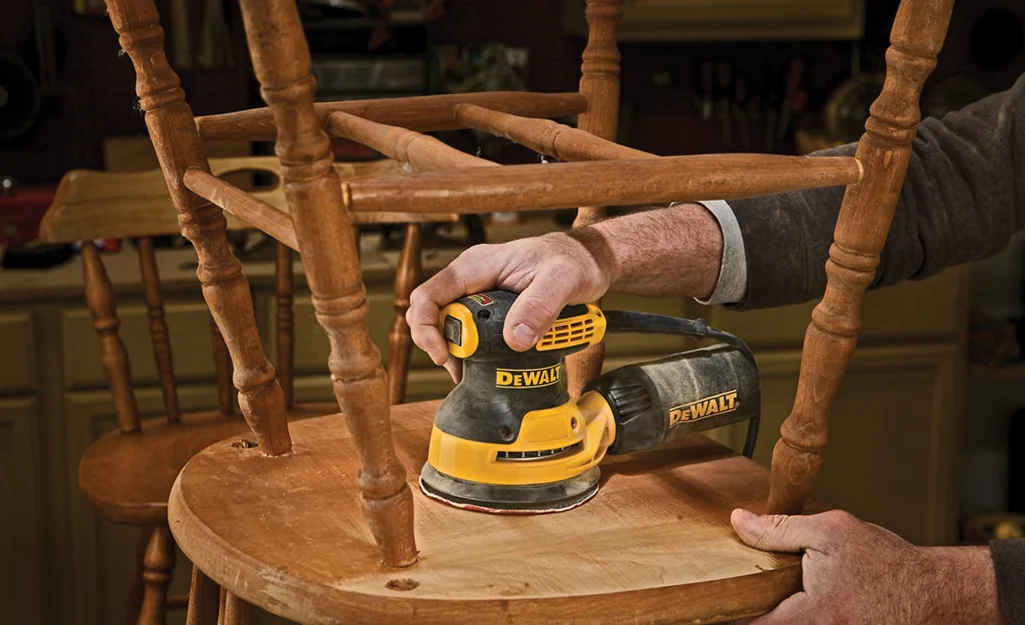
Credit: www.homedepot.com
Choosing The Right Orbital Sander
Choosing the right orbital sander is the first step toward smooth and efficient sanding. The right tool makes your work easier and the finish better. Many types of orbital sanders exist, each with unique features. Understanding these differences helps you pick the best one for your project.
Types Of Orbital Sanders
Random orbital sanders offer smooth finishes and reduce swirl marks. They work well on wood, metal, and plastic. Sheet orbital sanders use square sanding pads and are good for flat surfaces. Palm sanders are small and lightweight, perfect for detail work and small areas.
Power And Speed Settings
Look for an orbital sander with adjustable speed settings. Different materials need different speeds. Lower speeds work well for delicate surfaces. Higher speeds help remove paint or rough layers faster. Variable speed control gives you better sanding precision.
Pad Size And Shape
Choose the right pad size for your project. Larger pads cover more area and work faster. Smaller pads are easier to control in tight spots. Round pads reach corners better, while square pads fit edges and flat surfaces well.
Dust Collection Features
Dust collection is important for clean work and health. Many orbital sanders come with built-in dust bags or ports for vacuum attachment. Good dust collection keeps your workspace tidy and reduces airborne dust. It also helps extend the life of your sanding pads.
Ergonomics And Weight
Comfort matters during long sanding jobs. Choose a sander that feels balanced in your hand. Look for soft grips and vibration reduction features. Lighter sanders cause less fatigue, but heavy-duty models may offer more power.
Preparing Your Workspace
Preparing your workspace is the first step before using an orbital sander. A clean and organized area helps you work safely and efficiently. It also protects your project and tools from damage.
Take time to arrange everything you need within reach. This reduces distractions and keeps your focus on sanding.
Clear The Area Of Dust And Debris
Remove dust, dirt, and loose materials from your work surface. Dust can clog the sandpaper and create uneven sanding. Use a brush or vacuum to clean the area well.
Secure The Workpiece Firmly
Clamp or hold your workpiece steady to stop it from moving. A moving object makes sanding difficult and can cause mistakes. Use clamps or a workbench to keep your piece fixed.
Set Up Proper Lighting
Good lighting helps you see the surface clearly. Shadows can hide scratches or rough spots. Position lamps or work lights to shine evenly on the project.
Wear Safety Gear
Put on safety glasses to protect your eyes from dust and particles. Use a mask or respirator to avoid breathing in dust. Hearing protection is also useful if the sander is loud.
Check Your Power Source
Make sure your sander’s power cord or battery is ready and safe to use. Avoid extension cords that could cause tripping. Confirm the power outlet is close and works well.
Selecting Sandpaper Grits
Selecting the right sandpaper grits is key to using an orbital sander well. Each grit serves a different purpose during sanding. Using the correct grit will save time and improve results.
Start by understanding grit numbers. Lower numbers mean rougher sandpaper. Higher numbers mean finer sandpaper. Choose the grit based on your sanding task.
Understanding Coarse Grits
Coarse grits range from 40 to 60. Use them for heavy material removal. They work well on rough wood or old paint. Coarse grit helps shape the surface quickly.
Choosing Medium Grits
Medium grits range from 80 to 120. They smooth out surfaces after coarse sanding. Use medium grit to remove scratches left by coarse paper. It prepares the surface for fine sanding.
Using Fine Grits
Fine grits range from 150 to 220. Use them for finishing work. Fine grit removes small scratches and smooths the surface. It prepares wood for staining or painting.
When To Use Extra Fine Grits
Extra fine grits go from 240 to 400 and above. Use them for polishing or between coats of finish. They create a very smooth surface. Choose extra fine grit for delicate jobs.
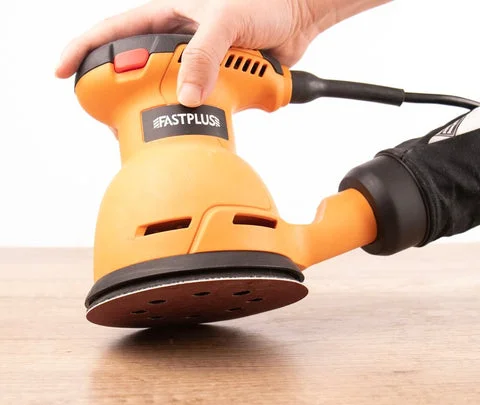
Credit: fastplus.eu
Starting The Sander Correctly
Starting your orbital sander the right way sets the stage for smooth results. A proper start prevents damage to your workpiece and the tool. It also helps you control the sanding process better.
Follow simple steps to get your sander ready before making contact. This approach saves time and effort while improving the finish.
Prepare The Work Area
Clear dust and debris from the surface. Ensure the piece is stable and won’t move during sanding. A clean, secure area helps the sander work evenly.
Attach The Sanding Disc Firmly
Check that the sanding disc is the right grit for your task. Attach it tightly to avoid slipping. A loose disc can cause uneven sanding or damage.
Hold The Sander Properly
Grip the sander with both hands for control. Keep your arms relaxed but steady. This reduces fatigue and improves precision.
Turn On The Sander Before Contact
Switch the sander on and let it reach full speed. Avoid placing it on the surface too soon. Starting at full speed protects the material and tool.
Begin Sanding With Light Pressure
Let the weight of the sander do the work. Avoid pressing down hard. Light pressure keeps the motor from bogging down and prevents scratches.
Proper Sanding Techniques
Proper sanding techniques are key to getting smooth, even surfaces with an orbital sander. These techniques help avoid scratches, gouges, or uneven sanding. Following simple steps makes your work look professional and lasts longer.
Using the orbital sander correctly also saves time and effort. It reduces the need for extra sanding or fixing mistakes. Focus on these basic methods to improve your sanding results on wood or other materials.
Sanding With The Grain
Always sand in the direction of the wood grain. This prevents unwanted scratches and marks. Moving the sander across the grain can leave rough lines that are hard to remove. Let the sander follow the natural pattern of the material for the best finish.
Maintaining Light Pressure
Use only light pressure when sanding. The tool’s weight and your hand’s grip provide enough force. Pressing too hard can damage the surface or slow the sander’s motor. Light pressure helps the sandpaper do its job smoothly and evenly.
Using Smooth, Even Movements
Move the sander in steady, overlapping motions. Avoid staying too long in one spot to prevent uneven sanding. Keep your movements fluid and consistent. This technique ensures a uniform surface and reduces swirl marks.
Avoiding Common Mistakes
Using an orbital sander can speed up your woodworking or home projects. Avoiding common mistakes helps you get smooth, even results without damage. These errors often cause uneven sanding and shorten the sander’s life. Learn how to handle the tool properly for the best finish.
Pressing Too Hard
Pressing down on the sander can cause scratches and uneven surfaces. The tool’s weight is enough to sand the material effectively. Pressing too hard slows the motor and wears out the sandpaper fast. Let the sander glide gently for smooth, consistent results.
Moving Too Fast Or Slow
Moving the sander too fast can create uneven spots and swirl marks. Moving too slow causes deep grooves and rough patches. Keep a steady, moderate pace to ensure even sanding across the surface. Allow the sander to do the work without rushing or lingering too long.
Tilting The Sander
Tilting the sander causes uneven pressure and damage to the workpiece. Always keep the sander flat and in full contact with the surface. Tilting can gouge the wood or leave unsightly marks. Maintain a level position to achieve a smooth, flawless finish.
Maintaining Your Orbital Sander
Maintaining your orbital sander is key to keeping it in good shape. Regular care helps the tool last longer and work better. Simple steps can prevent damage and ensure smooth sanding every time.
Cleaning The Sanding Pads
Remove dust and debris after each use. Use a brush or compressed air to clean the pads. This stops clogging and improves sanding quality. Clean pads also reduce wear on the abrasive discs.
Replacing Abrasive Discs
Change discs when they wear out or lose grit. Worn discs cause uneven sanding and damage surfaces. Peel off the old disc and stick a new one firmly. Check the disc fits well and is centered before use.
Finishing Touches For A Flawless Surface
Achieving a flawless surface with an orbital sander requires careful attention to detail during the finishing process. This step ensures your project looks smooth and professional. Small mistakes can leave scratches or uneven spots, so take time to perfect the final touch. Proper sanding technique and gradual grit progression make a big difference.
Progressing Through Grits
Start with a coarse grit to remove rough areas quickly. Then switch to medium grit to smooth out the scratches left by the coarse paper. Finally, use fine grit sandpaper to polish the surface and prepare it for finishing. Change the sandpaper regularly to keep the sander effective. Sand in even, overlapping passes without pressing too hard. This helps avoid gouges and keeps the surface level.
Inspecting For Smoothness
Stop frequently to check your progress by feeling the surface with your hand. Run your fingers over the wood to find any bumps or rough patches. Look closely under good light to spot scratches or dull spots. Fix these areas by sanding gently with the appropriate grit. A smooth surface reflects light evenly and feels soft to touch. Take your time; a careful inspection prevents problems later.

Credit: www.youtube.com
Frequently Asked Questions
What Is The Correct Way To Use An Orbital Sander?
Turn on the orbital sander and let it reach full speed before contact. Move it gently with the grain, avoid pressing down. Use light, even pressure and keep the sander flat. Sand in smooth, overlapping motions for an even finish.
Replace sandpaper when worn.
5 common mistakes with a random orbital sander
Common mistakes with a random orbital sander include pressing too hard, using wrong speed, moving too fast or slow, tilting the sander, and neglecting disc maintenance.
Do You Push Down On Orbital Sander?
Do not push down on an orbital sander. Let its weight and your hand pressure do the work. Pressing hard can damage the surface and strain the motor.
What Is The Golden Rule Of Sanding?
The golden rule of sanding is to always sand with the grain and progress gradually from coarse to fine grits. This prevents surface damage and ensures a smooth finish.
What Is The Correct Way To Hold An Orbital Sander?
Hold the sander firmly but lightly. Let its weight do the sanding, not your pressure.
Conclusion
Using an orbital sander is simple and effective with practice. Always let the sander reach full speed before contact. Move the tool gently, letting its weight do the work. Sand with the grain to avoid surface scratches. Change sandpaper grits gradually for a smooth finish.
Keep the sander flat to maintain even sanding. Regularly check and replace worn discs for best results. With these tips, your sanding projects will improve steadily. Enjoy the process and take your time for quality work.
