Plumbing rough-in is the hidden stage that makes every bathroom, kitchen, or laundry work smoothly. It’s the work done before walls are closed—getting pipes, drains, and vents into the right place. If you’re new to plumbing or thinking about a DIY home project, you need the right tools for this tricky part of the job.
The right tools make the work faster, safer, and much less stressful. But with so many options, it’s easy to feel lost. This guide cuts through the confusion and explains what you really need for a plumbing rough-in, how each tool is used, and practical advice to help you work like a pro.
What Is Plumbing Rough-in?
Plumbing rough-in means installing the pipes and drainage lines before the walls or floors are finished. This step happens after framing but before drywall. It sets up water supply lines, waste lines, and vent pipes so everything connects correctly later.
Think of it as the skeleton of your plumbing system—it has to be precise.
A good rough-in prevents leaks, future repairs, and code violations. Even small mistakes at this stage can lead to big headaches. That’s why the right tools—and knowing how to use them—are so important.
Essential Plumbing Rough-in Tools
Some tools are must-haves for any plumbing rough-in, whether you’re a DIYer or a pro. Here’s a breakdown of the most important ones.
Pipe Cutters
You’ll need to cut pipes to fit between studs and joists. There are two main types:
- Tubing cutters: These make clean cuts on copper and plastic pipes. They’re easy to use and leave a smooth edge.
- Hacksaws: Good for larger pipes or tight spaces, but can leave rough edges.
Tip: Always smooth the cut end with a deburring tool to prevent leaks.
Pipe Wrenches
Pipe wrenches grip round pipes and fittings tightly. They’re heavy, strong, and can handle tough jobs. Two sizes—10-inch and 14-inch—cover most rough-in work. Don’t use them on finished fittings, as they can scratch surfaces. New to this tool? Our step-by-step on how to use a pipe wrench covers proper grip and technique.
Adjustable Wrenches
These versatile wrenches fit different nut sizes. Keep at least two handy for tightening or loosening supply line connections. For tight spots behind sinks where these won’t reach, see how to use a basin wrench.
Tape Measure
Precision is key. A 25-foot tape measure is best for measuring pipe runs, distances from walls, and fixture locations. Marking your measurements clearly reduces mistakes.
Torpedo Level
A small torpedo level ensures pipes slope properly for drainage (usually 1/4 inch per foot). Even a small slope error can cause drainage problems.
Pipe Benders
For copper or PEX lines, pipe benders help you curve pipes smoothly without kinking. This keeps water flowing and prevents weak spots.
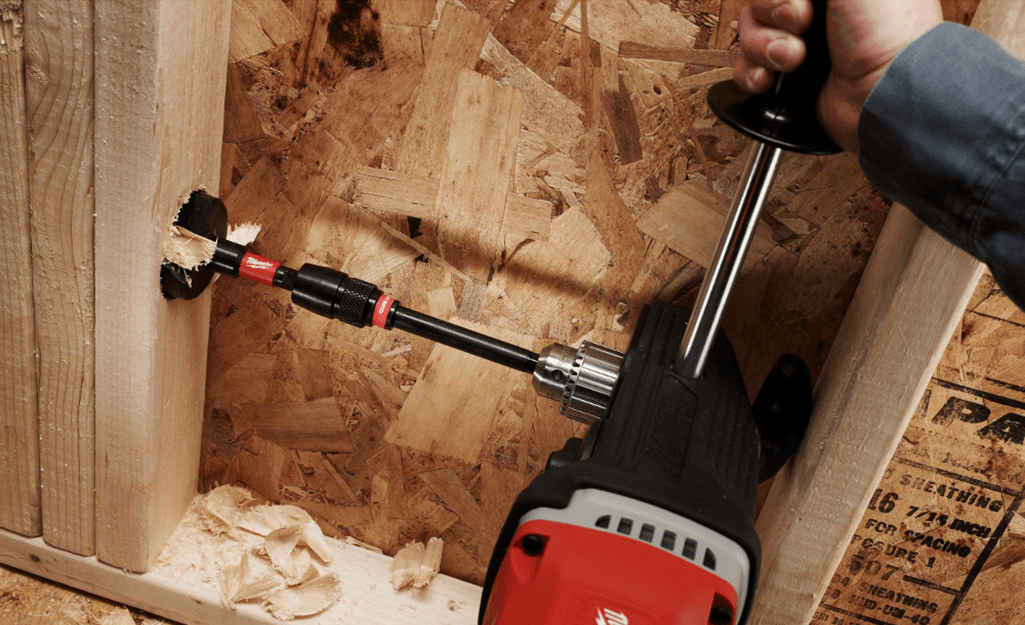
Hole Saws And Drill Bits
Rough-in means drilling holes through studs, joists, and plates. Hole saws make clean, round holes for pipes. Spade bits or auger bits are great for smaller holes. Choose the right size for your pipe, and always check for wires or other obstacles before drilling.
Plumber’s Torch
If you’re working with copper pipes, you’ll need a plumber’s torch to solder joints. A propane or MAP gas torch is common. Always have fire safety tools nearby—soldering can start fires if you’re not careful.
Pipe Threader
Some pipes, like galvanized or black iron, need threads on the ends. A pipe threader adds these, so fittings screw on tightly. Manual threaders are fine for small jobs; powered ones save time on big projects.
Reaming And Deburring Tools
After cutting pipes, use these tools to remove sharp edges inside and outside the pipe. This protects fittings and ensures a leak-free seal.
Pex Tools
If you use PEX piping, you’ll need special tools:
- PEX cutter: Makes straight, clean cuts.
- Crimp tool: Secures metal rings on PEX joints.
- Expansion tool: Used for expansion-style fittings.
Plumber’s Tape (teflon Tape)
This thin, white tape wraps around threads to prevent leaks. Always use it on threaded fittings, but not on compression or flare fittings.
Pipe Clamps And Supports
Pipes need to be secured in place before walls are closed. Pipe clamps and hangers prevent movement and noise. They also help keep the required slope.
Marking Tools
Permanent markers or wax pencils are best for marking cut lines and hole positions. Pencil marks can fade or rub off.
Safety Gear
Don’t forget safety glasses, gloves, and a dust mask. Drilling and cutting pipes can send debris flying. Protecting yourself is just as important as protecting your plumbing.

Credit: www.protoolreviews.com
Specialty Tools For Tough Situations
Not every rough-in is straightforward. Here are some advanced tools that save time and frustration.
Pipe Freezing Kits
If you need to work on a live water line, a pipe freezing kit can freeze a section so you can make changes without draining the whole system. These are expensive but can be rented for difficult jobs.
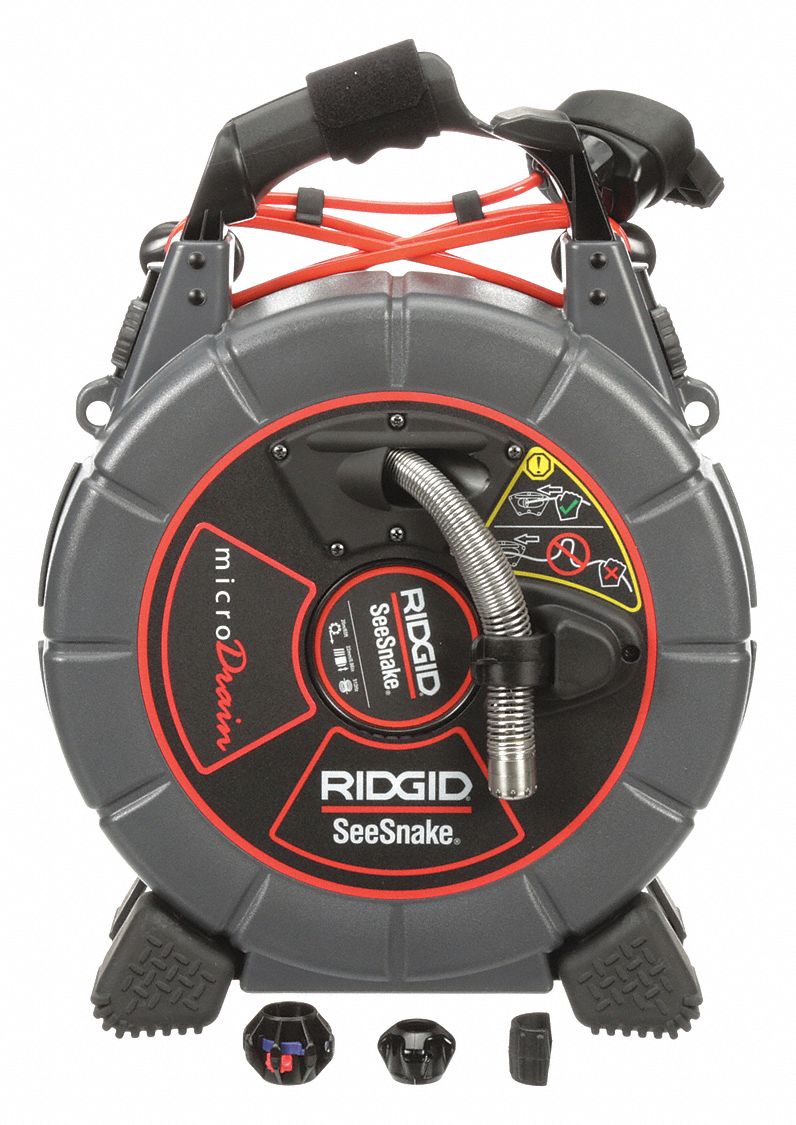
Inspection Cameras
Running pipes behind walls or under floors? An inspection camera (also called a borescope) helps you see hidden spaces, check for obstructions, or confirm your work is correct.
Laser Levels
For long pipe runs, a laser level ensures everything is perfectly straight or sloped. This is especially useful for large bathrooms or commercial projects.
Pressure Test Pumps
After rough-in, you must test for leaks. Pressure test pumps let you fill the system with air or water and check if everything holds. This step is often required by building inspectors.
Multi-tool (oscillating Tool)
An oscillating multi-tool cuts through drywall, wood, or metal. It’s a lifesaver for last-minute changes or tight spaces.
Tool Comparison: Hand Tools Vs Power Tools
When is it better to use power tools instead of hand tools? Here’s a quick comparison to help you decide.
| Task | Hand Tool | Power Tool | Best For |
|---|---|---|---|
| Cutting copper pipe | Tubing cutter | Reciprocating saw | Hand for precision; Power for speed |
| Drilling stud holes | Manual auger | Drill with spade bit | Power for most jobs |
| Tightening fittings | Pipe wrench | Impact wrench | Hand for control; Power for large jobs |
Insight: Beginners often think power tools are always better. In reality, hand tools give more control and reduce mistakes, especially for delicate or precise work.
Choosing The Right Tools For Your Plumbing Rough-in
Not all tools are needed for every job. Here’s how to build your kit:
Job Size
- Small projects (single bathroom): Basic hand tools, tape, safety gear, and a torch if using copper.
- Large projects (whole house): Add power tools, inspection cameras, and pressure test pumps.
Pipe Material
- Copper: Tubing cutter, torch, solder, flux.
- PEX: PEX cutter, crimp or expansion tool.
- PVC/CPVC: Hacksaw, pipe cement, deburring tool.
- Not sure which material to choose? Our plumbing pipe types guide compares copper, PEX, and PVC for different applications.
Budget
Tools can be expensive. Consider renting specialty items or buying quality used tools for less common tasks.
Skill Level
If you’re new, start with simple, reliable tools. As you gain confidence, you can add advanced or power tools.
Common Mistakes When Selecting Rough-in Tools
Many beginners spend too much or too little on tools. Here are the top mistakes to avoid:
- Buying cheap tools: Low-quality tools break easily and cause sloppy work. Invest in good brands for core items.
- Ignoring safety gear: Cuts, burns, and eye injuries are common. Always have safety equipment.
- Skipping specialty tools: Don’t try to “make do” with the wrong tool. For example, using a hacksaw instead of a tubing cutter can lead to leaks.
- Not planning ahead: Make a list before starting. Missing a tool in the middle of a job wastes time and can lead to mistakes.
- Not checking local codes: Some areas require specific tools or methods. Always check before starting.
Credit: www.bebreginaelena.it
Practical Tips For Smooth Plumbing Rough-in
- Label pipes as you install them. This saves confusion later.
- Test-fit everything before gluing or soldering. Mistakes are easier to fix when pipes are dry-fit.
- Clean all fittings before joining. Dirt or burrs can ruin a seal.
- Double-check slopes for drain lines. Even a tiny error can create slow drains.
- Keep your work area tidy. A cluttered space leads to mistakes and accidents.
Example: Roughing In A Bathroom
Let’s look at a simple example—a bathroom with a toilet, sink, and shower.
- Mark fixture locations with a tape measure and marker.
- Drill holes in the floor and wall plates for supply and drain lines using a hole saw.
- Run supply lines (PEX or copper) using a tubing cutter and pipe bender.
- Install drains and vents. Use a hacksaw for PVC, then deburr and test-fit.
- Secure pipes with clamps.
- Pressure test with a pump to check for leaks before covering walls.
Non-obvious insight: It’s easy to forget vent pipes, but they’re required for drains to work properly. Plan for them early, or you’ll need to open walls later.
Maintenance And Storage Tips
Quality tools last years if cared for. Here’s how to keep your rough-in tools in top shape:
- Clean tools after use to remove glue, solder, or pipe shavings.
- Oil moving parts like pipe wrenches to prevent rust.
- Store in a dry place. Damp tools rust and become unsafe.
- Check for damage before each job. A worn-out cutter or dull saw blade can ruin your work.
Cost Comparison: Diy Vs Hiring A Plumber
Rough-in tools are an investment. Is DIY cheaper than hiring a pro? Here’s a realistic comparison.
| Task | DIY Cost (Tools + Materials) | Pro Plumber Cost |
|---|---|---|
| Bathroom Rough-In | $300 – $800 | $1,500 – $3,500 |
| Kitchen Rough-In | $400 – $900 | $2,000 – $4,000 |
| Whole House | $1,500 – $3,000 | $8,000 – $15,000 |
Note: DIY is cheaper if you already have some tools and basic skills. If not, mistakes can be costly—sometimes it’s better to hire a pro for complex jobs.
Credit: bsptools.com
Where To Learn More
Codes and techniques change. Stay updated with resources like the National Geographic Plumbing Overview, which explains history and best practices.
Frequently Asked Questions
What Is The Most Important Tool For Plumbing Rough-in?
The pipe cutter is crucial because you’ll need precise, clean cuts on every pipe. The wrong cut can lead to leaks and failed inspections.
Do I Need Power Tools For A Basic Bathroom Rough-in?
Not always. Most jobs can be done with hand tools like a tubing cutter, pipe wrench, and hacksaw. Power tools are faster but not always necessary for small projects.
How Do I Know Which Pipes And Fittings To Use?
Check local building codes, and match the pipe type (PEX, copper, PVC) with compatible fittings. Most codes allow PEX or copper for supply and PVC for drains.
Can I Rent Plumbing Rough-in Tools?
Yes, many hardware stores rent specialty tools like pipe threaders, pressure test pumps, and inspection cameras. This is a smart choice for one-time projects.
What’s The Biggest Mistake Beginners Make During Rough-in?
Rushing the layout and forgetting to test for leaks. Always measure twice, cut once, and test your system before closing the walls.
A good plumbing rough-in makes the rest of your project simple. With the right tools, a careful plan, and a few expert tips, you’ll save time, money, and frustration—setting your home up for years of worry-free plumbing.
