
Pulling a nail with a hammer seems simple, but there’s more to it than just yanking. If you do it wrong, you can damage your material, hurt yourself, or even break your tools. Understanding the right way to remove a nail ensures you work safely and protect your project.
Whether you’re fixing old furniture, doing home repairs, or learning for the first time, this guide will show every detail you need to know. With a few smart techniques, you can make even the toughest nails come out smoothly and avoid common mistakes that frustrate beginners.
Understanding Your Hammer
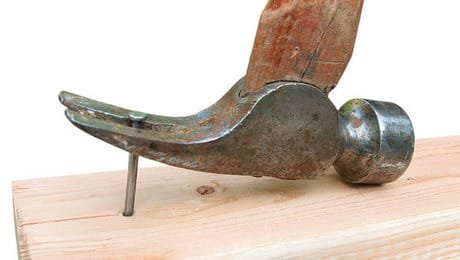
Before you pull a nail, it helps to know your hammer. The most common type for this job is the claw hammer. The claw hammer has two main parts: a flat head for driving nails in, and a curved, forked claw for pulling them out. The shape of the claw gives you leverage, making it easier to lift the nail.
Some hammers, like the rip hammer, have a straighter claw, which is better for demolition but less gentle on surfaces. For delicate work, a finishing hammer is lighter and has a thinner claw, which helps avoid dents.
If you only have a basic claw hammer, don’t worry. You can still remove most nails as long as the claw fits under the nail head. If you’re interested in the different types of hammers and their uses, you can check out this Hammer Wikipedia page.
Tools You May Need Besides A Hammer
While a hammer is the main tool, sometimes you need extra help. Here are some tools that make pulling nails easier:
- Pry bar: For stubborn or sunken nails
- Pliers: To grip small or bent nails
- Block of wood: To protect surfaces
- Flathead screwdriver: To start lifting a nail
- Nail set: For finishing work
If you often pull nails, keeping these tools nearby saves time.
Getting Ready To Pull A Nail
Preparation is key for a safe and clean result. Here’s how to set up:
- Inspect the nail. Look at how deep the nail is and what material it’s in. Older nails may be rusted, while new ones might come out easily.
- Check your hammer and tools. Make sure your hammer’s claw isn’t damaged or loose.
- Protect your surface. Place a small block of wood under your hammer’s claw to avoid marking the wood or wall. This trick is especially helpful when removing nails from furniture or finished trim.
- Wear safety gear. Gloves protect your hands from sharp edges, and safety glasses keep dust and metal bits out of your eyes.
A small preparation saves time and avoids frustration later.
Step-by-step: How To Pull A Nail With A Hammer
Removing a nail may look simple, but following the right steps makes it easier and safer.
1. Position The Hammer Claw
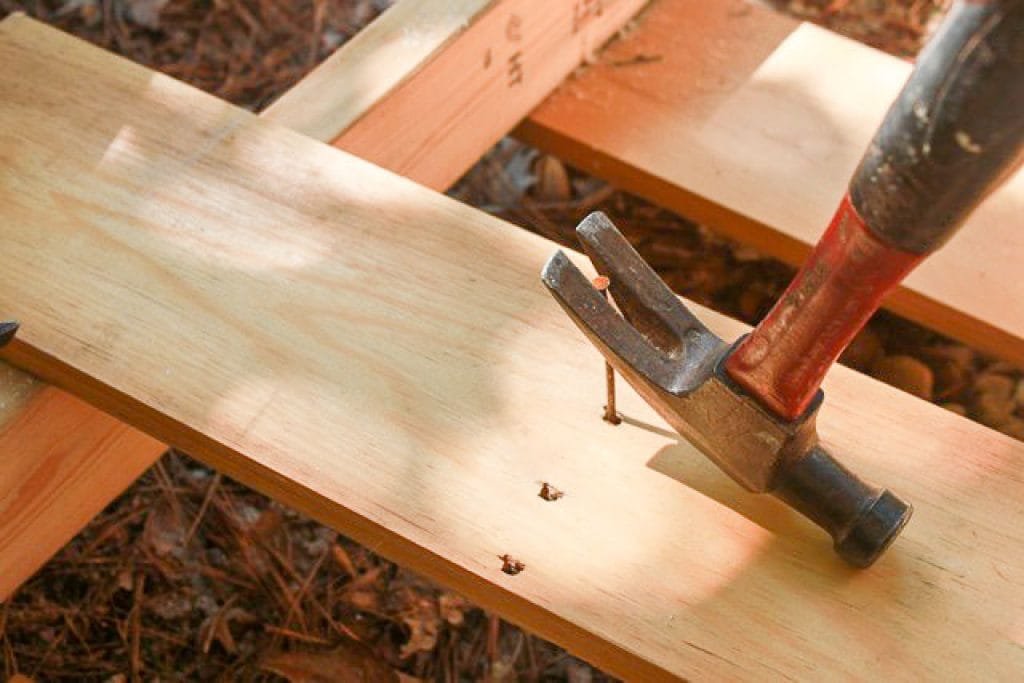
Slide the claw under the nail head. If the nail is flush with the surface or buried, use a flathead screwdriver or pliers to lift the head enough to fit the claw. Be gentle to avoid damaging the material.
2. Create Leverage
Once the claw is under the nail head, rock the hammer back slowly. The curved claw acts as a lever. If you use a block of wood under the hammer head, you get more leverage and protect the surface at the same time.
3. Pull The Nail Out
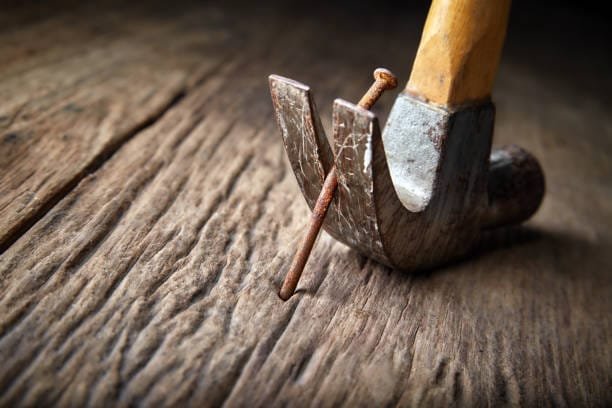
Apply steady pressure on the hammer handle. The nail should lift smoothly. If it’s stuck, wiggle the hammer from side to side or try pulling at a slight angle. For long nails, you may need to stop halfway, reposition the claw, and pull again.
4. Remove Bent Or Stubborn Nails
If the nail bends or doesn’t come out, use pliers to grab the exposed part and pull while using the hammer’s claw for extra force. For very difficult nails, a pry bar can help finish the job.
5. Inspect The Hole
Once the nail is out, check the hole. For visible surfaces, you may want to fill it with wood filler or putty to restore a smooth finish.
Common Nail Pulling Challenges And Solutions
Not all nails come out easily. Here’s how to deal with common problems:
Nails Without Heads
Sometimes, the nail head is missing or broken off. In this case, use locking pliers to grip what’s left of the nail, then rock the pliers against a block of wood to slowly pull it free.
Sunken Nails
Nails driven below the surface need extra care. Use a flathead screwdriver or a small pry bar to lift the nail until the claw fits underneath. Be patient—forcing it can damage your material.
Rusty Or Old Nails
Rust makes nails weak and likely to break. Apply a drop of oil around the nail and let it sit for a few minutes before pulling. This can loosen the rust and make removal easier.
Nails In Delicate Surfaces
When working with trim, molding, or thin boards, always use a block of wood under your hammer. Pull slowly and, if possible, from the back of the material to avoid visible damage.
Comparison: Hammer Types For Nail Pulling
The type of hammer you use can make a difference. Here’s a quick comparison:
| Hammer Type | Best For | Claw Shape | Surface Protection |
|---|---|---|---|
| Claw Hammer | General work, woodworking | Curved | Good with block of wood |
| Rip Hammer | Demolition, framing | Straight | Rough, can damage surfaces |
| Finishing Hammer | Trim, finish work | Thin, curved | Best for delicate surfaces |
Credit: www.finehomebuilding.com
How To Pull Different Types Of Nails
Not all nails are the same. Here’s how to handle the most common kinds:
Common Nails
Large, thick nails used in framing and rough work. Use a standard claw hammer and a block of wood for leverage.
Finish Nails
Small, thin nails used in trim and molding. Use a finishing hammer or pry bar. Pull from the back of the trim if possible to avoid leaving marks.
Brad Nails
Very thin and short, often used in furniture. Pliers are usually best, as these nails can bend easily.
Box Nails
Similar to common nails but thinner. Use gentle pressure to avoid bending.
Spiral Or Ring Shank Nails
These have ridges for extra grip. They’re tough to remove. Wiggle the hammer side to side, or use a pry bar if needed.
Why Some Nails Are Harder to Remove
Nail withdrawal resistance varies with shank shape, material, penetration depth, corrosion, wood density, and the condition of the joint. A smooth-shank nail in soft, sound wood may come out more readily than a ring-shank nail designed for greater holding power, but there is no defensible universal difficulty score for each nail type.
Choose the removal method from the nail that is actually present. A protruding common nail often suits a claw hammer with a protective wood block. A small finish or brad nail may need end-cutting pliers or a narrow nail puller. A ring-shank nail may resist removal more strongly and can damage the wood if pulled without considering whether the workpiece needs to be saved. Stop if the board starts splitting or the fastener breaks.
Safety Tips For Pulling Nails
Safety should never be ignored when working with tools. Here are key things to remember:
- Wear gloves to avoid cuts from sharp edges or rust.
- Use safety glasses. Pieces of metal or wood can fly up when pulling a stubborn nail.
- Check your work area. Make sure no one is standing close behind or beside you.
- Pull slowly and steadily. Jerking the hammer can damage material or cause you to lose balance.
- Dispose of nails properly. Old nails are sharp and dangerous. Place them in a container, not loose in the trash.
Many injuries happen because people rush or don’t pay attention. Taking a few seconds to check your surroundings makes a big difference.
Mistakes To Avoid When Pulling Nails
Even experienced workers make mistakes. Here are some to watch for:
- Pulling too fast: This can break the nail or damage the material.
- Not using a block of wood: The hammer’s claw can dent or scratch surfaces.
- Using the wrong hammer: A demolition hammer can ruin delicate woodwork.
- Ignoring stuck nails: Forcing a stuck nail can split wood. Try wiggling, oil, or different tools.
- Not checking for wires or pipes: In walls or floors, nails may be near electrical wires or pipes. Be careful before pulling hard.
Knowing what to avoid is just as important as knowing what to do.
Advanced Techniques For Difficult Nails
Some nails are really hard to remove. Here are tips for the toughest cases:
Double-leverage Trick
If the nail is deeply embedded, stack two blocks of wood under the hammer. This gives extra leverage with less force. It’s a simple trick, but very effective.
Using A Pry Bar With A Hammer
Insert the pry bar under the nail head, then place the hammer head under the pry bar as a fulcrum. Push down on the bar gently. This combo often works for large or rusty nails.
Avoid Heating Embedded Nails
Do not heat an embedded nail to loosen it: heat can damage finishes or nearby materials. Support the surface with a wood block and use a suitable nail puller or locking pliers. Stop if the fastener or workpiece starts to fail.
When To Replace Or Repair Tools
Good tools last, but even the best hammer can wear out. Signs it’s time to replace your hammer include:
- Loose head: Dangerous and can fly off.
- Cracked handle: Risk of breaking during use.
- Damaged claw: Won’t grip nails properly.
Don’t risk injury or ruined work with bad tools. A quality hammer is a good investment if you do a lot of DIY or construction.
Credit: www.chisentools.com
Real-life Example: Fixing A Loose Floorboard
Imagine you find a squeaky floorboard in your home. You want to fix it without damaging the wood. Here’s how you’d use what you’ve learned:
- Find the old nail causing the squeak.
- Slide the hammer’s claw under the nail head, using a block of wood for protection.
- Pull gently. If the nail is stuck, try oil or a pry bar.
- Once removed, replace the nail with a screw for a stronger hold and less squeak.
This simple process saves you from bigger repairs and keeps your floor in good shape.
Choose the Nail Puller by Access and Workpiece
No reliable test source is cited for percentage success rates of a claw hammer, pry bar, or pliers, and results would vary with the nail, wood, access, and operator. Use a task-based comparison instead of invented success percentages.
| Tool | When it is useful | Main caution |
|---|---|---|
| Claw hammer | Accessible nail heads in ordinary woodwork | Pad the fulcrum to protect finished surfaces. |
| Small pry bar or nail puller | Stubborn heads or restricted claw access | Use controlled leverage; thin trim can split. |
| End-cutting or locking pliers | Exposed shanks, broken heads, or small fasteners | Do not gouge the workpiece or snap the nail. |
For safe hammer inspection, grip and control, consult our guide to using a hammer safely. Inspect tools before applying force and keep your face and hands clear of a fastener that may suddenly release.
How To Fill Nail Holes After Pulling
Once you remove a nail, you may want to restore the surface. Here’s what to do:
- Clean the hole of dust and loose fibers.
- Use wood filler or putty for wood surfaces. For walls, use spackle.
- Press filler into the hole with a putty knife.
- Let it dry, then sand smooth.
- Paint or stain to match the surface.
This step is important if you want your project to look professional.
Protecting the Workpiece During Nail Removal
Choose a hammer with a sound, firmly attached head and an intact claw. Put a thin scrap-wood pad beneath the hammer’s contact point to spread the load and reduce dents. Grip the nail as close to the wood as the claw allows, then pull with controlled leverage rather than jerking. If the nail bends or the head breaks off, stop and select a suitable nail puller or locking pliers instead of striking blindly. Check behind boards for electrical wiring and plumbing before prying into concealed areas. Dispose of removed nails promptly with their sharp points contained.
Frequently Asked Questions
What If The Nail Head Breaks Off During Removal?
If the head breaks, grip the remaining nail with pliers and pull while rocking against a block of wood. If it’s too deep, use a small pry bar or carefully drill around the nail to free it.
Can I Reuse Nails After Pulling Them?
You can, but it’s not recommended. Pulled nails often bend or get damaged, which can make them weak. For important work, use new nails for safety and strength.
How Can I Avoid Damaging Wood When Pulling Nails?
Always use a block of wood under your hammer’s claw to spread the force and protect the surface. Pull slowly and, if possible, from the back side of the material.
Is It Safe To Pull Nails From Old Walls?
Be careful with old walls—there may be hidden wires or pipes. Use a stud finder if you’re unsure, and wear safety gear to protect against dust and debris.
What’s The Best Way To Pull A Rusty Nail?
Apply a few drops of oil to loosen the rust, wait a few minutes, then pull using a hammer or pry bar. If it remains stuck, use controlled leverage with a suitable nail puller; avoid heating the fastener or damaging surrounding material.
Pulling a nail with a hammer is a basic skill, but mastering the right method makes every project easier and safer. With these detailed steps, smart tips, and practical examples, you’ll be ready to handle any nail—no matter how stubborn.
Remember, patience and the right tools are your best friends. Happy building!
Credit: www.istockphoto.com