If you’re tackling a door installation or repair, knowing how to router door hinges correctly is a game changer. Getting the hinges perfectly recessed not only ensures your door swings smoothly but also gives your work a clean, professional finish.
You might be wondering how to make those precise cuts without wasting time or damaging your door. This guide will walk you through the simple steps to router door hinges like a pro, whether you’re a beginner or looking to sharpen your skills.
Stick with me, and you’ll soon have the confidence to handle door hinge installation with ease and accuracy. Let’s get started!

Credit: us.amazon.com
Tools And Materials
Routing door hinges requires the right set of tools and materials. These ensure a clean, precise cut for your hinges to fit perfectly. Gathering everything before starting saves time and reduces mistakes.
Using proper tools also improves safety and the quality of your work. Below, find a detailed list of essential tools and materials needed for routing door hinges.
Router
The router is the key tool for this task. Choose a router with variable speed control for better handling. A plunge router is ideal because it allows you to control the depth accurately.
Router Bits
Use a straight or hinge mortising bit designed for door hinges. The size depends on your hinge dimensions. Sharp bits provide cleaner cuts and reduce tear-out.
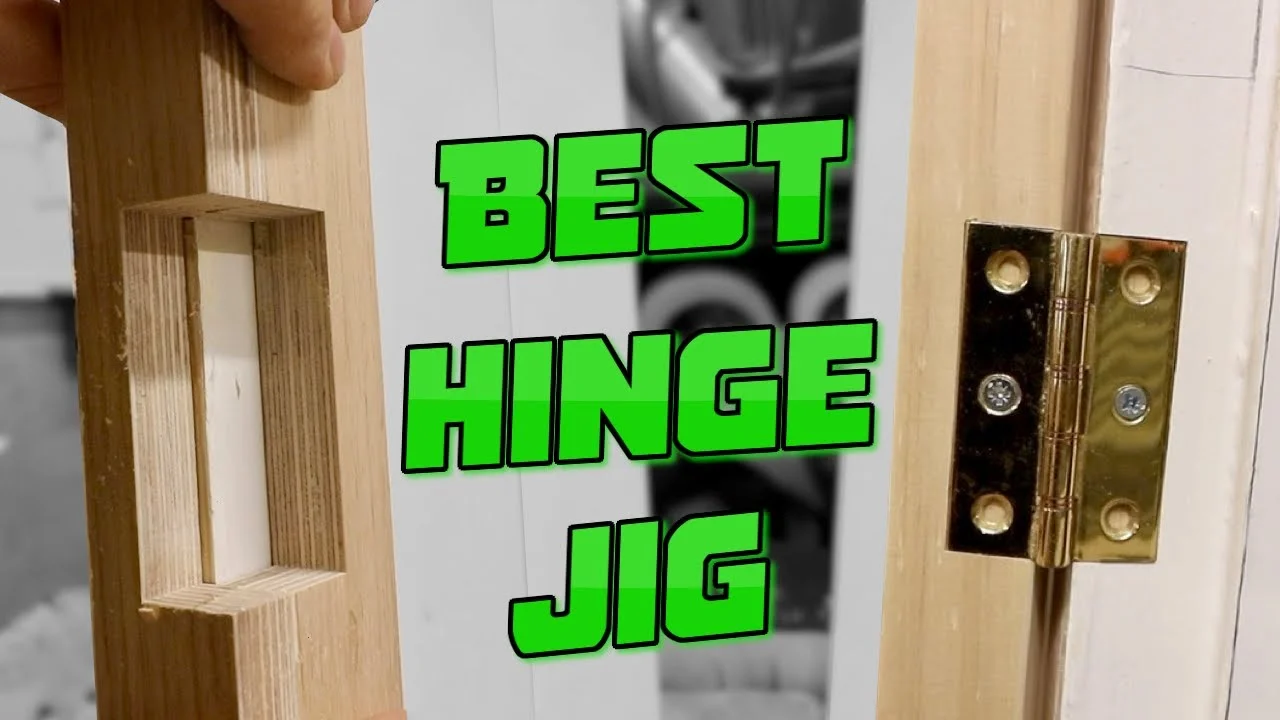
Hinge Template Or Jig
A hinge template guides the router to cut precise recesses. It saves time and ensures uniform depth and shape. You can buy one or make a simple jig yourself.
Measuring Tools
Accurate measurements are crucial. Use a tape measure, combination square, and pencil for marking hinge positions on the door and frame. Double-check all measurements before routing.
Clamps
Clamps hold the door steady during routing. Secure your workpiece to prevent movement and achieve clean cuts. Use enough clamps to keep the door firmly in place.
Chisel And Hammer
A sharp chisel cleans up corners or fine-tunes the recess. Sometimes the router cannot reach tight spots. Light hammer taps help remove small wood pieces carefully.
Safety Gear
Wear safety glasses to protect your eyes from wood chips. Hearing protection reduces noise from the router. Use a dust mask to avoid inhaling fine dust particles.
Screwdriver And Screws
After routing, attach the hinges with screws. A screwdriver or drill with a screwdriver bit makes this easier. Use screws that fit your hinges and door material.
Choosing The Right Router Bit
Choosing the right router bit is key to routing door hinges cleanly and accurately. The router bit shapes the recess where the hinge will sit. A proper fit ensures the door closes smoothly and looks professional. The wrong bit can cause uneven cuts or damage the wood.
Select a bit designed for hinge mortising. These bits have a flat bottom to create a precise, square recess. A straight or spiral up-cut bit works well. They help remove wood chips quickly and keep the cut clean.
Consider the size of your hinges before picking a bit. The cutting diameter should match the hinge leaf width. Using a bit too small or too large leads to poor fitting and weak joints.
Flat Bottom Router Bits For Door Hinges
Flat bottom bits create sharp, clean recesses. They cut straight edges that fit hinge plates perfectly. These bits reduce tear-out and splintering around the edges. This results in a smooth surface for the hinge to rest on.
Choose a bit with a diameter equal to or slightly smaller than the hinge leaf. This helps keep the mortise within the hinge boundary. A bit with a bearing guide can improve accuracy during routing.
Straight Vs Spiral Bits
Straight bits are simple and affordable. They cut straight down and leave a flat bottom. They work well for softer woods and small hinge mortises.
Spiral bits remove chips more efficiently. They reduce heat and burn marks on the wood. These bits also create cleaner edges. Spiral bits are best for hardwoods or larger hinges.
Choosing The Right Diameter And Cutting Depth
Match the bit diameter to the hinge size for a snug fit. Measure the hinge leaf width and thickness before routing. Set the cutting depth to match the hinge leaf thickness exactly.
Using a depth stop on your router helps maintain consistent depth. It prevents over-cutting, which weakens the door frame. Test the bit on scrap wood to adjust depth before the final cut.
Preparing The Door And Frame
Preparing the door and frame is the first step to routing door hinges properly. This step ensures the hinges fit snugly and the door operates smoothly. Careful preparation saves time and prevents mistakes.
Start by inspecting the door and frame for any damage or warping. A flat, clean surface makes routing easier and more accurate. Remove old hinges and clean the area of any debris or paint. This creates a clear space for the new hinge.
Measuring And Marking The Hinge Location
Measure the exact position for the hinges on the door and frame. Use a tape measure and pencil to mark the top and bottom hinge spots. Double-check your measurements before marking to avoid errors. Mark the outline of the hinge plate with a sharp pencil for clear guidance.
Securing The Door For Routing
Place the door on a stable work surface or sawhorses. Clamp it securely to prevent movement while routing. A steady door allows for precise cuts and safer work. Ensure the door edge is accessible for the router bit.
Preparing The Frame For Hinge Routing
Open the door and position the frame for easy access to hinge spots. Mark the hinge outlines on the frame to match the door. Use clamps or wedges to hold the frame steady if needed. Clear the area around the frame for smooth tool movement.
Marking Hinge Positions
Start by placing the hinge on the door edge where it will sit. Mark around the hinge outline and screw holes with a pencil for precise routing. Accurate marking ensures the hinge fits snugly and the door operates smoothly.
Start by closing the door in its frame. Align the door exactly where it will hang. Use a pencil to mark the top and bottom edges of the door on the frame. This step ensures proper hinge placement and door alignment.
Positioning The Hinges On The Door
Place the hinge on the door edge at the desired height. Typically, one hinge sits about 7 inches from the top, another 11 inches from the bottom. Mark the outline of the hinge on the door with a sharp pencil. These marks guide the router for precise cutting.
Marking Screw Hole Locations
After outlining the hinge, open it slightly on the door edge. Mark the center of each screw hole inside the hinge plate. These marks help pre-drill holes, preventing wood splitting. Accurate screw hole marking makes hinge installation easier and secure.
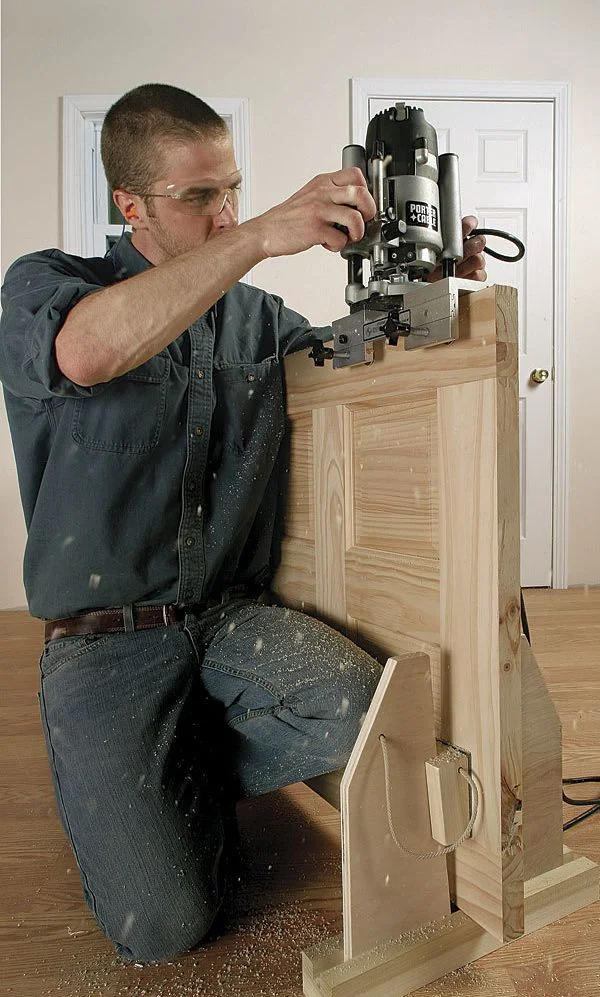
Setting Up The Router And Jig
Setting up the router and jig correctly is essential for routing door hinges. This step ensures precise cuts and a perfect fit for your hinges. Take time to prepare your tools and workspace carefully.
A well-set router and jig help prevent mistakes and save time. You get clean, professional results with less effort. Follow these steps to set up your router and hinge jig properly.
Select a straight or hinge mortising bit sized to match your hinge thickness. The bit should cut cleanly without forcing the router. Check the bit for sharpness and stability before use. A dull bit can cause rough edges and uneven cuts.
Adjusting The Router Depth
Set the router depth to match the hinge leaf thickness. Use a ruler or caliper to measure the hinge. Adjust the router base so the bit cuts just deep enough for the hinge to sit flush. Test the depth on a scrap piece of wood first.
Securing The Hinge Jig
Attach the hinge jig firmly to the door or frame. Clamp it securely to avoid shifting while routing. Make sure the jig aligns with your hinge placement marks. The jig guides the router for accurate cuts every time.
Positioning The Router On The Jig
Place the router on the jig base plate, matching the bit with the jig’s guide. Hold the router steady and check alignment before turning it on. Ensure the router moves smoothly along the jig without catching or tilting.
Routing The Hinge Mortises
Routing the hinge mortises is a key step in fitting door hinges properly. It creates a precise recess for the hinge leaf to sit flush with the door edge. This step ensures the door closes smoothly and looks neat. Using a router simplifies this task and improves accuracy.
Proper setup and careful routing prevent damage to the door and frame. The goal is a clean, even mortise matching the hinge size exactly. Below are easy steps to guide you through the process.
Preparing The Door And Marking The Hinge Position
Start by placing the hinge on the door edge. Align it at the desired height and mark around it with a pencil. Mark the outline clearly on the door surface. Also, mark the screw hole positions to guide drilling later. Double-check measurements to avoid mistakes.
Setting Up The Router And Guide
Choose a router bit that matches the hinge thickness, usually a straight bit. Attach a hinge template or guide to the door edge for steady routing. Adjust the router depth to match the hinge leaf thickness. Secure the door firmly to prevent movement during routing.
Routing The Mortise Carefully
Turn on the router and start routing inside the marked outline. Move the router steadily along the guide to create an even recess. Avoid rushing to prevent chipping or uneven cuts. Rout multiple shallow passes instead of one deep cut for better control. Clean up the mortise edges with a chisel if needed.
Checking The Fit And Making Adjustments
Place the hinge in the routed mortise to check the fit. The hinge should sit flush with the door surface without gaps. If the mortise is too shallow, route a little deeper. If too deep, fill the excess with wood filler or thin shims. Ensure screw holes align properly before final installation.
Checking And Adjusting Fit
Checking and adjusting the fit of door hinges is a key step after routing. It ensures the door swings smoothly and closes properly. A good fit prevents gaps and misalignment that can cause wear and noise.
Start by placing the hinge into the routed recess. Check if it sits flush with the door or frame surface. The hinge should not stick out or be recessed too deeply. If needed, use the router or a chisel to fine-tune the recess depth.
Testing The Hinge Alignment
Close the door slowly to see how the hinges align. Look for uneven gaps between the door and frame. Misaligned hinges can cause the door to bind or rub. Adjust the hinge position by slightly shifting it within the routed recess.
Adjusting Screw Placement
Loosen screws slightly to reposition the hinge if needed. Move the hinge up, down, or sideways to improve fit. Tighten screws firmly once the hinge sits perfectly. Proper screw placement stabilizes the hinge and door movement.
Ensuring Smooth Door Movement
Open and close the door several times to test smoothness. The door should swing freely without catching or sticking. Lubricate the hinge pins if the movement feels stiff. Smooth operation extends the door and hinge lifespan.
Credit: www.finehomebuilding.com
Installing Hinges And Final Touches
Installing door hinges and adding final touches complete the process of routing hinges with precision. This step ensures your door fits perfectly and operates smoothly. Take your time to secure hinges firmly and check alignment carefully. Proper installation prevents door sagging and enhances durability.
Preparing The Hinge Placement
Place the hinge into the routed recess on the door edge. Make sure it fits flush with the wood surface. Use a pencil to mark screw holes through the hinge plate. This prevents slipping when drilling holes later.
Drilling Pilot Holes
Use a drill with a bit slightly smaller than your screws. Drill pilot holes on the pencil marks to avoid wood splitting. Keep the drill straight and steady for clean holes. Pilot holes help screws go in smoothly and hold tightly.
Screwing Hinges In Place
Align the hinge back on the recess. Insert screws into the pilot holes and tighten them with a screwdriver. Do not overtighten to avoid stripping screws or damaging the wood. Check hinge movement after installation to confirm smooth operation.
Final Adjustments And Checks
Test the door by opening and closing it several times. Observe the hinge alignment and door swing. Adjust screws slightly if the door binds or hangs unevenly. Sand any rough edges around the hinge for a clean look. Finish with paint or varnish to protect the wood.
Credit: www.youtube.com
Frequently Asked Questions
Can You Use A Router For Door Hinges?
Yes, a router can accurately cut recesses for door hinges. Use a hinge template and sharp router bit for clean mortises.
How To Route Door Hinges Without A Router?
Use a sharp chisel and hammer to carefully carve out the hinge recess. Mark hinge outline, score edges, then chisel evenly.
What Router Bit For Cutting Door Hinges?
Use a straight router bit, typically 1/4-inch or 1/2-inch diameter, for cutting door hinge mortises accurately.
What Is The 7 11 Hinge Rule?
The 7 11 hinge rule guides hinge placement: position one hinge 7 inches from the top, another 11 inches from the bottom.
Can I Use A Router To Install Door Hinges?
Yes, a router helps create precise recesses for door hinges, making installation easier and cleaner.
Conclusion
Routing door hinges becomes easier with the right steps and tools. Take your time to measure and mark hinge positions clearly. Use a sharp router bit for clean cuts. Secure the door firmly to avoid mistakes. Practice on scrap wood before working on the actual door.
With patience, your door will fit smoothly and function well. This skill improves your woodworking and home repair projects. Keep your tools sharp and your workspace safe. Soon, installing door hinges will feel natural and rewarding.
