Last Updated: March 21, 2026
If you’ve ever faced a tough grinding, sanding, or polishing job, you know how important the right tool is. A die grinder can make your work faster, cleaner, and more precise.
But if you’re not sure how to use it properly, it can feel tricky or even unsafe. This guide will walk you through everything you need to know to handle your die grinder like a pro. From setting it up to choosing the right bits and mastering the technique, you’ll gain the confidence to tackle your projects with ease.
Ready to unlock the full potential of your die grinder? Let’s dive in.
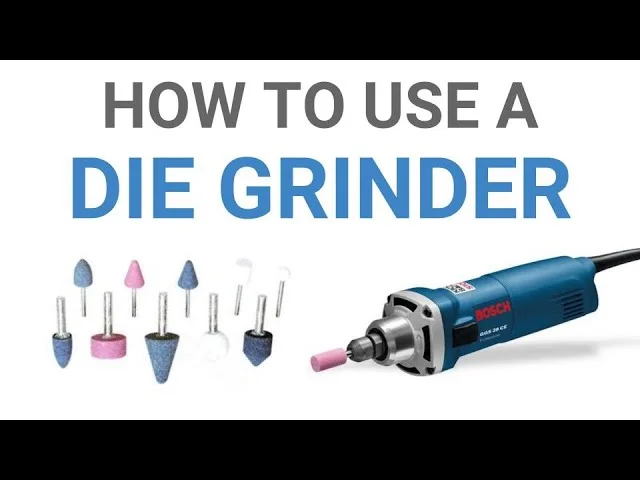
Credit: www.youtube.com
Choosing The Right Die Grinder
Picking the correct die grinder makes your work easier and safer.
Consider the tasks and materials before choosing a grinder.
The right tool helps you finish jobs faster and with better results.
Types Of Die Grinders
Electric die grinders run on power cords or batteries. They suit indoor work and offer steady speed.
Air die grinders need an air compressor. They are lighter and perfect for long use.
Choose based on your workspace and how long you will use the tool.
Power And Speed
Power affects how fast and strong the grinder works.
Higher speed grinders cut and shape materials quickly.
For delicate jobs, choose a grinder with adjustable speed.
Size And Grip
Smaller grinders are easier to control in tight spaces.
Look for a comfortable grip to reduce hand fatigue.
A lightweight die grinder helps with precision and longer use.
Collet Size
The collet holds the bit in place. It must fit the bits you plan to use.
Common collet sizes are 1/4 inch and 1/8 inch.
Check bit sizes before buying a die grinder to avoid mismatches.
Essential Die Grinder Bits
Die grinders are versatile tools used for cutting, grinding, and shaping materials. The right bits make the job easier and safer. Essential die grinder bits help you work on metal, wood, plastic, and more. Each bit serves a specific purpose. Knowing which bits to use improves your results and saves time.
Rotary Burr Bits
Rotary burr bits are common for shaping and carving hard materials. They come in different shapes like cylinder, ball, and cone. Use these bits for grinding metal and smoothing rough edges. They remove material quickly and leave a clean finish.
Cutting Wheels
Cutting wheels are thin discs made for slicing through metal and plastic. Attach them to your die grinder to cut bolts, screws, and pipes. These wheels spin fast and make precise cuts. Always wear safety glasses when using cutting wheels.
Sanding Drums
Sanding drums are cylindrical bits covered with sandpaper. Use them to smooth wood, plastic, and metal surfaces. They help remove paint, rust, and rough spots. Replace the sandpaper sleeves when worn out for the best sanding results.
Grinding Stones
Grinding stones are made of abrasive materials. Use them for sharpening blades and removing rust. They work well on metal and hard surfaces. Grinding stones come in various shapes and grit sizes for different tasks.
Setting Up Your Die Grinder
Setting up your die grinder properly ensures safe and efficient work. Preparing the tool before use helps avoid accidents and tool damage. Follow clear steps to get your die grinder ready for any task.
Pick a die grinder suitable for your project. Check the power source: electric or air-powered. Match the grinder size and speed to the work you plan.
Installing The Correct Attachment
Select the right bit or accessory for your task. Make sure it fits securely in the collet. Tighten the collet nut firmly to avoid slipping.
Checking Air Or Power Supply
Connect the die grinder to a clean air supply or power outlet. Use an air regulator to control pressure for air tools. Confirm the power source delivers steady voltage for electric models.
Wearing Safety Gear
Put on safety glasses to protect your eyes. Wear hearing protection to guard against loud noise. Use gloves for a better grip and hand protection.
Testing The Die Grinder
Turn on the die grinder briefly to check for smooth operation. Listen for unusual sounds that may indicate problems. Stop immediately if the tool vibrates excessively or feels loose.
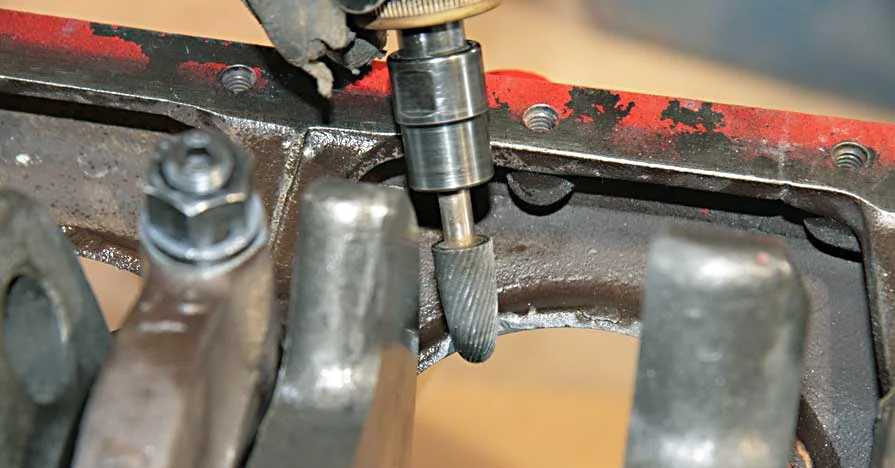
Credit: www.burdental.com
Basic Handling Techniques
Basic handling techniques are key to using a die grinder safely and effectively. Understanding how to hold and control this tool helps prevent accidents. It also improves the quality of your work.
Using a die grinder requires steady hands and focus. Small mistakes can cause damage to your project or injury. Follow these simple steps to handle the tool with confidence.
Proper Grip And Stance
Hold the die grinder firmly but not too tight. Use both hands when possible for better control. Position your body to maintain balance. Keep your feet shoulder-width apart. This stance helps absorb any kickback from the tool.
Starting And Stopping The Tool
Always start the die grinder before touching the work surface. Let it reach full speed. To stop, release the trigger and wait for the tool to fully stop. Never set it down while the disc or bit is still spinning.
Controlling Speed And Pressure
Adjust the speed according to the task and material. Use slower speeds for delicate work. Apply gentle pressure. Pressing too hard can damage the tool and the material. Let the grinder do the work.
Moving The Grinder Smoothly
Move the die grinder in steady, controlled motions. Avoid sudden jerks or twists. Keep the tool flat against the surface for even grinding. Change direction slowly to prevent gouges or uneven marks.
Maintaining Clear Visibility
Keep your work area well-lit. Position yourself to see the grinding surface clearly. Wear safety goggles to protect your eyes. Good visibility helps you guide the tool accurately and avoid mistakes.
Tips For Precision Work
Precision work with a die grinder requires careful control and attention. Small mistakes can ruin your project. Follow these tips to improve accuracy and get clean results. Prepare your workspace and tools well before starting.
Using the right technique helps you avoid slips and uneven cuts. Keep your hands steady and focus on the task. Wear safety gear to protect your eyes and ears from dust and noise.
Choose The Correct Grinding Bit
Select a bit that matches your material and job type. Smaller bits offer better control for detailed work. Coarser bits remove more material but can be harder to control. Test the bit on scrap material first.
Maintain A Steady Grip
Work In Short Intervals
Use Proper Speed Settings
Safety Gear And Precautions
Using a die grinder involves fast spinning bits that cut, grind, or shape materials. This power can cause injuries without proper safety measures. Wearing the right gear and taking precautions keeps you safe and helps work go smoothly. Always prepare before starting your die grinder tasks.
Wear Protective Eyewear
Small particles fly off at high speed during grinding. Protective glasses or goggles shield your eyes from dust and debris. Choose eyewear that fits snugly and covers your eyes completely. Avoid using only regular glasses, as they do not provide enough protection.
Use Hearing Protection
Die grinders produce loud noise that can harm your hearing. Earplugs or earmuffs reduce noise levels and prevent damage. Pick comfortable hearing protection, especially for long work sessions. Protecting your ears helps maintain focus and reduces fatigue.
Wear Gloves For Hand Safety
Gloves protect your hands from sharp edges and hot surfaces. Use tight-fitting gloves to keep a good grip on the tool. Avoid loose gloves that can get caught in the grinder. Inspect gloves for holes or wear before use.
Wear A Dust Mask
Grinding creates fine dust that can irritate your lungs. A dust mask or respirator filters harmful particles from the air. Choose masks rated for your work environment. Proper breathing protection helps avoid respiratory problems.
Secure Your Work Area
Clear the workspace of clutter and hazards. Make sure your workpiece is firmly clamped or held steady. Keep cords away from the grinder’s path. A tidy area reduces the risk of accidents and allows better control.
Check The Tool Before Use
Inspect the die grinder and attachments for damage. Make sure the bit is properly installed and tightened. Check the power cord and air hose for cracks or leaks. A well-maintained tool works safely and efficiently.
Common Mistakes To Avoid
Using a die grinder can be tricky without the right care. Many beginners make errors that reduce their tool’s efficiency. These mistakes may also cause safety risks or damage to the workpiece. Avoiding common errors helps you work better and safer.
Focus on these key mistakes to improve your die grinder skills quickly. Small changes in your technique make a big difference in results.
Not Wearing Proper Safety Gear
Always wear safety glasses to protect your eyes from flying debris. Ear protection prevents hearing damage from loud noise. Gloves help avoid cuts and blisters. Skipping safety gear can lead to serious injuries.
Using The Wrong Grinding Bit
Choose the correct bit for your material and task. Using the wrong bit can damage your work or wear out the tool faster. Check the bit type and size before starting your project.
Applying Too Much Pressure
Let the grinder do the work by itself. Pressing too hard causes uneven cuts and can break the bit. A light, steady touch gives smoother results and keeps the tool safe.
Ignoring Tool Maintenance
Clean your die grinder regularly to remove dust and debris. Check for worn parts and replace them as needed. Poor maintenance leads to tool failure and unsafe operation.
Operating Without Firm Control
Hold the die grinder with both hands for better control. Loose grip causes mistakes and accidents. Keep a steady hold to make precise cuts and avoid slips.
Maintenance And Care
Proper maintenance and care extend the life of your die grinder. Regular checks keep the tool running smoothly and safely. Clean the grinder after every use to remove dust and debris. Store it in a dry, cool place to avoid rust and damage.
Cleaning The Die Grinder
Use a soft brush or compressed air to clean the vents. Wipe the body with a damp cloth. Avoid water inside the motor or switch area. Clean the collet and spindle to prevent buildup.
Lubricating Moving Parts
Apply a few drops of oil to the spindle and collet regularly. Use manufacturer-recommended lubricants. Proper lubrication reduces wear and keeps the grinder running quietly. Do not over-lubricate, as this can attract dust.
Inspecting And Replacing Accessories
Check grinding bits for wear or damage before use. Replace dull or broken bits immediately. Use the correct size and type for your grinder. Tighten accessories securely to avoid accidents during operation.
Checking Air Supply And Hoses (for Air Die Grinders)
Inspect air hoses for cracks or leaks. Ensure connections are tight and secure. Use clean, dry air to prevent moisture damage. Drain air compressors regularly to remove water buildup.
Regular Safety Checks
Examine the power cord or air hose for damage. Test the on/off switch to ensure it works well. Replace damaged parts promptly to avoid hazards. Wear safety gear while maintaining the tool.
Credit: knowhow.napaonline.com
Frequently Asked Questions
How Is A Die Grinder Used?
Hold the die grinder firmly with both hands. Start at low speed, then increase gradually. Apply light pressure while moving the tool steadily over the workpiece. Use appropriate bits for grinding, sanding, or polishing. Always wear eye and hearing protection during operation.
What Bits Do You Use With A Die Grinder?
Use carbide burrs, grinding stones, sanding discs, and cutting wheels with a die grinder. Choose bits for metal, wood, or plastic shaping.
How To Set Up A Die Grinder?
Secure the die grinder, insert the correct bit, and tighten the collet. Connect power or air supply. Wear safety gear. Test at low speed before use.
How Do You Use A Grinder Step By Step?
Hold the grinder firmly. Insert the correct bit securely. Wear safety gear. Start at low speed. Gently apply pressure while moving the grinder steadily. Increase speed if needed. Avoid overloading. Turn off and disconnect after use. Clean and store properly.
What Is A Die Grinder Used For?
A die grinder shapes, smooths, and cuts metal, wood, and plastic surfaces.
Conclusion
Using a die grinder takes practice and care. Always wear safety gear to protect yourself. Start slow and control your tool firmly. Choose the right bit for your project. Keep steady hands to avoid mistakes or injury. Clean and maintain your grinder after each use.
This simple tool can help shape, grind, or polish many materials. With patience and attention, you can get good results every time. Safety and control are key for successful die grinder use.
Related reading: how to use a plasma cutter.
{ “@context”: “https://schema.org”, “@type”: “Article”, “headline”: “How to Use a Die Grinder: Essential Tips for Precision and Safety”, “description”: “N/A”, “url”: “https://www.powertoolstoday.com/how-to-use-a-die-grinder/”, “datePublished”: “2025-12-06”, “dateModified”: “2026-03-18”, “author”: { “@type”: “Organization”, “name”: “Power Tools Today”, “url”: “https://www.powertoolstoday.com” }, “publisher”: { “@type”: “Organization”, “name”: “Power Tools Today”, “url”: “https://www.powertoolstoday.com” }, “mainEntityOfPage”: { “@type”: “WebPage”, “@id”: “https://www.powertoolstoday.com/how-to-use-a-die-grinder/” }, “image”: { “@type”: “ImageObject”, “url”: “https://www.powertoolstoday.com/wp-content/uploads/2025/11/how-to-use-a-die-grinder.jpg” } }{ “@context”: “https://schema.org”, “@type”: “Article”, “headline”: “How to Use a Die Grinder: Essential Tips for Precision and Safety”, “description”: “N/A”, “url”: “https://www.powertoolstoday.com/how-to-use-a-die-grinder/”, “datePublished”: “2025-12-06”, “dateModified”: “2026-03-19”, “author”: { “@type”: “Organization”, “name”: “Power Tools Today”, “url”: “https://www.powertoolstoday.com” }, “publisher”: { “@type”: “Organization”, “name”: “Power Tools Today”, “url”: “https://www.powertoolstoday.com” }, “mainEntityOfPage”: { “@type”: “WebPage”, “@id”: “https://www.powertoolstoday.com/how-to-use-a-die-grinder/” }, “image”: { “@type”: “ImageObject”, “url”: “https://www.powertoolstoday.com/wp-content/uploads/2025/11/how-to-use-a-die-grinder.jpg” } }nnnn