An angle grinder is one of those tools that looks simple until you turn it on. Then the power, speed, and sparks make it clear: this tool needs respect. If you want clean cuts, smoother surfaces, and fewer mistakes, learning how to use an angle grinder the right way matters.
In this guide, you’ll learn the basic parts of the tool, how to set it up, and the safest way to cut and grind different materials. You’ll also see the small habits that make a big difference, like letting the wheel do the work and choosing the right disc for the job.
Keep reading, because once you understand how to use an angle grinder correctly, you can work faster, stay safer, and get cleaner results on your DIY projects.
Credit: www.familyhandyman.com
Angle Grinder Basics
An angle grinder is a versatile power tool used for cutting, grinding, and polishing. It works on many materials like metal, stone, and wood. Knowing the basics helps you use it safely and effectively.
This section covers the main parts of an angle grinder and the types of discs you can use. Understanding these basics sets a strong foundation for your projects.
Main Parts And Functions
The angle grinder has several key parts. The motor powers the tool and spins the disc. The disc guard protects you from sparks and debris. The side handle helps you hold the tool firmly. The trigger switch turns the grinder on and off. The spindle locks the disc in place. Each part works together for smooth operation.
Types Of Discs And Their Uses
Angle grinders use different discs for different jobs. Cutting discs are thin and designed to cut metal or stone. Grinding discs are thicker and remove material quickly. Flap discs smooth rough surfaces and blend edges. Wire brush discs clean rust and paint. Using the right disc improves results and safety.
One detail beginners often miss is disc speed rating. The disc must match or exceed the grinder’s RPM. A disc that is too slow for the tool can fail under load. Also, never use a worn cutting disc for side grinding. Cutting wheels are made for edge use, not heavy sideways pressure.
Safety Gear Essentials
Using an angle grinder can be powerful and efficient. Safety gear is essential to protect yourself from sparks, debris, and sharp fragments. Wearing the right equipment reduces the risk of injury and ensures a safer work experience.
Eye And Face Protection
Always wear safety goggles or a full face shield. Sparks and small particles fly fast and can cause serious eye injuries. Goggles protect your eyes from dust and flying debris. A face shield adds extra protection for your whole face. Choose gear that fits well and stays secure during work.
For heavy cutting, a face shield should not replace goggles. Use both if the material may throw sharp fragments. Dust from concrete, tile, and rust can also get into your eyes long after the cut is done.
Gloves And Clothing Tips
Use thick, durable gloves to protect your hands. Gloves stop cuts, burns, and scrapes from the grinder and materials. Wear long-sleeved shirts and long pants made of non-flammable fabric. Avoid loose clothing that can catch on the grinder or moving parts. Closed-toe shoes with good grip protect your feet from falling objects and sparks.
Setting Up The Grinder
Setting up your angle grinder properly ensures safety and effective work. This step prepares the tool for the task ahead. Take time to check each part before starting. A well-set grinder works smoother and lasts longer.
Before you plug it in, inspect the power cord, wheel, guard, and side handle. If anything looks cracked, loose, or bent, fix it first. A quick check takes less than a minute and can prevent a dangerous failure.
Installing The Correct Disc
Choose the disc that matches your project and grinder size. Check the disc’s condition for cracks or damage. Place the disc on the spindle carefully, aligning it properly. Tighten the disc nut firmly but avoid over-tightening. Using the right disc improves results and prevents accidents.
Make sure the arrow on the disc, if it has one, matches the direction of rotation on the tool. Also check that the inner and outer flanges are seated correctly. A disc that is not mounted flat can wobble, vibrate, and wear out faster.
Adjusting Handles And Guards
Attach the side handle for better control and balance. Adjust the handle position for comfort and stability. Position the safety guard to protect from sparks and debris. Make sure the guard is locked securely in place. Proper handle and guard setup reduces risk and increases precision.
Place the guard so sparks fly away from your body and toward a safe direction. If you need to change the guard for a different cutting angle, unplug the grinder first. Never use the tool with the guard removed.
Correct Holding Techniques
Correct holding techniques improve safety and precision when using an angle grinder. Holding the tool properly reduces vibration and prevents accidents. It also helps maintain control over the cut or grind. This section explains how to hold the angle grinder for the best results.
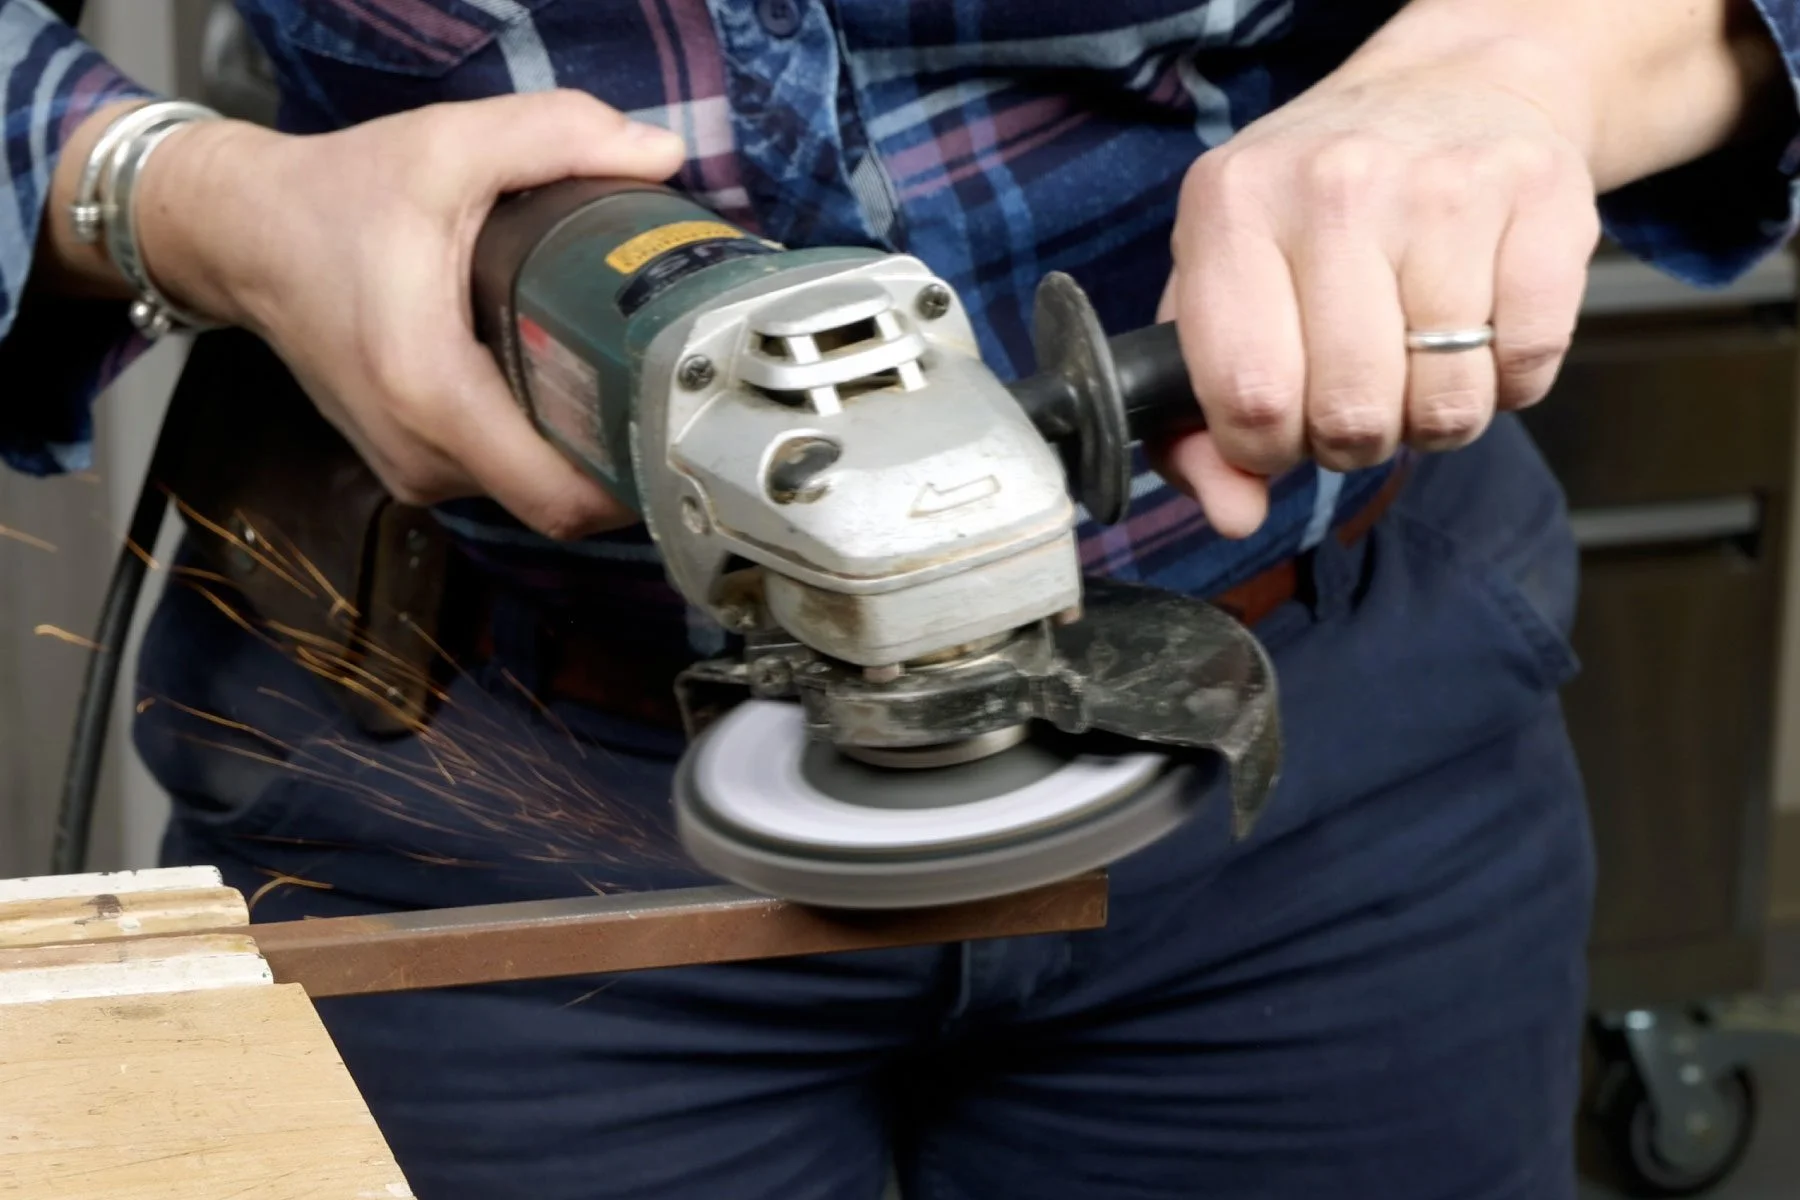
Hand Placement For Stability
Use both hands to hold the angle grinder firmly. Place your dominant hand on the main handle. Your other hand should grip the side handle tightly. This two-hand grip provides balance and reduces tool kickback. Avoid holding the grinder with one hand only. Keep your hands dry and free from oil or grease. This prevents slipping and increases your grip strength.
Body Positioning For Control
Stand with your feet shoulder-width apart for balance. Position your body so you face the work surface directly. Keep your arms slightly bent, not locked. This stance gives better control over the tool’s movements. Lean slightly forward to apply steady pressure. Avoid leaning too far or twisting your body. Always stay alert and ready to stop if needed.
Try to keep the grinder to one side of your body, not directly in line with the wheel. If the wheel binds or breaks, this position gives you a little more room to react. Good body placement is one of the easiest ways to improve control.
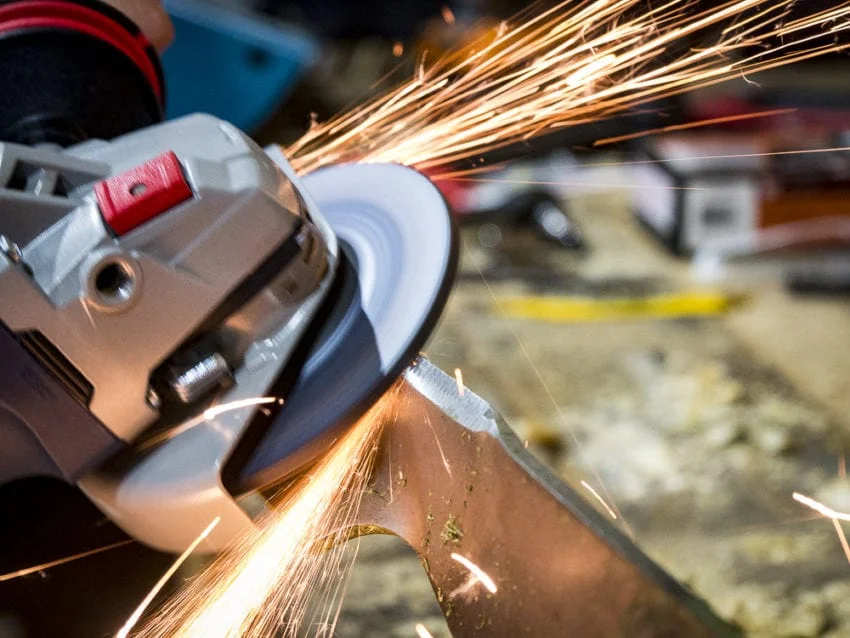
Cutting Metal With Precision
Cutting metal with precision requires focus and the right technique. An angle grinder can make clean, accurate cuts if used properly. This tool helps shape metal parts for projects, repairs, and crafts. Understanding how to select the right disc and maintain proper cutting angles improves results. Safety and control matter most during every cut.
Choosing The Right Disc
Select a disc designed for metal cutting, not grinding. Thin cutting discs slice through metal smoothly and reduce sparks. Avoid thick discs that cause rough cuts or damage the material. Check the disc’s size to fit your angle grinder. Use discs with a high-quality bond and proper speed rating. Replace worn or damaged discs immediately. Proper discs make your cuts clean and precise.
Proper Cutting Angles
Hold the cutting wheel at a 90-degree angle to the material so the disc enters the surface straight. Keeping the wheel perpendicular prevents binding, reduces kickback, and lowers the risk of the disc shattering. Move the tool steadily along the marked line and let the disc do the work without forcing it. Keep a firm grip with both hands to control movement, and stop cutting before the disc reaches the end of the material. A consistent 90-degree angle keeps cuts straight and protects both you and the wheel.
For longer cuts, start with a light scoring pass first. This shallow pass helps the wheel stay on line and gives you better control. On thick metal, let the wheel cool for a moment between passes so the edge does not overheat and wear out too fast.
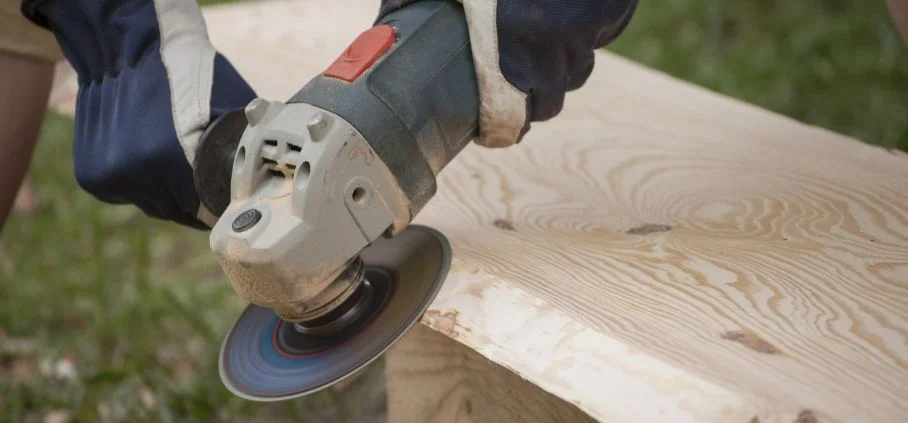
Grinding And Smoothing Surfaces
Grinding and smoothing surfaces with an angle grinder is a common task in many projects. This process helps create an even, clean finish on metal, wood, or concrete. Proper use of the angle grinder ensures a smooth surface and prepares materials for painting or welding.
Using the right disc and steady hand will improve your results. Control the tool carefully to avoid damage to the surface. Patience and practice lead to better finishes.
Surface Preparation Tips
Choose the correct grinding disc for your material. Use a coarse disc for heavy grinding and a fine disc for smoothing. Keep the grinder moving to avoid gouges or burns. Hold the tool at a consistent angle, usually around 15 to 30 degrees. Clean the surface before starting to remove dirt and debris. Wear safety gear like gloves and goggles for protection. Work in small sections for better control and accuracy.
If you are removing rust or paint, start with a wire brush or coarse flap disc before switching to a finer disc. That saves time and helps you avoid over-grinding the good metal underneath. A smooth finish is easier to get in stages than in one hard pass.
Avoiding Common Mistakes
Do not press too hard; let the grinder do the work. Avoid staying too long in one spot to prevent uneven surfaces. Check the disc often for wear or damage. Secure your workpiece to stop it from moving during grinding. Keep both hands on the tool for stability. Never grind without eye protection. Do not use a damaged or wrong disc as it risks injury and poor results.
Using An Angle Grinder On Concrete And Tile
Using an angle grinder on concrete and tile is a common task in construction and renovation. The tool makes cutting and shaping easier and faster. It helps create clean edges and smooth finishes on hard surfaces. Understanding how to choose the right blade and follow safe cutting steps is essential for best results.
Selecting Diamond Blades
Diamond blades are best for cutting concrete and tile. They have tiny diamonds on the edge that grind through hard materials. Choose a blade size that fits your angle grinder. Thin blades cut more smoothly and reduce dust. Look for blades labeled for wet or dry cutting. Wet cutting uses water to cool the blade and lower dust. Dry cutting is faster but creates more dust. Use the blade type that fits your project needs and safety gear.
Use a blade made for the exact material you are cutting. A tile blade and a concrete blade can look similar, but they are not always the same. For brittle tile, a continuous-rim blade usually gives a cleaner edge. For masonry or concrete, a segmented blade often cuts faster and clears dust better.
Step-by-step Cutting Process
Start by marking the cutting line on the concrete or tile. Secure the material firmly to avoid movement. Hold the angle grinder with both hands for control. Turn on the grinder and let it reach full speed. Gently lower the blade onto the marked line. Move the grinder steadily along the line without forcing it. Keep the blade straight and avoid tilting. If cutting concrete, take breaks to prevent overheating. After finishing, lift the grinder away and turn it off. Let the blade stop spinning before setting it down.
For tile, make shallow passes instead of trying to cut through in one go. This reduces chipping along the top edge. Score the surface first, then deepen the cut slowly. If the cut must be very clean, cut slightly outside the line and finish the edge carefully.
Credit: fantastichandyman.com.au
Maintenance And Troubleshooting
Proper maintenance and troubleshooting keep your angle grinder working safely and efficiently. Regular care helps avoid breakdowns and extends tool life. Knowing simple fixes saves time and money.
Cleaning And Storage
After each use, unplug the angle grinder. Wipe dust and debris off the tool with a dry cloth. Use compressed air to clean vents and moving parts. Avoid water or wet cloths to stop rust and damage.
Store the grinder in a dry place. Keep it inside a case or toolbox to protect it from dust and moisture. Make sure the power cord is coiled loosely to avoid cuts or breaks.
Fixing Common Issues
If the angle grinder won’t start, check the power source first. Inspect the cord for cuts or damage. Replace a faulty switch if the tool still fails to turn on.
Grinding discs that wobble or vibrate may be loose or worn out. Tighten the disc or replace it with a new one. Make sure to use the right size and type for your grinder.
The motor might overheat if used too long without breaks. Allow the tool to cool down before continuing work. Clean air vents regularly to improve airflow and prevent overheating.
Also listen for new noises, like scraping or rattling. Those sounds often mean the guard, flange, or bearing needs attention. If the grinder smells hot or loses power quickly, stop using it until it is checked.
Credit: www.protoolreviews.com
Frequently Asked Questions
How To Use Angle Grinder Step By Step?
Hold the angle grinder with both hands firmly. Turn it on and let it reach full speed. Position the wheel perpendicular to the surface. Gently apply pressure and move steadily. Turn off and wait for it to stop before setting it down.
Always wear safety gear. Before starting, check that the correct disc is installed, the guard is in place, and the workpiece is secured.
What Four Things Should You Avoid When Using Angle Grinders?
Avoid using damaged discs, applying excessive pressure, grinding without guards, and neglecting proper personal protective equipment when using angle grinders.
How Do You Cut With An Angle Grinder?
Hold the angle grinder firmly with both hands. Turn it on and let it reach full speed. Position the cutting wheel at a 90-degree angle to the material. Gently guide the grinder along the cut line without forcing it. Always wear safety gear during cutting. If the material is thick, make several shallow passes instead of one deep cut.
What Is The Correct Angle Grinder Cutting Position?
Hold the angle grinder with both hands. Position the cutting wheel at a 90-degree angle to the work surface. Maintain steady pressure and avoid tilting to prevent kickback or wheel damage.
How Do I Safely Start Using An Angle Grinder?
Hold the grinder firmly with both hands and turn it on. Wait until it reaches full speed before use. Stand to the side of the wheel, not in line with it, and let it run for a second before touching the material.
Authoritative External References
- ANSI — Standards information relevant to power tool safety and proper equipment practices.
- ISO — International standards resources related to tool manufacturing, quality, and safety.
- OSHA Hand & Power Tools Safety — Official guidance on safe operation of powered hand tools and related hazards.
Conclusion
Using an angle grinder safely improves your work quality and speed. Always wear protective gear like gloves and goggles. Hold the tool firmly with both hands for control. Let the grinder reach full speed before cutting or grinding. Keep the angle grinder steady and avoid forcing it.
Regular practice helps you gain confidence and skill. Follow these simple tips to use an angle grinder effectively and safely every time. If you remember only one thing, remember this: the tool works best when you guide it, not when you push it.
Related reading: What Is an Angle Grinder Used For.
Related reading: How to Sharpen Drill Bits on a Bench Grinder.
Related reading: How to Sharpen a Lawn Mower Blade With a Bench Grinder.
