
A loose wood joint should be repaired by restoring the fit and bonding surfaces, not by simply forcing more glue into the gap. The correct method depends on the joint type, whether the parts can be separated safely, the condition of the wood, and what adhesive was used originally.
For chairs, tables, frames, and other furniture, the strongest repair usually comes from disassembly, cleaning the joint, correcting the fit, applying a compatible adhesive, and clamping the parts in alignment.
Find Out Why the Joint Is Loose
Common causes include failed glue, wood movement, worn tenons or dowels, damaged fasteners, cracked wood, and joints that were loose from the start. A squeak or wiggle alone does not tell you which cause is responsible.
If the surrounding wood is split, rotten, crushed, or badly worn, simple reglueing may not be enough.
Disassemble When It Can Be Done Safely
If the joint can be taken apart without breaking the wood or damaging an important finish, disassembly gives you the best access to remove failed adhesive and inspect the fit.
Do not force antique, veneered, brittle, or complex furniture apart. Valuable or historically important pieces may need a conservator because the original adhesive and finish can affect the repair method.
Clean Old Adhesive Carefully
New adhesive bonds best to sound wood and compatible surfaces. Remove loose, brittle adhesive without changing the joint geometry. Avoid aggressively sanding tenons or dowels smaller just to make them look clean.
Do not automatically add water to old joints. Water can swell wood, damage finishes, and affect some historic glues.
Dry-Fit Before Gluing
Reassemble the joint without adhesive and check alignment, shoulder contact, gaps, and clamp access. A joint that is mechanically very loose needs its fit corrected rather than being filled with random toothpicks or filler.
Wood filler is generally cosmetic and should not be treated as a structural replacement for missing joint material.
Credit: store.upholster.com
Choose the Adhesive for the Joint
PVA wood glue is common for clean, close-fitting interior wood joints. Other repairs may call for hide glue, polyurethane adhesive, epoxy, or a manufacturer-specific product.
Do not assume epoxy is simply “stronger” and therefore better. Epoxy can fill some gaps, but a poorly fitted joint, contaminated wood, or moving furniture structure can still fail. It is also difficult to reverse on antique work.
Clamp for Alignment, Not Maximum Force
Use enough clamp pressure to bring the joint fully together and hold it in correct alignment. Excessive pressure can distort furniture, crush soft wood, or squeeze out too much adhesive.
Clamp time and full cure time depend on the adhesive, temperature, humidity, wood species, joint geometry, and manufacturer instructions. Avoid fixed “30–60 minutes” or “24 hours” rules unless they match the adhesive label.
Mortise-and-Tenon and Dowel Joints
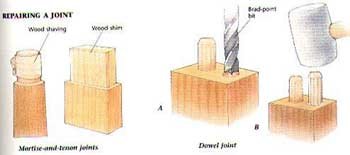
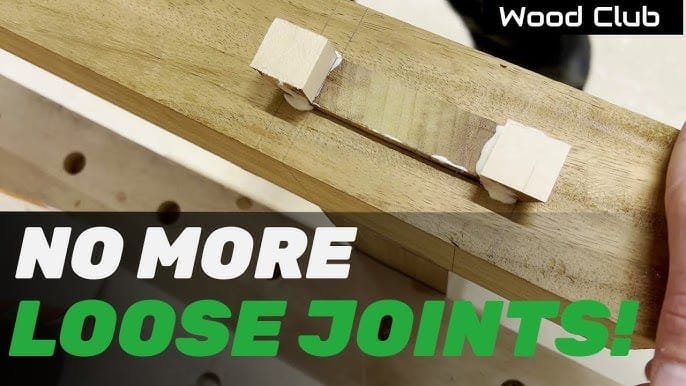
If a tenon or dowel is worn, the durable repair is to restore the fit with sound wood using a repair appropriate to the joint. Random toothpicks may work for some screw holes but are not a universal repair for furniture joinery.
If a dowel is split, crushed, or loose in its hole, replacement may be better than adding more adhesive.
Loose Screw Joints
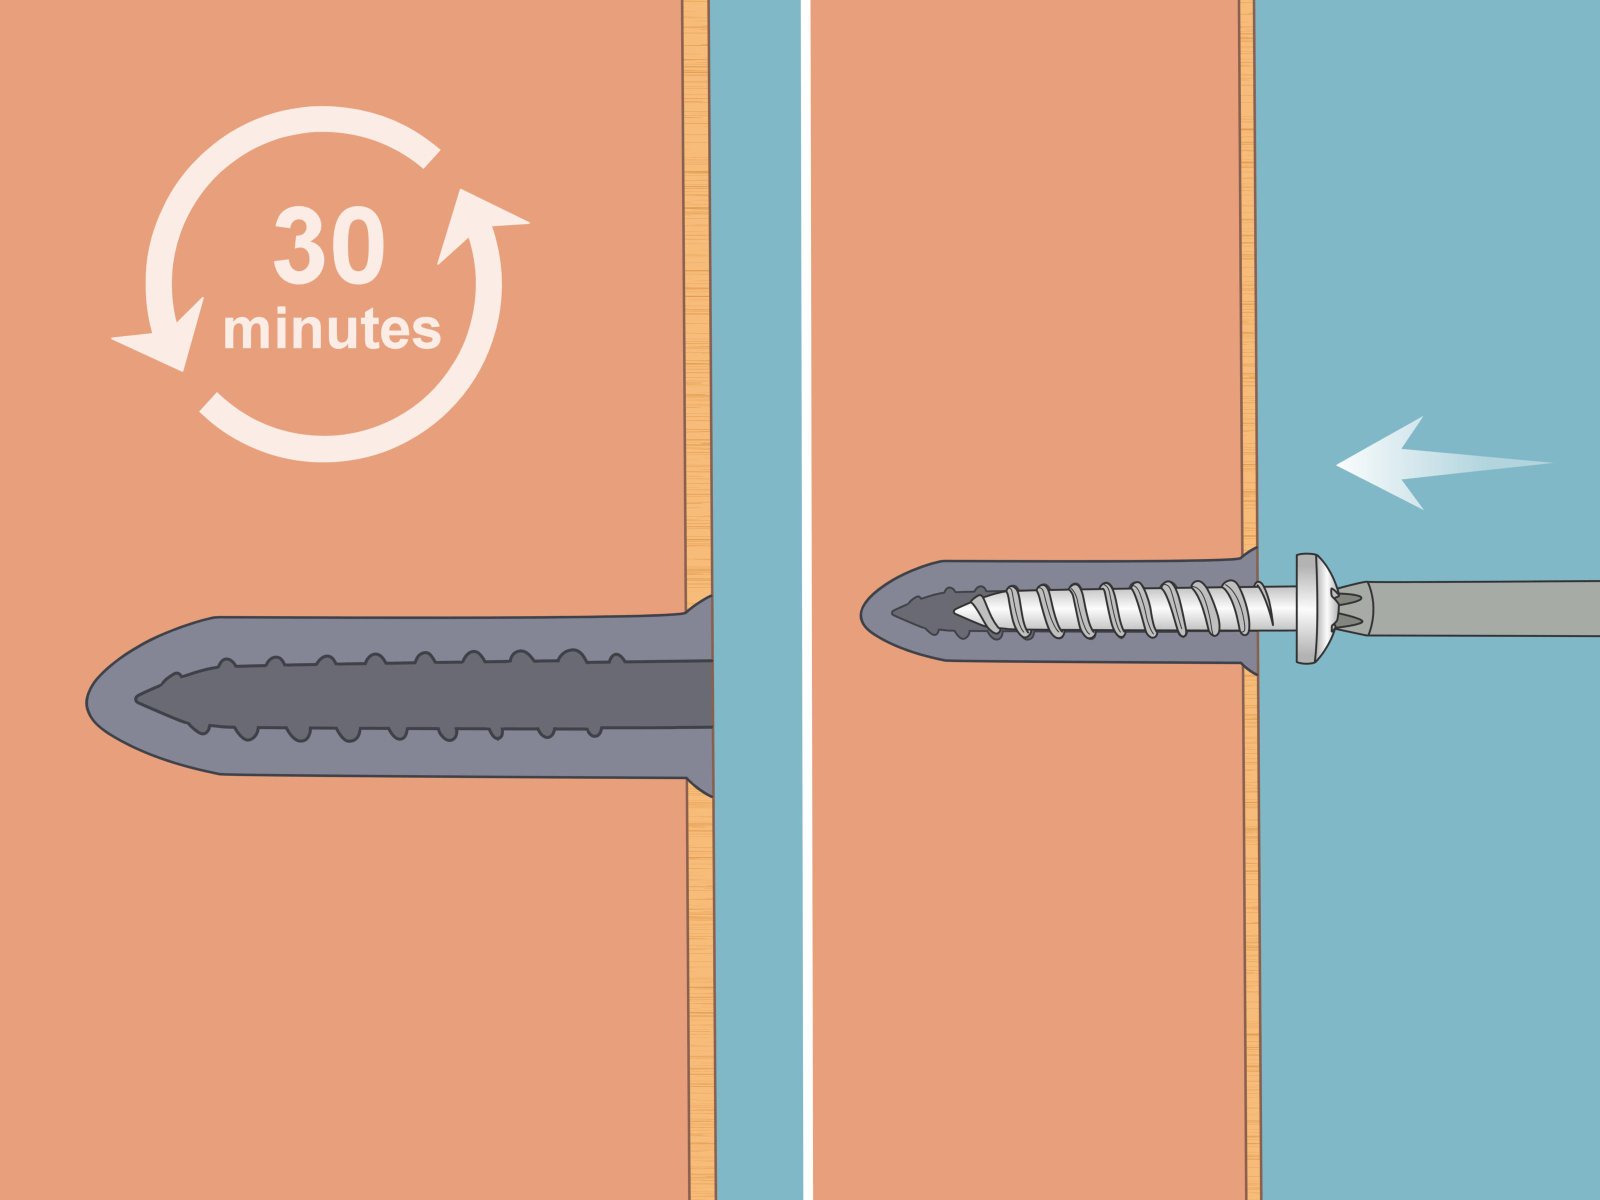
If a screw no longer holds, inspect the hole and surrounding wood. The repair may involve a correctly fitted wood plug, a larger approved fastener, or rebuilding damaged material. Avoid repeatedly driving a larger screw into weak wood without checking whether enough material remains.
Glue Injection Has Limits
Injecting glue into a joint that cannot be disassembled can sometimes improve a minor loose joint, but it is less reliable when old adhesive blocks contact between fresh glue and wood. Drilling an access hole also creates permanent damage.
Use injection only when you understand the joint and accept the tradeoff.
Credit: www.youtube.com
When Reinforcement Makes Sense
Screws, dowels, corner blocks, or brackets can be appropriate when the original joint design or repair plan calls for them. They should not be added automatically to every failed glue joint.
Visible furniture, antiques, and chairs can lose value or develop new stress concentrations if reinforcement is added without regard to the original construction.
Repair Planning by Joint Type
Identifying the original joint matters before deciding on glue, a dowel or a fastener. In a mortise-and-tenon assembly, inspect the tenon shoulders and walls for wear or cracks; the repair must restore sound contact rather than merely filling the mortise with adhesive. For a dowel joint, check whether the dowel itself is split, whether its bore has become enlarged, and whether both pieces still align. Replacing a damaged dowel with a correctly fitted compatible part is often more effective than pushing additional adhesive into an old cavity.
A glued edge joint behaves differently from a loose chair rail. If the boards remain sound and the break can be opened without damage, remove failed adhesive, test the contact area and reclamp according to the glue maker’s instructions. A screw-driven joint needs attention to the fastener, pilot hole and surrounding wood—not a treatment copied from a loose mortise. Do not automatically use toothpicks or decorative filler in load-bearing furniture. If you cannot tell why a chair, step or support has loosened, stop using it until its load-bearing strength has been properly assessed.
How to Prepare Clean Wood for a Durable Bond
Once disassembly is appropriate, photograph the pieces and mark their original orientation before taking them apart. Protect fragile edges and existing finishes. Remove loose failed adhesive using a method compatible with the old glue and wood species. The goal is a close-fitting, sound bonding surface, not an enlarged gap caused by excessive scraping or sanding. Test the joint dry. If the shoulders do not close or the joint rocks, correct the underlying fit before applying new adhesive.
Make sure the chosen glue is suitable for the wood, exposure and application. PVA is common on clean interior wood, but not every adhesive bonds well to previously painted, sealed or contaminated surfaces. Titebond’s wood-glue FAQ explains the importance of clean bonding surfaces and different clamping conditions. The appropriate open time, assembly time, clamping duration and curing period should be taken from the exact product label; examples given for one brand are not universal instructions.
Clamping and Testing Without Rebreaking the Joint
Dry-fit with the clamps installed before gluing if the assembly is complex. Use protective cauls or pads where appropriate to avoid marking the finish. Apply the adhesive as directed to the intended surfaces, bring the parts together in correct orientation and tighten gradually. Verify that the frame has not racked and that shoulders are fully seated. More pressure is not automatically stronger: over-clamping can crush fragile pieces or push them out of alignment.
Respect the manufacturer’s complete cure period before loading the joint. A chair may look repaired as soon as the glue stops moving, but premature weight-bearing can compromise the bond. After cure, check the piece for movement, cracks and misalignment without subjecting it to a dangerous improvised overload test. If the connection carries body weight or has already failed repeatedly, professional furniture repair or component replacement may be safer than repeated DIY reglueing.
When a Repair Should Be Rebuilt Instead
If a tenon has decayed, a joint shoulder is split, or wood fibers have been crushed away, glue alone will not recreate the missing geometry. A skilled repairer may need to splice sound wood, replace a rail or reproduce a compatible dowel or tenon. Avoid drilling extra reinforcement holes close to an already damaged edge; this can create additional splitting. On antique furniture, irreversible epoxies, hardware and surface alteration can reduce historical value, so consult a conservator first.
For a quick check, ask three questions: Is the wood itself sound? Can the parts still meet with reliable contact? Does the proposed adhesive match the original surface and intended load? If any answer is uncertain, do not conceal the defect with filler or a decorative patch. Our published wood-glue drying guide covers cure-time considerations, while this article focuses on restoring failed joint fit and alignment.
Common Mistakes
- Adding fresh glue over thick layers of failed old glue.
- Using wood filler as structural material.
- Using random toothpicks to tighten every loose joint.
- Assuming epoxy is always stronger and better.
- Over-clamping.
- Using fixed cure times instead of the adhesive instructions.
- Drilling glue-injection holes before trying a safer repair.
- Repairing a cracked or rotten structural member without addressing the damage.
When to Get Professional Help
Use a furniture repair specialist or conservator for valuable antiques, complex veneered work, major cracks, severely worn joints, or furniture whose failure could cause injury. Chairs and load-bearing furniture deserve particular care.
Credit: www.wikihow.com
Diagnose Why the Joint Became Loose
A loose wood joint may result from failed adhesive, movement as wood expands and contracts, broken fasteners, crushed fibers, or a joint that never fit properly. Determine the cause before adding glue or screws. If the joint can be separated without further damage, remove failed adhesive where appropriate, inspect the mating surfaces, and dry-fit the parts. Adhesive cannot reliably fill every oversized gap, and a tight clamp cannot correct a joint that is badly misaligned.
Choose an adhesive suited to the materials and service environment, follow its open-time and clamping instructions, and apply pressure sufficient to close the joint without starving it of glue. Protect visible surfaces from squeeze-out and allow the full specified cure time before loading. Where a tenon, dowel, or screw hole is worn, a properly fitted repair insert or replacement component may be more durable than repeated glue injection. Structural furniture joints that support a person’s weight warrant extra caution and professional repair if their integrity is uncertain.
Frequently Asked Questions
Can I Fix a Loose Joint Without Taking It Apart?
Sometimes, but it is usually harder to clean and restore the bonding surfaces. If safe disassembly is possible, it often produces a more reliable repair.
What Glue Should I Use?
Use an adhesive compatible with the wood, original construction, environment, and joint fit. PVA is common for many clean interior joints, but it is not universal.
How Long Should I Clamp It?
Follow the adhesive manufacturer’s clamp and cure instructions for the actual temperature and material.
Should I Add Screws?
Only when reinforcement fits the joint design and will not split, distort, or devalue the piece.
Does Wood Filler Make a Loose Structural Joint Strong Again?
No. Filler is generally cosmetic and should not replace sound joinery, proper adhesive application or an approved mechanical repair.
Restore Fit Before Adding Strength
A durable loose-joint repair starts by understanding why the joint failed. Restore clean contact and proper fit first, then use the appropriate adhesive and clamping method instead of trying to compensate with excess glue or hardware.