
Replacing a bathroom faucet can make your sink look new and even help you save water. Many people think this job needs a plumber, but with the right tools and steps, you can do it yourself—even if you have little experience. Learning how to install a bathroom faucet is not just about fixing leaks or updating style; it’s also a chance to improve your home and gain confidence in basic repairs.
This guide will take you through every step, from removing the old faucet to checking for leaks after installation. You’ll find practical tips, common mistakes to avoid, and advice on choosing the right faucet for your sink. Whether you want a modern look or just need to stop a drip, this article will help you handle the job with less stress.
Tools And Materials You Need
Before starting, gather everything you need. Having all tools and parts close will make the process smoother and prevent mid-job trips to the store.
Common Tools:
- Adjustable wrench
- Basin wrench (helps in tight spaces under the sink)
- Screwdrivers (flathead and Phillips)
- Bucket or bowl (to catch water)
- Thread sealant only if explicitly required for the selected fitting
Materials:
- New bathroom faucet (make sure it matches your sink: centerset or widespread)
- Supply lines (if your new faucet does not include them)
- Plumber’s putty or silicone caulk
- Towels or rags
Pro tip: A basin wrench is not required, but it makes loosening and tightening nuts under the sink much easier, especially if space is tight.
Choosing The Right Bathroom Faucet
Not all faucets will fit every sink. Picking the wrong type can lead to leaks, wasted money, or extra work.
Key Factors:
- Mounting Type: Check if your sink has one hole, three holes, or a special configuration. Most bathroom sinks use centerset (holes 4 inches apart) or widespread (holes 6-16 inches apart) faucets.
- Handle Options: Single-handle faucets are easier for children and people with limited mobility. Two-handle faucets offer more precise temperature control.
- Height and Spout Reach: Make sure the spout is high enough for washing hands but not too tall for your space.
- Finish: Chrome is common and easy to clean, but brushed nickel or matte black can add style.
- Water Efficiency: Look for models with the WaterSense label, which use at least 20% less water without sacrificing performance.
Example Faucet Comparison
Here’s a quick look at two typical faucet types:
| Feature | Centerset Faucet | Widespread Faucet |
|---|---|---|
| Holes Needed | 3 (4” apart) | 3 (6”-16” apart) |
| Best For | Smaller sinks | Larger sinks, modern style |
| Ease of Install | Usually easier | Can be more complex |
Non-obvious insight: Some sinks have custom configurations, so always measure the holes before buying. Also, many new faucets include supply lines, but not all—check the box before leaving the store.
Credit: www.youtube.com
Removing The Old Faucet
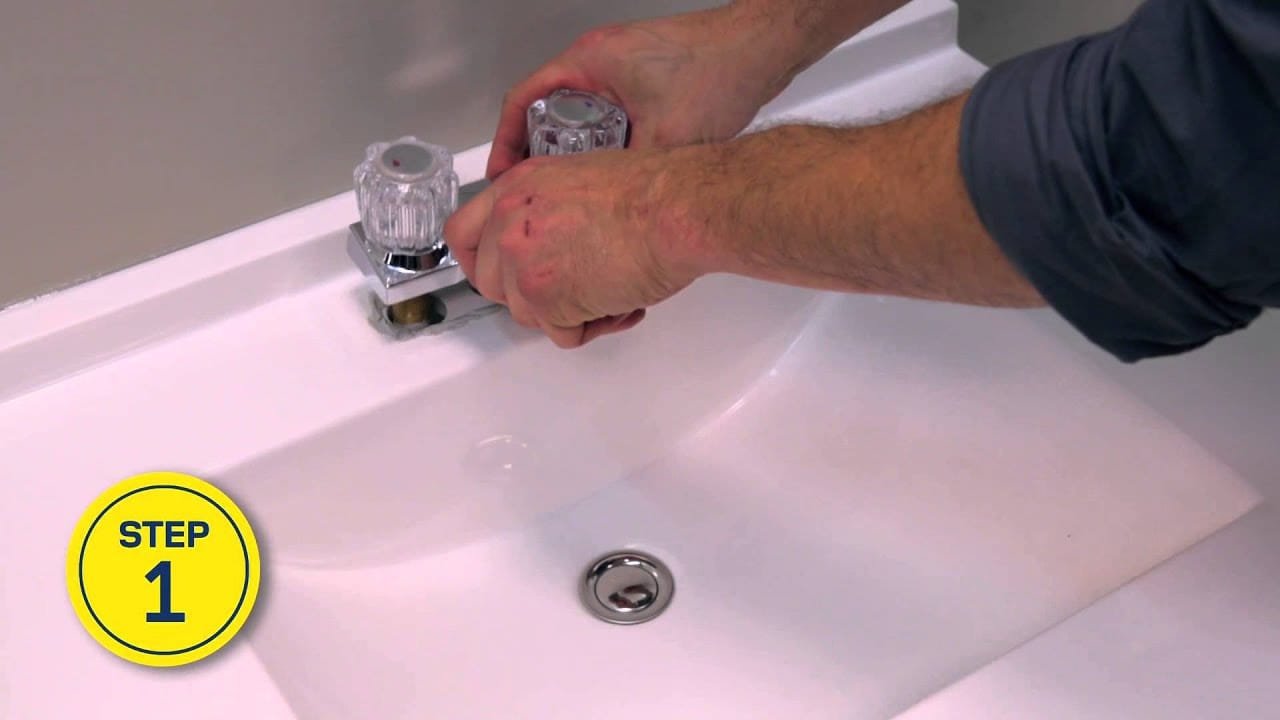
This is the messiest part, but also very important for a leak-free install. Take your time, and don’t force any part.
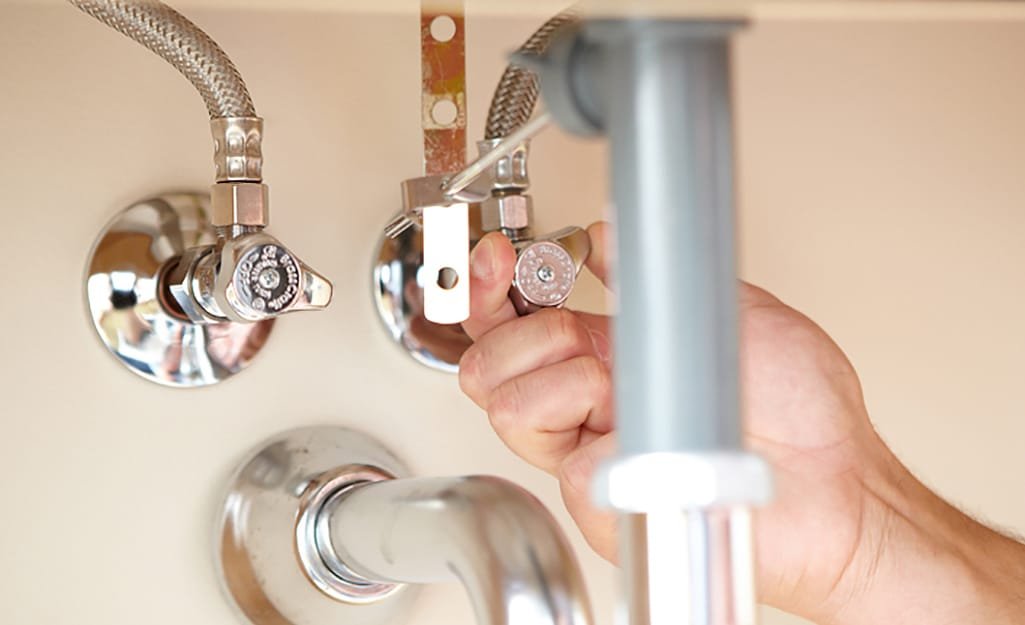
- Turn Off Water Supply: Look under the sink for shutoff valves. Turn them clockwise to stop the water. Open the faucet to release pressure.
- Disconnect Supply Lines: Use your wrench to loosen the nuts connecting the faucet to the water lines. Keep your bucket under the area to catch drips.
- Loosen Mounting Nuts: Under the sink, use a basin wrench to remove the nuts that hold the faucet in place. If these are corroded, spray with penetrating oil and wait a few minutes.
- Remove Old Faucet: Lift the faucet straight up. If it sticks, gently rock it side to side—don’t pry with a sharp tool, as you could damage the sink.
- Clean the Area: Scrape away old plumber’s putty or caulk. Clean the sink surface well so your new faucet seals tightly.
Common mistake: Forgetting to turn off the main water supply if the shutoff valves don’t work. Test the valves first; if water still flows when the valve is off, stop and turn off water at the main valve.
Installing The New Bathroom Faucet
Now you’re ready for the main event. Read all instructions that come with your faucet—there are small differences between brands.
Step 1: Place The Faucet
- Insert the faucet through the mounting holes in your sink.
- If your faucet needs a rubber or plastic gasket, place it under the base before setting it down.
- For faucets without a gasket, apply a thin bead of plumber’s putty or silicone caulk around the base.
Step 2: Secure The Faucet
- From under the sink, thread the mounting nuts onto the faucet tailpieces.
- Tighten the nuts by hand first, then use a wrench for the final snug fit.
- Be careful not to overtighten, as this can crack ceramic sinks.
Step 3: Connect Supply Lines
- Attach the supply lines to the faucet tailpieces and the shutoff valves.
- Check whether each fitting seals with a washer, gasket, compression surface, or tapered pipe thread. Use thread sealant only if the specific fitting manufacturer requires it; do not tape gasketed supply connections.
- Tighten with a wrench, but again, don’t overtighten.
Step 4: Install The Drain Assembly (if Included)
Many new faucets come with matching drain kits. This is a good time to replace the old drain, but you can skip this if yours is in good shape.
- Remove the old drain by loosening the slip nut under the sink.
- Insert the new drain body into the sink hole using plumber’s putty under the rim.
- Tighten the nut underneath, making sure the opening faces the back for the pivot rod.
- Attach the lift rod to the drain stopper and test for smooth movement.
Pro tip: Always check the drain assembly for leaks by running water before cleaning up.
Step 5: Turn On The Water And Check For Leaks
- Open the shutoff valves slowly and check for leaks at all connections.
- Run the faucet for at least one minute to flush out debris.
- Check under the sink and at the drain for any drips.
- If you spot a leak, close the supply, identify the leaking fitting, and inspect its seal and alignment. Follow the fitting manufacturer’s tightening instructions rather than adding tape indiscriminately.
Example: If your faucet connects to copper pipes, don’t twist the pipe while tightening. Hold the pipe steady with one wrench and turn the nut with another.
Credit: www.homedepot.com
Troubleshooting Common Problems
Sometimes, things don’t go as planned. Here’s how to handle issues many beginners face:
Leaky Connections
- Fix: Turn off the water, disconnect, and add plumber’s tape. Retighten carefully.
Faucet Won’t Fit
- Fix: Double-check sink hole spacing. If you bought the wrong size, you may need an adapter or a different faucet.
Weak Water Flow
- Fix: Remove the faucet aerator and rinse it. Debris from installation can block it. Also, check your shutoff valves are fully open.
Drain Leaks
- Fix: Make sure the drain assembly is straight and the plumber’s putty is even. Overtightening can cause leaks, so go slow.
Non-obvious insight: If water is leaking under the handles, the cartridge or washer inside the faucet may be loose or faulty. You may need to open the handle and adjust or replace the cartridge.
How Much Time And Money Will You Need?
Most faucet installs take about 1–2 hours if you have all tools ready and no surprises. Here’s a quick look at costs and time:
| Item | Average Cost (USD) | Time Needed |
|---|---|---|
| Basic faucet | $40–$100 | — |
| Tools (if needed) | $10–$30 | — |
| Professional plumber | $120–$300 | 1–2 hours |
| DIY install | Faucet only | 1–2 hours |
Tip: Even if you need to buy a wrench, you’ll often save $100 or more compared to hiring a pro.
Safety And Clean-up Tips
Installing a faucet is generally safe, but a few simple habits can prevent trouble.
- Always check for sharp edges under the sink.
- Wear gloves if you have sensitive skin.
- Keep towels nearby to soak up spills.
- Throw out old plumber’s putty or gaskets—reusing them often leads to leaks.
Don’t rush the clean-up: Water left behind can cause mold or damage. Wipe all areas dry and check again after a few hours.
Upgrading For Efficiency
If you’re replacing a very old faucet, upgrading can save water and money. Modern WaterSense faucets can save up to 700 gallons per year for an average family, according to the EPA.
Example: If your old faucet uses 2.2 gallons per minute (gpm) and the new one uses 1.5 gpm, you save about 30% on bathroom sink water use.
For more on water-saving fixtures, visit the EPA WaterSense Program.
Credit: www.youtube.com
When To Call A Professional
DIY works for most people, but it’s smart to ask for help if:
- You see old, corroded pipes or signs of water damage.
- Shutoff valves don’t work or break during removal.
- The faucet install instructions seem very different from your setup.
Insight: Many homeowners damage shutoff valves by overtightening. If you feel resistance, stop and check the threads.
Leak Prevention: Identify the Connection Before Using Sealant
Bathroom faucet supply connections commonly rely on factory washers, gaskets or compression-style seals rather than thread sealant. Do not automatically apply PTFE tape or plumber’s putty to every connection: extra sealant can interfere with a fitting designed to seal on a washer or cone. Use only the sealant and tightening procedure specified by the faucet and supply-line manufacturers.
- Confirm the faucet hole spacing and supply connection sizes before removing the old fixture.
- Close the shutoff valves and verify the flow has stopped.
- Inspect flexible supply lines and replace damaged or incompatible parts.
- Hand-start threaded fittings to avoid cross-threading, then tighten as directed.
- Restore water slowly and inspect all connections with a dry tissue.
- Check again after operating both hot and cold water and after a short period of use.
If a shutoff valve leaks or cannot close, stop work and arrange repair before disconnecting plumbing. Faucet installation should follow the fixture manufacturer’s own instructions.
Frequently Asked Questions
How Do I Know If My Sink Fits A New Faucet?
Check the number and spacing of holes in your sink. Most sinks are drilled for centerset (4 inches between holes) or widespread (6–16 inches). Measure before buying.
Can I Install A Bathroom Faucet Without Special Tools?
Yes, but a basin wrench makes the job easier, especially in tight spaces. You can use adjustable wrenches and pliers if you’re careful.
What If My Shutoff Valves Are Stuck?
Do not force a seized shutoff valve. Shut off the upstream supply if accessible and consult a qualified plumber if the valve or piping is damaged or uncertain.
How Do I Stop A Leak After Installing My Faucet?
Shut off the water and identify which fitting leaks. Many faucet supply connections seal with washers or compression surfaces and must not receive PTFE tape. Follow the fitting manufacturer’s instructions, inspect seals and avoid overtightening; call a plumber if the leak persists.
Is Plumber’s Putty Or Silicone Better For Sealing?
Neither is universally appropriate. Use the faucet or drain manufacturer’s specified gasket or sealant; some finishes and materials are incompatible with traditional plumber’s putty, and many fittings need no added sealant.
Installing a bathroom faucet is a practical skill that can boost your confidence and save money. With patience and the right tools, even beginners can get professional results. Remember to check all connections and don’t rush—careful work now means fewer problems later.
If you run into issues, there’s no shame in calling a pro, but most homeowners find this is a manageable and rewarding project.