
To use a basin wrench, shut off the water, place the spring-loaded jaw around the faucet mounting nut, orient the jaw so it bites in the direction you need to turn, then rotate the T-handle to loosen or tighten the nut. The tool is designed for faucet nuts that sit behind the sink bowl where an ordinary wrench cannot reach.
The most important details are getting the jaw fully seated on the nut, choosing the correct jaw direction, and using steady pressure instead of forcing the handle. If the nut is corroded or the wrench keeps slipping, stop and correct the grip before applying more force.
Basin Wrench Basics
A basin wrench is a special tool for plumbing tasks. It helps remove or tighten nuts under sinks. These nuts are often hard to reach with regular wrenches. The basin wrench’s unique design makes this job easier. It has a long handle and a gripping head that turns.
The head of the basin wrench is adjustable. It fits different sizes of nuts around faucet tails. The handle gives extra reach and leverage. This is helpful in tight spaces below sinks. Learning how to use a basin wrench saves time and effort.
What Is A Basin Wrench?
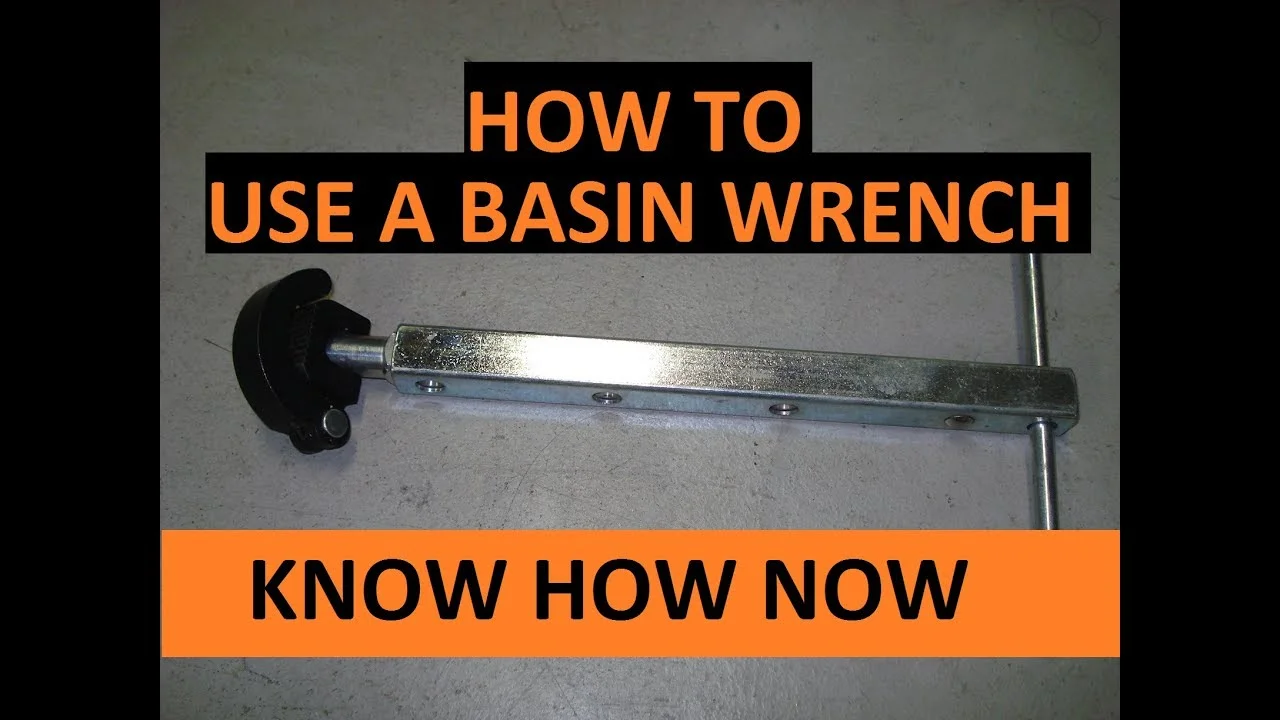
A basin wrench is a plumbing tool with two main parts. One is a long handle. The other is a pivoting jaw or gripping head. The head can turn and adjust to grab nuts. Its shape helps reach nuts behind or under the sink. This tool is made for faucets and plumbing fixtures.
Parts Of A Basin Wrench
The key parts include the handle, the jaw, and the pivot. The handle is long to reach deep spaces. The jaw has teeth to grip nuts tightly. The pivot allows the jaw to turn and lock in place. These parts work together to loosen or tighten nuts easily.
When To Use A Basin Wrench
Use a basin wrench to work on faucet mounting nuts. These nuts are usually behind sinks or in small spaces. Regular wrenches cannot reach or fit these places well. The basin wrench slides into tight spots and grips the nut. It is perfect for plumbing repairs or installations.
How The Basin Wrench Works
The jaw of the basin wrench adjusts to fit the nut size. Place the jaw on the nut under the sink. The handle extends down for better reach. Turn the handle to loosen or tighten the nut. The jaw grips firmly without slipping off during use.
Credit: www.youtube.com
Choosing The Right Basin Wrench
Choosing the right basin wrench is key to completing plumbing tasks smoothly. The correct tool fits well in tight spaces and grips nuts firmly. It reduces effort and prevents damage to fixtures. Picking the right size and style helps you work faster and safer.
Understanding Basin Wrench Sizes
Basin wrenches come in various sizes. Most common lengths range from 10 to 18 inches. Longer wrenches offer more reach under sinks. Shorter wrenches are easier to handle in tight spots. Choose a size that fits your workspace comfortably.
Types Of Basin Wrenches
There are fixed-head and adjustable-head basin wrenches. Fixed-head models have a stable gripping jaw. Adjustable-head wrenches can swivel to fit different angles. Adjustable heads offer more flexibility in cramped areas. Consider the space and angle before selecting one.
Material And Build Quality
Look for basin wrenches made of strong steel. Steel tools last longer and resist bending. Some have rubber grips for better comfort and control. A well-built wrench feels sturdy and durable in your hand. Avoid cheap models that might break under pressure.
Additional Features To Consider
Some basin wrenches include ratcheting mechanisms. Ratchets make turning nuts easier and faster. Others have reversible jaws for both tightening and loosening. These features save time and reduce hand strain. Choose extra features based on your needs.
Preparing For The Job
Gather all necessary tools and clear the workspace under the sink. Make sure the basin wrench jaw range fits the faucet mounting nut before you start. Wear gloves for a better grip and protect your hands during the job.
Gather All Necessary Tools And Materials
Before starting, collect everything needed for the job. This includes the basin wrench, plumber’s tape, a bucket, and a cloth. Having all tools ready saves time and avoids frustration. A flashlight might help to see under the sink clearly.
Turn Off The Water Supply
Always shut off the water valves under the sink. This prevents water leaks while working. Open the faucet after closing the valves to drain any remaining water. Keep a towel handy to catch drips or spills.
Clear The Work Area
Remove items stored under the sink to create space. This makes it easier to move and reduces the risk of damage. Wipe the area clean for better visibility and safer handling of tools.
Inspect The Sink And Faucet Setup
Look closely at how the faucet is attached. Identify the mounting nuts that the basin wrench will loosen or tighten. Check for any rust or corrosion that could make the job harder.
Wear Protective Gear
Put on safety glasses to protect eyes from dirt and debris. Gloves can protect hands from sharp edges and improve grip. Dress comfortably to move freely during the repair.
Basin Wrench Direction: Loosen vs Tighten
| Goal | Jaw orientation | Handle movement |
|---|---|---|
| Loosen a faucet nut | Flip the pivoting jaw so its teeth bite when the nut turns counterclockwise | Move the T-handle in the loosening direction while keeping upward pressure on the jaw |
| Tighten a faucet nut | Reverse the jaw so it bites when the nut turns clockwise | Use short, controlled turns and stop when the faucet is secure |
If you are working upside down and the direction feels confusing, test the jaw by hand first: it should cam tighter onto the nut in the direction you intend to turn.
Positioning The Wrench Correctly
Positioning the basin wrench correctly is key to effective faucet repair. This tool is specifically designed for tight spaces under sinks. Proper placement helps avoid slipping and damage to the nut or fixture.
Focus on fitting the wrench head firmly around the nut. The jaws should grip the flat sides, not the corners. This ensures a secure hold and prevents rounding off the nut.
Align The Wrench Head With The Nut
Place the wrench head so the jaws fit tightly on the nut’s flat sides. The pivoting head should be centered for balance. A good grip reduces the effort needed to turn the nut.
Use The Correct Angle
Hold the handle so the wrench head approaches the nut from below. The handle should extend downward to give better leverage. Keep the wrench aligned straight with the nut to avoid slipping.
Adjust The Jaw Tension
Check the spring-loaded jaws for proper tension. They must clamp firmly but still allow some movement. Adjust as needed to fit the nut snugly without forcing the wrench.
Secure The Handle Position
Once the jaws grip the nut, position the handle for easy turning. The handle should clear other pipes and obstacles. This helps apply steady force without awkward angles.
Loosening Faucet Nuts
Loosening faucet nuts can be tricky because these nuts are often in tight spaces under sinks. A basin wrench is designed to reach and turn these nuts easily. This tool helps you remove the faucet without damaging it or the sink.
The basin wrench has a long handle and a special jaw that grips the nut firmly. It works well in small, hard-to-reach areas. Using the right technique can save time and effort.
Positioning The Basin Wrench Correctly
Start by placing the basin wrench head around the faucet nut. The jaw must grip the flat sides of the nut. Make sure the serrated edge touches the nut for a firm hold.
Adjust the wrench so the handle points down or sideways. This gives you enough leverage to turn the nut. Check that the wrench does not slip before applying force.
Turning The Nut To Loosen It
Turn the basin wrench handle counterclockwise to loosen the nut. Use slow and steady pressure. If it does not move, try rocking the wrench gently back and forth.
Keep the wrench tightly gripping the nut to avoid slipping. If the nut is very tight, use your body weight to push the handle. This increases the force without straining your hands.
Removing The Nut Safely
Once the nut is loose, continue turning until it comes off the faucet tailpiece. Be careful not to drop the nut into the cabinet or drain.
Remove the basin wrench and check the nut for any damage. Save the nut if you plan to reuse it with a new faucet or parts.
Tightening Faucet Nuts
Tightening faucet nuts is a key step in installing or repairing a faucet. These nuts hold the faucet securely to the sink or countertop. Over time, they can become loose, causing leaks or wobbling. A basin wrench is the perfect tool for this job. It fits into tight spaces and provides the leverage needed to tighten these nuts firmly.
Tightening Nuts In Tight Spaces
The basin wrench has a long handle and a pivoting jaw. This design helps reach nuts in narrow, hard-to-access areas under the sink. Place the wrench’s jaw around the nut. The jaw automatically adjusts to grip the nut tightly.
Applying The Right Amount Of Force
Turn the wrench handle clockwise to tighten the nut. Use steady, even pressure. Avoid overtightening, which can damage the nut or faucet. The basin wrench gives good leverage, so small movements create enough force.
Checking For A Secure Fit
After tightening, check if the faucet is stable. Try moving the faucet gently to see if it wobbles. If it still feels loose, tighten the nut a little more. Make sure the faucet does not move but avoid forcing the nut.
Tips For Working In Tight Spaces
Working under sinks means dealing with cramped, hard-to-reach spots. These tight spaces challenge your movement and visibility. Using a basin wrench correctly can ease this task.
Here are some practical tips to help you work better in those narrow areas.
Choose The Right Basin Wrench Size
Pick a basin wrench with a long handle for extra reach. A smaller head fits better in tight spots. This choice improves control and access.
Position Yourself Comfortably
Find a stable position before starting. Kneel or lie down to get closer to the work area. Avoid awkward angles that cause strain.
Use Adequate Lighting
Bright light helps see the nuts and threads clearly. Use a flashlight or headlamp for focused light. This reduces mistakes and speeds up work.
Adjust The Wrench Head Carefully
Make sure the wrench head grips the nut firmly. The self-adjusting head should lock onto the nut securely. Avoid slipping by testing the grip before turning.
Turn Slowly And Steadily
Apply slow, steady pressure when turning the wrench. Fast, jerky moves can damage nuts or pipes. Patience helps prevent slips and breaks.
Credit: www.finehomebuilding.com
If the Nut Will Not Move
- Re-seat the jaw on the flats of the nut and verify the jaw is facing the correct direction.
- Brush away loose corrosion and debris before trying again.
- Use penetrating oil only when it is appropriate for the fitting/material and keep it off surfaces where the faucet manufacturer prohibits it.
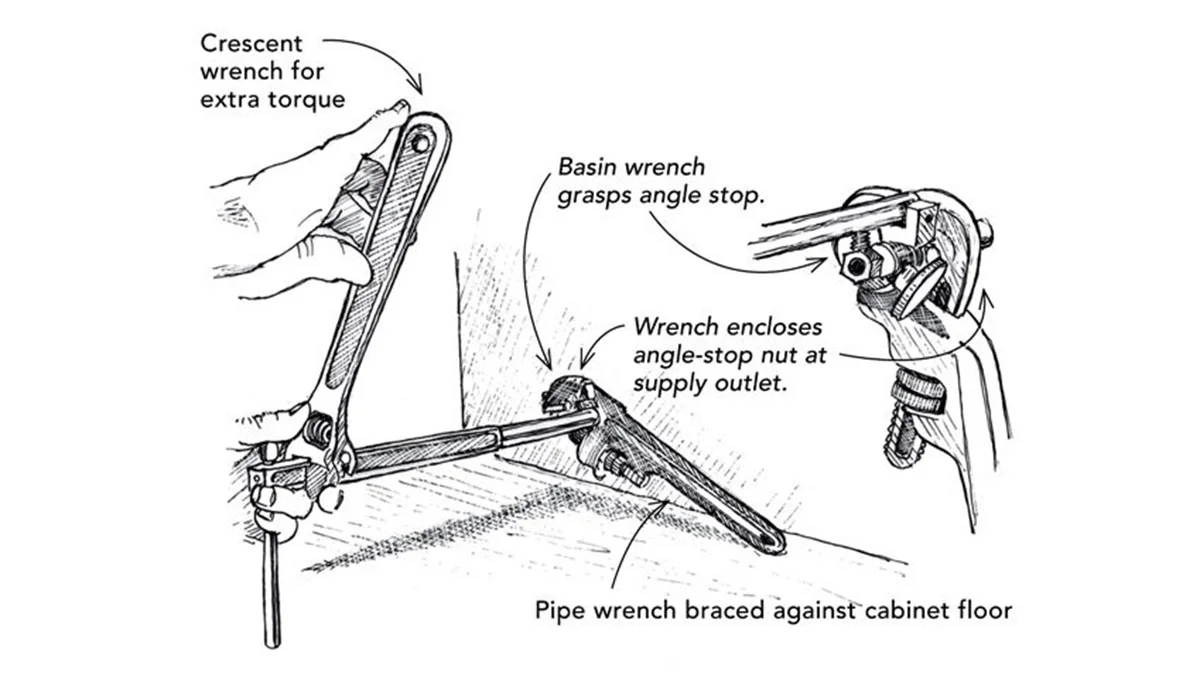
- Do not add a long cheater bar to the T-handle; excessive leverage can twist supply lines, crack plastic mounting hardware, or damage the sink/faucet.
- If the mounting nut is plastic, badly rounded, or inaccessible, use the faucet manufacturer’s removal method or a dedicated faucet-installation tool.
Common Mistakes To Avoid
Using a basin wrench can simplify faucet installation and removal. Yet, beginners often make mistakes that cause frustration or damage. Avoiding these errors helps you finish the job faster and safer. Below are common mistakes to watch out for when using a basin wrench.
Incorrect Positioning Of The Wrench Head
Placing the wrench head in the wrong spot makes it slip off the nut. Always align the jaws around the nut’s flat sides. The serrated part must grip the nut firmly to prevent slipping.
Applying Excessive Force
Forcing the wrench too hard can damage the nut or plumbing parts. Turn the wrench gently and steadily. If the nut does not move, check for corrosion or use a lubricant.
Using The Wrong Size Basin Wrench
Choosing a basin wrench that is too large or too small reduces control. Use a wrench size that fits the nut snugly. This ensures better grip and less chance of slipping.
Ignoring Tight Spaces
Basins often have cramped spaces. Not adjusting the wrench handle length or angle causes difficulty. Extend and rotate the handle for better access and leverage in tight spots.
Not Checking Wrench Condition
A worn or damaged wrench head won’t grip properly. Inspect your basin wrench before each use. Replace it if teeth are dull or parts are loose for safe operation.
