
When you work with electricity, safety is everything. One of the most important tools for electricians and DIY enthusiasts is the voltage tester. But many people find voltage tester displays confusing or even intimidating. If you’ve ever wondered how to read a voltage tester display correctly, you’re not alone. Understanding your tester not only keeps you safe but also helps you fix electrical problems faster and avoid expensive mistakes.
In this guide, you’ll learn what a voltage tester is, the different types of displays, and exactly how to interpret the numbers and symbols you see. We’ll explore common errors, practical examples, and tips that even experienced users sometimes miss.
By the end, you’ll feel confident picking up any voltage tester and knowing exactly what its display is telling you.
What Is A Voltage Tester?
A voltage tester is a device used to check for the presence of electrical voltage in wires, outlets, or equipment. It helps confirm if a circuit is live or safe to touch. The display on the tester shows you what voltage it detects, usually in volts (V).
There are two main types of voltage testers:
- Non-contact voltage testers, which light up or beep when they sense voltage without touching wires directly.
- Contact voltage testers, which require physical contact with the wire or outlet to show a reading.
Most modern testers use digital displays, but some still use analog (needle) displays. Knowing the difference is key to accurate readings.
Understanding Different Voltage Tester Displays
Digital Vs. Analog Displays
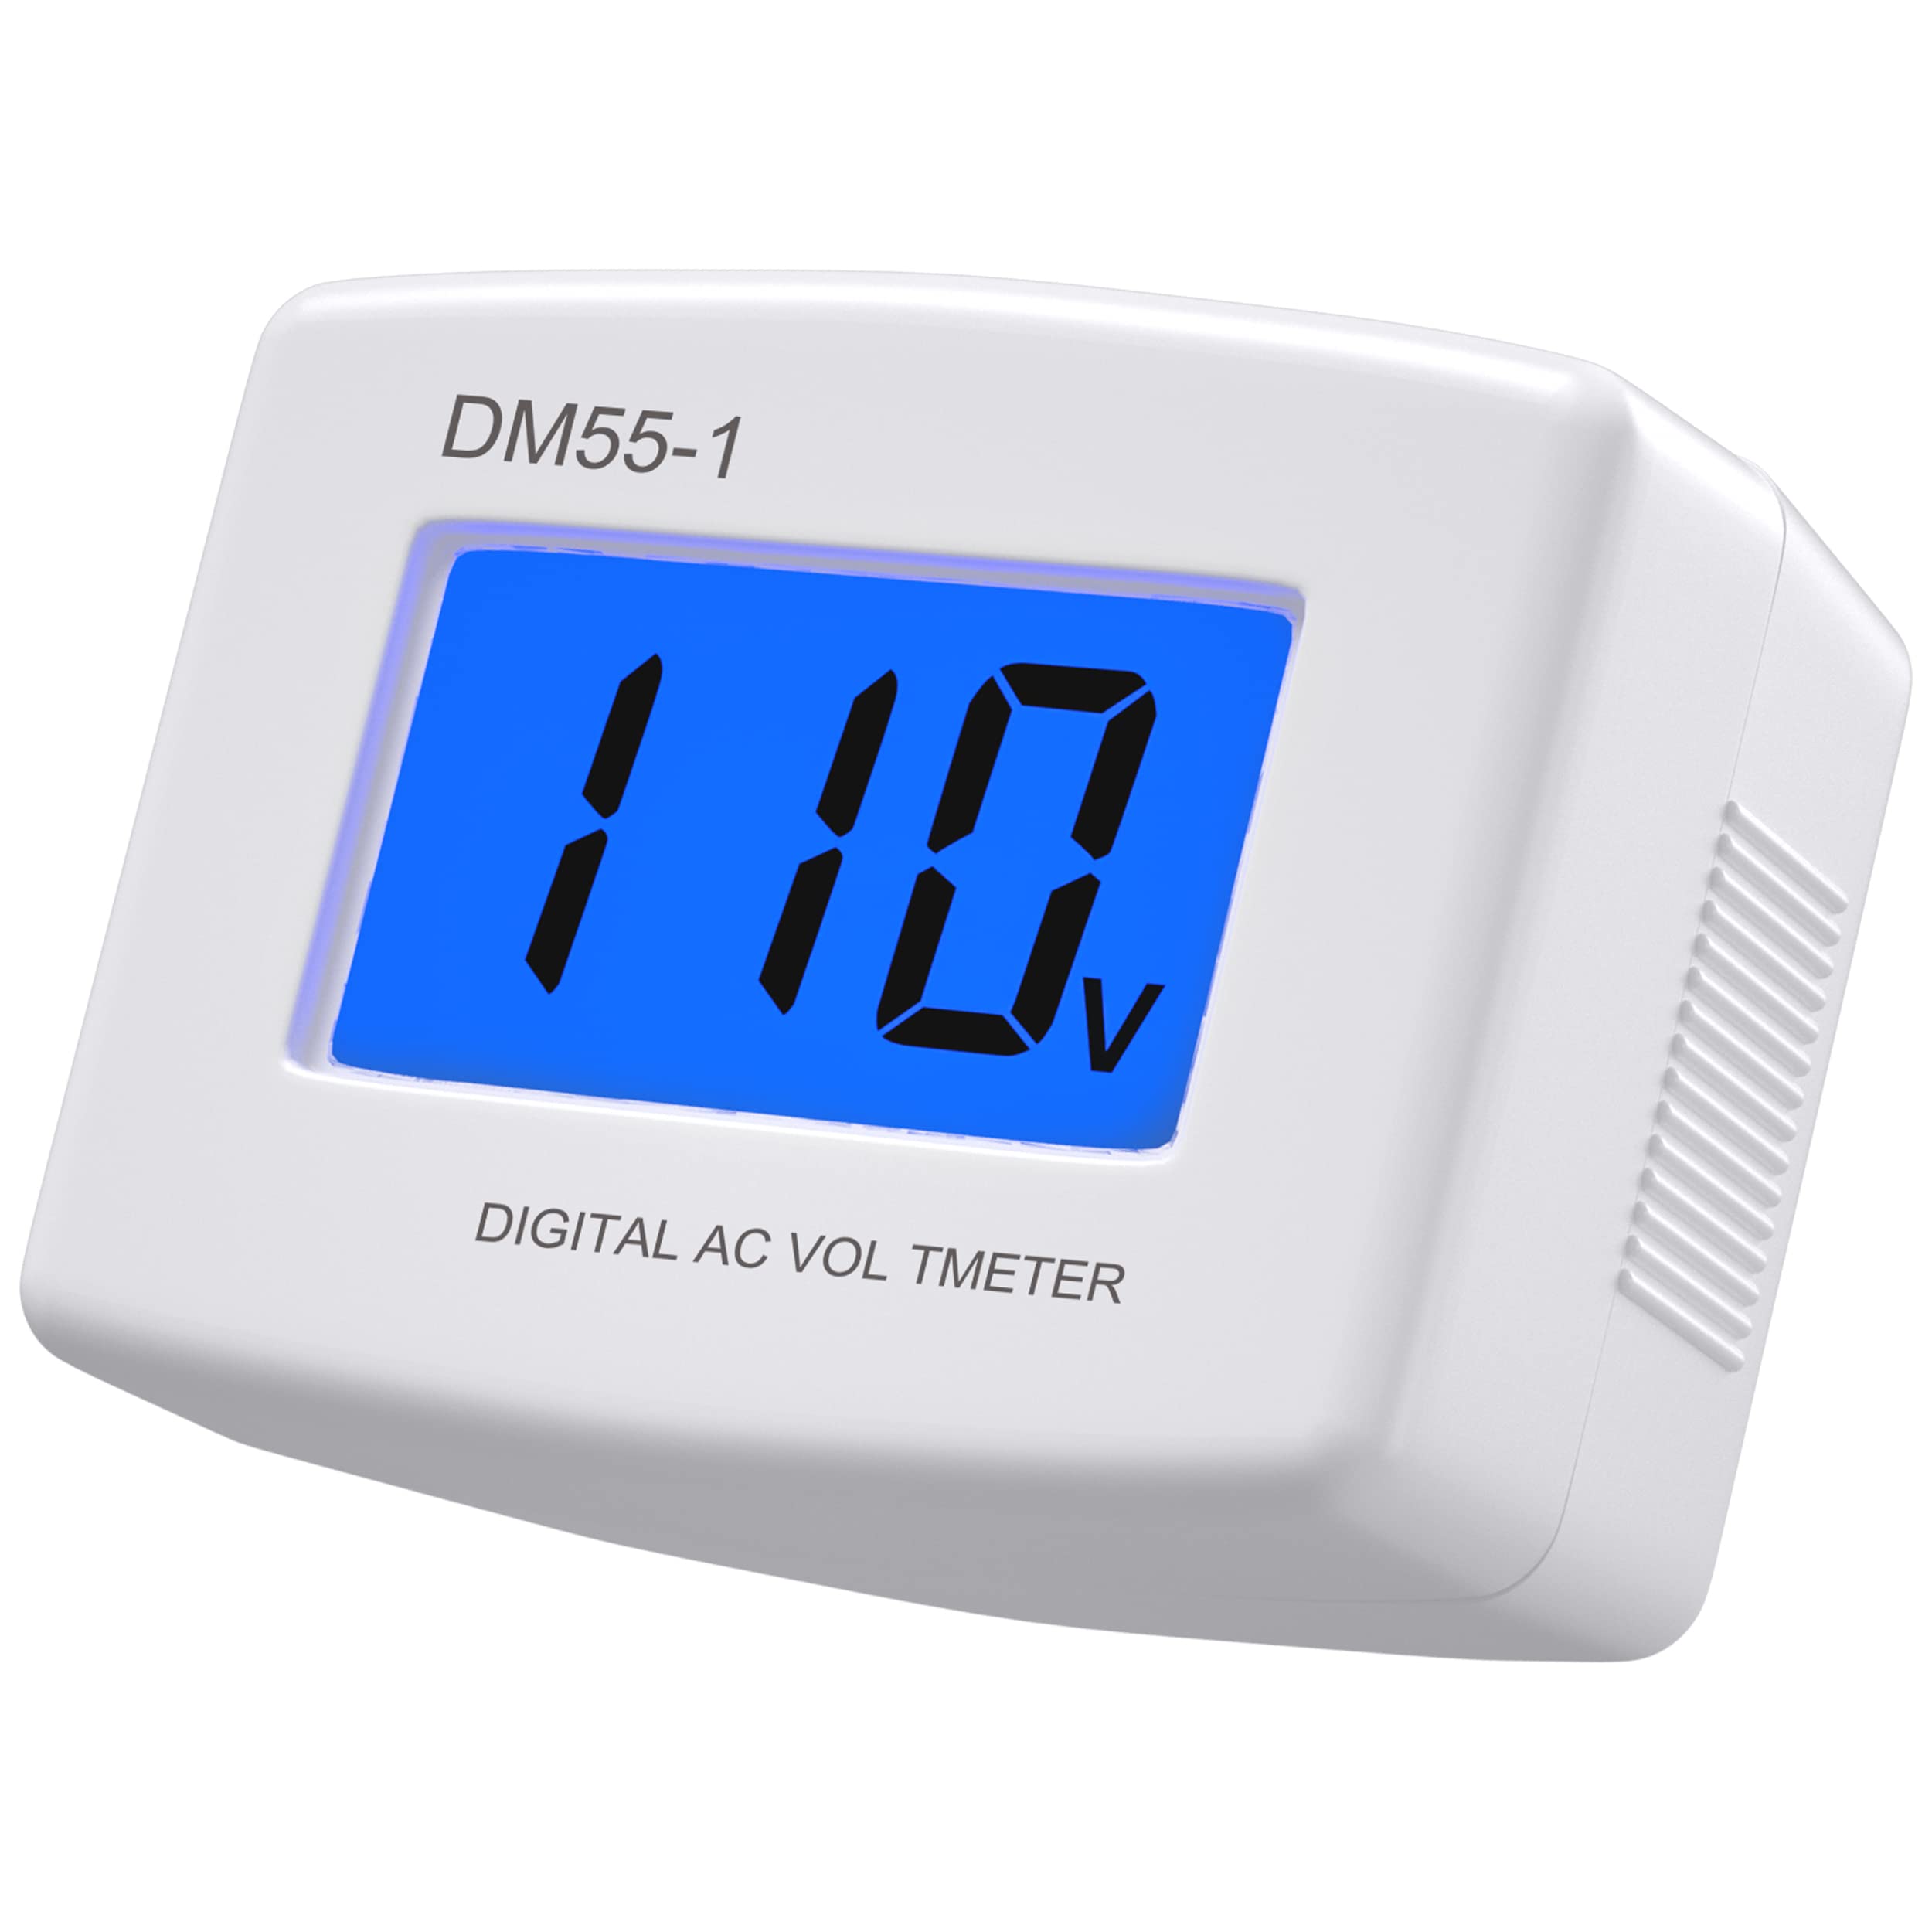
Digital displays show numbers, often with extra symbols (like AC, DC, or battery icons). They’re easy to read and precise.
Analog displays use a moving needle on a scale. You must watch where the needle points. These are less common today but still found in some older or cheaper testers.
Here’s a quick look at how they compare:
| Type | Display | Accuracy | Ease of Use |
|---|---|---|---|
| Digital | Numerical (LCD/LED) | High (usually ±1-2%) | Very Easy |
| Analog | Needle/Scale | Lower (±3-5%) | Moderate |
Digital testers are recommended for beginners because their displays are clearer and easier to understand.
Common Display Symbols
Most voltage tester displays include symbols and units. Some symbols you’ll see:
- V: Volts (the main measurement)
- AC: Alternating Current (used in homes and businesses)
- DC: Direct Current (batteries, electronics)
- Ω: Ohms (for resistance, if your tester can measure it)
- Battery icon: Indicates tester battery status
Understanding these symbols is crucial for correct readings.
Credit: www.amazon.com
Step-by-step: How To Read A Voltage Tester Display
Let’s walk through the process using a digital voltage tester, which is the most common today.
1. Power On And Select The Right Mode
Before testing, make sure your tester is switched on and set to the correct mode (AC or DC, depending on what you’re measuring).
- For wall outlets or home wiring, select AC.
- For batteries or small electronics, select DC.
If your tester is auto-ranging, it will pick the right range by itself. If not, you’ll need to choose a range higher than the expected voltage.
2. Prepare For Testing
Always check your tester on a known live source first. This is called a “test before touch” routine. It ensures your tester is working.
Hold the tester by the insulated handles. Never touch the metal probe tips during testing.
3. Make Contact With The Circuit
- For outlets: Insert the probes into the slots.
- For wires: Touch the probes to the exposed metal (not insulation).
- For batteries: Touch one probe to the positive (+) and one to the negative (–) terminal.
The display will show a number, such as 230, 120, or 12.6.
4. Read The Display
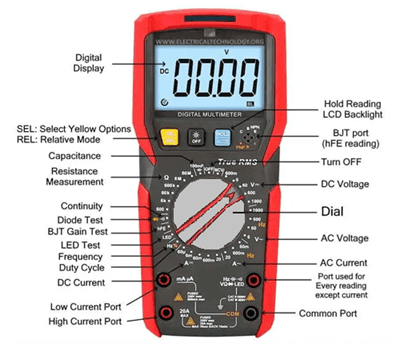
Look at the numbers and symbols:
- Number: This is the voltage detected.
- V: Confirms the measurement is in volts.
- AC/DC: Tells you the current type.
- Other icons (battery, overload): Pay attention to warnings.
Example: If your tester shows 121 V AC, you know the outlet is live and working properly. If it shows 0.0 V, the circuit is dead (or your tester isn’t working).
5. Interpret Special Indicators
Many digital testers have extra indicators:
- OL or 1 (on the left): Means “overload” or “out of range.” The voltage is higher than the tester can measure.
- Low battery symbol: Tester battery is weak. Change batteries for accurate readings.
- Flashing or beeping: Indicates live voltage detected (especially in non-contact testers).
Understanding these indicators prevents mistakes.
Real-world Examples
To make things clearer, let’s look at a few practical scenarios.
Checking A Wall Outlet
Suppose you test a standard North American outlet. You set your tester to AC. After inserting the probes, the display reads 119.6 V AC. This means the outlet is live and within normal voltage (typically 110–125 V in the US).
If you see something like 180 V or 70 V, the outlet may be faulty or wired incorrectly.
Testing A Car Battery
Set your tester to DC. Place the red probe on the positive terminal and the black probe on the negative. The display shows 12.7 V DC. That’s a healthy battery. If it shows 10.5 V or lower, the battery is weak or discharged.
Diagnosing A Dead Circuit
You’re fixing a light switch. With the circuit “off,” your tester shows 0.0 V. When you turn it “on,” you see 237 V AC (in Europe). This means power is flowing as expected.
Comparing Different Tester Readings
Here’s how the same outlet might look on different testers:
| Tester Type | Display Reading | What It Means |
|---|---|---|
| Digital | 120.0 V AC | Normal US voltage |
| Analog | Needle at 120 | Normal US voltage |
| Non-contact | Red light/beep | Voltage detected, but not exact value |
Common Mistakes And How To Avoid Them
Even with a good tester, some errors can lead to wrong readings or unsafe work.
- Wrong mode selected: Always check if you’re set to AC or DC, depending on your circuit.
- Dead tester battery: A weak battery can give false “0” readings. Replace batteries regularly.
- Not making good contact: Poor contact gives inaccurate results. Clean probe tips if needed.
- Overload warning ignored: If the display says “OL” or “1,” stop and use a higher range or different tester.
- Forgetting to zero/test before use: Always check your tester on a known live source before and after measuring.
Non-obvious insight: Many beginners forget to check for “ghost voltage.” This is a small, harmless voltage caused by nearby wires. If your tester shows a low voltage (like 10–30 V) in a dead circuit, use a low-impedance tester to confirm.
Extra Tips For Accurate Voltage Tester Readings
- Use both hands carefully: Always keep one hand away from the circuit to reduce shock risk.
- Read the manual: Each tester has unique features and quirks.
- Label your probes: Some testers show negative readings if the probes are reversed—this is normal for DC.
- Digital hold function: Some testers have a “hold” button to freeze the display. This is useful in tight spaces.
- Temperature and humidity: Extreme cold or moisture can affect readings. Wait until the environment is safe.
Safety Precautions
Reading a voltage tester display is only useful if you stay safe. Here are key reminders:
- Never trust a “0 V” reading alone—test your tester first.
- Wear insulated gloves and shoes when working with live circuits.
- Don’t use a damaged tester.
- If you’re not sure, call a licensed electrician.
How To Choose The Right Voltage Tester
Not all testers are equal. Consider these factors when choosing one:
| Feature | Why It Matters |
|---|---|
| Display type | Digital is easier for most people |
| Voltage range | Must cover your local supply (e.g., 0–600 V for home use) |
| AC/DC capability | Needed for both home and automotive work |
| Auto-ranging | Less setup, fewer mistakes |
| Durability | Shockproof casing for safety |
Practical insight: Many pros keep both a non-contact tester (for fast checks) and a digital contact tester (for precise readings).

Credit: www.vecteezy.com
When To Trust (and Not Trust) Your Tester
Voltage testers are reliable, but not perfect. Here’s when to be careful:
- If your tester gives inconsistent readings, check the battery and probes.
- If you suspect high voltage, always use a tester rated for that voltage.
- For critical repairs, confirm with two different testers.
Extra tip: Environmental factors like static electricity, fluorescent lighting, or long cables can sometimes “trick” cheap testers. If in doubt, double-check.
Frequently Asked Questions
How Can I Tell If My Voltage Tester Is Broken?
If your tester always shows “0 V” even on known live outlets, or random numbers that don’t match reality, it may be faulty. Check the battery, probes, and try on a different circuit. If still unsure, replace it.
What Does “ol” Mean On My Voltage Tester Display?
“OL” stands for “overload” or “out of limits. ” It means the voltage is higher than your tester’s range. Switch to a higher range or use a tester with a wider range.
Why Does My Non-contact Tester Beep Near Some Wires But Not Others?
Non-contact testers beep when they sense an electric field. If a wire is not powered, shielded, or not live, it may not beep. Sometimes, it can detect voltage from nearby live wires (ghost voltage). Always confirm with a contact tester.
Can A Voltage Tester Show A False Positive?
Yes. In some cases, like “ghost voltage,” you may get a reading where there is no real power. This often happens in long cables near other live wires. Use a low-impedance tester to confirm.
Where Can I Learn More About Electrical Safety?
A great resource is the OSHA Electrical Safety page. It covers safe practices for both beginners and professionals.
Reading a voltage tester display is a skill that improves with practice. Take your time, follow these steps, and soon you’ll be confident and safe every time you work with electricity.
Credit: www.allelcoelec.com
