
Replacing a sink drain is usually a manageable DIY repair when the sink, drain assembly, tailpiece, and trap are accessible and in good condition. The exact sealing method depends on the sink and drain manufacturer, so do not assume plumber’s putty, silicone, thread compound, or one universal drain size is correct for every installation.
This guide focuses on replacing the drain assembly itself. If the cabinet piping is badly corroded, misaligned, leaking inside the wall, or otherwise damaged, the job has moved beyond a simple drain swap.
Identify the Sink and Drain Type First
Kitchen strainers, bathroom pop-up drains, vessel-sink drains, and disposal connections are not installed the same way. Check the sink material, overflow design, drain-hole size, stopper system, and the replacement drain manufacturer’s instructions before buying parts.
Tools and Materials
- Bucket and towels
- Appropriate pliers or wrench
- Drain-removal tool if the existing locknut or strainer requires one
- Replacement drain compatible with the sink
- Sealant or putty only if specified for that drain and sink material
- New slip-joint washers or trap parts if the existing ones are damaged
Do not automatically use pipe-joint compound on slip-joint connections. Many trap joints seal with tapered washers, not thread sealant.
Remove the Existing Drain
- Place a bucket under the trap.
- Disconnect the trap or tailpiece as required and empty trapped water.
- Remove the locknut or retaining hardware while supporting the drain from above.
- Lift out the old flange or strainer.
- Clean old sealant and debris from the sink opening without damaging the sink surface.
The water supply normally does not need to be shut off just to replace a sink drain because the repair is on the waste side, but keep the faucet off while the drain is disconnected.
Install the New Drain According to Its Design
Follow the supplied order for flange, gasket, friction washer, locknut, tailpiece, and stopper parts. Some drains seal with putty under the flange, some call for silicone, and some include a gasket intended to be used without either.
Using the wrong sealant can stain porous stone, interfere with a gasket, or make later service difficult.
Reconnect the Trap Without Forcing Alignment
The tailpiece and trap should align without severe side load. If the new drain sits at a different height or position, use compatible plumbing fittings rather than forcing the trap sideways.
Replace cracked, hardened, distorted, or missing slip-joint washers. Tighten slip nuts only enough to seal; overtightening can distort plastic washers or crack components.
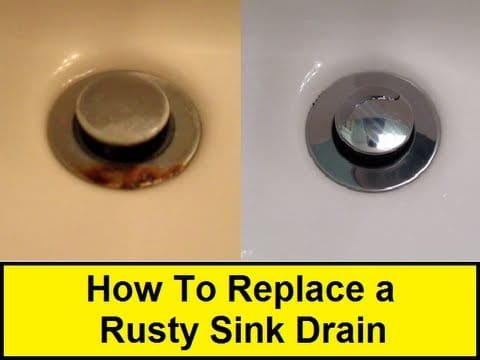
Credit: www.youtube.com
Bathroom Pop-Up Drains
For a pop-up drain, orient the drain body correctly for the pivot rod if the model uses one. Reconnect the pivot rod, clevis, and lift rod according to the drain kit instructions and test that the stopper opens and closes without binding.
Kitchen Sink Strainers
Kitchen basket strainers often use a large retaining nut or other clamping system. Use the sealant and tightening sequence supplied by the strainer manufacturer. Do not assume bathroom-drain instructions apply to a kitchen strainer.
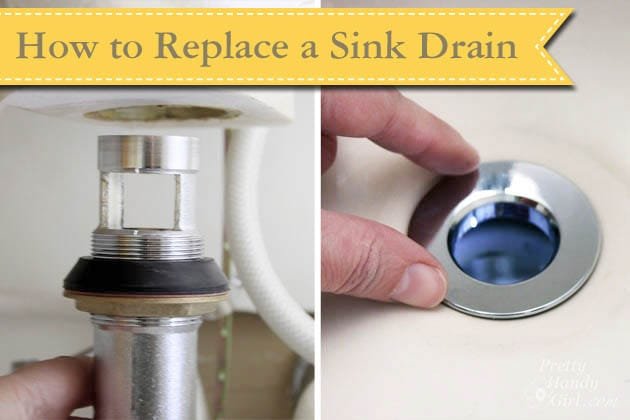
Credit: prettyhandygirl.com
Leak-Test the Installation
- Dry the cabinet and all joints so new moisture is easy to see.
- Run a small amount of water and inspect the flange, drain body, tailpiece, and trap.
- Fill the sink partway, then release the water to test a higher flow rate.
- If a joint leaks, identify exactly where the water begins rather than simply tightening every connection.
A flange leak may require reinstalling the drain. A slip-joint leak can indicate a misaligned or damaged washer, not just a loose nut.
Choosing a Compatible Sink Drain: Pre-Purchase Checklist
Take photographs of the old drain from above and from inside the cabinet before removal. Note whether the sink is a bathroom basin with an overflow passage, a vessel sink without an overflow, or a kitchen bowl with a basket strainer or disposal connection. Compare the drain opening, stopper style, mounting method, tailpiece diameter, and available space below the sink. A bathroom sink with an overflow normally needs a compatible overflow drain; a non-overflow basin needs a fitting approved for that design. These are not interchangeable simply because the decorative flange looks similar.
Confirm the material and finish of the sink before choosing a sealing product. Some putties can stain porous stone and some products are unsuitable for certain plastics. Oatey notes that plumber’s putty must be used only where compatible with the fixture and application. If a new drain includes its own flange gasket, the instructions may require that gasket without additional putty or silicone. Adding extra sealant can stop the gasket from sitting correctly.
Step-by-Step Connection and Gasket Check
After removing the old drain, inspect the sink opening for chips, scratches, rust and leftover sealant. Clean gently with a sink-compatible cleaner, then dry the sealing area as the replacement maker directs. Lay out each component in installation order: upper flange, specified top seal, lower gasket or friction ring, retaining nut, tailpiece and any stopper mechanism. Different drain systems use different orders, so follow the actual parts diagram instead of assuming every fitting shares one standard stack.
Start the retaining parts squarely by hand to avoid cross-threading. Support the drain above while tightening below. Do not turn a chrome flange against a fragile finish or force the locknut hard enough to distort a gasket. Reconnect a correctly sized tailpiece and P-trap with clean mating surfaces and correctly oriented tapered slip-joint washers. Nuts that tighten but still leak may indicate a cracked washer, wrong size, sideways misalignment or damaged thread. Do not force rigid pipe into alignment to conceal a fit problem.
Leak-Test Sequence Before Closing the Cabinet
Begin with a dry cabinet floor and paper towel beneath the joints so fresh water is easy to spot. Run a modest stream and examine the flange underside, drain-body threads where applicable, tailpiece and trap connections. Then partially fill the sink and release it, checking for leaks during the higher flow. If the drain is a pop-up model, test the stopper in both positions and verify that its pivot-rod seal remains dry. Wipe fittings dry between checks to locate where leakage first appears rather than guessing based on the lowest drip point.
If the leak comes from the flange, follow the manufacturer’s procedure for removing and resealing it rather than tightening blindly. If it comes from a slip joint, inspect washer fit and alignment first. If it comes from a cracked sink, corroded trap arm or inaccessible wall connection, stop and contact a plumber. Run a final test after correcting any connection, and inspect the cabinet later for slow leaks or moisture under stored items. Avoid using chemical drain cleaners while the drain is disassembled or leaking.
Drain Replacement Troubleshooting
| Symptom | What to inspect first | Safe next step |
|---|---|---|
| Water appears under the sink flange | Flange sealing method, incompatible putty or displaced gasket | Remove, clean and reseat using the drain manufacturer’s procedure |
| Water drips from a slip nut | Wrong, twisted or damaged washer; poor alignment | Disassemble and replace the washer or fitting as needed |
| Trap cannot reach the new tailpiece | Part sizes, height and trap-arm position | Use a correctly sized compatible part; do not pull piping sideways |
| Pop-up stopper will not close | Pivot-rod and stopper alignment | Follow the drain kit’s adjustment steps |
| Slow seep continues after repair | Flange, tailpiece and trap under multiple water-flow conditions | Isolate the source and seek professional service if unresolved |
Common Mistakes
- Assuming all household drains use the same diameter.
- Using plumber’s putty on a sink material or drain that forbids it.
- Adding thread compound to a washer-sealed slip joint.
- Overtightening plastic or porcelain-adjacent components.
- Forcing a trap out of alignment to reach the new tailpiece.
- Skipping a full-basin leak test.
When to Call a Plumber
Get professional help if the drain piping is corroded into the wall, the trap arm is improperly sloped or misaligned, the sink is cracked, the drain connection is inaccessible, or repeated correct assembly still leaks.
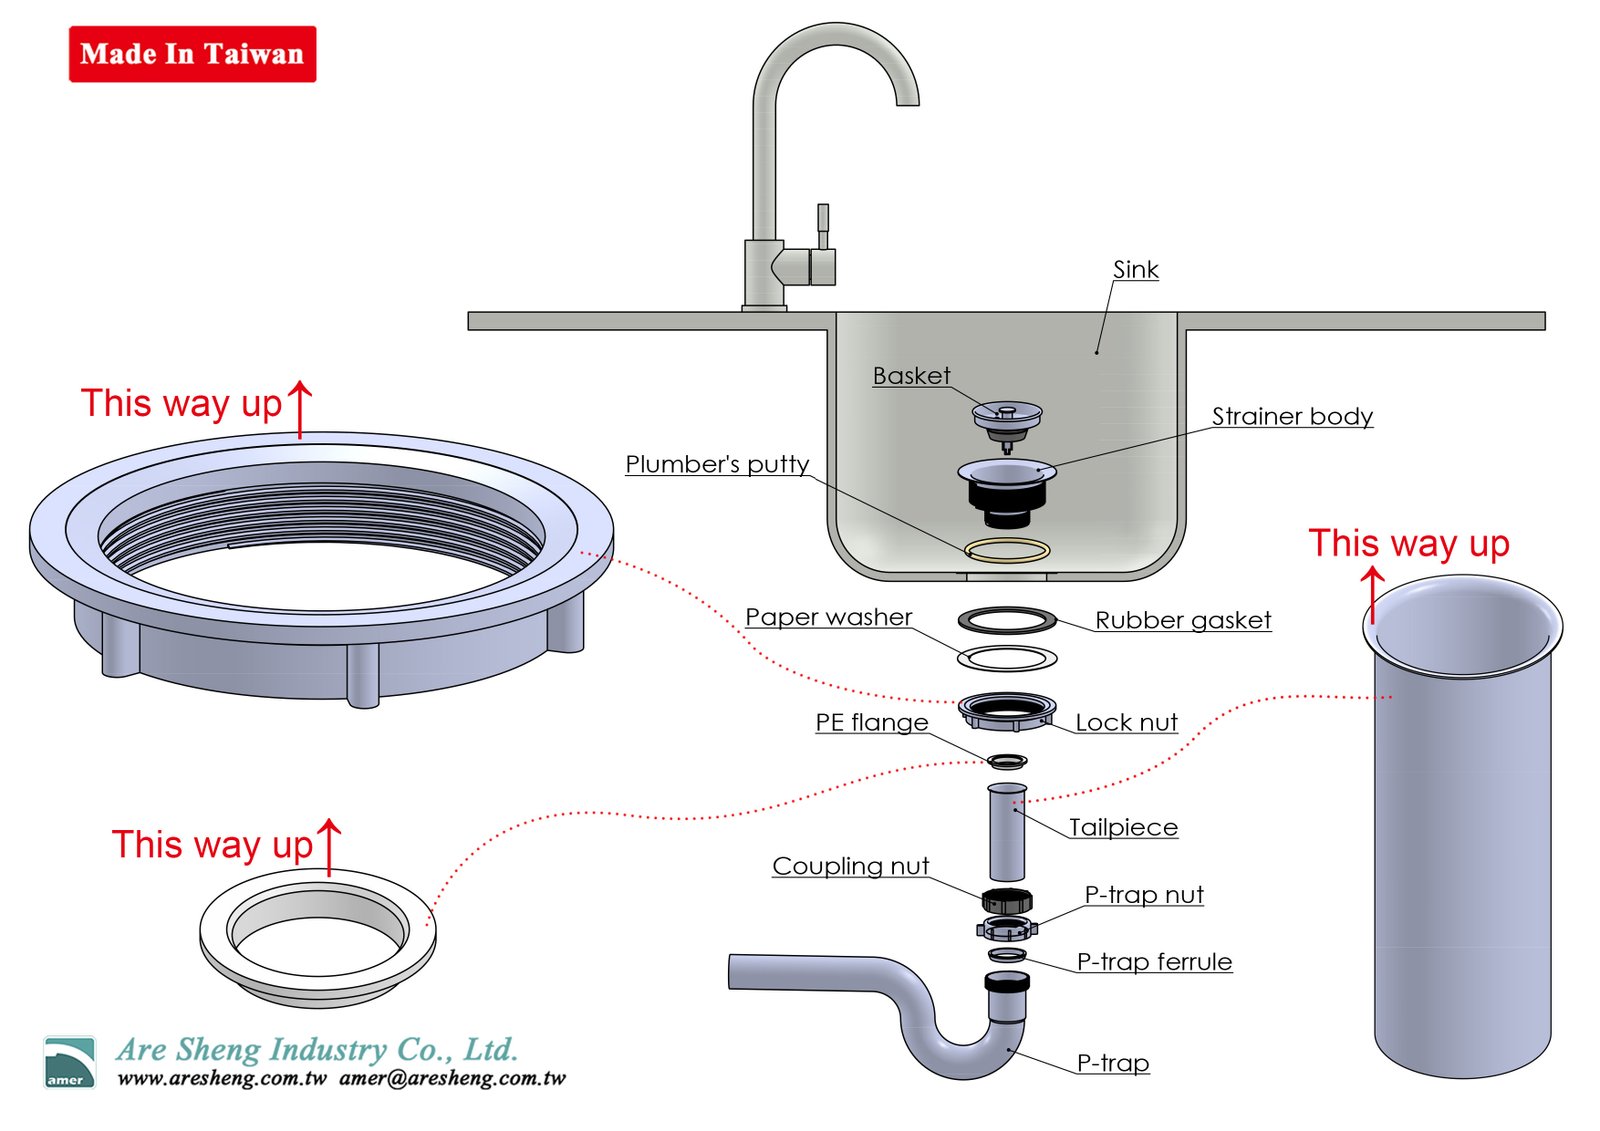
Credit: www.aresheng.com.tw
Identify the Drain Assembly Before Buying Parts
A bathroom sink pop-up drain, a kitchen basket strainer, and a disposal-connected drain are not interchangeable assemblies. Check the sink opening, drain body, overflow provision where applicable, tailpiece dimensions, and connection to the existing trap before buying replacements. Place a container under the trap, remove the old assembly carefully, and clean old sealant from the sink surface without scratching the fixture. Use only the gasket or sealant arrangement specified for the new drain; adding plumber’s putty to every gasket can create leaks or damage incompatible surfaces.
Reassemble without forcing misaligned plastic threads or overtightening metal fittings against fragile sinks. The trap must retain its proper configuration and accessible connections, and the installation must meet local plumbing requirements. Fill the sink, check the drain flange for seepage, release a full basin of water, and inspect each joint with a dry tissue. Recheck after several normal uses. If corrosion, damaged piping, or persistent leakage is present, repair the underlying problem instead of repeatedly tightening the same connection.
Frequently Asked Questions
Do I Always Need Plumber’s Putty?
No. Use the sealing method specified for the drain and sink material. Some assemblies use silicone or a supplied gasket instead.
Do I Need to Replace the P-Trap?
Not if it is compatible, correctly aligned, and in good condition. Replace damaged or incompatible parts.
How Tight Should the Connections Be?
Follow the drain and trap manufacturer’s instructions. “As tight as possible” is not a safe rule.
If the drain is not leaking but the sink empties slowly, investigate blockage before replacing a sound drain assembly. That is a different repair: see our published kitchen drain cleaning guide for clog-related maintenance rather than treating every slow drain as a failed strainer or seal.
What If the Sink Shutoff Valve Will Not Close?
Do not dismantle the drain or nearby supply lines while uncertain about isolation. Use an appropriate broader shutoff or qualified plumber as needed.
Why Does a New Sink Drain Still Leak?
Check gasket orientation, sealant compatibility, seating surfaces and alignment. Do not solve every leak by overtightening the assembly.
Bottom Line
A reliable sink-drain replacement depends on compatibility, clean sealing surfaces, correct gasket order, proper trap alignment, and a careful leak test—not on one universal sealant or size.