
A sharp spade bit is a woodworker’s best friend. It gives you smooth, fast holes and helps your drill work efficiently. Over time, though, even the best bits get dull. Dull bits burn wood, make your drill work harder, and can even be dangerous.
Many people throw away dull spade bits without knowing that sharpening them is simple and saves money. If you want better results and longer life for your tools, learning how to sharpen a spade bit is essential.
This guide will walk you through every step. Whether you’re a hobbyist or a professional, you’ll learn not only the basics but also smart tips that most beginners miss. Before you grab your spade bits and start sharpening, take a moment to understand why technique matters and what mistakes to avoid.
Proper sharpening gives you cleaner holes, less splintering, and makes your projects easier.
Why Keep Spade Bits Sharp?
Spade bits cut by scraping wood away. Sharp edges slice cleanly, while dull ones tear and burn. Here’s what a sharp bit does for you:
- Faster drilling: Less force needed, so you work quicker.
- Cleaner holes: Less splintering and roughness.
- Longer tool life: Reduces wear on your drill and bit.
- Safer work: Dull bits can slip or bind, risking injury.
A sharp bit is not just about speed—it’s about quality and safety.
Tools And Materials Needed
You don’t need expensive equipment to sharpen a spade bit. Here’s what helps:
- Small flat file: For the main edges.
- Diamond file or sharpening stone: For a finer edge.
- Bench vise: To hold the bit steady (optional, but helpful).
- Permanent marker: To see your progress as you file.
- Safety glasses: Metal filings can be dangerous.
- Gloves: For extra grip and protection.
- Cloth: To wipe the bit clean after sharpening.
Pro tip: A small file set made for chainsaws or small tools works perfectly on spade bits.
Understanding Spade Bit Anatomy
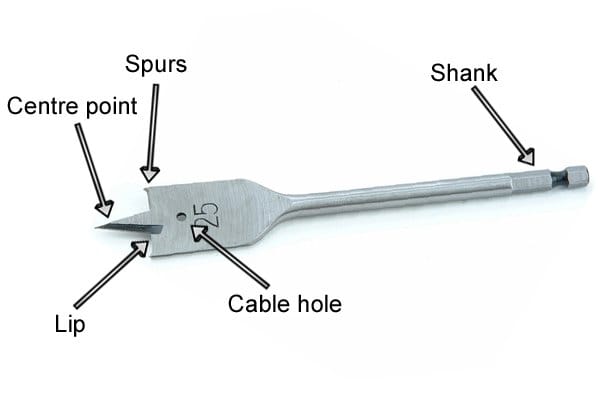
To sharpen properly, you must know the parts of a spade bit:
- Cutting edge: The flat, wide part that scrapes the wood.
- Spurs: Small points at the outer edges that score the wood.
- Center point: The tip that starts the hole and guides the bit.
Each part has a unique role. The cutting edge does most of the work, the spurs clean up the hole’s edge, and the center point keeps the bit steady.
| Spade Bit Part | Function |
|---|---|
| Cutting Edge | Removes most of the wood |
| Spurs | Scores the hole’s edge |
| Center Point | Centers and guides the bit |
Step-by-step: How To Sharpen A Spade Bit
1. Prepare Your Workspace
Find a stable, well-lit area. If you have a bench vise, clamp the spade bit with the flat side up. This keeps your hands free and ensures accuracy. Put on your safety glasses and gloves.
2. Mark The Edges
Use a permanent marker to color the cutting edges and spurs. This trick shows you where you’ve filed and prevents removing too much metal. Many beginners skip this step and end up with an uneven bit.
3. File The Cutting Edge
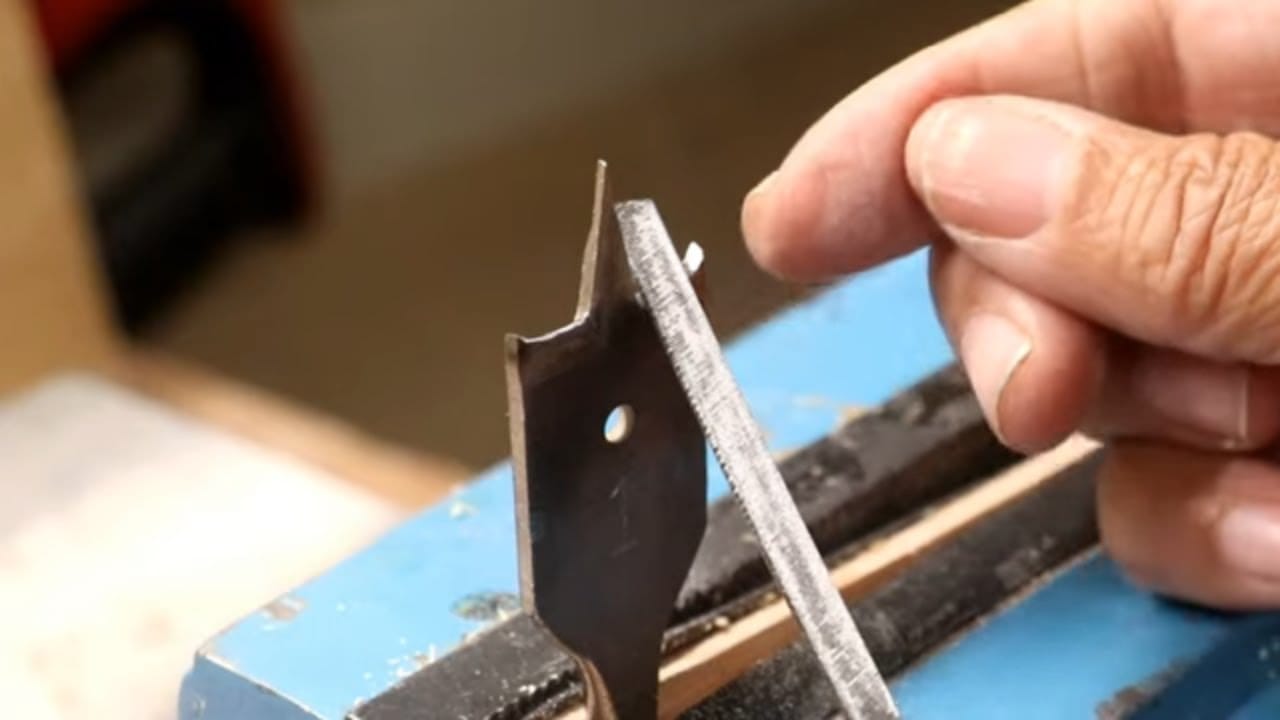
Hold the file flat against the main cutting edge. Push forward, following the original angle (usually about 15–20 degrees). Use gentle, even strokes. The goal is to remove just enough metal to reveal clean, shiny steel.
- Do not round the edge. Keep the angle flat for the best performance.
- Check your progress. When the marker is gone and the edge is clean, stop.
4. Sharpen The Spurs
The spurs need to be sharp but not shortened. Use the edge of your file and stroke away from the center. Only file the inside of the spur—not the outer side. This keeps the spur tall and sharp.
- Tip: Filing the outside will change the diameter of your bit. Avoid this mistake.
5. Tidy The Center Point
If the center point is dull, use the file to restore its tip. File gently and keep the point centered. This part does not need to be razor-sharp, just pointed enough to start holes easily.
6. Hone The Edge (optional)
For a super-sharp finish, use a diamond file or sharpening stone on the cutting edges and spurs. This polishes away tiny burrs and gives you a smoother cut.
7. Clean The Bit
Wipe the bit with a cloth to remove filings. Inspect your work: all edges should be shiny, flat, and even. If you see nicks or uneven spots, repeat the steps as needed.
8. Test Your Bit
Before putting your bit back in the toolbox, drill a test hole in scrap wood. If the bit cuts cleanly and quickly, you’ve done well. If it tears or burns, check the edges again.
Credit: www.youtube.com
Common Mistakes To Avoid
Even experienced users make errors when sharpening spade bits. Watch out for these:
- Changing the edge angle: This weakens the bit and makes drilling harder.
- Shortening the spurs: Only file the inside, never the outer edge.
- Over-sharpening: Removing too much metal shortens the bit’s life.
- Ignoring balance: Uneven edges cause wobbling holes and rough cuts.
- Forgetting safety: Always wear eye protection.
How Often Should You Sharpen Spade Bits?
There’s no strict rule. It depends on how much you drill and the kind of wood you use. As a general guide:
- After 20–30 holes in hardwood
- When you notice burning, splintering, or extra force needed
- Before important projects
Tip: Regular, light sharpening extends the life of your bits. Don’t wait until they’re completely dull.
Credit: woodworking.stackexchange.com
When To Replace Instead Of Sharpen
Sometimes, sharpening is not enough. Here’s when to consider a new bit:
- Severely bent or cracked bits
- Missing or broken spurs
- Center point damaged beyond repair
- Bit worn too short from repeated sharpening
Trying to revive a broken bit can be unsafe and wastes time.
Manual Vs. Power Sharpening
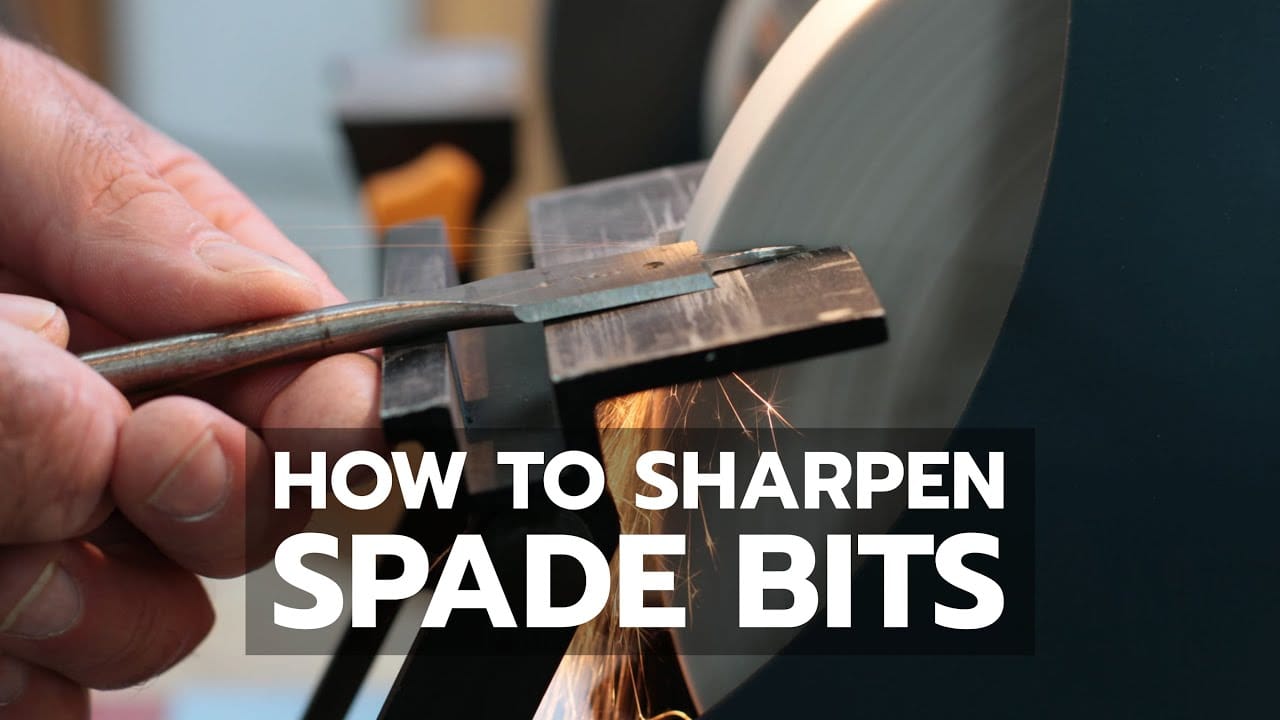
Some people use a bench grinder or rotary tool for speed. While this works, it’s easy to overheat and ruin the bit’s temper (metal hardness).
| Method | Pros | Cons |
|---|---|---|
| Hand Filing | More control, less risk of overheating | Slower |
| Bench Grinder | Fast, good for many bits | Easy to remove too much metal, can overheat bit |
If you use a grinder, cool the bit in water frequently and go slow. For most users, hand filing is the safest and simplest method.
Practical Tips For Better Sharpening
- Sharpen before storing: Clean, sharp bits last longer in storage.
- Use light pressure: Let the file do the work. Heavy force causes slips and uneven edges.
- Match both sides: File both main edges the same amount for a centered cut.
- Label your bits: If you have many sizes, keep track of which are sharp and which need work.
- Store bits properly: Keep them dry and separated to avoid dulling.
How A Sharpened Bit Affects Your Drilling
You’ll feel the difference immediately. Drilling requires less effort, and the holes look cleaner. In some tests, a sharp bit can drill through softwood in half the time compared to a dull one. Splintering at the exit side of the hole is also reduced, giving a more professional result.
Comparing Sharpened Vs. Dull Spade Bits
Here’s a quick look at what changes after sharpening:
| Feature | Sharp Bit | Dull Bit |
|---|---|---|
| Drilling Speed | Fast | Slow |
| Hole Quality | Clean, smooth | Rough, splintered |
| Effort Needed | Low | High |
| Risk of Burning | Low | High |
| Tool Life | Extended | Shortened |
Advanced Insight: Customizing Your Bit
Some experienced woodworkers adjust the angle of their spade bits for specific tasks. For example, a slightly steeper angle works better in softwood, while a flatter one suits hardwood. This is an advanced step. For most users, stick to the factory angle.
Another tip: If you need a cleaner exit hole, sharpen the spurs to a fine point. This scores the wood before the main edge cuts through, reducing tear-out.
Where To Learn More
If you want to see sharpening in action, many professional woodworkers share tutorials online. For a deeper dive into tool sharpening, check the Wikipedia page on sharpening.
Frequently Asked Questions
How Do I Know If My Spade Bit Is Dull?
If your drill is struggling, making smoke, or the holes look rough, your bit is probably dull. Another sign is increased vibration or having to push harder than normal.
Can I Use Sandpaper To Sharpen A Spade Bit?
Sandpaper is not effective for sharpening metal edges. A file or diamond stone is better. Sandpaper can round the edge instead of sharpening it.
How Many Times Can I Sharpen A Spade Bit?
You can sharpen a spade bit many times if you only remove a little metal each time. When the bit becomes too short or the spurs disappear, it’s time to replace it.
Should I Oil My Spade Bits After Sharpening?
A light coat of oil can prevent rust. Wipe off excess oil before use. This is especially important if you store bits in a humid area.
Can I Sharpen Bits With A Dremel Or Rotary Tool?
Yes, but use caution. High speed can overheat the bit and damage the metal. Use a light touch and cool the bit often if you choose this method.
A sharp spade bit is a small investment of time that brings big rewards in your workshop. With the right technique, your bits will last longer, cut better, and make every project smoother. Take a few minutes to sharpen your spade bits—you’ll notice the difference the next time you drill.
Credit: www.youtube.com
