
Renting a floor sander can completely change how your wood floors look. Whether you want to restore old floorboards or finish a new surface, the right sander can make your project easier and faster. But many people feel unsure about which machine to choose, how to use it, and what costs to expect. This guide will help you understand everything about floor sander rental—from picking the right type to finishing your project safely and efficiently. If you want to save money and get professional results, keep reading.
What Is A Floor Sander And When Do You Need One?
A floor sander is a powerful tool designed to sand and smooth wooden floors. It removes old paint, stain, scratches, and uneven surfaces. You need a sander if you want to:
- Refinish hardwood floors
- Prepare new wood for sealing or staining
- Remove old varnish or glue
Many people think only professionals can sand floors, but with the right rental machine and some guidance, homeowners can achieve great results.
Types Of Floor Sanders
Choosing the right sander is important. Here are the main types you’ll find at rental stores:
Drum Sanders
Drum sanders are heavy machines that remove a lot of material quickly. They are perfect for old, uneven floors but can leave marks if used incorrectly. These sanders are best for large, open areas.
Orbital (or Square Buff) Sanders
Orbital sanders are lighter and easier to control. They move in a circular pattern and remove less wood. This makes them ideal for finishing or touching up floors. They are also safer for beginners.
Edge Sanders
Edge sanders are handheld machines designed for sanding close to walls and corners—places where larger sanders can’t reach. They provide a smooth finish along edges.
Comparison: Floor Sander Types
Here’s a quick comparison to help you choose:
| Type | Best For | Skill Level | Speed | Finish Quality |
|---|---|---|---|---|
| Drum Sander | Heavy removal, old floors | Intermediate/Pro | Fast | Rough to Medium |
| Orbital Sander | Finishing, light sanding | Beginner | Medium | Smooth |
| Edge Sander | Edges, corners | All levels | Medium | Smooth |
Insight: Many beginners think drum sanders are always best, but for small rooms or first-timers, an orbital sander is often safer and gives a more even finish.

Credit: www.youtube.com
How To Choose The Right Floor Sander For Your Project
Selecting the right sander depends on your project size, wood type, and your skill level.
- Room Size: For large, open spaces, a drum sander saves time. For small rooms, an orbital sander is easier to maneuver.
- Floor Condition: If your floor has deep scratches or paint, you need a drum sander. For light wear, an orbital sander is enough.
- Experience Level: If you are new, start with an orbital sander to avoid damaging your floor.
Tip: You may need both a main sander and an edge sander to cover all areas.
Where To Rent A Floor Sander
Most home improvement centers and tool rental shops offer floor sanders. Some well-known places include:
- The Home Depot
- Lowe’s
- Local hardware stores
- Specialized tool rental centers
Online reservation: Many stores let you reserve sanders online and pick them up in person. This ensures the machine is available when you need it.
Floor Sander Rental Costs
The cost of renting a floor sander depends on the type of sander, rental period, and your location.
| Sander Type | Half-Day (4 hours) | Full Day | Weekly |
|---|---|---|---|
| Drum Sander | $35–$50 | $55–$75 | $220–$300 |
| Orbital Sander | $30–$45 | $50–$65 | $200–$250 |
| Edge Sander | $20–$30 | $35–$50 | $120–$180 |
Extra costs: You will also pay for sandpaper, dust bags, and sometimes a deposit. Sandpaper usually costs $3–$7 per sheet, and you may need several sheets for a full floor.
Non-obvious insight: Some rental stores offer package deals for both a drum/orbital sander and edge sander, which can save you money.
What’s Included In A Floor Sander Rental?
Usually, your rental includes:
- The sander machine
- Basic instructions or a quick demo
- Sometimes a dust bag
You must buy or rent:
- Sandpaper (choose several grits)
- Extra dust bags
- Extension cords (if needed)
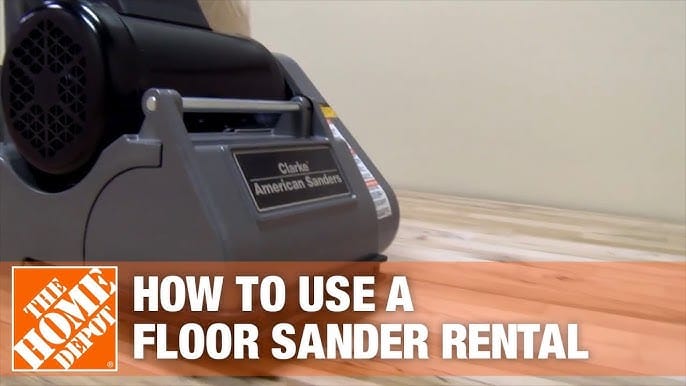
Tip: Always ask the rental staff to show you how to change sandpaper and empty the dust bag.
Credit: www.youtube.com
Preparing Your Room For Sanding
Preparation is the key to a smooth sanding job. Here’s what to do before you start:
- Remove all furniture and rugs.
- Pull out nails or staples sticking up from the floor.
- Sweep and vacuum to remove dust and dirt.
- Seal off doors and vents with plastic to keep dust from spreading.
- Check for loose boards and secure them with nails or screws.
Pro tip: If your floor has a wax finish, clean it with mineral spirits before sanding. Wax can clog sandpaper quickly.
How To Use A Floor Sander: Step-by-step
Using a floor sander takes practice, but these steps make the process clearer:
- Install the right sandpaper grit. Start with coarse grit (36 or 40) for old finishes, then medium, then fine.
- Plug in the sander and put on safety gear: Ear protection, dust mask, and goggles.
- Start the sander off the floor, then gently lower it as you walk forward.
- Move slowly along the wood grain, overlapping each pass slightly.
- Never let the sander sit still while running; it can gouge the floor.
- Empty the dust bag often to prevent clogs and fire risk.
- Switch to finer grits for each sanding pass until the floor feels smooth.
- Use the edge sander for corners and edges the main sander can’t reach.
- Vacuum thoroughly between each grit change.
Example: For a medium-sized living room, sanding usually takes 4–6 hours, plus extra time for preparation and cleanup.
Safety Tips For Floor Sander Rental And Operation
Floor sanders are strong machines. Safety matters:
- Wear protective gear: Mask, earplugs, safety glasses
- Keep cords clear of the sanding path
- Do not wear loose clothing that can catch in the machine
- Ventilate the room to avoid dust buildup
- Never leave the machine running unattended
Less-known tip: Some woods, like old oak or tropical hardwoods, create fine dust that can be harmful. Always use a good dust mask or respirator.
Common Mistakes To Avoid
Many first-time renters make simple mistakes. Avoid these:
- Skipping grits: Don’t jump from coarse to fine paper. Missing a grit leaves scratches.
- Sanding across the grain: Always sand with the wood grain for a smooth finish.
- Not cleaning dust: Dust between sanding stages can cause rough patches.
- Forcing the machine: Let the sander do the work. Pushing too hard can damage the floor or the machine.
- Ignoring edge work: Use an edge sander for a uniform look.
Credit: www.mcaa.org
Returning Your Rental: What To Know
Before you return the sander:
- Clean the machine—remove all dust and sandpaper.
- Check for damage and report any issues to the rental store.
- Return all accessories (cords, dust bags) to avoid extra charges.
- Refuel (if using a gas-powered sander).
Quick tip: Take photos of the sander when you return it. This gives you proof in case of disputes about condition or missing parts.
Realistic Expectations: Diy Vs. Professional Sanding
Renting a sander saves money, but results depend on your skill and patience. Professional sanding may cost $2–$5 per square foot, while DIY rental can cut costs by 60–70%. However, professionals have years of experience and better dust control systems.
Non-obvious insight: Some deep stains, pet marks, or water damage may not sand out completely. You may need to replace boards or use a wood stain to hide marks.
When Not To Sand Your Floors Yourself
DIY sanding is not for every floor. Avoid sanding if:
- Your floor is engineered wood with a thin top layer (risk of sanding through)
- There is suspected lead paint or asbestos in old adhesives
- The boards are loose, badly warped, or rotted
If you are unsure, ask a flooring expert before renting.
Floor Sander Rental: Key Questions To Ask
When you visit the rental store, ask:
- Which sander type is best for my floor?
- How much sandpaper will I need?
- Are there package deals for multiple machines?
- What safety gear do you recommend?
- Is there a support number if I have trouble with the machine?
These questions help prevent surprises and extra trips.
How To Get The Best Finish After Sanding
Sanding is just the first step. For a beautiful floor, consider these final steps:
- Vacuum thoroughly after the last pass
- Wipe with a damp cloth to remove all dust
- Apply your chosen finish (polyurethane, oil, or wax)
- Let each coat dry fully before walking on the floor
Pro tip: Test your finish in a small, hidden area first to check color and texture.
Environmental And Health Considerations
Sanding creates a lot of dust and noise. Protect your health:
- Use a dust extractor if the rental shop offers one
- Dispose of used sandpaper and dust bags safely
- Open windows for fresh air
Extra insight: Some rental stores now offer HEPA-filtered sanders for better dust control. Ask about these for a cleaner project.
For more details about wood floor care, check the Wikipedia page on wood flooring.
Frequently Asked Questions
How Much Does It Cost To Rent A Floor Sander?
Rental costs vary by location and machine type. On average, you’ll pay $50–$75 per day for a drum or orbital sander, plus extra for sandpaper and accessories.
Can I Sand My Floors If They Have Deep Stains Or Pet Damage?
You can remove some surface stains, but deep marks may not come out fully. In these cases, consider using a stain or replacing damaged boards.
How Long Does It Take To Sand A Typical Room?
Sanding a medium-sized room (about 200 sq. Ft. ) usually takes 4–6 hours, not including preparation and cleanup. Beginners may need extra time.
Do I Need Special Training To Use A Floor Sander?
No special license is needed, but it helps to watch a demonstration or online video. Start with a small area to practice before tackling the full floor.
Is Renting A Floor Sander Better Than Hiring A Professional?
Renting saves money but requires time, effort, and care. If your floor is in poor shape or you want a perfect finish, a professional may be worth the extra cost.
A floor sander rental lets you renew your floors for a fraction of the cost of new flooring. With the right preparation, smart machine choice, and safety habits, you can achieve a professional look. Remember, patience and attention to detail are as important as the tool itself.
Good luck with your sanding project!
