
Cutting curves with a jigsaw is a skill that opens new creative possibilities for anyone working with wood, plastic, or metal. Whether you want to craft unique furniture, build custom shelves, or make decorative signs, mastering curved cuts is essential.
Many beginners find this task difficult, but with the right tools, techniques, and knowledge, even complex shapes can become manageable. This guide will walk you through every step, from choosing the right jigsaw and blade to finishing your cuts cleanly.
You’ll learn not just how to do it, but how to do it safely, smoothly, and with confidence.
Why Use A Jigsaw For Curved Cuts?
A jigsaw is one of the most flexible power tools for cutting curves. Its narrow blade moves up and down rapidly, letting you follow lines and shapes that are impossible with a circular saw or table saw. The jigsaw’s maneuverability means you can cut tight circles, sweeping arcs, or even intricate patterns. Unlike hand tools, it saves time and reduces fatigue. This is why artists, carpenters, and DIYers often choose the jigsaw when their project requires more than just straight lines.
Choosing The Right Jigsaw
Not all jigsaws are equal, and the right choice can make a big difference. There are two main types:
| Type | Best For | Pros | Cons |
|---|---|---|---|
| Corded Jigsaw | Long projects, heavy use | Consistent power, no batteries | Needs a power outlet, less portable |
| Cordless Jigsaw | Outdoor, quick jobs | Portable, easy to move | Limited battery life, sometimes less power |
Corded jigsaws are ideal for workshop use. They offer steady performance and never run out of battery. For cutting many curves or thick materials, this is a smart choice. Cordless jigsaws are great for working outside or away from outlets. They are lighter and easy to handle, but you must watch the battery level.
Look for a jigsaw with variable speed control. Slower speeds are better for tight or delicate curves, while faster speeds help with long, sweeping arcs. Also, choose a model with an orbital action setting. This feature moves the blade in a slight oval, cutting faster and clearing sawdust more efficiently. However, for very fine curves, turn off the orbital action for more control.
Selecting The Right Blade
The blade is as important as the jigsaw itself. Here’s what you need to know:
| Blade Type | Best For | Teeth Per Inch (TPI) | Curve Ability |
|---|---|---|---|
| Fine-tooth blade | Hardwood, plastic | 10-20 | Good for tight, smooth curves |
| Coarse-tooth blade | Softwood, fast cuts | 6-10 | OK for gentle curves, not tight |
| Scroll blade | Intricate, small shapes | 15-20 | Excellent for sharp, tight turns |
For most curved cuts, a scroll blade or fine-tooth blade is best. These blades are thinner and can turn easily without bending or breaking. Avoid using wide blades—they struggle with tight turns and may wander off your line. Always match the blade to your material: wood, metal, or plastic blades are designed differently.
Preparing Your Workpiece
Before starting any cut, good preparation is key:
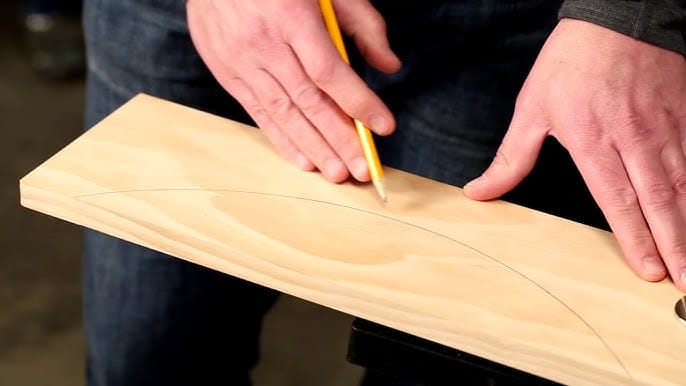
- Mark your curve clearly. Use a soft pencil or fine-tip marker. For large circles, a compass or a string tied to a nail works well.
- Clamp your material firmly to a workbench. Movement ruins accuracy and can be dangerous.
- Remove any debris or dust. A clean surface helps you follow your line.
If your curve starts inside the material (not from the edge), drill a starter hole slightly wider than your jigsaw blade. This gives you a place to insert the blade and begin cutting.
Cutting Techniques For Smooth Curves
The way you hold and move the jigsaw affects the quality of your cuts. Here’s how to get the best results:
Start Slow And Steady
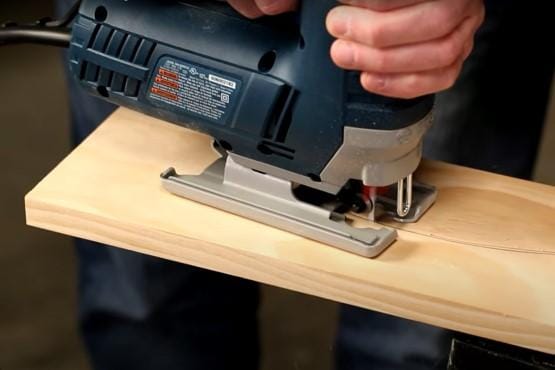
Place the shoe (flat metal base) of the jigsaw firmly on your workpiece. Align the blade with your start point. Squeeze the trigger gently and let the blade reach full speed before moving forward. For tight curves, keep the speed slow and use both hands for control.
Follow The Line, Don’t Force The Blade
Guide the saw along your marked curve. Let the blade do the work; don’t push hard or twist the jigsaw. Forcing the tool causes the blade to bend, which leads to rough edges or broken blades. If you find the jigsaw struggling, slow down and check your blade.
Make Relief Cuts
For very tight curves or sharp angles, make relief cuts. These are straight cuts from the waste side up to the curve line. When you reach a sharp turn, the waste pieces will break away, allowing you to turn the jigsaw more easily.
Pivot, Don’t Twist
To follow a curve, pivot the jigsaw gently as you cut. Imagine steering a car around a bend, not jerking the wheel. Small, smooth movements create cleaner results.
Deal With Sawdust
Sawdust can cover your line and ruin accuracy. Many jigsaws have a blower feature that clears dust from the cut. If yours does not, pause often to brush away dust with your hand or use a small vacuum.
Common Mistakes And How To Avoid Them
Even experienced users make errors. Here are some pitfalls to watch out for:
- Using the wrong blade: Wide or coarse blades can’t follow curves well.
- Pushing too hard: Forcing the saw leads to blade deflection and rough edges.
- Not securing the workpiece: Movement makes it impossible to cut accurately and increases risk.
- Ignoring relief cuts: Trying to turn too sharply all at once usually causes splintering or blade breakage.
- Cutting too fast: High speed reduces control and increases burn marks, especially on hardwood.
Many beginners overlook the importance of blade selection for each curve type. Another common mistake is not supporting both sides of the cut, which can cause splintering as the waste piece falls away.
Credit: learn.kregtool.com
Advanced Tips For Perfect Curves
If you want your curved cuts to look professional, try these techniques:
- Tape the cut line: Placing masking tape over your mark reduces splintering, especially on plywood or veneer.
- Sand after cutting: Even a good jigsaw cut may need light sanding. Use a drum sander or sandpaper wrapped around a dowel to smooth curves.
- Practice on scrap: Before cutting your actual piece, try the same curve on scrap material. This helps you feel the right speed and pressure.
- Work from the “good” side: Some blades cut cleaner on one side. If your jigsaw blade tears the surface, flip the material so the clean side faces down.
- Adjust orbital settings: For tight curves, turn off orbital action. For gentle curves or long arcs, a low orbital setting speeds up the cut.
Safety Tips When Cutting Curves
Never ignore safety. Jigsaws are powerful, and accidents happen quickly.
- Wear safety glasses to protect your eyes from flying chips.
- Use ear protection if you’re cutting for long periods.
- Secure loose clothing and hair. They can get caught in the moving blade.
- Keep both hands on the tool whenever possible.
- Disconnect power when changing blades or making adjustments.
One often-missed tip: always wait for the blade to stop moving before setting the jigsaw down. The inertia can cause the tool to jump or the blade to break.
Credit: www.youtube.com
Comparing Jigsaw To Other Curve-cutting Tools
How does a jigsaw compare to other tools for curved cuts? Here’s a quick look:
| Tool | Curve Ability | Speed | Skill Needed | Common Uses |
|---|---|---|---|---|
| Jigsaw | Excellent for most curves | Fast | Beginner to advanced | Furniture, crafts, signs |
| Band Saw | Very precise, tight curves | Fast | Intermediate to advanced | Detailed woodworking |
| Coping Saw | Very tight, intricate curves | Slow | Beginner | Small projects, trim |
| Scroll Saw | Extremely precise, tiny curves | Medium | Intermediate | Ornamental work |
The jigsaw is the most versatile for general curved cutting, especially for larger workpieces and medium-to-tight curves. For ultra-fine details, a scroll saw is better, but it’s less flexible with thick or large material.
Project Ideas Using Jigsaw Curves
Want to practice your new skills? Here are some beginner-friendly ideas:
- Curved shelves: Add style to basic wall storage.
- Garden signs: Cut custom shapes like leaves, animals, or flowers.
- DIY clocks: Create a unique circular or wavy clock face.
- Toy animals: Simple animal outlines make great gifts for children.
- Decorative panels: Add curved cutouts to cabinet doors or room dividers.
Each of these projects can be started with scrap wood and improved as your confidence grows.
Real-world Example: Cutting A Perfect Circle
Suppose you want to cut a circle for a table top or speaker. Here’s a step-by-step method:
- Mark the center of your circle on the wood.
- Use a compass or string to draw the circle.
- Drill a starter hole inside the circle, near the line.
- Insert the jigsaw blade into the hole and begin cutting slowly, following the line.
- Use relief cuts if the circle is small or the wood is thick.
- Sand the edge after cutting for a smooth finish.
This method works for any size circle and is much faster than using a hand saw.
Frequently Asked Questions
How Do I Stop Wood From Splintering When Cutting Curves With A Jigsaw?
Use a fine-tooth blade and place masking tape over your cut line. Cut slowly and support the wood on both sides. If possible, cut with the “good” side down, as most jigsaws cut upward.
What’s The Tightest Curve I Can Cut With A Jigsaw?
It depends on your blade. With a scroll blade, you can cut circles as small as 1 inch in diameter. Remember, the thinner the blade, the tighter the curve you can achieve.
Can I Cut Metal Curves With A Jigsaw?
Yes, but use a metal-cutting blade with high teeth per inch (TPI). Go slow and use cutting oil to keep the blade cool. Always wear goggles for safety.
Why Does My Jigsaw Blade Bend On Curves?
Pushing too fast or using a blade that’s too wide causes bending. Let the blade do the work, and choose a narrow, fine-tooth blade for curves.
Are There Any Alternatives To Using A Jigsaw For Curves?
Yes. Scroll saws and band saws are good for very tight or intricate curves. For smaller projects, a coping saw works well. For more details, see this Wikipedia article on jigsaws.
Cutting curves with a jigsaw is a skill that improves with practice. By choosing the right tools, preparing carefully, and using smart techniques, you’ll achieve clean, accurate curves that make your projects stand out. Remember to work safely, be patient, and don’t be afraid to experiment—great results come from both knowledge and experience.
:max_bytes(150000):strip_icc()/101653033-090ebbb4cf3b4fedb7e523d3778b7a62.jpg)
Credit: www.woodmagazine.com
