A multimeter is one of the most useful tools for anyone who works with electronics or electricity. It can measure voltage, current, resistance, and sometimes more. But even the best multimeter can give wrong readings if it’s not calibrated properly.
Calibration is the process of checking and adjusting your multimeter to make sure it gives accurate results. Many people use a multimeter every day but never think about calibration—until they start troubleshooting a problem and the numbers don’t make sense.
If you want reliable measurements, you need to know how to calibrate a multimeter correctly. This guide will walk you through the full calibration process, explain why it matters, and share expert tips that even experienced users sometimes miss. Whether you use a digital or analog multimeter, this article gives you everything you need to keep your device in top condition.
Why Multimeter Calibration Matters
An uncalibrated multimeter can lead to serious mistakes. Imagine testing a circuit and getting the wrong voltage—you could damage components, cause safety risks, or waste hours chasing a problem that doesn’t exist. Calibration makes sure your readings match the real values.
Most manufacturers recommend calibrating your multimeter at least once a year. However, if you use your device daily, in harsh environments, or for critical measurements, more frequent checks are wise. Professional labs calibrate their instruments every few months or even before every important project.
Impact Of Inaccurate Measurements
- Safety risks: Wrong readings can lead to electrical shocks or fires.
- Wasted time: Troubleshooting based on false data is frustrating and expensive.
- Damaged equipment: Sensitive components can be destroyed by incorrect voltage or current.
Types Of Multimeters And Calibration Differences
Not all multimeters are the same. The two main types are analog and digital.
| Feature | Analog Multimeter | Digital Multimeter |
|---|---|---|
| Display | Needle and scale | LCD numbers |
| Accuracy | Lower, more user error | Higher, less user error |
| Calibration needs | Zero adjustment, mechanical checks | Electronic adjustment, firmware checks |
Digital multimeters (DMMs) are more common today, but analog meters are still used for some special tasks. The calibration steps are similar but not identical.

Credit: aelabgroup.com
Equipment And Standards For Calibration
Before you start, gather the right tools. You’ll need:
- Calibration reference source: This is a device that produces known, precise voltages, currents, or resistances. Professional labs use a multimeter calibrator.
- Test leads: Good quality, clean, and undamaged.
- Documentation: Your multimeter’s manual and calibration certificate, if available.
- Environment: A stable room with minimal temperature and humidity changes.
For home users, you can use high-precision reference resistors or voltage sources if you don’t have a lab calibrator. But for critical work, always use certified equipment.
International Standards
Calibration should follow recognized standards such as ISO/IEC 17025. Certified labs will provide a report showing traceability, so you know your device meets global requirements.
Step-by-step Multimeter Calibration
Calibrating a multimeter is a careful process. Here’s how to do it right.
1. Preparation
- Turn off the multimeter.
- Let it rest in the calibration room for at least 30 minutes. This prevents temperature changes from affecting results.
- Inspect test leads and connectors for damage or dirt.
- Set the multimeter to the correct function (voltage, current, resistance).
2. Zero Adjustment (for Analog Meters)
Analog meters need to be zeroed before each use.
- Set the meter to the lowest DC voltage range.
- Short the test leads together.
- Adjust the zero knob until the needle points exactly to zero.
3. Voltage Calibration
- Connect the multimeter to a reference voltage source.
- Set the meter to the correct range (e.g., 2V, 20V).
- Compare the reading to the reference.
- If the reading is off, adjust the calibration trimmer (sometimes inside the case) until the display matches the reference.
For example, if your reference voltage is exactly 5. 000V and your meter reads 4. 98V, adjust until it reads 5. 00V.
4. Current Calibration
- Use a precise current source.
- Select the correct current range.
- Connect the meter in series with the source.
- Compare and adjust as with voltage.
5. Resistance Calibration
- Use a high-accuracy resistor (e.g., 1,000 Ω ±0.01%).
- Set the multimeter to the closest range.
- Connect the resistor, and check the reading.
- Adjust the resistance calibration control if available.
6. Document The Results
Write down every test and adjustment. Good records help you track trends and prove your meter is accurate.
7. Final Check
After adjusting all ranges, test again. Calibration can affect other ranges, so a final check is necessary.
Common Calibration Mistakes And How To Avoid Them
Even experienced users can make errors during calibration. Here are some pitfalls to watch for:
| Mistake | How to Avoid |
|---|---|
| Ignoring test lead condition | Clean and inspect leads before calibration |
| Calibrating in unstable environments | Choose a room with stable temperature and humidity |
| Not allowing warm-up time | Let the meter rest 30 minutes in the room |
| Using low-accuracy reference sources | Use certified or high-precision standards |
| Skipping final checks | Re-test all ranges after adjustments |
A non-obvious insight: Many users forget that battery voltage inside the multimeter can affect readings, especially in analog meters. Always check and replace batteries before calibration.
Another common oversight is electromagnetic interference from nearby equipment. Turn off or move away from strong electrical devices during calibration to avoid false readings.
Professional Vs. Diy Calibration
Should you calibrate your multimeter yourself or send it to a certified lab?
Diy Calibration
- Pros: Saves money, immediate results, good for non-critical work.
- Cons: Limited accuracy, not traceable to standards, may miss hidden faults.
Professional Calibration
- Pros: Full accuracy, certified traceability, detailed reports.
- Cons: Costs more, takes time (shipping, waiting for results).
If you work in an industry where traceability is required (like aerospace, healthcare, or manufacturing), only a certified lab calibration is acceptable.
How Often Should You Calibrate?
The calibration interval depends on:
- Frequency of use: Daily use means more frequent calibration.
- Environment: High temperature, humidity, or vibration can affect stability.
- Criticality: For safety or compliance, calibrate more often.
A typical schedule:
- Home or hobby: Every 12 months
- Professional lab: Every 3–6 months
- Critical industry: As specified by regulations
You should also calibrate after any strong physical shock, exposure to moisture, or if you notice strange readings.
Signs Your Multimeter Needs Calibration
Watch for these warning signs:
- Readings drift over time.
- Comparing with another meter gives different results.
- Unstable or flickering display.
- Battery warning light is on.
- Physical damage to case or leads.
If you see any of these, calibrate immediately.
Advanced Calibration: Using A Multimeter Calibrator
For higher accuracy, a multimeter calibrator is used. It’s a laboratory device that creates standard voltages, currents, and resistances. Here’s how it works:
- Set the calibrator to a known value (like 10.000V).
- Connect your multimeter.
- Compare and adjust the meter as needed.
Professional calibrators can test all ranges and functions, including frequency and capacitance in advanced meters. If you’re serious about electronics, investing in a used calibrator can be worthwhile.
Calibration Records And Certificates
Maintaining good records is part of quality control. After calibration:
- Record date, results, and adjustments.
- Note the reference standards used.
- Keep certificates from professional calibrations.
This helps with troubleshooting, resale value, and compliance audits.
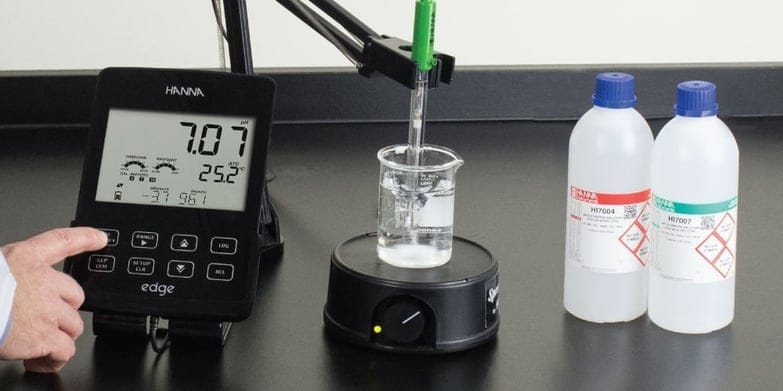
Credit: blog.hannainst.com
When To Replace Instead Of Calibrate
Calibration can’t fix every problem. Replace your multimeter if:
- It fails calibration by a large margin.
- There’s visible damage to the case or display.
- Buttons or switches don’t work reliably.
- The display is always unstable.
For most users, a mid-range digital multimeter is affordable to replace every 3–5 years if used heavily.
Calibration In Industrial And Educational Settings
In factories, power plants, and schools, calibration is more than a personal task—it’s a legal requirement. Devices are marked with calibration stickers showing the last and next calibration dates. Auditors may check these stickers to ensure safety and compliance.
For educational labs, regular calibration teaches students the importance of measurement accuracy and good laboratory practice.
Practical Tips For Accurate Calibration
Here are some expert tips that can make a big difference:
- Warm up your multimeter: Let it run for 15–30 minutes before calibration for stable readings.
- Avoid static electricity: Discharge yourself before touching the meter or reference sources.
- Use shielded cables: This reduces noise in sensitive measurements.
- Check all ranges: Don’t just calibrate one function—verify AC and DC voltage, current, and resistance.
- Label your meter: After calibration, add a label with the date and your initials.
Real-world Example: Calibration Saves The Day
A technician was repairing a medical device and kept seeing a voltage that was too high. After two hours of work, he realized his multimeter hadn’t been calibrated in over a year. He recalibrated it, and the readings matched the circuit’s real values—saving both time and money.
Additional Resources
For more details on calibration standards and methods, you can read the official guide at Wikipedia: Calibration.
Frequently Asked Questions
How Do I Know If My Multimeter Is Accurate?
You can compare it with a known reference source or another calibrated meter. If readings are off by more than the specified tolerance (usually listed in the manual), calibration or repair is needed.
Can I Calibrate A Multimeter Without Special Equipment?
For basic checks, you can use precision reference resistors or batteries. For full calibration, you need certified sources or send it to a professional lab.
How Long Does Multimeter Calibration Take?
A basic DIY calibration may take 30–60 minutes. Professional calibration in a lab can take a few days including shipping and paperwork.
Is Calibration Required For All Multimeters?
For casual hobby use, calibration is recommended but not required. For professional, industrial, or safety-critical use, regular calibration is essential and often required by law.
What If My Multimeter Cannot Be Calibrated?
If your meter cannot be adjusted to match reference values, or if it fails by a wide margin, it’s time to replace it. This ensures you always get safe and reliable measurements.
A properly calibrated multimeter is the foundation of every successful electronics or electrical job. With the right tools and regular checks, you can trust your measurements and avoid costly mistakes.

Credit: www.youtube.com
