Have you ever needed to fasten materials with rivets but didn’t have a rivet gun on hand? It can feel frustrating when the right tool is missing, especially if you’re in the middle of a project.
But here’s the good news: you don’t always need a rivet gun to get the job done. With a few simple tools you probably already have and some easy techniques, you can install rivets securely and keep your project moving forward.
Keep reading, and you’ll discover straightforward, practical methods to install rivets without a rivet gun—no stress, no extra trips to the hardware store. Your DIY skills are about to get a whole lot sharper!
Credit: www.yukerivet.com
Tools Needed
Installing rivets without a rivet gun requires some basic tools. These tools help you secure the rivet tightly and safely. You can find most of these items at home or in a simple toolbox. Preparing the right tools makes the job easier and faster.
Basic Household Items
A hammer is essential for setting rivets without a gun. Choose a heavy hammer with a flat face for best results. A hard, flat surface like a sturdy table or concrete floor works well as a base. You will also need a small metal punch or nail to create a hole if one is not already made.
Use a pair of pliers to hold the rivet steady during installation. A washer can help distribute pressure evenly and protect the material. Having a ruler or measuring tape ensures you place rivets accurately.
Alternative Tools For Riveting
A socket wrench or a piece of pipe can replace a rivet gun’s mandrel. These tools help pull the rivet tight when used with a hammer. A block of wood or metal can act as a bucking bar to support the rivet’s back side.
Some people use a screwdriver with a flat head to help push the rivet through the hole. Another option is a clamp to hold materials firmly together while setting rivets. These alternative tools can work well if you don’t have specialized riveting equipment.
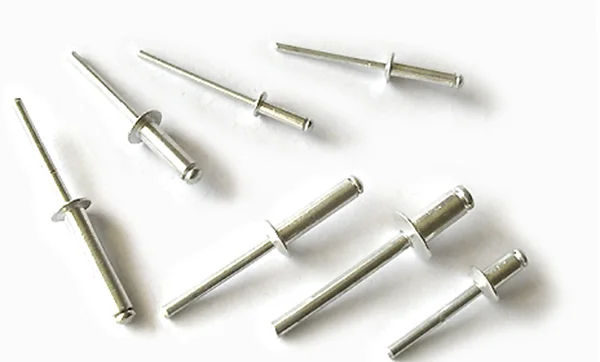
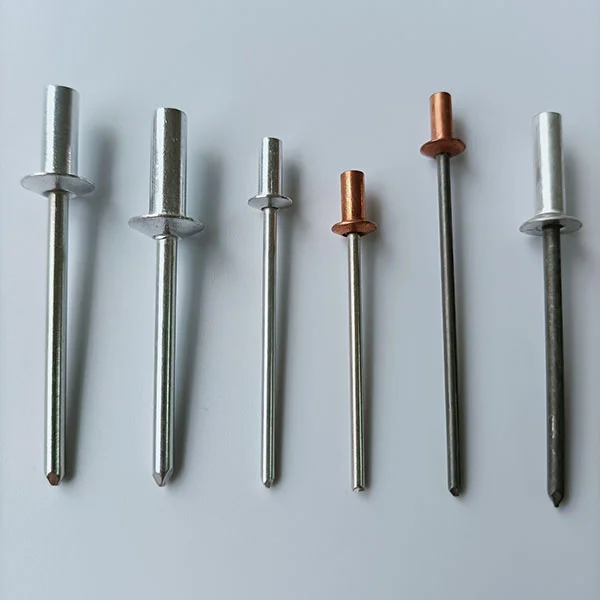
Types Of Rivets
Rivets join materials firmly and last long. Different types suit various tasks. Knowing each type helps in choosing the right one for your project. This guide covers common rivet types for easy installation without a rivet gun.
Solid Rivets
Solid rivets are simple and strong. They have a smooth cylindrical body with a head. You insert them into holes and hammer the tail to form a second head. This process clamps materials tightly. Solid rivets need a hard surface and a hammer to install.
Pop Rivets
Pop rivets, also called blind rivets, work in tight spaces. They have a hollow body and a pin inside. Pulling the pin expands the rivet body to hold materials. Pop rivets need a special tool but can sometimes be set with pliers or hand tools carefully.
Rivet Nuts
Rivet nuts act like threaded inserts. They fit into thin materials and create strong screw threads. Tightening a screw pulls the rivet nut to clamp the material. You can install them using a bolt, nut, and wrench without a rivet gun.
Preparing Materials
Preparing materials is the first step to install rivets without a rivet gun. Proper preparation ensures a strong and neat finish. You need to gather the right tools and prepare the surfaces correctly before starting.
Two main tasks are drilling holes and cleaning surfaces. These steps help the rivets fit well and hold firmly.
Drilling Holes
Use a drill bit that matches the rivet size. This prevents loose or tight fitting. Mark the spots carefully where you want to place the rivets.
Drill straight holes through both materials. Avoid angled holes for a secure hold. Clear any debris from the holes after drilling.
Cleaning Surfaces
Remove dust, dirt, and grease from the areas around the holes. Use a clean cloth or a brush for this. Clean surfaces help rivets stick better and last longer.
Make sure both sides of the materials are dry before setting the rivets. Moisture can weaken the bond and cause rust over time.
Credit: www.yukerivet.com
Using A Hammer And Hard Surface
Using a hammer and a hard surface to install rivets offers a simple, tool-free solution. This method works well for small projects or when you lack specialized tools. It requires patience and care to get a strong, lasting hold.
Start by placing the rivet into the pre-drilled hole. Then position the workpiece on a sturdy, flat surface like a metal anvil or a thick wooden block. The hard surface supports the rivet during setting.
Setting Solid Rivets
Hold the rivet firmly in place. Use the hammer to strike the rivet head with steady, controlled taps. The goal is to flatten the rivet tail on the opposite side, locking the materials together.
Keep hitting the rivet tail until it spreads out and forms a tight seal. Avoid hitting too hard at once to prevent damaging the material or the rivet.
Tips For Safety And Precision
Wear safety glasses to protect your eyes from metal shards or debris. Use gloves to shield your hands while handling the rivet and hammer. Secure your workpiece to prevent slipping during hammering.
Strike the rivet straight on to avoid bending or misaligning it. Check your progress often to ensure the rivet is setting properly. Stop once the rivet tail is firmly flattened and the joint feels solid.
Pliers And Vice Grip Method
The pliers and vice grip method offers a simple way to install rivets without a rivet gun. This technique uses basic tools you likely have at home. It works well for small jobs and quick fixes. The method involves holding and compressing the rivet manually. This ensures the rivet secures your materials firmly.
Securing Pop Rivets
Start by placing the rivet through the holes in your materials. Use pliers to hold the rivet’s body tightly. Next, grip the rivet stem with vice grips. Slowly pull the stem while keeping the body steady. This action pulls the rivet tight and clamps the materials together. Keep pulling until the rivet stem snaps off. The rivet should now hold the pieces firmly in place.
Deforming Rivet Stems
Deforming the rivet stem helps lock the rivet in place. Use the vice grips to squeeze the stem after pulling it. This will flatten and spread the stem inside the materials. The deformed stem prevents the rivet from slipping out. Avoid squeezing too hard or you may break the rivet. Take small, steady steps to deform the stem properly. This ensures a strong, lasting hold without special tools.
Diy Bucking Bar Alternatives
Installing rivets without a rivet gun requires a solid backing tool called a bucking bar. This tool supports the rivet’s tail during hammering. Without a proper bucking bar, the rivet may not set correctly. You can create DIY alternatives that work well for small projects. These options save money and use items you likely have at home.
Choosing the right DIY bucking bar alternative helps ensure a strong rivet connection. The key is to find a hard, heavy object with a smooth surface. This provides the right resistance to form the rivet properly. Below are practical ideas for making your own bucking bar.
Creating A Makeshift Bucking Bar
Use a piece of thick metal or steel bar as a bucking bar substitute. It should be heavy enough to absorb hammer impact. Shape the metal with smooth, flat edges to avoid damaging the rivet. Avoid sharp or rough surfaces that can mar your project. A small block of steel or a heavy wrench can work well. Hold it firmly against the rivet’s tail while striking the head with a hammer. This method mimics the action of a real bucking bar.
Using Household Items Effectively
Look for solid, heavy objects around your home. A clean, flat hammer head can sometimes serve as a backing tool. Use a thick glass bottle or a sturdy metal pipe. Place the object behind the rivet to support it during hammering. Avoid fragile or soft items that may break or deform. Keep a towel or cloth nearby to protect delicate surfaces. These household items offer an easy fix when you lack professional tools.
Avoiding Common Mistakes
Avoiding mistakes during rivet installation without a rivet gun helps achieve strong, lasting results. Simple errors can weaken the hold or damage materials. Careful steps keep your project neat and secure. Read on for key tips to prevent common problems.
Preventing Rivet Damage
Use the right rivet size for your materials. Oversized rivets can crack or split the surface. Undersized rivets may not hold firmly. Work on a hard, stable surface to avoid bending the rivet. Tap gently at first to control pressure. Avoid hitting too hard, which can deform the rivet head.
Ensuring Secure Fastening
Align the rivet hole and materials perfectly before setting the rivet. Misalignment weakens the joint and looks unprofessional. Use a backing tool or a sturdy object to support the rivet tail. This prevents the rivet from pushing through or loosening. Strike the rivet evenly to create a tight seal. Check the rivet after setting to confirm it does not move.
Credit: www.youtube.com
When To Consider Rivet Alternatives
Choosing the right fastener matters when you lack a rivet gun. Alternatives to rivets can save time and effort. They also suit projects where rivets may not work well. Knowing when to pick other options helps you finish tasks smoothly.
Self-clinching Fasteners
Self-clinching fasteners press into thin metal sheets. They create strong threads without extra tools. These fasteners hold tightly and resist pull-out forces. Use them for metal parts needing removable screws. Installation only requires a simple press or hammer.
They work well with stainless steel and aluminum. Self-clinching fasteners avoid the need for welding or rivet guns. This option suits electronics, automotive, and aerospace projects. They provide a clean look with no visible heads.
Pem Hardware Options
PEM hardware includes nuts and studs that attach firmly. These fasteners embed into metal and offer strong hold. PEM options fit where welding or riveting is hard. They allow easy assembly and disassembly with standard tools.
Install PEM hardware using a press or special tool. They are common in sheet metal fabrication and industrial uses. PEM fasteners reduce damage to thin materials. Choose PEM parts for durability and simple installation without a rivet gun.
Frequently Asked Questions
How To Set Rivets Without A Rivet Gun?
Drill a hole for the rivet. Insert the rivet. Hold the head with pliers. Hammer the tail to secure it.
Can You Install Rivets With A Hammer?
Yes, you can install rivets with a hammer. Place the rivet in a hole, hold a bucking bar behind it, and hammer the head. This flattens the rivet, securing materials together without a rivet gun.
Can You Set Rivets By Hand?
Yes, you can set rivets by hand using a hammer and a hard surface. This method flattens rivets effectively for functional projects.
What Can I Use In Place Of A Rivet?
You can use bolts, screws, nuts, self-clinching fasteners, or PEM hardware instead of rivets. These alternatives offer removable and reusable fastening options.
How Can I Install Rivets Without A Rivet Gun?
Use a hammer and a hard surface to set rivets by striking them firmly in a pre-drilled hole.
Conclusion
Installing rivets without a rivet gun is simple with basic tools. Use a hammer and a solid surface to secure rivets tightly. This method works well for small projects or quick fixes. Always make sure the materials are aligned before hammering.
Practice on scrap pieces to get the right force. With patience, you can achieve strong, durable joints. Avoid rushing to prevent damage to your materials. This easy technique saves money and time when a rivet gun is unavailable. Try it yourself and see how effective it can be.
Related reading: Best Rivet Guns.
