If you want to measure a battery, power supply, or DC circuit, How to Test DC Voltage With a Multimeter is one of the most useful skills to learn. The good news is that the process is simple once you know where to place the probes and what the numbers mean.
This guide shows you how to check DC voltage safely, how to choose the correct multimeter setting, and how to read the result without guesswork. You will also learn common mistakes, how to avoid false readings, and what different voltage values usually tell you about a battery or device.
Whether you are checking a 1.5V AA battery, a 12V car battery, or a small DC adapter, the same basic method applies. The details matter, though, and a few small errors can give confusing results.
What DC voltage means and why it matters
DC voltage means direct current voltage. In simple words, it is the electrical pressure that flows in one direction only. Batteries, USB chargers, solar panels, and many small electronics use DC power.
This matters because voltage tells you if a power source is working, weak, or dead. A battery can still power a device at a low level, but the voltage may already be too low for reliable use. That is why a battery that “kind of works” is often not actually healthy.
One helpful detail many beginners miss is this: voltage alone does not prove a battery is perfect. A battery may show a normal voltage with no load, but drop badly when the device starts drawing current. That is why voltage testing is a first check, not the final answer in every case.
DC voltage is also different from AC voltage. AC changes direction back and forth, while DC stays in one direction. If you choose the wrong setting on your multimeter, the reading will be wrong or may show nothing useful.
Common DC sources you may test
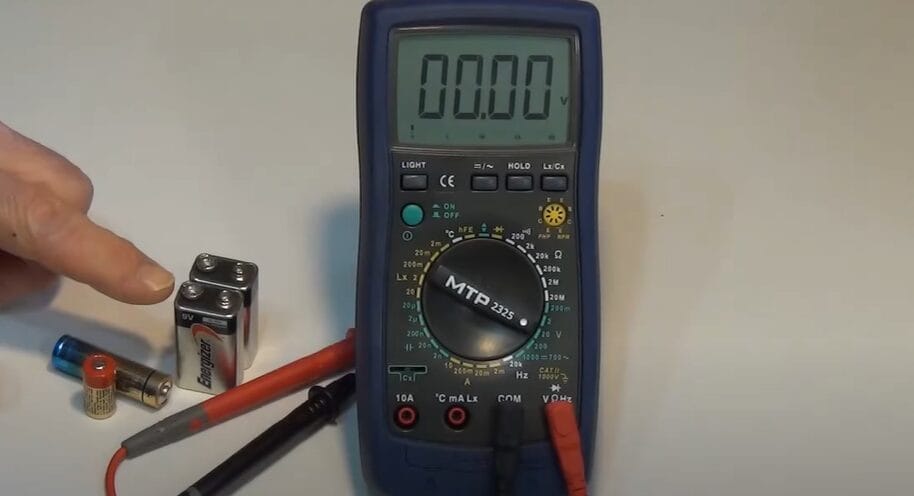
- AA, AAA, C, D, and 9V batteries
- 12V car and motorcycle batteries
- USB chargers and power banks
- Solar panels and charge controllers
- Small DC motors and adapters
What you need before you start
You do not need advanced tools. A basic digital multimeter is enough for most DC voltage checks. Still, using it the right way matters more than buying a fancy model.
Before testing, make sure the meter is working, the probes are in the correct ports, and the device or battery is easy to reach. If the area is dark or cramped, add light first. Most mistakes happen because people rush.
Here is a simple checklist of what helps:
- A digital multimeter with DC voltage mode
- Red and black test leads
- The battery, adapter, or circuit you want to test
- Good lighting
- Basic safety awareness
For battery and electrical safety basics, the U.S. Consumer Product Safety Commission has helpful general guidance on safe consumer product use and battery handling through its official electrical safety information.
Know the meter ports first
Most multimeters have three common input ports. The black probe usually goes in COM, which stands for common. The red probe goes in the port marked V, Ω, or sometimes VΩmA.
Do not place the red lead in the high-current amp port unless you are measuring current. That is a common mistake. It can blow the internal fuse or give you a dead meter for voltage testing.
How to Test DC Voltage With a Multimeter step by step
The basic process is simple: set the meter to DC voltage, touch the probes to the two points you want to test, and read the number. The key is to do each step in order.
- Turn the multimeter on.
- Plug the black probe into COM.
- Plug the red probe into the V port.
- Set the dial to DC voltage, usually marked with V and a straight line with dotted lines under it.
- If your meter is not auto-ranging, choose a range above the expected voltage.
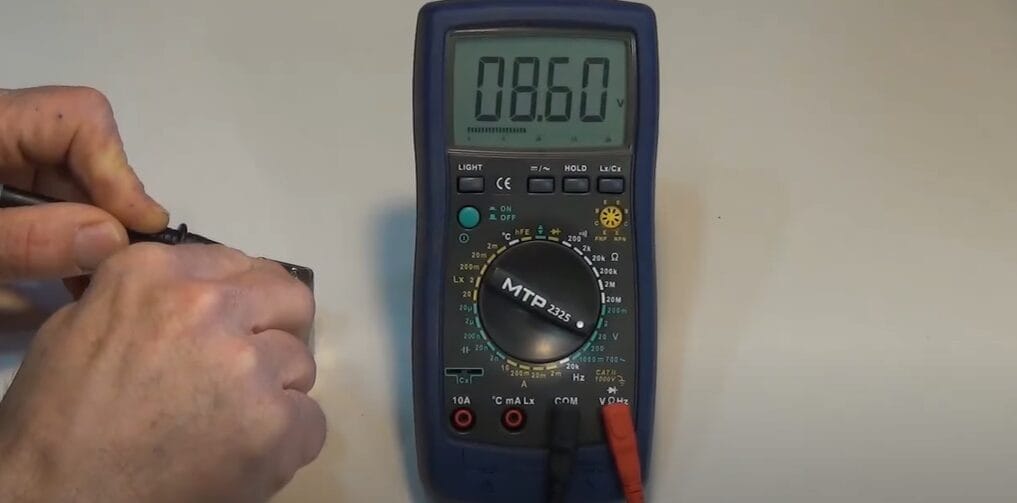
- Touch the black probe to the negative side and the red probe to the positive side.
- Read the display.
If your meter is auto-ranging, it will select the range for you. If it is manual, choose a range such as 20V for a 12V battery or 2V for a 1.5V battery. Using a range that is too low often shows an overload message, while a range that is too high may reduce display detail.
When you place the probes correctly, a positive number appears on the screen. If the probes are reversed, many digital meters simply show a minus sign. That does not mean the voltage is wrong. It usually means the probe polarity is swapped.
Step 1: Identify the test points
For a battery, the positive terminal is usually marked + and the negative terminal is marked –. On a DC adapter or circuit board, labels may be less obvious. In that case, look for printed markings near the terminals or connector.
On a coaxial power plug, the center pin is often positive, but not always. Never assume. Check the label on the adapter or the device manual if the polarity is unclear.
Step 2: Choose the correct DC setting
Most multimeters show DC voltage as V with a straight line over a dotted line. AC voltage usually has a wavy line. This symbol matters more than the number next to the dial.
If you test a 12V battery on AC mode, you may get a confusing near-zero reading. If you test household AC on DC mode, the reading will also be wrong. The meter does exactly what you tell it to do, not what you mean.
Step 3: Start with a higher range if needed
If your multimeter is manual-range, start above the voltage you expect. For example, use the 20V range for common 1.5V, 9V, and 12V tests. If you are checking a 24V system, choose 200V or the next suitable range.
Starting too low can show OL, 1, or another overload indicator. Starting too high is safer than starting too low. You can always lower the range later for a sharper reading.
Step 4: Place the probes on the right terminals
Put the black probe on the negative point and the red probe on the positive point. Keep steady contact. If the tips slip, the reading may jump or disappear.
On battery terminals, touch only the metal contact area. On exposed wires or boards, avoid letting the probes touch each other. That can short the circuit.
Step 5: Read and record the number
The display may show 1.58, 12.65, 19.8, or another value. Record the number exactly if you need to compare it later. A difference of just 0.2V can matter in low-voltage systems.
Do not round too quickly. A battery at 12.6V is different from one at 11.9V, even though both are “around 12 volts.” Small differences often explain why devices work sometimes and fail at other times.
How to interpret the reading correctly
A voltage number only means something when you compare it to the expected value. A 1.5V battery rarely reads exactly 1.500V. A healthy alkaline AA battery may read around 1.55V when fresh and closer to 1.2V when weak under load.
For a 12V lead-acid battery, the resting voltage is more useful than a quick guess. A fully charged battery often sits near 12.6V to 12.8V. Around 12.4V suggests partial charge, and near 12.0V or lower usually means the battery is weak or discharged.
The voltage reading does not always tell the whole story. A battery may look fine at rest and still fail under load. That is one reason mechanics and technicians often test both voltage and load performance.
Here is a quick reference for common DC sources:
| Source | Typical healthy reading | What low voltage may mean |
|---|---|---|
| AA alkaline battery | About 1.5V fresh | Near 1.2V or less can be weak |
| 9V battery | About 9.4V to 9.6V fresh | Near 8.0V or less may be near end of life |
| 12V lead-acid battery | About 12.6V to 12.8V fully charged | Near 12.0V or less is often discharged |
| USB power | About 5.0V | Much below 4.8V can cause device problems |
One non-obvious point: a charger can show the right voltage with no load but fail when a device is plugged in. That means the adapter may be weak even if the no-load measurement looks normal. This is common with cheap wall adapters and aging power supplies.
Credit: toolsweek.com
Common mistakes that give wrong readings
Most bad results come from a small number of simple errors. If your number looks strange, check these first before blaming the meter.
Using the wrong mode
DC and AC are easy to mix up. The symbols look different, but if you rush, it is easy to miss them. Always confirm the meter is on DC voltage before testing batteries or DC adapters.
Putting the red lead in the wrong port
If the red probe is in the current port, the meter may not measure voltage correctly. In some meters, this mistake can also damage the fuse. Make it a habit to leave the red lead in the voltage port unless you are measuring current on purpose.
Reading only one probe point
Voltage is measured between two points. Touching just one probe to a terminal does not tell you anything useful. You need both probes in place to complete the measurement path.
Letting the probes slip
Slipping probes can create unstable readings or short adjacent contacts. This is especially risky on small boards or narrow battery terminals. Use steady hands and good lighting.
Ignoring polarity
If the reading has a minus sign, the meter is usually telling you the probes are reversed. The value may still be correct in magnitude, but the polarity is backward. Swap the probes if you want a positive display.
Another subtle issue is dirt or corrosion on battery terminals. A corroded terminal may read oddly because the probe does not make good contact. Clean the contact point first if the number jumps around or seems too low.
Special cases: batteries, cars, and small electronics
Different DC sources need slightly different testing habits. The meter method stays the same, but the expected values and safe approach change.

Credit: fluke.com
Batteries
For loose batteries, measure directly on the terminals. For battery packs, check the main output terminals only if you know the polarity. Some rechargeable packs have protection circuits, so a low reading may mean the pack is protected rather than fully empty.
Fresh batteries can also read higher right after charging or right after removal from a charger. Letting them rest for a short time often gives a more stable reading.
Car and motorcycle batteries
Test at the battery posts with the engine off for a resting reading. A healthy 12V battery should usually be above 12.4V at rest. If the engine is running, you may see around 13.5V to 14.8V from the charging system.
That running voltage can help you spot alternator issues. If the engine is on and the reading stays near battery resting voltage, the charging system may not be working properly. If it is far above 15V, overcharging may be a concern.
USB and low-voltage electronics
USB power is typically 5V, though many modern chargers and devices negotiate other voltages. If you are only checking the basic USB output, around 5V is normal. A much lower reading can explain charging failures.
For small boards, be careful not to bridge contacts with the probe tips. Some boards have tiny pads close together, and one slip can short the circuit. If possible, use probe tips with insulated covers or test clips.
How to test safely and avoid damage
DC voltage testing is low risk compared with higher-power electrical work, but safe habits still matter. The main goal is to avoid short circuits, probe slips, and accidental damage to the meter.
Never test voltage with the meter set to current. That can create a short path through the meter. Also avoid touching bare metal probe tips with both hands at once, especially near charged batteries or live circuits.
If you are testing a car battery, keep metal jewelry away from the terminals. A ring or watch can become a problem if it bridges a connection. Small batteries can also spark if shorted, so treat them with respect.
For more official battery and consumer product safety basics, check the Consumer Product Safety Commission guidance before testing unfamiliar devices.
When to stop and inspect before testing
- The battery case is swollen, cracked, or leaking
- The wires are frayed or exposed
- The connector is hot or smells burnt
- The meter leads are damaged
- You are unsure which terminal is positive
If any of these signs appear, pause and inspect the setup first. A five-second check can prevent damage that takes hours to fix.
Quick troubleshooting when the meter shows the wrong result
If the reading looks wrong, start with the most likely causes. In most cases, the problem is not the meter itself.
- Check the mode. Make sure the dial is on DC voltage, not AC or current.
- Check the probe ports. Black should be in COM, red should be in the voltage port.
- Check polarity. A negative sign usually means the probes are reversed.
- Check contact quality. Dirty terminals or loose probe contact can distort readings.
- Check the range. If the meter is manual-range, choose a higher range first.
- Test a known source. Try a fresh battery to confirm the meter works normally.
If the meter still shows nothing useful, the battery or circuit may truly be dead. On the other hand, if the reading jumps around, the contact point may be unstable or the source may be under load. That is why a second test on a known-good battery is so helpful.
One non-obvious insight: some digital meters respond slowly to unstable DC sources. If you test a charger with pulsing output or a weak battery under load, the number may bounce. This does not always mean failure, but it does mean the source is not steady.
What to do after you get the reading
The number you see should guide your next step. If the voltage is normal, the problem may be somewhere else in the device, such as a fuse, switch, connector, or load issue.
If the voltage is low, charge the battery, replace it, or inspect the power source. If a charger or adapter is low, test another outlet or another device to narrow down the cause. Good troubleshooting is about separating source problems from load problems.
If you are keeping records, write down the date, source, and reading. That makes it easier to see patterns over time. A battery that drops 0.3V in a few days may be losing charge even if it still works today.
Credit: toolsweek.com
Final tips that make testing easier
Use the meter often enough that the controls feel familiar. A multimeter is much easier to use when you already know where the dial, ports, and symbols are. The more often you test, the faster you will spot a bad reading.
Also, trust the process more than the guess. People often assume a battery is good because a device turns on, or bad because it looks old. The meter gives you real data, and that is what makes How to Test DC Voltage With a Multimeter such a useful skill.
Remember the main habits: choose DC mode, use the correct ports, match the probes to the polarity, and compare the result to the expected range. Those four steps solve most testing problems in minutes, not hours.
If the DC reading is coming from a vehicle battery or charging system, also read how to test a 12V battery with a multimeter. If voltage looks correct but the circuit still fails, how to test a wire with a multimeter can help you find hidden breaks or high resistance.
Safety note: DC voltage testing is done on an energized circuit, but resistance and continuity tests are not. Never switch the meter to ohms or continuity while the battery or power supply is still connected.
FAQs
1. What symbol should I look for on the multimeter for DC voltage?
Look for V with a straight line and dotted line under it. That symbol means DC voltage. AC voltage usually has a wavy line instead.
2. Can I test a battery while it is still in a device?
Yes, if you can safely reach the terminals or test points. Just make sure the probe tips do not short nearby contacts. Testing in place can show whether the battery is reaching the device under normal conditions.
3. Why does my meter show a minus sign?
A minus sign usually means the probes are reversed. The voltage value is still there, but the polarity is backward. Swap the red and black probes to see a positive reading.
4. What is a normal reading for a 12V battery?
A healthy 12V lead-acid battery often reads about 12.6V to 12.8V at rest. Around 12.4V may mean partial charge, and near 12.0V or lower usually means it is weak or discharged.
5. Do I need an expensive multimeter to test DC voltage well?
No. A basic digital multimeter is enough for most DC voltage checks. Accuracy, clear display, and correct use matter more than a high price tag for this task.
