A burst pipe in your home can quickly turn into a stressful situation. Water may flood your floors, damage walls, and even cause electrical hazards. Acting fast is essential, but so is doing the job right. Whether you’re a DIY enthusiast or just want to control the problem until a plumber arrives, understanding how to repair a burst pipe can save you money, time, and headaches.
This guide covers each step, explains tools and materials, and includes practical advice to help you handle a burst pipe confidently.
Understanding The Causes Of Burst Pipes
Pipes usually burst when water inside them freezes, expands, and puts pressure on the pipe wall. However, freezing is not the only reason. Other common causes include:
- Corrosion: Old pipes, especially those made from steel or iron, can rust over time and weaken.
- High water pressure: If the pressure is too high, it can stress the pipe and cause it to crack.
- Physical impact: Accidentally hitting a pipe during repairs or renovations can create weak spots.
- Poor installation: Pipes not installed correctly may have loose joints or improper support.
Knowing the cause helps prevent future bursts, so examine your system for these risk factors.
Immediate Steps When A Pipe Bursts
When you discover a burst pipe, quick action is critical. Here’s what you should do immediately:
- Turn off the main water supply. This stops water from flooding your home.
- Turn off electricity in the affected area if water is near electrical outlets or appliances.
- Drain the faucets. Open cold taps to release any remaining water in the pipes and reduce pressure.
- Move belongings. Remove valuable items and furniture from the area to prevent water damage.
- Catch leaking water. Use buckets or towels to collect water and minimize spread.
These steps limit the damage and make repair work safer and easier.
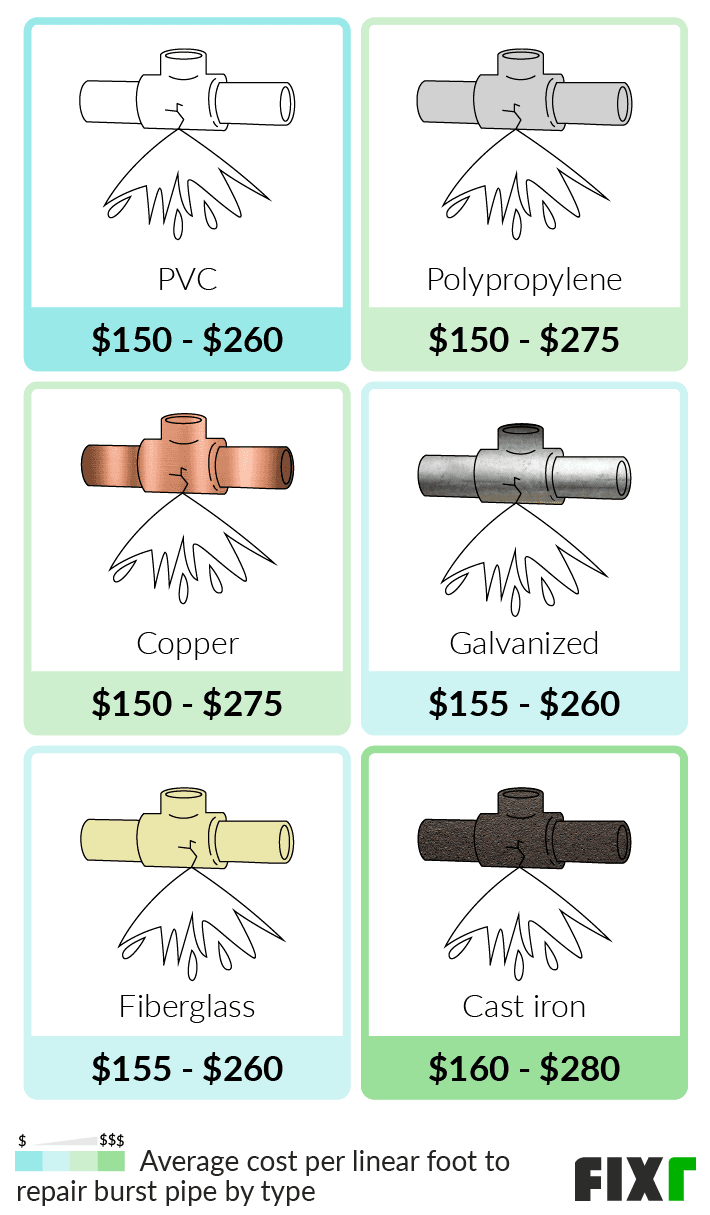
Credit: www.fixr.com
Tools And Materials Needed For Repair
Before you start repairing a burst pipe, gather the necessary tools and materials. Here’s a helpful overview:
| Tool/Material | Purpose |
|---|---|
| Pipe cutter or hacksaw | Cutting the damaged pipe section |
| Bucket/towels | Collecting water, keeping the area dry |
| Pipe repair clamp | Temporary or permanent sealing |
| Epoxy putty | Sealing small cracks or holes |
| Replacement pipe & fittings | For replacing the burst section |
| Adjustable wrench, pliers | Tightening connections |
| Sandpaper or steel wool | Cleaning pipe ends for better seals |
| Measuring tape | Measuring the replacement section |
| Protective gloves & goggles | Personal safety |
Having everything ready before you begin means less time with water off and less stress during the repair.
Assessing The Damage
Not every burst is the same. Some are small cracks, while others may be large splits or completely broken pipes. Carefully examine the affected area:
- Size of the hole: Small leaks can often be patched, while large holes may require replacing a section.
- Location: Pipes inside walls or under floors are harder to access and may need special tools or professional help.
- Pipe material: Copper, PVC, and steel pipes each need different repair methods.
Check the pipe’s condition around the burst. If it’s corroded or very old, you may need to replace a longer section, not just the damaged part.
Temporary Fixes For Burst Pipes
If you can’t get professional help immediately, a temporary fix can buy you time and prevent more water damage.
Using A Pipe Repair Clamp
A pipe repair clamp is a quick way to seal a burst. It consists of a rubber sleeve and a metal clamp.
- Dry the pipe with a towel.
- Place the rubber part over the hole.
- Tighten the metal clamp around it.
This fix works for most pipe materials and can last a few days if installed tightly.
Applying Epoxy Putty
Epoxy putty is a fast-setting material that can seal small cracks or holes.
- Clean and dry the area.
- Knead the putty until soft and stick it over the hole.
- Press firmly and shape it to cover the leak.
- Let it cure (usually 30-60 minutes).
Remember, these are temporary solutions. Use them only until you can do a permanent repair.
Permanent Pipe Repair Methods
For a lasting solution, it’s best to replace the damaged section. The method depends on the pipe material.
Repairing A Copper Pipe
- Cut out the damaged section using a pipe cutter or hacksaw. Cut at least 1 inch beyond the visible damage on both sides.
- Clean pipe ends with sandpaper to remove burrs and dirt.
- Fit a copper coupling or a push-fit connector (like SharkBite) onto each end.
- Insert the new pipe piece and secure connections. For soldered joints, heat and apply solder as needed.
Push-fit connectors are simpler for beginners and don’t require soldering.
Repairing A Pvc Or Plastic Pipe
- Cut out the damaged section using a PVC cutter or hacksaw.
- Dry fit the new piece and connectors to ensure correct length.
- Apply PVC primer and cement to the pipe ends and inside the connectors.
- Insert and twist the new section into place, holding for 30 seconds until set.
Wait at least 1 hour before turning water back on, as the cement needs time to cure.
Repairing A Steel Pipe
Steel pipes often use threaded joints.
- Unscrew the damaged section with a wrench.
- Clean threads and apply pipe joint compound or Teflon tape.
- Install the new section and tighten securely.
Steel pipes are heavy and may be rusty, so wear gloves and use extra caution.
Testing The Repair
Once the permanent repair is complete, it’s important to check for leaks.
- Turn on water slowly at the main valve.
- Watch the repaired area for several minutes.
- Check for drips or moisture. Even a tiny leak means the repair is not tight enough.
- Run water through nearby faucets to test pressure.
If you see any leaks, shut the water off again and tighten or redo the connection.
Cleaning Up And Preventing Mold
After repairing the pipe, it’s not enough to just let things dry out. Water trapped in walls, floors, or carpets can cause mold and mildew. Here’s what you should do:
- Use fans and dehumidifiers to dry the area quickly.
- Remove wet drywall or insulation if the leak was inside a wall.
- Disinfect surfaces with a bleach solution to kill bacteria.
- Check for hidden moisture with a moisture meter if possible.
Mold can form within 24-48 hours, so act quickly to dry everything thoroughly.
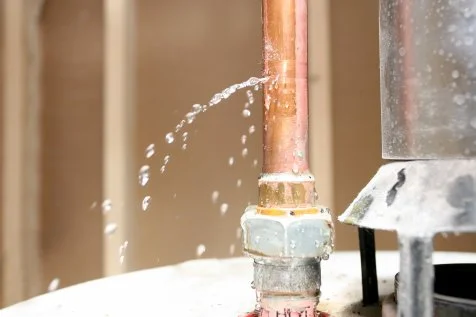
Credit: www.hgtv.com
Common Mistakes To Avoid
Even careful DIYers sometimes make errors. Here are common mistakes and how to avoid them:
- Not turning off water and power before starting. This is dangerous and can worsen damage.
- Using the wrong repair method for the pipe material. Always check if your pipe is copper, PVC, or steel.
- Rushing the job. Take time to clean and dry pipe ends before connecting.
- Not checking for leaks after repair. Always test with water before closing walls or ceilings.
- Ignoring signs of old pipes. If you see rust, corrosion, or repeated leaks, consider replacing more of the system.
Learning from these mistakes can save you from repeated repairs or expensive fixes later.
When To Call A Professional Plumber
Some situations are too complex or risky for a DIY fix. Call a professional if:
- The burst pipe is hard to reach (inside walls, ceilings, or underground).
- The main water line is affected.
- You see electrical problems or water near wiring.
- The damage is severe, or multiple pipes are affected.
Professional plumbers have the expertise and tools to handle major repairs safely and quickly. If you’re unsure, it’s always better to ask for help than risk further damage.
Cost Comparison: Diy Vs. Professional Repair
Understanding the cost difference can help you decide whether to repair yourself or call a plumber.
| Repair Option | Estimated Cost | Time Required |
|---|---|---|
| DIY (materials only) | $20 – $50 | 1-3 hours |
| Professional plumber | $150 – $500+ | 1-2 hours (plus wait time) |
| Water damage repair | $1,000 – $4,000 | Several days |
DIY is much cheaper but only recommended for small, accessible leaks. Professional help is best for complex cases.
Preventing Burst Pipes In The Future
Prevention is often easier and cheaper than repair. Here are some effective ways to protect your pipes:
- Insulate exposed pipes. Use foam pipe insulation in cold areas like basements and attics.
- Keep heat on during cold weather. Even when you’re away, keep your home above freezing.
- Let faucets drip in extreme cold to keep water moving.
- Check water pressure and install a pressure regulator if necessary.
- Replace old pipes before they fail, especially if you have galvanized steel or aging copper.
- Seal cracks in walls to keep out cold air near pipes.
A small investment in prevention can save you from big headaches later.
Non-obvious Insights Homeowners Miss
Many people don’t realize that leaks can start days before a burst actually occurs. If you notice a slight drop in water pressure, stains, or a musty smell, check your pipes right away. Also, after a pipe bursts, the hidden water inside walls or floors can keep causing damage even after the main leak is fixed. Using a moisture meter or infrared camera can help you find wet areas you can’t see.
Another detail: not all insurance policies cover burst pipes, especially if you didn’t maintain your home properly or left heating off during winter. Always check your policy and keep records of repairs and maintenance.
Frequently Asked Questions
How Do I Know If My Pipe Has Burst?
Common signs include a sudden drop in water pressure, water stains on walls or ceilings, unexpected puddles, or the sound of running water when taps are off. If you notice these, check your pipes right away.
Can I Use Duct Tape For A Burst Pipe?
Duct tape can help slow a leak for a few minutes, but it’s not a reliable fix. Water pressure will quickly force the tape off, so use a proper pipe repair clamp or call a plumber as soon as possible.
What Should I Do If The Burst Pipe Is Behind A Wall?
First, turn off the main water supply. Then, cut a small hole in the wall to access the pipe. You may need to remove drywall and insulation. If you’re not comfortable, it’s best to call a professional.
How Long Does A Temporary Repair Last?
Most temporary repairs, like clamps or epoxy putty, last a few days to a week. However, it’s important to replace or permanently repair the pipe as soon as possible to avoid future leaks.
Where Can I Find More Information On Pipe Repair And Home Plumbing?
For more detailed guides and safety advice, you can visit the Family Handyman website, which offers expert tips for homeowners.
Repairing a burst pipe can be challenging, but with the right tools, knowledge, and careful work, you can minimize damage and keep your home safe. By acting quickly, following the steps above, and knowing when to call for help, you’ll be ready to handle most pipe emergencies with confidence.
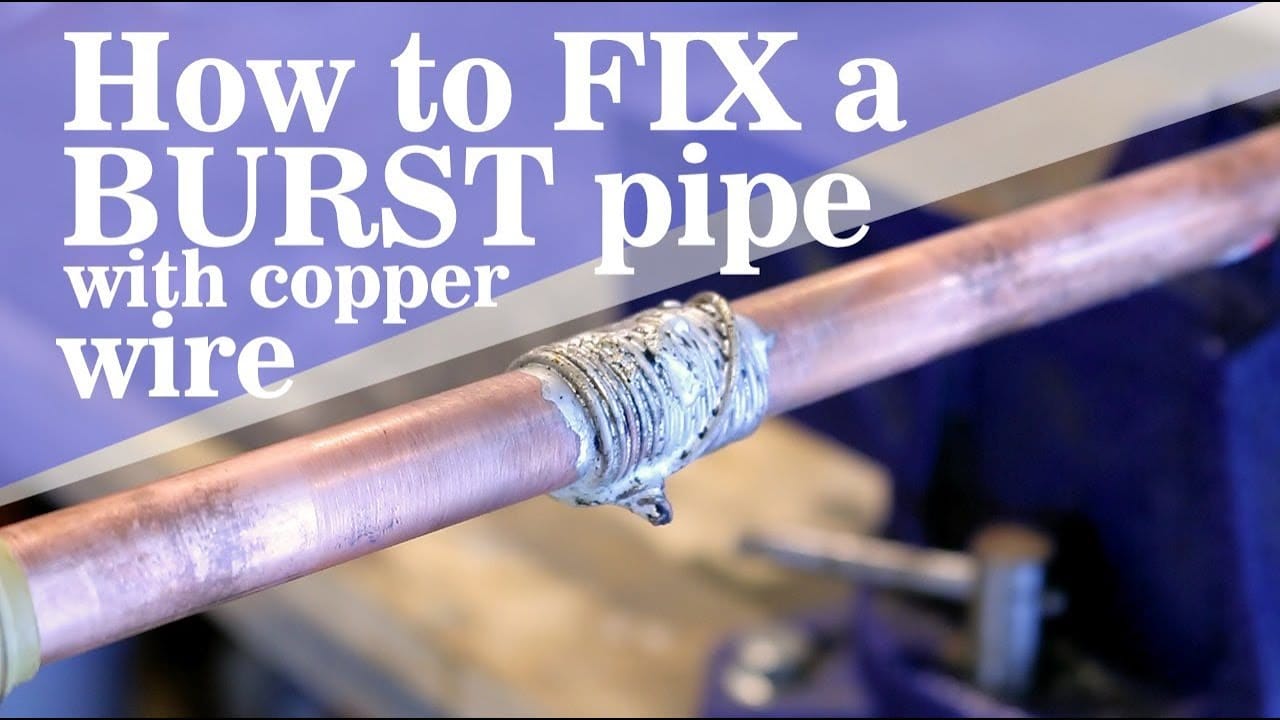
Credit: www.youtube.com
