Are your router bits not cutting as smoothly as they used to? Dull bits can slow down your work, cause rough edges, and even damage your projects.
But before you rush out to buy new ones, what if you could bring your router bits back to life with a simple sharpening process? Imagine saving money, improving your woodworking results, and getting the satisfaction of maintaining your own tools.
In this guide, you’ll discover clear, easy steps to sharpen your router bits right at home. Ready to make your tools sharp and your cuts flawless again? Let’s get started!
Credit: www.paoson.com
Signs Of A Dull Router Bit
Knowing the signs of a dull router bit helps keep your projects clean and precise. Dull bits reduce cutting quality and increase effort. Watch for these common symptoms to decide when to sharpen your router bits.
Burn Marks On Wood
Burn marks appear when the bit cuts too slowly. The dull blade rubs instead of slicing wood. This causes heat buildup and dark spots on your workpiece.
Rough Or Tear-out Edges
A sharp bit produces smooth edges. Dull bits leave rough cuts and tear-outs. The wood fibers split unevenly, ruining the finish.
Increased Router Motor Load
The router motor works harder with dull bits. You may notice the tool slowing down or straining. This means the bit cannot cut efficiently.
Excessive Vibration And Noise
Dull bits cause the router to vibrate more. You might hear unusual sounds during cutting. These signs show the bit is struggling to cut cleanly.
Slow Or Inefficient Cutting
Cutting takes longer with dull bits. You must push harder to get through the wood. This reduces control and increases the chance of mistakes.
Cleaning Router Bits Before Sharpening
Cleaning router bits before sharpening is an essential first step. Dirt, resin, and pitch build-up can block the sharpening process. These substances dull the bit and reduce cutting efficiency. Removing them ensures a smooth and precise sharpen.
Clean bits allow sharpening tools to reach the cutting edges fully. This helps restore sharpness evenly. Skipping cleaning may cause uneven sharpening or damage. Clean bits also last longer and cut better.
Gathering Cleaning Supplies
Start with simple supplies. Use a small brush, like an old toothbrush, to scrub the bits. Choose a cleaning solution such as mineral spirits or a specialized blade cleaner. Have a container ready for soaking bits if needed.
Removing Resin And Pitch
Spray or soak the router bits in the cleaning solution. Let them sit for 30 to 60 minutes to soften the build-up. Use the brush to scrub off softened resin and pitch. Repeat soaking if stubborn residue remains.
Drying And Inspecting Bits
After cleaning, rinse bits with water or wipe with a clean cloth. Dry them thoroughly to prevent rust. Check each bit for any remaining dirt or damage. Clean bits are now ready for sharpening.
Tools Needed For Sharpening
Sharpening router bits requires specific tools to ensure precision and safety. Using the right tools helps keep the bits sharp and extends their life. The tools listed below are essential for anyone wanting clean, sharp cuts with their router.
Diamond File
A diamond file is perfect for sharpening router bits. It removes small amounts of metal evenly. This file works well on carbide tips, which are common on router bits. Its fine grit provides a smooth finish without damaging the bit.
Bench Grinder
A bench grinder speeds up the sharpening process. It is best for metal bits with steel cutting edges. Use it carefully to avoid overheating the bit. Overheating can reduce the bit’s hardness and cause damage.
Sharpening Jig
A sharpening jig holds the router bit steady during sharpening. It ensures the correct angle is maintained. This tool helps achieve consistent results and prevents uneven sharpening. Some jigs are adjustable for different bit sizes.
Safety Gear
Safety gear protects you during sharpening. Wear safety glasses to shield your eyes from metal filings. Use gloves to protect your hands from sharp edges. A dust mask helps avoid inhaling fine metal dust.
Cleaning Supplies
Cleaning supplies remove resin and dirt from the bits before sharpening. Mineral spirits and a small brush work well for cleaning. A clean bit sharpens more effectively and lasts longer.
Credit: www.youtube.com
Sharpening Straight Router Bits
Straight router bits cut clean lines and grooves in wood. Over time, they dull and need sharpening. Keeping these bits sharp improves cut quality and tool life. Sharpening straight router bits is simple with the right tools and method. This section explains clear steps to sharpen these essential bits safely and effectively.
Gather The Right Tools
Use a diamond hone or fine sharpening stone. A magnifying glass helps inspect edges. Safety glasses protect your eyes from tiny metal particles. Gather a soft cloth for cleaning and a small brush to remove debris.
Clean The Router Bit
Remove resin and dirt before sharpening. Use a brush and mineral spirits or bit cleaner. Soak if needed to loosen pitch. Dry the bit completely with a cloth. Clean bits sharpen more evenly and last longer.
Secure The Bit For Sharpening
Hold the bit firmly in a vice or clamp. Avoid touching the sharp edges. Secure bits prevent slipping and reduce injury risk. Proper positioning helps maintain the correct sharpening angle.
Sharpen The Cutting Edges
Use a diamond hone to gently stroke the flat sides. Match the original angle of the edge. Make light, even strokes along the length. Avoid rounding the edges; keep them crisp. Sharpen both sides equally for balance.
Inspect And Test The Bit
Check the edges with a magnifying glass. Look for a clean, bright edge without chips. Test the bit on scrap wood for smooth cuts. Repeat sharpening if needed but avoid over-sharpening. Properly sharpened bits cut cleaner and reduce burn marks.
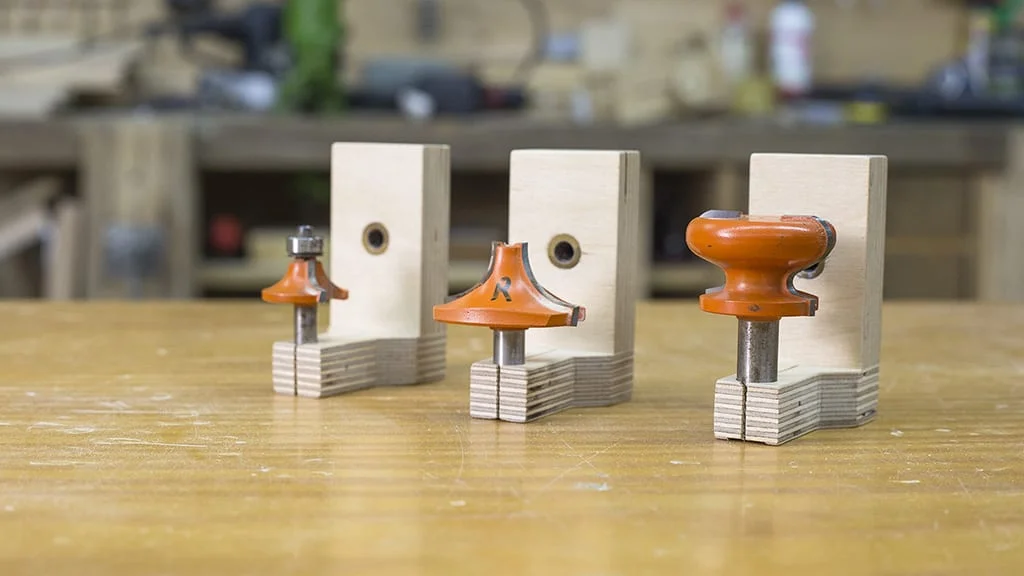
Sharpening Profiled Router Bits
Sharpening profiled router bits requires care and precision. These bits have complex shapes that create decorative edges. Maintaining their sharpness ensures clean cuts and smooth finishes.
Unlike straight bits, profiled bits need special attention to keep their detailed edges intact. Dull edges cause tear-out and rough surfaces. Proper sharpening restores the bit’s original shape and cutting efficiency.
Cleaning The Bit Before Sharpening
Remove any pitch or resin buildup first. Use a soft brush and a bit cleaner or mineral spirits. This step prevents clogging the sharpening tool and ensures a smooth sharpening process.
Choosing The Right Sharpening Tool
Use a fine diamond hone or a small file made for router bits. These tools fit the curves and grooves of profiled bits well. Avoid large or coarse tools that can damage the profile.
Sharpening The Cutting Edges
Follow the original angle of the cutting edge exactly. Lightly hone each edge with even strokes. Keep the pressure gentle to avoid changing the profile shape. Sharpen all edges equally for balanced cutting.
Maintaining The Bit’s Profile
Work slowly to keep the profile’s curves smooth and consistent. Check the bit often under good light. Stop sharpening once the edges look sharp and clean. Over-sharpening can ruin the bit’s shape and performance.

Credit: www.mpower-tools.com
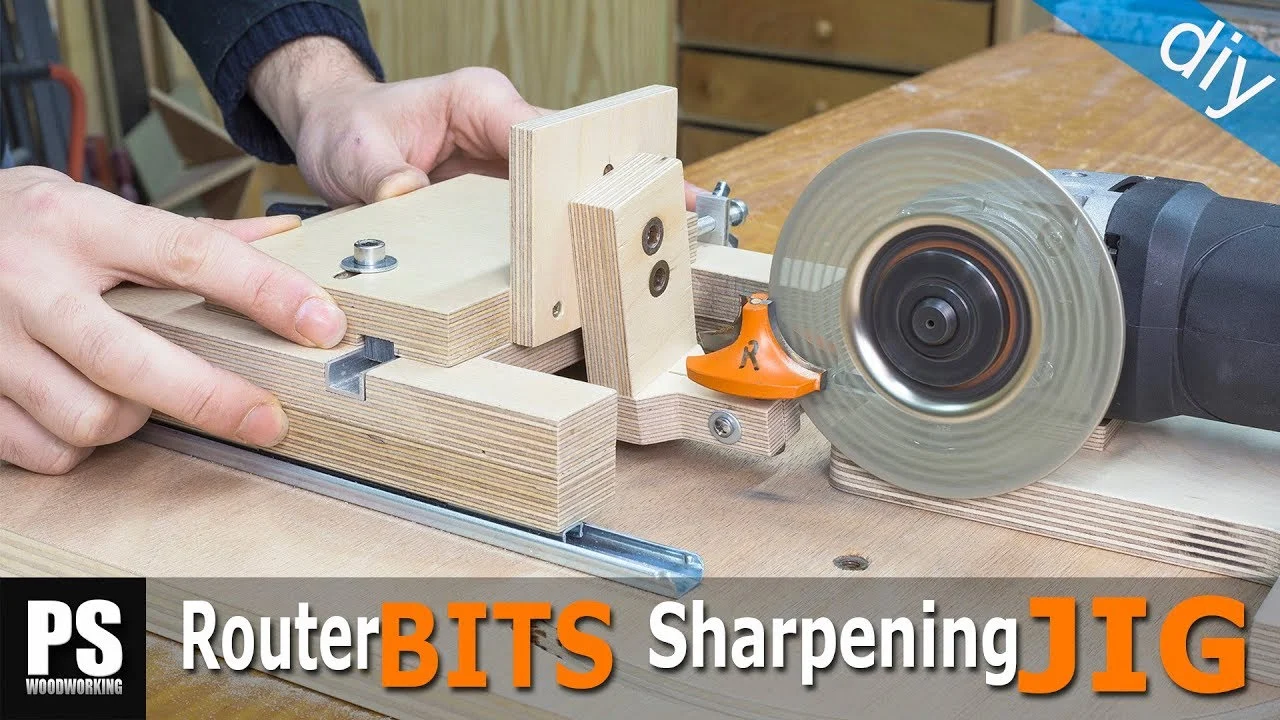
Using A Sharpening Jig
Using a sharpening jig makes the process of sharpening router bits easier and more precise. The jig holds the bit steady and sets the correct angle for sharpening. This tool helps you keep the original shape of the bit. It also reduces the risk of uneven edges or damage.
A sharpening jig works well with diamond or carbide sharpening stones. It guides the bit smoothly over the sharpening surface. This creates clean, sharp edges that improve cutting performance. The jig saves time and effort compared to freehand sharpening.
What Is A Sharpening Jig?
A sharpening jig is a tool that holds router bits in place. It keeps the bit at a fixed angle for sharpening. The jig usually has adjustable parts to fit different bit sizes. It offers stability and control during sharpening.
How To Set Up The Sharpening Jig
First, clean the router bit to remove any dirt or resin. Then, place the bit into the jig securely. Adjust the angle according to the bit’s original cutting edge. Make sure the bit does not move inside the jig. Lock the jig tightly before starting to sharpen.
Sharpening Process Using The Jig
Use a fine diamond or carbide stone with the jig. Gently move the bit along the sharpening surface. Keep steady pressure and follow the jig’s angle guide. Sharpen each cutting edge evenly for best results. Check the bit often to avoid over-sharpening.
Benefits Of Using A Sharpening Jig
The jig ensures consistent sharpening angles every time. It helps extend the life of your router bits. The tool reduces mistakes and uneven edges. Sharpening becomes safer and more comfortable with the jig. Your bits will cut cleaner and last longer.
Maintaining Sharp Edges Longer
Maintaining sharp edges on router bits extends their life and improves cutting quality. Sharp bits cut cleaner and reduce work time. Regular care helps keep edges sharp longer and prevents damage. Follow simple steps to protect your bits and enjoy better woodworking results.
Proper Cleaning After Each Use
Remove resin and pitch buildup after using router bits. Use a soft brush and a mild cleaner to scrub the bit. Avoid harsh chemicals that can damage the metal. Clean bits cut better and stay sharp longer.
Store Bits In A Dry Place
Keep router bits in a dry, dust-free container. Moisture causes rust that dulls edges quickly. Use a case with individual slots to prevent bits from touching. Proper storage helps maintain sharpness and prevents chips.
Avoid Overheating During Use
Cutting too fast creates heat that dulls the bit. Use the right speed for the wood type and bit size. Let the bit cool down between cuts if it gets hot. Cooler bits hold their sharp edges better.
Use Bits For Their Intended Purpose
Match the router bit to the material and cut type. Using bits on harder materials can dull edges fast. Use the correct bit for clean, precise cuts. This practice keeps edges sharp and prevents early wear.
When To Replace Router Bits
Knowing when to replace router bits is key for safe and clean woodworking. Worn-out bits can cause poor cuts and damage to your projects. Replacing bits at the right time keeps your tools efficient and your work quality high.
Signs Your Router Bit Needs Replacement
Dull edges that don’t cut smoothly signal the need for replacement. Bits that burn the wood or leave rough edges also show wear. If sharpening no longer improves performance, replacement is necessary.
Physical Damage And Wear
Chipped or broken tips are unsafe and reduce cutting accuracy. Excessive wear changes the bit’s shape, causing uneven cuts. Cracks or bends mean the bit must be replaced immediately.
Performance Decline Despite Sharpening
Bits lose their sharpness over time. Some can be sharpened a few times before replacement. When sharpening no longer restores clean cuts, buying new bits is best.
Frequently Asked Questions
What Is The Best Way To Sharpen Router Bits?
Clean router bits thoroughly to remove pitch and debris. Use a diamond honing stone or paddle to sharpen cutting edges evenly. Maintain consistent strokes on each side for balanced sharpness. Clamp the bit securely during sharpening to ensure precision and safety.
Is It Worth Sharpening Router Bits?
Yes, sharpening router bits restores cutting efficiency and extends their lifespan. Clean bits before sharpening for best results. Regular sharpening saves money and improves woodworking quality.
How Often Should I Sharpen Router Bits?
Sharpen router bits when they become dull or stop cutting cleanly. Regular inspection after heavy use helps maintain performance. Clean bits before sharpening for best results.
How To Fix Dull Drill Bits?
Clean drill bits with a wire brush to remove debris. Use a sharpening stone or grinder to sharpen edges evenly. Test bit on scrap material before use.
How Do I Know When Router Bits Need Sharpening?
Dull bits cut poorly, burn wood, or produce rough edges. Check for these signs.
Conclusion
Sharpening router bits keeps your tools effective and safe. Regular sharpening saves money and improves cutting quality. Clean bits before sharpening to remove debris and pitch. Use a diamond hone or sharpening stone for best results. Take your time to maintain the correct angle on edges.
Sharp bits make your woodworking smoother and more precise. Keep practicing this simple skill to extend your bit’s life. Small efforts lead to better projects and less frustration.
