
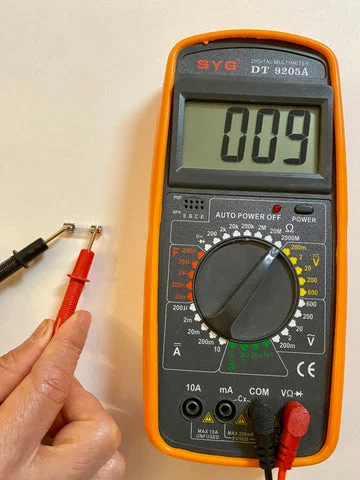
To test a standard one-time fuse with a multimeter, first disconnect and verify power is off, then remove the fuse according to the equipment instructions. Put the black lead in COM and red lead in V/Ω, select continuity or resistance (Ω), and touch the probes to opposite metal ends. An intact fuse normally reads close to the test-lead resistance and usually triggers the continuity tone. OL with verified probe contact indicates an open fuse; if the meter does not beep, check its resistance display and meter settings before concluding the fuse has blown.
As an Amazon Associate, I earn from qualifying purchases. This helps support the site at no extra cost to you.
Knowing how to test a fuse yourself saves you time and money, so you don’t have to rely on a technician for simple checks. In this guide, you’ll learn clear, step-by-step methods to test your fuse using a multimeter, even if you’re new to electrical tools.
Keep reading, and by the end, you’ll feel confident spotting a blown fuse and getting your devices back up and running fast.
Credit: thefuseshop.com
A basic continuity test does not need an expensive meter, but clear beeps and stable readings help. Our best value multimeters guide is useful if you need an affordable meter for fuse and battery checks.
Tools Needed
Essential tools include a digital multimeter, the fuse to test, and a non-conductive surface. A multimeter with continuity or resistance settings is required. Probes must be clean for accurate readings.
Testing a fuse with a multimeter requires only a few basic tools. These tools help you check if the fuse is working or blown. Having the right tools makes the process safe and easy.
Each tool has a specific role in the testing process. Using the correct tools ensures accurate results and protects you from electrical hazards.
Multimeter
A multimeter is the main tool you need. It measures electrical values like voltage, current, and resistance. If you are new to the meter itself, start with our multimeter basics guide. For testing fuses, the continuity or resistance mode is essential. Choose a digital or analog multimeter with clear settings. We recommend the AstroAI Digital Multimeter for easy and accurate fuse testing.
Fuse
You need the fuse you want to test. It can be from a car, appliance, or electronic device. Remove the fuse carefully before testing to avoid damage or injury.
Non-conductive Surface
Once the fuse has been safely removed from the de-energized equipment, set it on a clean, dry non-conductive surface for measurement. The surface itself does not disconnect electrical power; confirm that power is off before removal.
Protective Gloves
Use suitable protective equipment for the specific task, such as appropriately rated protective gloves where required, but never treat gloves as permission to remove or test a live fuse. Disconnect the supply and verify that the equipment is de-energized before handling the fuse. Household service panels and other exposed mains equipment should be left to a qualified electrician.
Small Screwdriver (optional)
Use a manufacturer-recommended fuse puller or an insulated extraction tool suited to the holder. Do not pry at exposed live contacts with a metal screwdriver. If the fuse is inside a service panel, high-energy enclosure, or a holder you cannot safely isolate, ask a qualified electrician to remove it.
Credit: www.youtube.com
Fuse Types
Fuses come in different types and sizes. Each type serves a specific purpose in protecting circuits. Knowing the fuse type helps test it correctly with a multimeter.
Some fuses are designed for cars, while others fit household appliances or electronics. The shape and size affect how you handle and check them.
Glass Tube Fuses
Glass tube fuses are clear cylinders with metal caps on both ends. They allow you to see inside to check for a broken wire. These fuses are common in older electronics and some appliances.
Testing is simple. You place the multimeter probes on the metal caps. If the wire inside is intact, the multimeter shows continuity or low resistance.
Blade Fuses
Blade fuses have plastic bodies with two metal prongs. They are popular in cars and trucks. A complete automotive fuse assortment kit is handy to have for quick replacements. The colored plastic indicates the fuse’s amperage rating.
To test, remove the fuse from the holder. Touch the multimeter probes to the metal prongs. A good fuse shows continuity; a bad fuse does not.
Ceramic Fuses
Ceramic fuses look like glass tube fuses but are made of ceramic. They handle higher temperatures and currents. These fuses are common in industrial and heavy-duty equipment.
Testing ceramic fuses is the same as glass tube fuses. Use the multimeter probes on both ends. Check for a continuous path through the fuse.
Resettable Fuses
Polymeric positive-temperature-coefficient (PPTC) resettable protectors behave differently from one-time fuses: their resistance increases when a fault heats them and generally falls after power is removed and they cool. Their normal resistance and reset behavior depend on part number and temperature; check the manufacturer’s data sheet rather than applying a universal near-zero-ohm rule.
For a PPTC resettable protector, disconnect power and let the component cool fully before measuring resistance as directed by its manufacturer. Compare the reading with the part’s specified resistance range and test conditions. High resistance may indicate a device that is still hot or tripped, a part fault, or an in-circuit measurement effect; the reading alone does not prove permanent damage.
Setting The Multimeter
Setting the multimeter correctly is the first step to test a fuse accurately. This process involves choosing the right mode on your multimeter. Two main modes help check a fuse: continuity and resistance. Knowing how to set these modes ensures a clear reading of the fuse condition.
Continuity Mode
Continuity mode checks if electrical current flows through the fuse. Set your multimeter to the continuity symbol, often shown as a sound wave or speaker icon.
Touch the probes together first. The multimeter should beep, confirming it works.
Remove the fuse from its holder and place it on a non-conductive surface.
Place one probe on each metal end of the isolated fuse. A beep suggests a low-resistance path. If there is no beep, check the displayed ohms or OL reading, ensure clean metal contact, and verify the meter’s continuity mode using the probes together. Beeper thresholds vary by meter, so no sound alone is not a definitive diagnosis.
Resistance Mode
Resistance mode measures how much electrical resistance the fuse has. Set your multimeter to the ohms (?) setting and choose the lowest range.
Place the fuse on a non-conductive surface. Touch each probe to a metal end of the fuse.
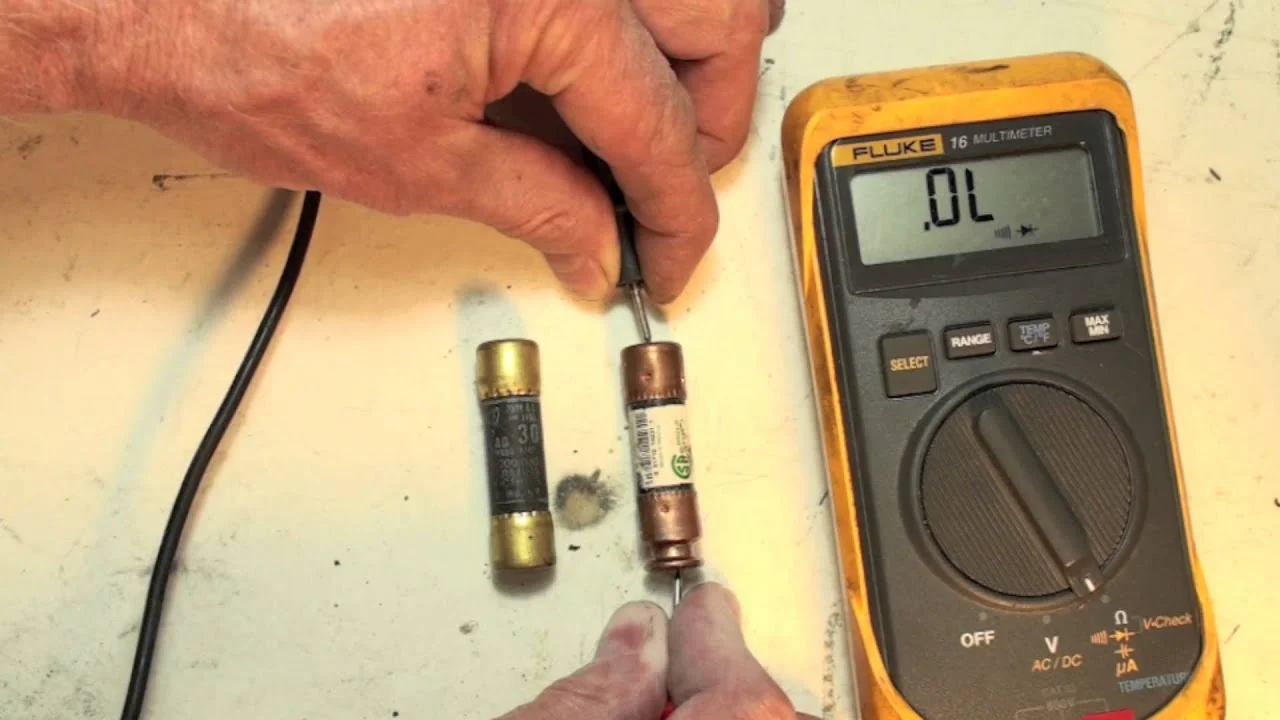
For a conventional one-time fuse, a resistance near the shorted-together test-lead reading indicates that its element is electrically continuous. OL after confirming the correct meter range and clean terminal contact indicates an open fuse. A continuity or resistance check cannot verify the fuse’s rated current, interrupting capacity, or time-delay behavior.
Removing The Fuse
Start by carefully removing the fuse from its holder to test it safely. Place the fuse on a non-metal surface before using the multimeter probes on each metal end.
Removing the fuse is the first step before testing it with a multimeter. This step is important to avoid inaccurate readings and possible damage to the multimeter. Always ensure the power to the circuit is turned off to stay safe.
Locate the fuse holder. It is usually found in the fuse box or near the device’s power source. The fuse holder may have a cover that you need to open carefully.
Use your fingers or a fuse puller tool to gently remove the fuse. Avoid using metal tools as they can cause short circuits or injury. Place the fuse on a clean, dry surface.
Checking Safety Before Removal
Unplug removable equipment or isolate the correct circuit using its manufacturer-prescribed procedure before fuse removal. For fixed wiring, a qualified person should secure the disconnect against re-energization where required and verify absence of voltage with appropriately rated equipment; a switch labeled OFF is not, by itself, proof that exposed conductors are safe.
Keep hands away from exposed conductors and follow the equipment’s removal procedure. Appropriate personal protective equipment is supplementary protection, not a substitute for disconnecting and verifying the absence of electrical power. Stop if safe isolation or access cannot be confirmed.
Handling The Fuse Properly
Handle the removed fuse gently by a safe insulated or nonconductive part when available, without pulling on fragile glass or forcing the holder. Avoid contaminating the metal contacts, and place the fuse on a clean, dry surface for testing. Do not handle a damaged fuse that may expose sharp or conductive parts without appropriate precautions.
Inspect the fuse visually for any cracks or discoloration. A damaged fuse should be replaced even before testing. Store the fuse safely if you plan to reuse it.
Testing Fuse With Continuity
Testing a fuse with continuity is a simple and reliable method to check if a fuse is working. A multimeter set to continuity mode helps you hear a beep when the fuse is intact. This method quickly shows if electricity can pass through the fuse without opening the circuit.
Using continuity testing avoids guesswork. It saves time and prevents unnecessary replacements. This test works well for both automotive and household fuses. Follow the steps carefully to get accurate results.
Set The Multimeter To Continuity Mode
Turn the dial on your multimeter to the continuity setting. This setting usually shows a symbol like a sound wave or speaker. It allows the multimeter to beep when a complete path is detected.
Test the multimeter by touching the probes together. You should hear a beep sound. This confirms the device works properly before testing the fuse.
Remove The Fuse And Prepare For Testing
Take the fuse out of its holder. Place it on a non-conductive surface such as a wooden table. Avoid testing the fuse while it is still in the circuit to prevent electric shock.
Make sure the power is turned off and the circuit is disconnected. Safety is very important during this step.
Test The Fuse With Probes
Touch the multimeter probes to each metal cap on the fuse ends. Hold the probes firmly to get a good connection. Listen carefully for the beep from the multimeter.
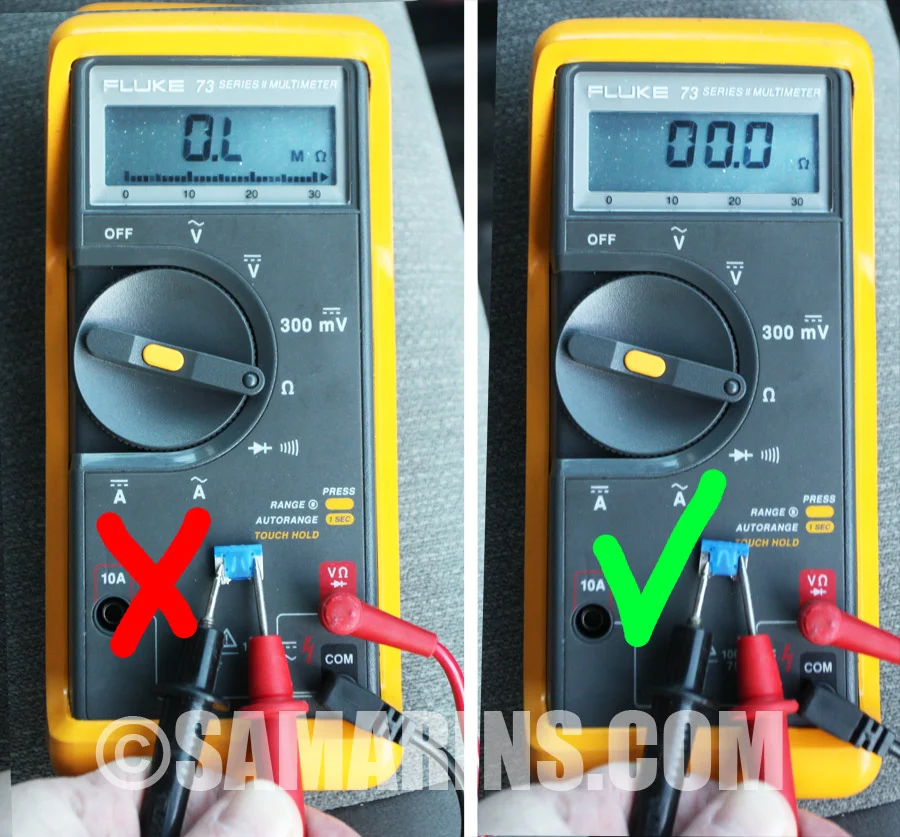
A beep normally indicates that the removed fuse has a low-resistance electrical path. If there is no beep, verify that the meter is in continuity mode, test the probes together, and inspect the resistance reading and contact points. An OL reading across the correctly contacted fuse indicates it is open. Passing this test does not establish whether the fuse has the correct protection rating.
Credit: www.samarins.com
Testing Fuse With Resistance
Testing a fuse with resistance helps check if the fuse is good or blown. Resistance measures how easily electricity flows through the fuse. A good fuse shows very low resistance. A blown fuse shows very high or infinite resistance.
This method uses the multimeter’s resistance setting, often marked as “?” for ohms. It is simple and safe if done correctly.
Set The Multimeter To Resistance Mode
Turn the multimeter dial to the lowest resistance range. This is usually marked with the omega symbol (?). If your multimeter has an auto-range feature, it will select the correct range automatically.
Prepare The Fuse For Testing
Remove the fuse from its holder carefully. Place it on a non-conductive surface like a wooden table. Avoid touching the metal ends to prevent inaccurate readings.
Measure The Fuse Resistance
Touch each multimeter probe to one metal end of the fuse. Make sure the probes connect firmly with the metal caps. Observe the reading on the multimeter screen.
Interpret The Resistance Reading
A reading close to zero ohms means the fuse is good. This shows the fuse allows electrical current to pass freely. If the reading shows very high or infinite resistance, the fuse is blown and must be replaced.
Interpreting Results
Interpreting the results after testing a fuse with a multimeter is simple but important. Understanding what the readings mean helps you decide if the fuse works or needs replacement. The multimeter gives clear signals that show the fuse’s condition. This section explains how to read those signals correctly.
Reading Continuity Test Results
In continuity mode, a beep across the isolated fuse usually means its element is electrically continuous. No beep should be checked against the ohms display and meter’s tone threshold; OL with confirmed contact indicates an open circuit. Always test the de-energized, removed fuse, not an energized fuse holder.
Understanding Resistance Measurements
Switch the multimeter to the lowest ohms setting. Place the probes on the fuse ends. A very low resistance value shows the fuse is intact. High or infinite resistance means the fuse is broken. Resistance measures how hard it is for electricity to flow. A good fuse has almost no resistance. A bad fuse stops current, showing high resistance.
Checking For Visual Clues
Inspect the removed fuse for a visibly broken element, darkening, a cracked body, or damaged end caps. These signs can support a fault diagnosis, but a fuse that looks normal may still be open—particularly an opaque ceramic fuse. Verify with a continuity or resistance test rather than relying on appearance alone.
Safety Tips
Testing a fuse with a multimeter requires caution to avoid electric shock. Always turn off power and remove the fuse before testing. Use the continuity or resistance setting, and watch for a beep or low resistance to confirm the fuse is good.
Wear Protective Gear
Always wear safety glasses to protect your eyes. Use insulated gloves to avoid electric shocks. Keep your hands dry and clean before testing.
Turn Off Power
Switch off the device or circuit before testing the fuse. Unplug from the power source to prevent accidents. Confirm no electricity is flowing to the fuse.
Use Proper Tools
Choose a multimeter with a fuse testing or continuity setting. Inspect the multimeter leads for damage before use. Use probes with insulated handles to stay safe.
Handle The Fuse Carefully
Remove the fuse gently from its holder. Place it on a non-conductive surface for testing. Avoid touching the metal ends with your fingers.
Check Multimeter Settings
Set the multimeter to the correct mode before testing. Use continuity or resistance mode for fuse checks. Verify the multimeter works by touching the probes together.
Work In A Safe Environment
Test in a well-lit area to see clearly. Keep your workspace dry and free of clutter. Avoid testing near flammable materials or liquids.
Technical references checked: Fluke: How to Check a Fuse with a Multimeter; Fluke: Continuity Test and Beeper Thresholds; Littelfuse: PPTC Resettable Fuse Behavior; OSHA: Safe De-energizing and Verification; Fluke: Correct Fuse Ratings.
Related testing guides: If the fuse is not the only suspect, check the power source too. Our guide on testing a battery with a multimeter can help you narrow down the fault.
Frequently Asked Questions
How To Tell If A Fuse Is Blown With A Multimeter?
Set the multimeter to continuity or lowest ohms setting. Touch probes to both fuse ends. A beep or low resistance means the fuse is good. No beep or infinite resistance indicates a blown fuse.
What Should A Fuse Read In Ohms?
A good fuse should read close to 0 ohms, indicating low resistance. A blown fuse shows infinite or very high resistance.
How To Tell If An Electrical Fuse Is Blown?
Set a multimeter to continuity or lowest ohms setting. Touch probes to fuse ends. No beep or infinite resistance means the fuse is blown.
Can A Blown Fuse Still Have Continuity?
For a conventional one-time fuse, an open element usually produces OL or very high resistance when tested out of circuit. A low-resistance reading means the element is still continuous, but it does not confirm the fuse’s rated performance or that the original circuit fault is gone. If the fuse has opened, investigate the cause and use only the replacement type and ratings specified for the equipment.
How Do I Test A Fuse Using A Multimeter?
Set the multimeter to continuity or resistance mode. Touch probes to fuse ends. A beep or low resistance means the fuse is good.
What Multimeter Setting Is Best For Testing Fuses?
Use the continuity setting, usually marked with a sound wave symbol. It beeps when the fuse is intact.
Conclusion
Testing a fuse with a multimeter is a simple, useful skill. It helps find blown fuses quickly and safely. Always set your multimeter correctly before testing. Touch the probes gently to the fuse ends. A beep or low resistance means the fuse is good.
If the meter shows OL across an isolated fuse after checking contact and meter function, replace the opened fuse with the exact manufacturer-approved type and appropriate current, voltage, interrupting and time-delay ratings. Do not substitute a higher-ampere fuse or bypass it. If the replacement blows again, stop and investigate the underlying circuit fault rather than repeatedly installing fuses.
Read also: How to Test a Starter With a Multimeter
