Measuring the moisture content of wood is a crucial step for carpenters, woodworkers, builders, and even homeowners. If wood is too wet or too dry, it can warp, crack, or cause failures in your project. A wood moisture meter is a small tool, but it can save you big headaches.
Using it the right way helps you avoid mistakes, choose the right wood, and make sure your finished work lasts. This article will guide you through everything you need to know about using a wood moisture meter, with clear steps, practical tips, and answers to common questions.
Why Moisture Matters In Wood
Wood is a natural material that absorbs and releases water depending on the environment. Freshly cut wood, called green wood, can have more than 50% moisture content. For most projects, wood should be dried down to 6–12% moisture, depending on your local climate. (Drying matters for finishes too — see our wood glue dry time guide for related cure-time considerations.)
Too much moisture can lead to:
- Warping: Boards bend or twist as they dry.
- Cracking: Wood splits when it dries too fast or unevenly.
- Gluing/finishing problems: Paints, varnishes, and glues don’t stick well to wet wood.
Using a wood moisture meter helps you avoid these problems by telling you the exact moisture content before you start a project.
Types Of Wood Moisture Meters
Not all moisture meters are the same. Choosing the right type can make your measurements more accurate.
Pin-type Moisture Meters
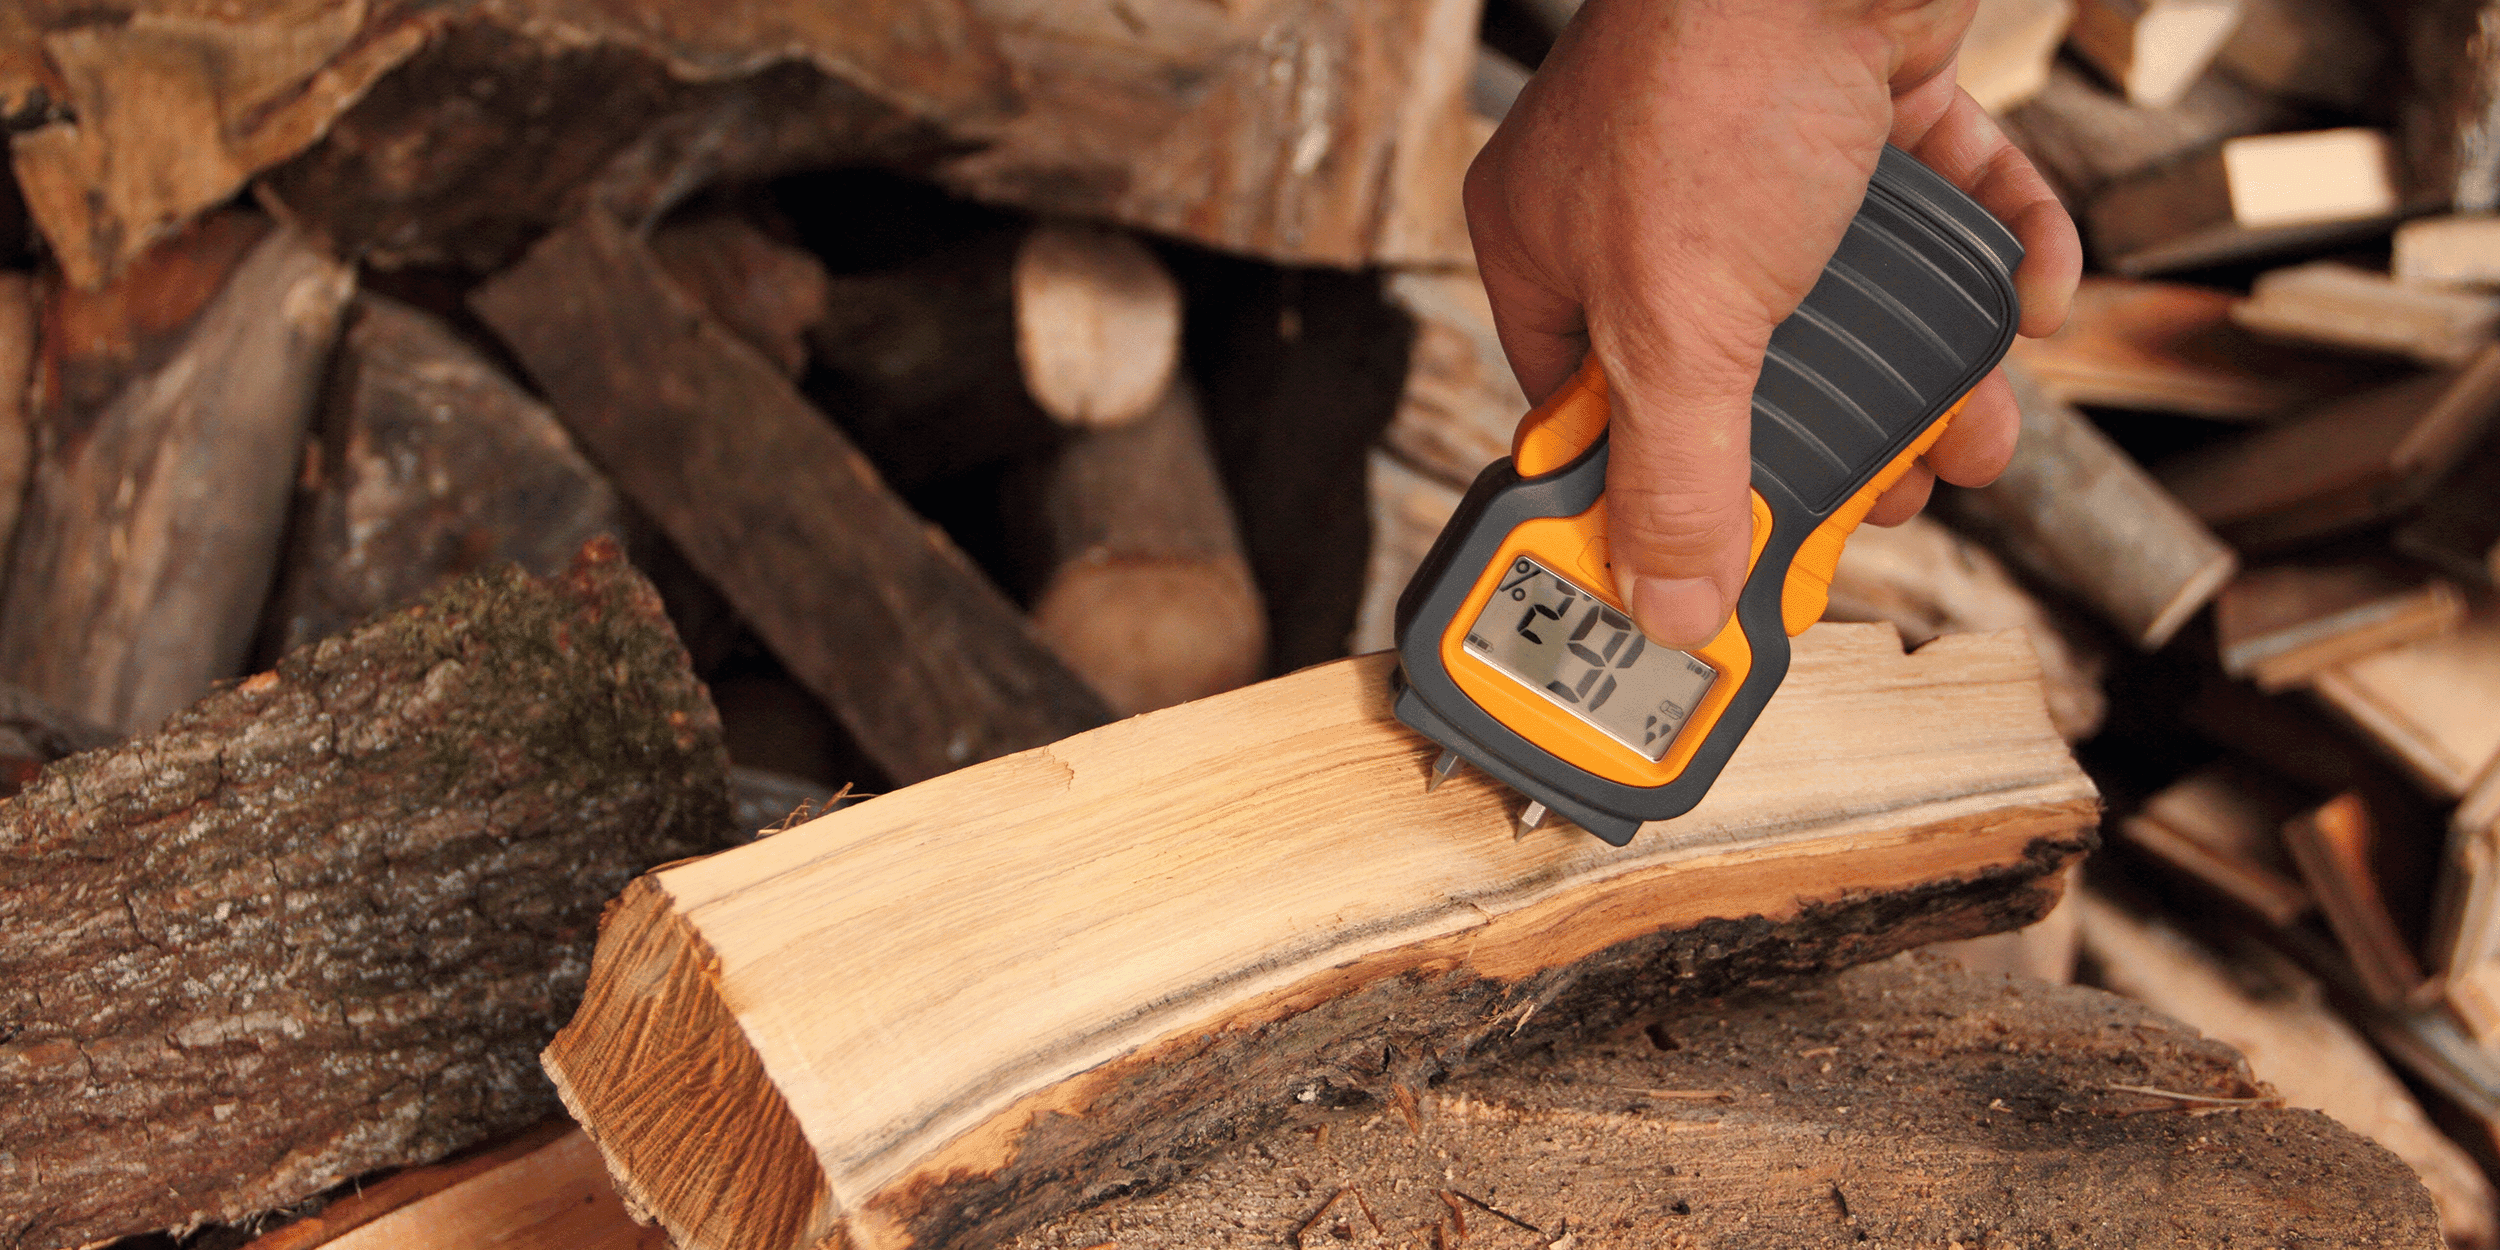
These meters use two metal pins that you push into the wood. They send a small electrical current between the pins. Since water conducts electricity, the meter shows the moisture level based on how much current passes through.
Pros:
- Accurate for measuring inside the wood.
- Good for thicker or denser wood.
Cons:
- Leaves small holes in the wood.
- Not ideal for finished surfaces.
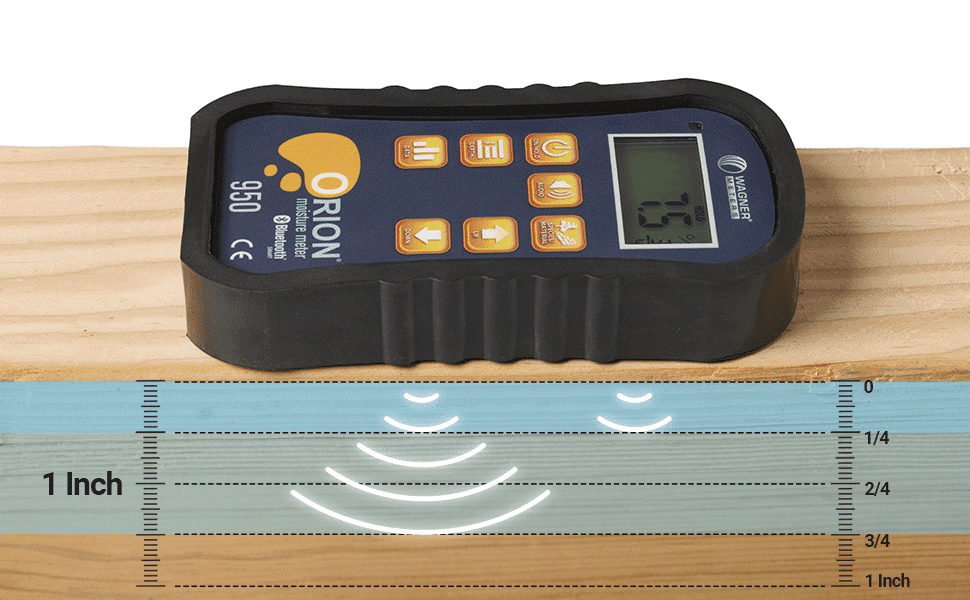
Pinless Moisture Meters
These use a flat sensor pad. You place the meter on the wood surface, and it uses electromagnetic waves to measure moisture.
Pros:
- Non-destructive (no holes).
- Fast and easy to use on large surfaces.
Cons:
- Only measures about ¾ inch deep.
- Not ideal for thin boards or very rough surfaces.
All-in-one Meters
Some meters combine both pin and pinless features. These are more expensive but give you flexibility.
Extra Insight: Many beginners forget that pin-type meters are affected by the wood species and temperature, while pinless meters can be confused by metal fasteners inside the wood.
Key Features To Consider
Before you buy or use a moisture meter, understand what features matter most:
- Measurement range: Most meters measure from 5% to 40% moisture. For woodworking, accuracy between 6–20% is most important.
- Species correction: Wood species have different densities. Good meters let you adjust for species for better accuracy.
- Depth of measurement: Pinless meters measure surface moisture; pin-type meters can go deeper.
- Digital display: Easier to read than analog needles.
- Data hold function: Lets you freeze the reading, which is useful in awkward positions.
How To Prepare Wood For Testing
Before you begin, make sure your wood and environment are ready for accurate readings.
- Acclimate the wood: Let the wood sit in the room where it will be used for at least 3–7 days.
- Clean the surface: Dust, paint, or finishes can affect readings. Wipe with a dry cloth.
- Check the temperature: Extreme cold or heat can throw off results. Test wood at room temperature.
- Choose the right spot: Avoid testing at knots, cracks, or resin pockets.
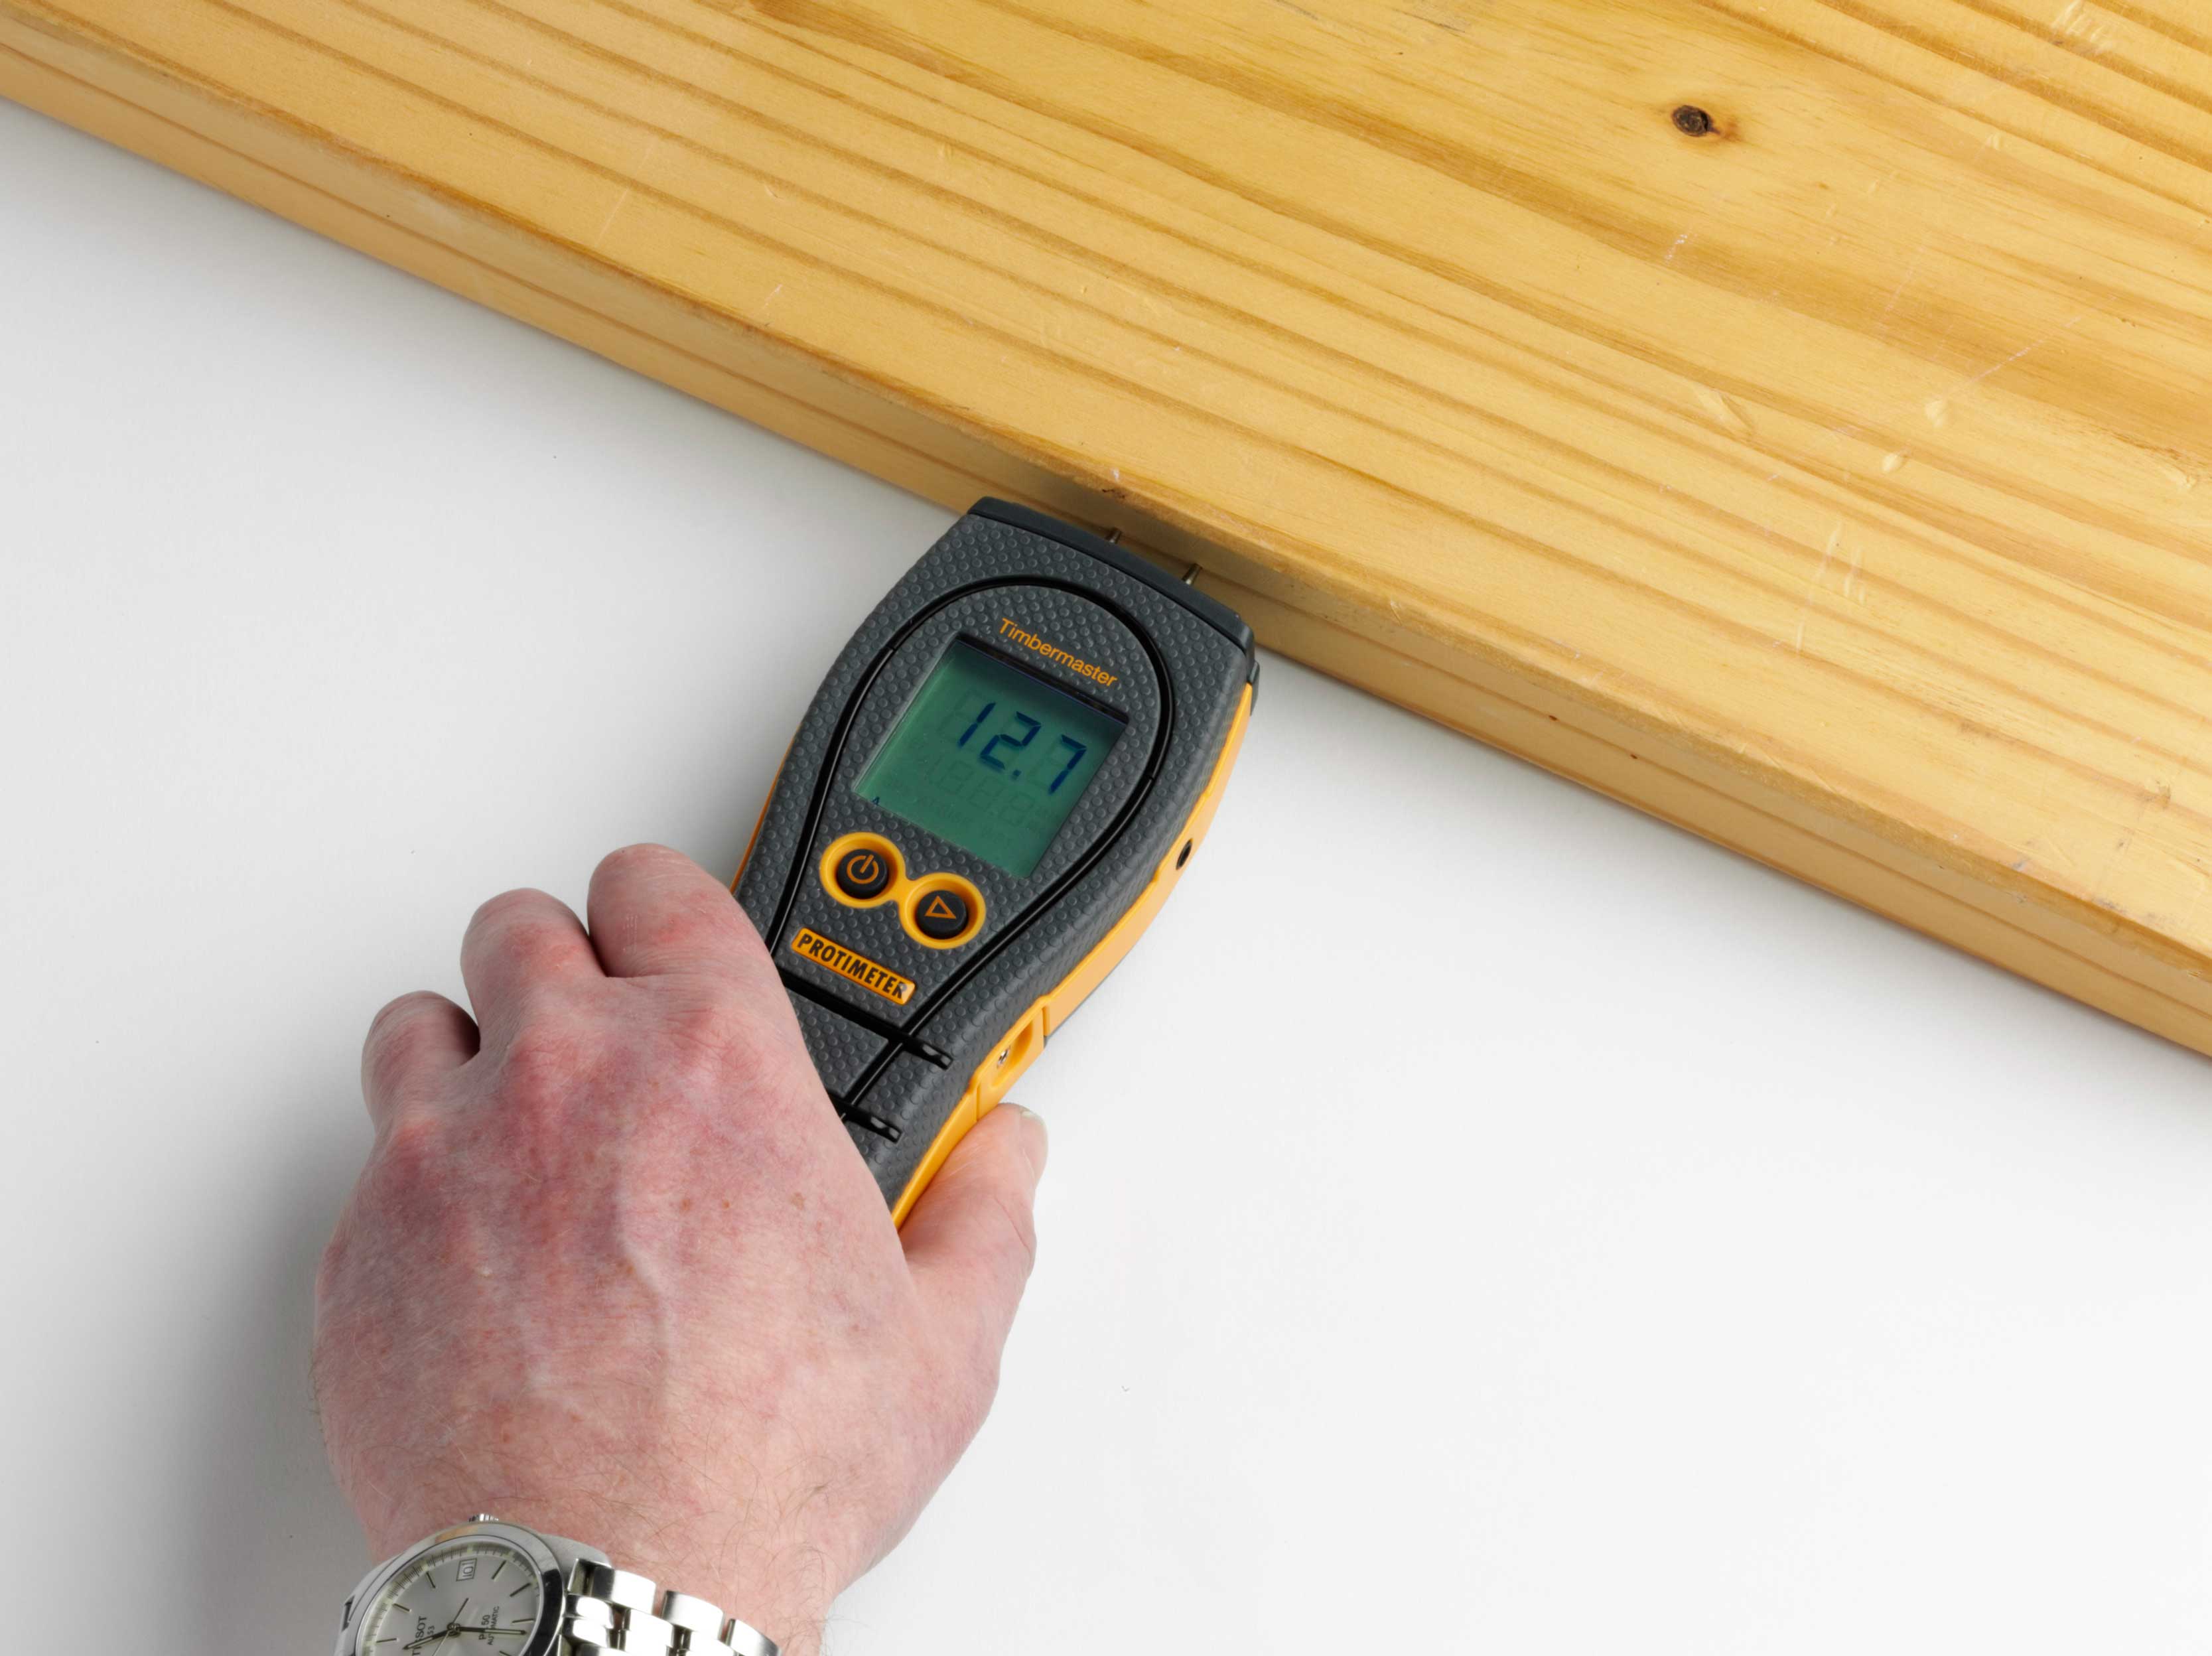
Credit: blog.protimeter.com
Step-by-step: How To Use A Pin-type Wood Moisture Meter
Using a pin-type meter is straightforward, but a few details make a big difference.
- Set the wood species: Check your meter’s manual and select the correct species code.
- Power on the meter: Make sure the battery is charged.
- Insert the pins: Gently press the pins into the wood, going with the grain. For thick wood, insert deeper if possible.
- Read the display: Wait 2–3 seconds for the reading to stabilize.
- Check several places: Test at least 3–5 spots on each board, especially near the ends and in the center.
- Record your results: Write down the readings for each board.
Pro tip: If you see a big difference between surface and deep readings, the wood hasn’t dried evenly. This is common in thick boards.
Step-by-step: How To Use A Pinless Wood Moisture Meter
Pinless meters are easier on the wood’s surface but need careful handling.
- Set the wood species: Some pinless meters allow this; check the manual.
- Place the meter flat: Hold the sensor pad flat against the wood surface.
- Press the button: Activate the reading and hold steady for a few seconds.
- Move and repeat: Test at different spots along the board.
- Compare readings: Look for consistent numbers. If one spot is much higher, check for wet patches or defects.
Extra Insight: Pinless meters can give false readings if there’s metal (like nails or screws) under the surface. Always scan away from hardware.
Comparing Pin Vs. Pinless Meters
Here’s a simple comparison to help decide which is better for your needs:
| Feature | Pin-Type Meter | Pinless Meter |
|---|---|---|
| Accuracy (deep) | High | Medium |
| Surface damage | Yes | No |
| Speed | Slower | Faster |
| Best for finished wood | No | Yes |
| Cost | Lower | Higher |
How To Interpret Moisture Meter Readings
Getting a number from your meter is only part of the job. You need to know what it means.
- 6–8%: Ideal for indoor furniture, cabinets, and wood floors in dry climates.
- 8–12%: Good for most indoor uses in moderate climates.
- 12–15%: OK for exterior trim, siding, or framing.
- Above 15%: Too wet for most uses. Wait for wood to dry or kiln-dry it.
- Below 6%: May be too dry; wood could crack when moved to a more humid place.
Non-obvious tip: The “right” moisture content depends on your location. For example, homes in Florida need higher moisture wood than in Arizona. Try to match the wood’s moisture to the environment where it will be used.
Credit: www.wagnermeters.com
Common Mistakes When Using A Wood Moisture Meter
Even experienced users can slip up. Watch for these common errors:
- Not correcting for wood species: Each species has a different density. Always set your meter for the right species.
- Testing only one spot: Wood can have wet patches. Check multiple places on every board.
- Ignoring temperature: Very hot or cold wood can give false readings.
- Measuring finished surfaces: Paint or varnish can block pins or sensors. Try to measure raw wood.
- Rushing the test: Let the meter settle for a few seconds for each reading.
Practical Tips For Accurate Results
- Test both ends and the middle: Ends dry faster than centers.
- Stack and sticker wood: If you’re drying lumber, use spacers so air can flow and moisture can escape evenly.
- Calibrate your meter: Some meters come with a calibration block. Test it regularly.
- Store wood properly: After testing, keep wood in a dry, ventilated place until it reaches the right moisture level.
Real-world Example
Imagine you’re building a dining table. You test your boards and find readings of 13–14%. Your home’s normal humidity is around 45%, which means wood should be about 8–9%. If you build the table now, the wood will shrink and possibly crack as it dries.
By waiting until the wood reaches 8%, you avoid costly repairs or a ruined project. Once your stock is dry, our comparison of sanding vs planing wood walks through the next prep step.
How To Maintain Your Moisture Meter
Just like any tool, your moisture meter works best with a little care.
- Keep it clean: Wipe off dust and moisture after use.
- Check batteries: Weak batteries can cause false readings.
- Store in a dry place: Avoid leaving it in humid or very hot environments.
- Protect the pins: For pin-type meters, cover the pins when not in use.
- Update software: Some digital meters allow updates for new wood species.
Advanced Tips: Testing Large Batches Of Wood
If you’re buying or drying a whole stack of lumber, a moisture meter helps you check the whole batch.
- Test at least 10% of boards: Pick boards from the top, middle, and bottom.
- Record all readings: Keep a log to track drying progress.
- Look for outliers: If one board is much wetter, separate it to dry longer.
Using a meter this way gives you confidence that your entire supply is ready—not just the top board.
Moisture Meters And Building Codes
Some building inspectors require wood to be below a certain moisture level before you can use it for framing or flooring. For example, the International Residential Code recommends wood framing at or below 19% moisture. Always check your local codes to stay compliant.
For further reading on wood moisture and building codes, you can visit the Woodworking Network.
Credit: www.woodsure.co.uk
Cost Comparison: Basic Vs. Advanced Meters
Here’s a quick comparison of costs and features:
| Type | Price Range | Main Features |
|---|---|---|
| Basic Pin-Type | $20–$50 | Manual adjustment, analog display |
| Digital Pin-Type | $50–$150 | Species selection, digital readout, depth settings |
| Pinless | $80–$300 | Non-destructive, depth control, surface scanning |
| All-in-One | $150–$400 | Pin & pinless, advanced calibration, memory storage |
Pro tip: For most DIY woodworkers, a mid-range digital pin-type meter offers the best mix of accuracy and value.
When To Re-test Your Wood
Moisture content can change with the weather. If you store wood for more than a few weeks, re-test before starting your project—especially if the seasons change or you move the wood to a new location.
Frequently Asked Questions
How Do I Know If My Wood Is Dry Enough To Use?
Check the moisture content with your meter. For indoor projects, aim for 6–12%. For outdoor use, 12–15% is usually safe. Always match the wood’s moisture to the room or climate where it will live.
Can I Use A Wood Moisture Meter On Painted Or Finished Wood?
Pinless meters can sometimes be used on finished wood, but accuracy drops. Pin-type meters struggle because the finish blocks the pins. For best results, measure unfinished surfaces or hidden spots.
What Happens If I Use Wood That’s Too Wet?
Wood that’s too wet will shrink, warp, or crack as it dries. This can ruin furniture, floors, or building projects. You may also have problems with glue or paint not sticking properly.
How Often Should I Calibrate My Moisture Meter?
Check calibration every few months, or if your readings suddenly seem off. Use the calibration block that came with your meter, or follow the manufacturer’s instructions.
Are Expensive Meters Much Better Than Cheap Ones?
More expensive meters often give more accurate readings and have extra features like species correction and data logging. However, for basic home projects, a reliable mid-range meter is usually enough.
Making sense of wood moisture is not as hard as it seems. With a little practice and the right moisture meter, you can choose, prepare, and use wood with confidence—getting results that last for years. From there, tools like a router unlock more shaping options; our how to use a wood router guide is a good next read.
