
If you use a nail gun and it suddenly stops firing, it can slow down your work and cause frustration. Many people face this problem, whether they use the tool for home projects or construction jobs. The good news is that you can often solve the issue with a few checks and fixes. This article will guide you through everything you need to know to get your nail gun working again, even if you are not an expert.
Understanding Why A Nail Gun Won’t Fire
A nail gun is a powerful tool, but it depends on many parts working together. When one thing goes wrong, the gun may not shoot nails as expected. The main reasons usually involve the power source, airflow, nail loading, or mechanical issues. Knowing where to start your inspection makes repairs much easier and safer.
Common Causes: Nail Gun Won’t Fire
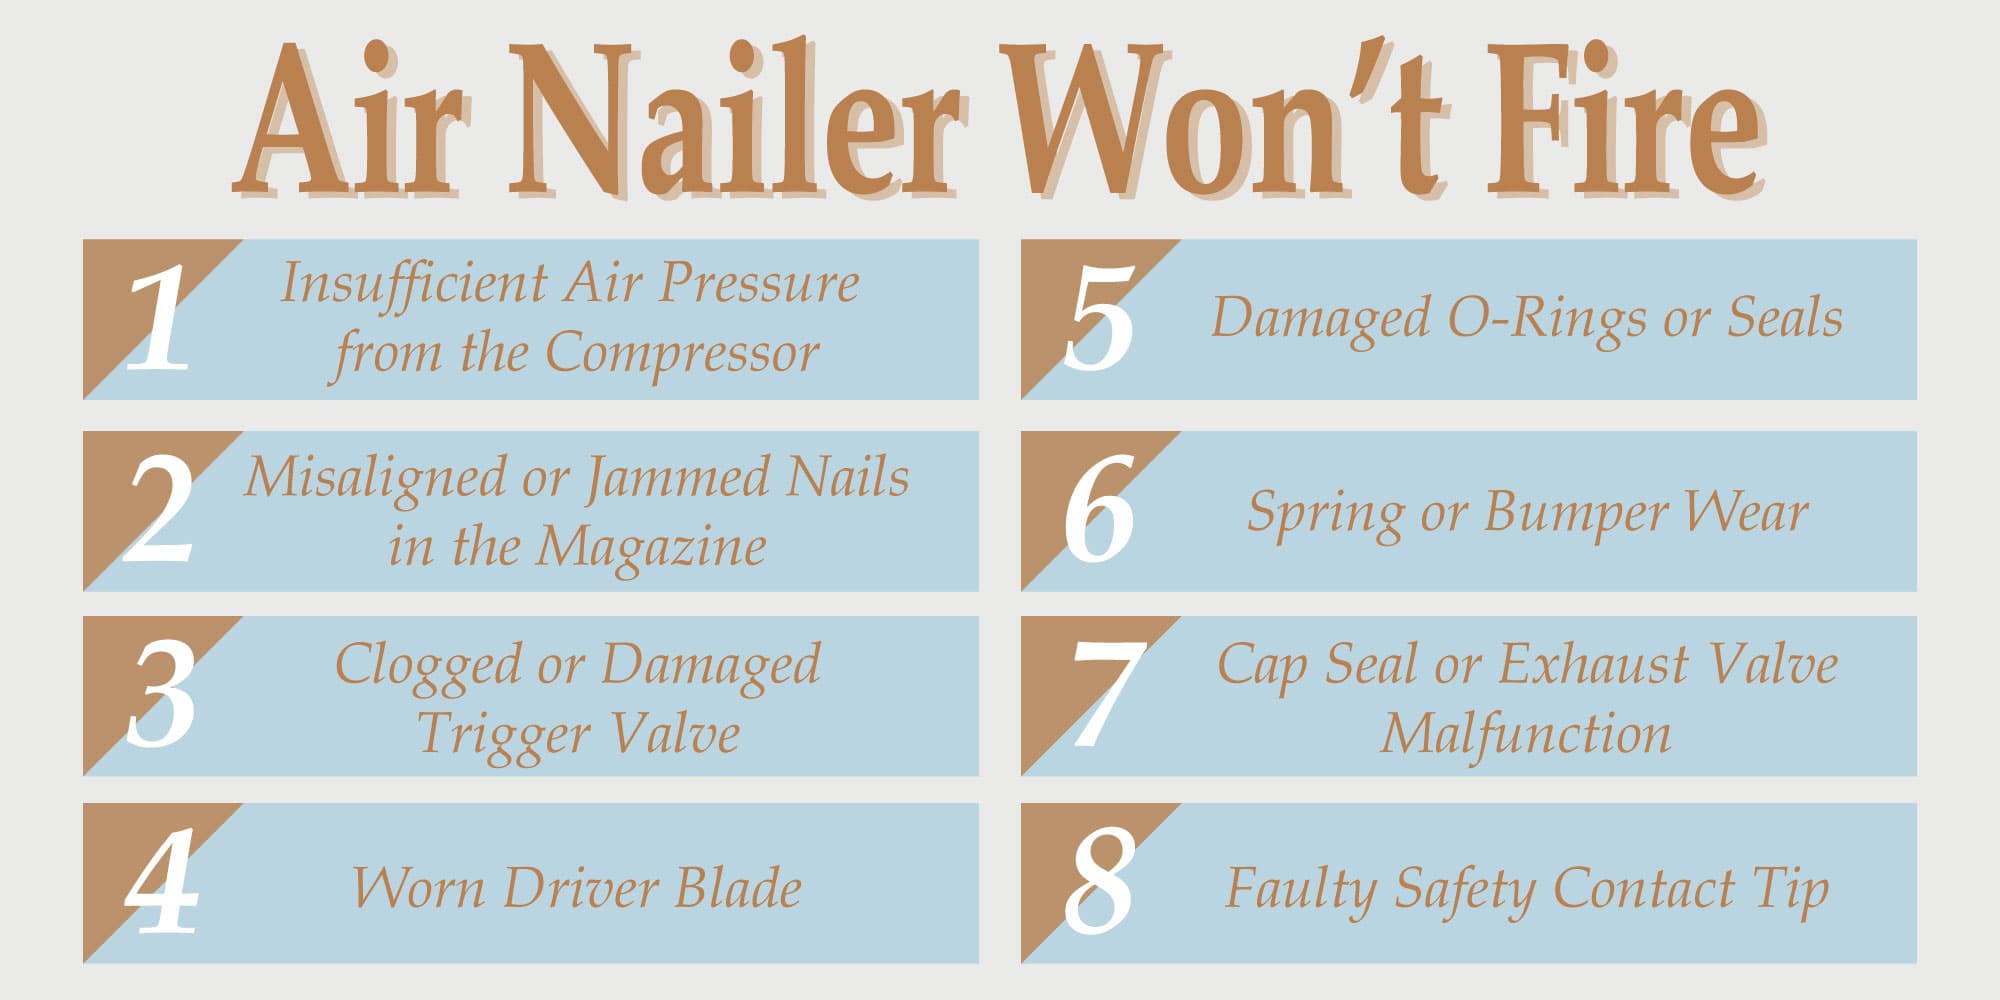
Several problems can cause a nail gun not to fire. Let’s look at the most frequent ones:
- Empty Magazine: No nails left in the gun.
- Jammed Nails: Nails stuck inside the firing path.
- Low Air Pressure: For pneumatic guns, not enough air.
- Battery Issues: Cordless guns may have a weak or dead battery.
- Trigger or Safety Problems: Safety lock is on, or trigger not engaging.
- Worn O-rings or Seals: Air leaks inside the tool.
- Dirty or Dry Parts: Lack of oil or too much dust.
- Broken Driver Blade: The part that pushes nails is damaged.
- Defective Solenoid or Circuit: In electric models, electronic failure.
- Incorrect Nails: Wrong size or type of nails.
Each problem has its own fix. Next, you’ll learn how to find and solve these issues step by step.
Credit: www.vim-ent.com
Step-by-step Fixes For A Nail Gun That Won’t Fire
1. Check The Power Source
For pneumatic nail guns, air is the power. For cordless nail guns, it’s the battery. For electric models, check the cord and outlet.
- Pneumatic: Make sure the air compressor is plugged in, turned on, and set to the right pressure (usually 70–120 PSI).
- Cordless: Remove the battery, charge it fully, and re-insert.
- Electric: Plug into a working outlet and check for power.
If you find a problem here, fix it first. Without power, the gun cannot fire.
2. Inspect And Refill The Magazine
Open the magazine and see if there are any nails left. If empty, refill with the correct size and type. Sometimes, even when the magazine looks full, a nail may be out of place, blocking the feed.
- Use only nails recommended by the manufacturer.
- Load them in the right direction.
If you use the wrong nails, the gun may jam or not fire.
3. Remove Nail Jams
A jammed nail is one of the most common reasons for a nail gun not working.
- Disconnect the tool from the power or air source.
- Open the nose or jam release according to your manual.
- Use pliers or a screwdriver to remove stuck nails.
- Check for bent nails and remove them.
Tip: Never try to clear a jam with the gun connected to power or air. This can cause injury.
4. Adjust Air Pressure (pneumatic Only)
Low air pressure means not enough force to fire a nail.
- Check the gauge on your air compressor.
- Increase pressure if below the tool’s minimum (usually 70 PSI).
- Inspect the hose for leaks or kinks.
If air leaks, listen for hissing sounds and replace damaged hoses or fittings.
Air Pressure Comparison
Below is a quick comparison of pressure needs for common nail guns:
| Nail Gun Type | Recommended PSI | Common Problem if Too Low |
|---|---|---|
| Brad Nailer | 60–100 PSI | Weak firing or no nails |
| Framing Nailer | 80–120 PSI | Partial firing, jams |
| Finish Nailer | 70–110 PSI | Incomplete drive |
5. Examine Trigger And Safety Mechanism
Most nail guns have a safety lock or a tip that must be pressed against wood to fire.
- Make sure the safety is not turned on.
- Check if the contact tip is moving freely.
- Press the tip against a piece of scrap wood and try again.
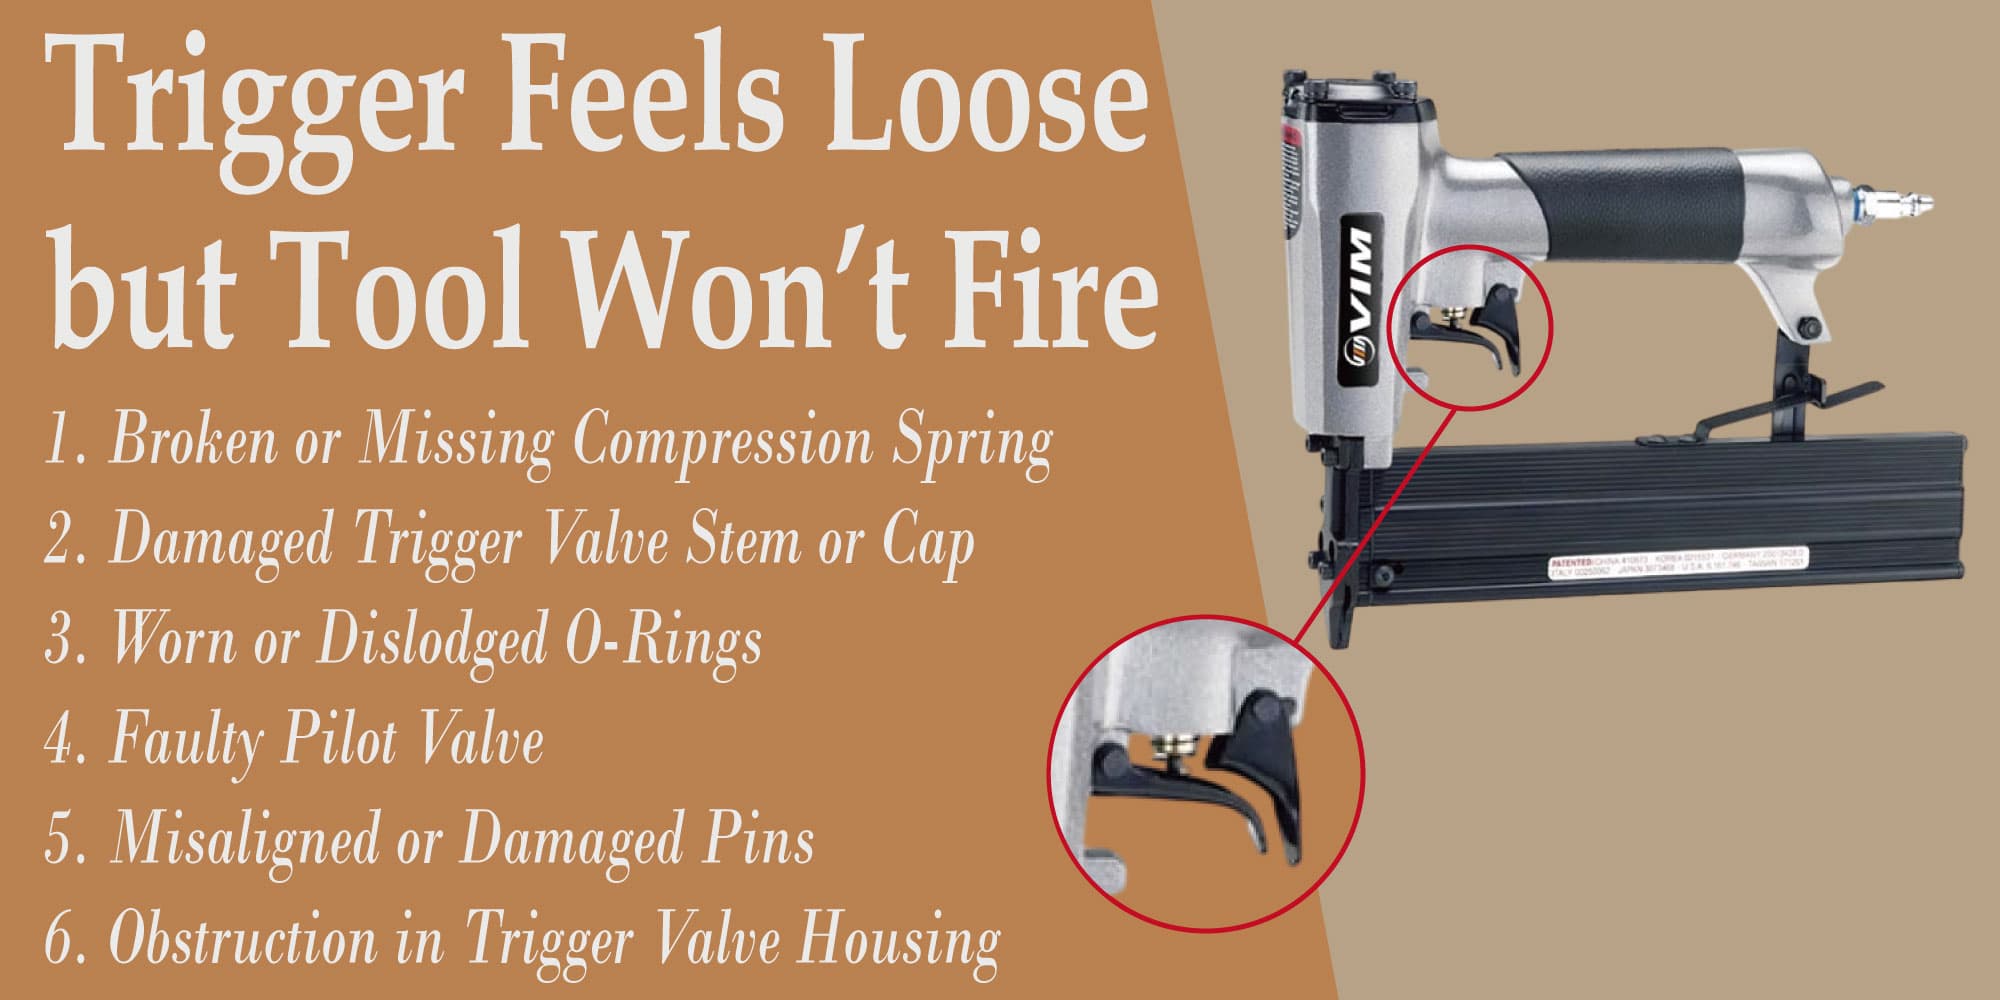
If the trigger feels loose or stuck, it may need cleaning or repair.
6. Clean And Lubricate The Tool
Dust, debris, or dryness can block moving parts.
- Disconnect from power or air.
- Open the housing if possible.
- Wipe out dust with a clean cloth.
- Add a few drops of pneumatic tool oil (for air guns) to the moving parts.
Insight: Many beginners skip regular cleaning, leading to faster wear and more jams. Clean your nail gun after every big project.
7. Check For Worn Parts
Over time, O-rings, seals, and the driver blade can wear out.
- Inspect for broken or cracked O-rings.
- Look at the driver blade for bends or chips.
- Replace any damaged part with the correct spare.
Common Wear Parts And Lifespan
| Part | Typical Lifespan | When to Replace |
|---|---|---|
| O-Rings | 1–3 years | When leaking air or dry |
| Driver Blade | 2–5 years | Bent, chipped, or broken |
| Seals | 3–5 years | Visible cracks or leaks |
Tip: Using the right oil and cleaning schedule extends these parts’ life.
8. Test With The Correct Nails
Using the wrong nails can stop your gun from firing.
- Check the manual for the correct gauge and length.
- Make sure the nails fit smoothly in the magazine.
Even a small difference in size can cause jams or misfires.
9. Inspect Electrical Or Battery Issues
For electric or cordless guns:
- Look for damaged wires, loose connections, or corroded contacts.
- Try a different battery or outlet if possible.
If the gun has lights or indicators, see if they signal a problem (like blinking or staying off).
10. Reset Or Replace Faulty Parts
If none of the above works, you may have a deeper issue.
- Reset the tool if it has a reset button.
- Consider replacing the solenoid (electric) or main valve (pneumatic).
- For older tools, sometimes a professional repair is best.
Non-Obvious Insight: Many people replace the entire gun for a small issue. Most repairs are cheaper if you identify the problem early.
Safety Tips When Fixing A Nail Gun
Fixing a nail gun is not just about solving the problem—it’s also about staying safe.
- Always disconnect the power or air before starting repairs.
- Wear safety glasses and gloves.
- Never point the gun toward yourself or others.
- Test the gun on scrap wood first, not your project.
Credit: www.youtube.com
Maintenance To Avoid Firing Problems
Prevention is better than cure. Regular care keeps your nail gun working longer and reduces firing problems.
- Clean after every big use.
- Oil moving parts (pneumatic) once a week or as advised.
- Store in a dry place, away from dust and moisture.
- Replace worn parts before they break.
Quick Maintenance Schedule Example
| Task | How Often | Why Important |
|---|---|---|
| Clean magazine & nose | After every project | Prevents jams |
| Oil moving parts | Weekly | Reduces wear |
| Check for air leaks | Monthly | Ensures full power |
| Inspect battery (cordless) | Before each use | Prevents no-fire |
Pro Tip: Set reminders for maintenance on your phone. Many people forget, leading to sudden breakdowns at the worst times.
When To Call A Professional
Some nail gun problems are too complex or risky to fix at home.
- If you smell burning or see smoke.
- If the tool makes strange noises after all checks.
- If you cannot remove a deep jam or broken part.
In these cases, contact a service center or the manufacturer. They have the right tools and knowledge for safe repairs. To learn more about professional repairs, you can visit the official DeWalt Support page.
Credit: www.vim-ent.com
Frequently Asked Questions
Why Does My Nail Gun Only Fire Sometimes?
Intermittent firing often means a small air leak, low battery, or a sticky trigger. Check for air leaks, recharge the battery, and clean the trigger area.
Can I Use Wd-40 Instead Of Pneumatic Tool Oil?
No. WD-40 is not designed for nail guns. It can damage rubber seals and O-rings. Always use oil made for pneumatic tools.
What Should I Do If Nails Keep Jamming?
Try using the correct size and type of nails. Clean the magazine and nose. If jams continue, inspect the driver blade and replace it if damaged.
Is It Safe To Fix My Nail Gun Myself?
For simple issues like clearing jams or cleaning, yes. For electrical problems or internal leaks, it’s best to call a professional.
How Often Should I Oil My Pneumatic Nail Gun?
Oil the moving parts before each use or at least once a week. This keeps seals fresh and prevents sticking.
—
Fixing a nail gun that won’t fire is usually straightforward if you follow the right steps. Start with basic checks, move to cleaning, and replace worn parts as needed. With regular maintenance and care, your nail gun will serve you well for many years.
If you ever feel unsure, don’t risk injury—get expert help. Now you’re ready to tackle most nail gun firing problems confidently and safely!
